
Introduction
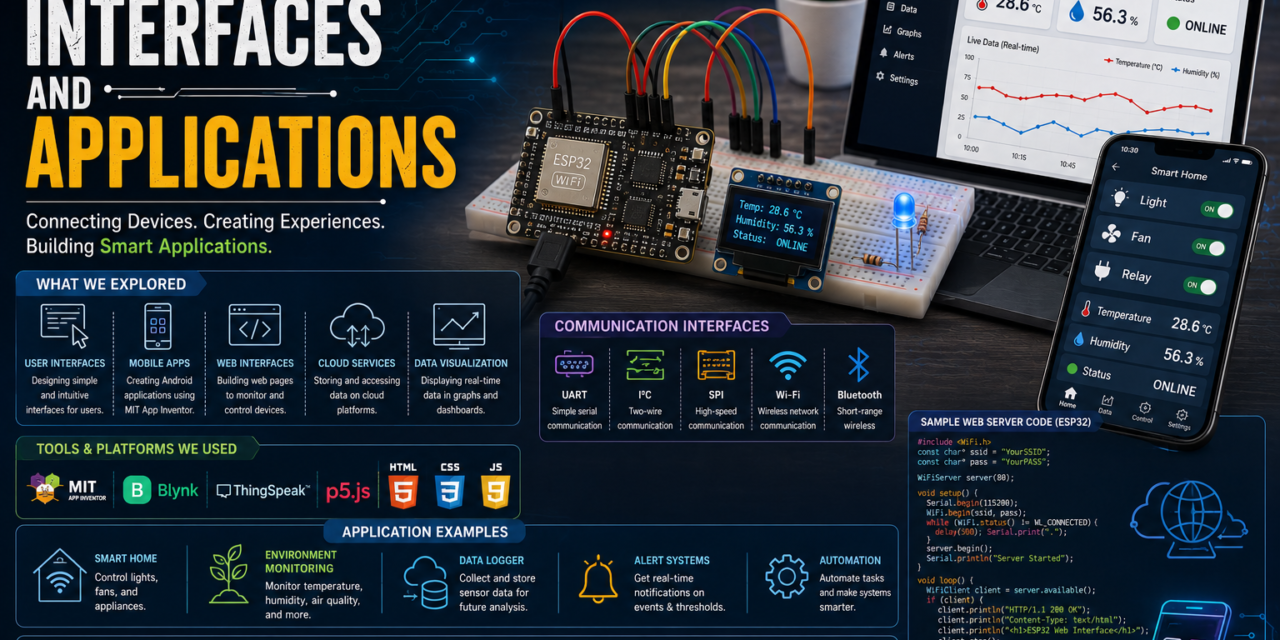
In Week 6, I learned about Interfaces and Applications and explored different software platforms used to create interactive interfaces and communicate with electronic systems. The main topics covered were Processing, p5.js, Blockly Games, PictoBlox, Web Servers, MIT App Inventor, and Blynk.
During this week, I explored different software platforms and learned how they can be used to create interactive applications and communicate with electronic systems. I learned about graphical interfaces, web-based interfaces, block-based programming, mobile applications, and IoT platforms.
These activities helped me understand how microcontrollers, sensors, computers, web interfaces, and mobile applications can communicate with each other to create interactive and connected systems.
What are Interfaces and Applications?
An interface is a medium through which a user, software, or electronic device communicates with another system. It allows users to send commands, control devices, and view information in an understandable way. Examples include mobile applications, websites, graphical user interfaces, buttons, displays, and IoT dashboards.
An application is a software program designed to perform a particular task or solve a specific problem. In embedded systems and IoT, applications can be used to monitor sensor values, control electronic devices, and communicate with microcontrollers.
During this week, I explored different interfaces and applications using Processing, p5.js, Blockly Games, PictoBlox, Web Servers, MIT App Inventor, and Blynk. I also learned how these platforms can communicate with hardware such as the XIAO ESP32-C3, LEDs, and DHT22 sensor.

Interfaces I Used
1. Processing IDE
What is Processing?
Processing is an open-source programming language and development environment used for creating interactive graphics, animations, visualizations, and applications. It provides a simple programming environment that is useful for learning coding and developing interactive projects.
Processing can also communicate with external hardware through serial communication. This makes it useful for creating computer-based interfaces that can control microcontrollers and electronic components.

Features of Processing
- Interactive graphics and animations
- Simple programming environment
- Serial communication support
- Useful for creative coding
- Can communicate with external hardware
- Suitable for visual and interactive applications
Advantages of Processing
- Easy to learn
- Simple interface
- Useful for creating visual applications
- Supports hardware communication
- Good for beginners and creative coding
Disadvantages of Processing
- Mainly focused on graphics and creative applications
- Hardware communication may require additional programming
- Not designed specifically for large-scale software development
How To Installed Processing
I followed these steps to install Processing:
- Searched for Processing IDE on Google.
- Opened the official Processing website.
- Selected the appropriate version for my computer.
- Downloaded the Processing software.
- Opened the downloaded installer.
- Followed the installation instructions.
- Completed the installation.
- Opened Processing and created a New Sketch.
2. Web Server
What is a Web Server?
A web server is a system that provides web pages or data to users through a web browser over a network. In IoT and embedded systems, a microcontroller such as the XIAO ESP32-C3 can work as a simple web server by connecting to Wi-Fi.
The user can enter the device’s IP address in a browser and access a webpage hosted by the microcontroller. This webpage can contain controls for electronic devices or display sensor information.

Features of a Web Server
- Provides web pages through a browser
- Works over a network
- Can be used for remote device control
- Can display sensor data
- Can communicate with IoT devices
Advantages of Web Servers
- Can be accessed through a web browser
- No separate control software is required
- Useful for remote monitoring and control
- Can provide a graphical interface
- Useful in IoT applications
Disadvantages of Web Servers
- Requires network connectivity
- Security needs to be considered
- More complex applications require more programming
- Performance depends on the hardware and network
How I Used the Web Server
I used the XIAO ESP32-C3 to create a simple web server. The ESP32-C3 was connected to Wi-Fi and hosted a webpage that could be accessed through its IP address.
3. PictoBlox
What is PictoBlox?
PictoBlox is a block-based programming platform used for learning programming and creating interactive projects. It uses drag-and-drop programming blocks, making programming concepts easier to understand.
PictoBlox can be used for projects involving Arduino, sensors, LEDs, motors, robotics, IoT, and AI.

Features of PictoBlox
- Block-based programming
- Easy drag-and-drop interface
- Supports Arduino and other hardware
- Useful for robotics and electronics
- Supports AI and IoT projects
- Suitable for beginners
Advantages of PictoBlox
- Easy to learn
- Does not require writing complex code
- Visual programming makes logic easier to understand
- Supports hardware projects
- Good for learning programming concepts
Disadvantages of PictoBlox
- Less flexible than traditional programming languages
- Advanced projects may require text-based programming
- Some features depend on supported hardware
How I Installed PictoBlox
I followed these steps:
- Searched for PictoBlox for Windows on Google.
- Opened the official PictoBlox download page.
- Selected the Windows Installer 64-bit option.
- Downloaded the installer.
- Opened the downloaded setup file.
- Selected the installation folder.
- Clicked Install.
- Waited for the installation to complete.
- Clicked Finish and opened PictoBlox.
4. p5.js
What is p5.js?
p5.js is a JavaScript library used for creating interactive graphics, animations, drawings, games, and creative web applications.
It provides simple functions for creating shapes, colours, text, animations, and user interactions using the mouse and keyboard. p5.js runs directly in a web browser, making it easy to create and test interactive projects.

Features of p5.js
- Browser-based programming
- Interactive graphics
- Animation support
- Mouse and keyboard interaction
- Creative coding
- Game development
- JavaScript-based
Advantages of p5.js
- Easy to start with
- Runs directly in a web browser
- No complicated installation required
- Useful for graphics and animations
- Good for creating interactive projects
Disadvantages of p5.js
- Requires basic JavaScript knowledge
- Mainly focused on browser-based creative applications
- Complex applications can require more programming knowledge
How I Started with p5.js
I searched for p5.js on Google and opened the p5.js Web Editor.
I explored the editor and learned about the basic structure of a p5.js program, including functions such as setup() and draw().
5. Blockly Games
What is Blockly Games?
Blockly Games is a collection of educational games designed to teach programming concepts through block-based coding.
Instead of writing programming code manually, users arrange visual blocks to create instructions. The games help learners understand concepts such as sequence, loops, conditions, logic, and problem-solving.

Features of Blockly Games
- Block-based programming
- Interactive learning
- Programming challenges
- Logical problem-solving
- Learning through games
- Suitable for beginners
Advantages of Blockly Games
- Easy to understand
- Makes programming interactive
- Helps develop logical thinking
- No traditional coding required
- Good for beginners
Disadvantages of Blockly Games
- Limited compared with professional programming environments
- Mainly designed for learning
- Not suitable for developing complete real-world applications
How I Used Blockly Games
I searched for Blockly Games online and opened the Blockly Games platform. I explored the available programming challenges and selected the Maze game.
Applications I Used
6. MIT App Inventor
What is MIT App Inventor?
MIT App Inventor is a web-based platform used to create mobile applications using a drag-and-drop interface and block-based programming.
It allows users to develop Android applications without needing to write complex programming code. The interface can be designed using visual components, while the application logic can be created using blocks.

Features of MIT App Inventor
- Drag-and-drop interface
- Block-based programming
- Android application development
- Easy user interface design
- Hardware and IoT communication support
- Beginner-friendly
Advantages of MIT App Inventor
- Easy to learn
- No advanced programming knowledge required
- Fast application development
- Visual programming makes logic easier
- Useful for IoT applications
Disadvantages of MIT App Inventor
- Mainly focused on simple and educational applications
- Less flexible than traditional mobile development tools
- Advanced applications may require other development platforms
How I Started with MIT App Inventor
I followed these steps:
- Searched for MIT App Inventor on Google.
- Opened the MIT App Inventor website.
- Created an account and logged in.
- Created a New Project.
- Designed the application interface.
- Opened the Blocks section.
- Created the required programming logic.
- Tested the application using the mobile device.
7. Blynk IoT
What is Blynk?
Blynk is an IoT platform used to connect, monitor, and control electronic devices through mobile and web interfaces.
It allows users to create dashboards using widgets such as buttons, switches, displays, gauges, and charts. A microcontroller such as the XIAO ESP32-C3 can communicate with Blynk through Wi-Fi.
Blynk can be used for applications such as home automation, environmental monitoring, smart agriculture, and remote device control.

Features of Blynk
- Mobile and web dashboards
- IoT device control
- Sensor data monitoring
- Datastreams
- Widgets
- Wi-Fi connectivity
- Remote monitoring
Advantages of Blynk
- Easy to create IoT dashboards
- Mobile and web access
- Supports many microcontrollers
- Useful for remote monitoring
- Suitable for IoT prototypes
Disadvantages of Blynk
- Requires internet connectivity for cloud-based features
- Some features depend on the available plan
- Configuration is required before connecting hardware
- Cloud dependency can be a limitation in some applications
Blynk Interface
I explored the Blynk interface and learned how to create a template, datastream, and dashboard. I also learned how widgets can be added to the dashboard to control devices or display sensor data.
Individual Assignments
After learning about the different interfaces and applications, I completed several individual assignments to apply what I had learned practically.
1. Processing – 5 LED Control Using XIAO ESP32-C3
As part of my individual assignment, I used Processing with the XIAO ESP32-C3 to control five LEDs.
I connected five LEDs to the XIAO ESP32-C3 and programmed the microcontroller to receive commands through serial communication. I then created a graphical interface in Processing containing buttons for the five LEDs.
When a button was pressed in Processing, a command was sent through the serial port to the XIAO ESP32-C3. The microcontroller received the command and switched the corresponding LED ON or OFF.
This assignment helped me understand serial communication, graphical interfaces, microcontroller control, and hardware-software interaction.
Arduino IDE Code
intleds[] = {D0,D1,D2,D3,D4};voidsetup(){Serial.begin(115200);for(inti = 0; i<5; i++){pinMode(leds[i],OUTPUT);digitalWrite(leds[i],LOW);}}voidloop(){if(Serial.available()){chardata = Serial.read();// Turn ONif(data=='1')digitalWrite(D0,HIGH);if(data=='2')digitalWrite(D1,HIGH);if(data=='3')digitalWrite(D2,HIGH);if(data=='4')digitalWrite(D3,HIGH);if(data=='5')digitalWrite(D4,HIGH);// Turn OFFif(data=='a')digitalWrite(D0,LOW);if(data=='b')digitalWrite(D1,LOW);if(data=='c')digitalWrite(D2,LOW);if(data=='d')digitalWrite(D3,LOW);if(data=='e')digitalWrite(D4,LOW);// ALL OFFif(data=='0'){for(inti = 0; i<5; i++){digitalWrite(leds[i],LOW);}}}}Processing Code
importprocessing.serial.*;SerialmyPort;voidsetup(){size(600,400);// XIAO ESP32-C3 is on COM6myPort=newSerial(this,"COM6",115200);}voiddraw(){background(240);fill(0);textAlign(CENTER);textSize(30);text("5 LED CONTROL",300,50);fill(0,180,0);rect(30,100,100,60);rect(145,100,100,60);rect(260,100,100,60);rect(375,100,100,60);rect(490,100,100,60);fill(255);textSize(18);text("LED 1",80,137);text("LED 2",195,137);text("LED 3",310,137);text("LED 4",425,137);text("LED 5",540,137);fill(200,0,0);rect(225,230,150,60);fill(255);textSize(20);text("ALL OFF",300,267);}voidmousePressed(){if(mouseX>30&&mouseX<130&&mouseY>100&&mouseY<160){myPort.write('1');}if(mouseX>145&&mouseX<245&&mouseY>100&&mouseY<160){myPort.write('2');}if(mouseX>260&&mouseX<360&&mouseY>100&&mouseY<160){myPort.write('3');}if(mouseX>375&&mouseX<475&&mouseY>100&&mouseY<160){myPort.write('4');}if(mouseX>490&&mouseX<590&&mouseY>100&&mouseY<160){myPort.write('5');}if(mouseX>225&&mouseX<375&&mouseY>230&&mouseY<290){myPort.write('0');}}Experience – Processing
Working with Processing helped me understand how a computer application can be used to control physical electronic components. I learned how to create a simple graphical interface and communicate with the XIAO ESP32-C3 using serial communication.
Controlling five LEDs through the Processing interface gave me practical experience in connecting software commands with hardware outputs.

2. Web Server – 3 LED Control
In this assignment, I used the XIAO ESP32-C3 to create a simple Wi-Fi web server for controlling three LEDs.
The XIAO ESP32-C3 was connected to a Wi-Fi network and programmed as a web server. I created a webpage containing ON and OFF buttons for three LEDs.
After connecting to Wi-Fi, the ESP32-C3 displayed its IP address in the Serial Monitor. I entered this IP address into a web browser and opened the control webpage.
Using the webpage buttons, I could turn the three LEDs ON and OFF remotely through the local Wi-Fi network.
Code
#include<WiFi.h>constchar* ssid = "YOUR_WIFI_NAME";constchar* password = "YOUR_WIFI_PASSWORD";WiFiServerserver(80);#defineLED1 D0#defineLED2 D1#defineLED3 D2boolled1State = false;boolled2State = false;boolled3State = false;voidsetup(){Serial.begin(115200);pinMode(LED1,OUTPUT);pinMode(LED2,OUTPUT);pinMode(LED3,OUTPUT);digitalWrite(LED1,LOW);digitalWrite(LED2,LOW);digitalWrite(LED3,LOW);WiFi.begin(ssid,password);Serial.print("Connecting to WiFi");while(WiFi.status()!=WL_CONNECTED){delay(500);Serial.print(".");}Serial.println();Serial.println("WiFi Connected!");Serial.print("IP Address: ");Serial.println(WiFi.localIP());server.begin();}voidloop(){WiFiClientclient = server.available();if(!client){return;}Stringrequest = client.readStringUntil('\r');client.flush();if(request.indexOf("GET /led1on")>=0){digitalWrite(LED1,HIGH);led1State = true;}if(request.indexOf("GET /led1off")>=0){digitalWrite(LED1,LOW);led1State = false;}if(request.indexOf("GET /led2on")>=0){digitalWrite(LED2,HIGH);led2State = true;}if(request.indexOf("GET /led2off")>=0){digitalWrite(LED2,LOW);led2State = false;}if(request.indexOf("GET /led3on")>=0){digitalWrite(LED3,HIGH);led3State = true;}if(request.indexOf("GET /led3off")>=0){digitalWrite(LED3,LOW);led3State = false;}if(request.indexOf("GET /alloff")>=0){digitalWrite(LED1,LOW);digitalWrite(LED2,LOW);digitalWrite(LED3,LOW);led1State = false;led2State = false;led3State = false;}Stringhtml = "";html+="<!DOCTYPE html>";html+="<html>";html+="<head>";html+="<meta name='viewport' content='width=device-width, initial-scale=1'>";html+="<title>3 LED Control</title>";html+="<style>";html+="body {";html+="font-family: Arial;";html+="text-align: center;";html+="background: #f2f2f2;";html+="}";html+=".box {";html+="background: white;";html+="margin: 15px auto;";html+="padding: 15px;";html+="max-width: 400px;";html+="border-radius: 12px;";html+="}";html+="button {";html+="padding: 12px 25px;";html+="margin: 5px;";html+="font-size: 18px;";html+="border: none;";html+="border-radius: 8px;";html+="}";html+=".on {";html+="background: green;";html+="color: white;";html+="}";html+=".off {";html+="background: red;";html+="color: white;";html+="}";html+="</style>";html+="</head>";html+="<body>";html+="<h1>3 LED CONTROL</h1>";html+="<div class='box'>";html+="<h2>LED 1</h2>";if(led1State)html+="<p>Status: <b style='color:green'>ON</b></p>";elsehtml+="<p>Status: <b style='color:red'>OFF</b></p>";html+="<a href='/led1on'><button class='on'>ON</button></a>";html+="<a href='/led1off'><button class='off'>OFF</button></a>";html+="</div>";html+="<div class='box'>";html+="<h2>LED 2</h2>";if(led2State)html+="<p>Status: <b style='color:green'>ON</b></p>";elsehtml+="<p>Status: <b style='color:red'>OFF</b></p>";html+="<a href='/led2on'><button class='on'>ON</button></a>";html+="<a href='/led2off'><button class='off'>OFF</button></a>";html+="</div>";html+="<div class='box'>";html+="<h2>LED 3</h2>";if(led3State)html+="<p>Status: <b style='color:green'>ON</b></p>";elsehtml+="<p>Status: <b style='color:red'>OFF</b></p>";html+="<a href='/led3on'><button class='on'>ON</button></a>";html+="<a href='/led3off'><button class='off'>OFF</button></a>";html+="</div>";html+="<a href='/alloff'>";html+="<button class='off'>ALL OFF</button>";html+="</a>";html+="</body>";html+="</html>";client.println("HTTP/1.1 200 OK");client.println("Content-Type: text/html");client.println("Connection: close");client.println();client.println(html);delay(1);client.stop();}Web Server Result
The web interface displayed:
3 LED CONTROL
- LED 1 – ON / OFF
- LED 2 – ON / OFF
- LED 3 – ON / OFF
- ALL OFF
The webpage allowed me to control the LEDs directly from a web browser.
Experience – Web Server
This assignment helped me understand how a microcontroller can communicate over Wi-Fi and work as a simple web server. I learned how to obtain the ESP32-C3 IP address and use it to access a webpage from a browser.
I also understood how buttons on a webpage can send commands to a microcontroller and control physical outputs.

3. PictoBlox – Bounce Ball Game
As part of my individual assignment, I created a Bounce Ball Game using PictoBlox with block-based programming.
I used a ball and paddle sprite and created the game logic using different blocks. The ball was programmed to move and bounce, while the paddle was controlled using keyboard inputs.
I also added conditions to detect the interaction between the ball and paddle. This helped me understand programming concepts such as events, loops, conditions, keyboard input, sprite movement, and collision detection.
Steps I Followed
- Opened PictoBlox.
- Selected the Blocks programming option.
- Added the ball and paddle sprites.
- Set up the game background.
- Created the ball movement using blocks.
- Added the bouncing logic.
- Programmed the paddle to move left and right.
- Tested the game.
- Debugged the game logic where required.
Experience – PictoBlox
Creating the Bounce Ball Game helped me understand programming logic through visual blocks. I learned how conditions and loops can be used to control sprites and create game behaviour.
Testing and correcting the game also helped me improve my debugging and problem-solving skills.


4. p5.js – Landscape
As part of my individual assignment, I used p5.js to create a visual landscape using programming.
I created mountains, snow, a sun, ground, a river, a tree, birds, and a title using different shapes and functions.
I used ChatGPT AI as a learning and coding support tool to understand programming concepts, generate ideas, modify code, and debug problems.
Code
functionsetup(){createCanvas(600,400);}functiondraw(){background(135,206,235);// Sunfill(255,200,0);noStroke();circle(450,100,100);// Mountainsfill(80,100,120);triangle(0,300,180,100,360,300);triangle(250,300,430,120,600,300);// Snowfill(255);triangle(180,100,145,140,165,130);triangle(430,120,395,160,420,150);// Groundfill(60,150,80);rect(0,300,600,100);// Riverfill(70,170,220);beginShape();vertex(250,300);vertex(350,300);vertex(500,400);vertex(100,400);endShape(CLOSE);// Tree trunkfill(100,60,30);rect(80,220,25,100);// Tree leavesfill(30,120,50);circle(90,200,90);circle(55,225,70);circle(125,225,70);// BirdsnoFill();stroke(0);strokeWeight(2);arc(150,100,25,15,PI,TWO_PI);arc(180,100,25,15,PI,TWO_PI);// TitlenoStroke();fill(0);textSize(20);text("p5.js Sunset Landscape",20,30);}
5. p5.js – Ball Game
I also created a simple Ball Clicking Game using p5.js. The ball moved downward on the screen and the player had to click the ball to increase the score.
This assignment helped me understand variables, functions, coordinates, animation, mouse interaction, conditions, and game logic.
Code
letballX;letballY;letballSize=30;letscore=0;letspeed=3;functionsetup(){createCanvas(600,400);ballX=random(30,width-30);ballY=50;}functiondraw(){background(220);// Ballfill(255,0,0);circle(ballX,ballY,ballSize);// Move ball downwardballY+=speed;// Scorefill(0);textSize(24);text("Score: "+score,20,35);// Reset ballif(ballY>height+ballSize){ballY=50;ballX=random(30,width-30);}}functionmousePressed(){letdistance=dist(mouseX,mouseY,ballX,ballY);if(distance<ballSize/2){score++;ballY=50;ballX=random(30,width-30);}}
Experience – p5.js
Working with p5.js gave me practical experience in creating visual and interactive applications using JavaScript. I learned how to use functions, shapes, colours, animation, coordinates, mouse interaction, and game logic.
Using ChatGPT AI as a learning aid helped me understand unfamiliar code and modify programs according to my requirements. This activity improved my understanding of creative coding and interactive web development.
6. Blockly Games – Maze
In the Blockly Games – Maze activity, I used block-based programming to guide a character through a maze and reach the destination.
I used blocks such as:
- Move forward
- Turn left
- Turn right
- Repeat
- If path
I had to arrange the blocks in the correct order so that the character could successfully navigate the maze.
This activity helped me understand sequence, loops, conditions, and logical problem-solving without writing traditional programming code.
Experience – Blockly Games
Blockly Games made programming logic easier to understand because I could visually arrange the instructions. Solving the maze required me to think about the correct sequence of actions and predict what each block would do.
This activity improved my logical thinking and problem-solving skills.

7. MIT App Inventor – ESP32 LED Control
In this assignment, I created a simple mobile application using MIT App Inventor to control an LED connected to an ESP32.
The ESP32 was connected to Wi-Fi and hosted simple control functions. The mobile application was designed with buttons that could send commands to the ESP32.
When the ON button was pressed, the ESP32 turned the LED ON. Similarly, pressing the OFF button turned the LED OFF.
This assignment helped me understand mobile application development, Wi-Fi communication, ESP32 programming, and IoT-based control.
Steps I Followed
- Searched for MIT App Inventor on Google.
- Opened the MIT App Inventor website.
- Created an account and logged in.
- Created a New Project.
- Designed the application interface.
- Opened the Blocks section.
- Created the logic for the ON and OFF buttons.
- Tested the application using the mobile device.
- Connected the application with the ESP32 through Wi-Fi.
ESP32 Code
#include<WiFi.h>#include<WebServer.h>constchar* ssid = "YOUR_WIFI_NAME";constchar* password = "YOUR_WIFI_PASSWORD";WebServerserver(80);constintledPin = 2;voidhandleOn(){digitalWrite(ledPin,HIGH);server.send(200,"text/plain","LED ON");}voidhandleOff(){digitalWrite(ledPin,LOW);server.send(200,"text/plain","LED OFF");}voidsetup(){Serial.begin(115200);pinMode(ledPin,OUTPUT);digitalWrite(ledPin,LOW);WiFi.begin(ssid,password);while(WiFi.status()!=WL_CONNECTED){delay(500);Serial.print(".");}Serial.println();Serial.print("ESP32 IP Address: ");Serial.println(WiFi.localIP());server.on("/on",handleOn);server.on("/off",handleOff);server.begin();}voidloop(){server.handleClient();}ESP32 Configuration
I entered the Wi-Fi network name and password in the ESP32 program. The ESP32 and mobile phone were connected to the same Wi-Fi network.
After the ESP32 successfully connected to Wi-Fi, its IP address was displayed in the Serial Monitor. This IP address was used by the mobile application to communicate with the ESP32.
The ESP32 then received the commands from the application and controlled the connected LED.
Experience – MIT App Inventor
This activity gave me practical experience in creating a mobile application and connecting it with an ESP32 through Wi-Fi.
I learned how a mobile interface can send commands to a microcontroller and how the microcontroller can respond by controlling a physical device. This helped me understand the basic concept of IoT device control through a mobile application.


8. Blynk – LED Control
As part of my individual assignment, I used Blynk with the XIAO ESP32-C3 to control an LED through a mobile interface.
I created a Blynk template and datastream and added a control button to the dashboard. The XIAO ESP32-C3 was connected to Wi-Fi and linked with the Blynk platform.
When the button was pressed in the Blynk application, the command was sent to the XIAO ESP32-C3 and the LED was turned ON or OFF.
Steps I Followed
- Logged into Blynk.
- Created a new template.
- Created a Datastream.
- Created the dashboard.
- Added a button widget.
- Added the template ID and template name to the Arduino code.
- Added the authentication token.
- Entered the Wi-Fi name and password.
- Uploaded the program to the XIAO ESP32-C3.
- Tested the LED control from the Blynk application.
Code
#defineBLYNK_TEMPLATE_ID "YOUR_TEMPLATE_ID"#defineBLYNK_TEMPLATE_NAME "YOUR_TEMPLATE_NAME"#defineBLYNK_AUTH_TOKEN "YOUR_AUTH_TOKEN"#include<WiFi.h>#include<BlynkSimpleEsp32.h>charssid[] = "YOUR_WIFI_NAME";charpass[] = "YOUR_WIFI_PASSWORD";#defineLED_PIN 21BLYNK_WRITE(V0){intvalue = param.asInt();digitalWrite(LED_PIN,value);}voidsetup(){Serial.begin(115200);pinMode(LED_PIN,OUTPUT);digitalWrite(LED_PIN,LOW);Blynk.begin(BLYNK_AUTH_TOKEN,ssid,pass);}voidloop(){Blynk.run();}

9. Blynk – Temperature and Humidity Monitoring Using DHT22
In another assignment, I used a DHT22 sensor, XIAO ESP32-C3, and Blynk to monitor temperature and humidity.
The DHT22 sensor measured the surrounding temperature and humidity. The XIAO ESP32-C3 read the sensor values and transmitted the data through Wi-Fi to the Blynk platform.
I created a Blynk dashboard to display the sensor readings using suitable widgets. This allowed me to monitor the environmental data through the application.
This assignment helped me understand how sensors, microcontrollers, Wi-Fi, cloud platforms, and mobile dashboards can work together in an IoT system.
Steps I Followed
- Created a new Blynk template.
- Created the required datastreams for temperature and humidity.
- Created the dashboard.
- Added widgets to display the sensor values.
- Added the template information and authentication token to the Arduino code.
- Entered the Wi-Fi credentials.
- Connected the DHT22 sensor to the XIAO ESP32-C3.
- Uploaded the program.
- Checked the sensor readings on the Blynk dashboard.


Week 6 – Overall Experience
Week 6 was a practical learning experience focused on interfaces, applications, programming, and IoT communication. I explored different platforms including Processing, Web Servers, PictoBlox, p5.js, Blockly Games, MIT App Inventor, and Blynk.
Through my individual assignments, I created a Bounce Ball Game using PictoBlox, solved programming challenges using Blockly Games, created visual applications and games using p5.js, and developed a Processing interface to control five LEDs using the XIAO ESP32-C3.
I also created a web server to control three LEDs through a browser, which helped me understand how Wi-Fi can be used to communicate with a microcontroller.
Using MIT App Inventor, I explored mobile application development and controlled an LED connected to an ESP32. With Blynk, I created an IoT interface for LED control and monitored temperature and humidity using a DHT22 sensor connected to the XIAO ESP32-C3.
Overall, Week 6 helped me understand the relationship between hardware, software, programming interfaces, web technologies, mobile applications, and IoT systems. It also improved my skills in programming, debugging, logical thinking, and developing interactive applications.


