Title – Smart Bell
Student Name – Atharv Badhe
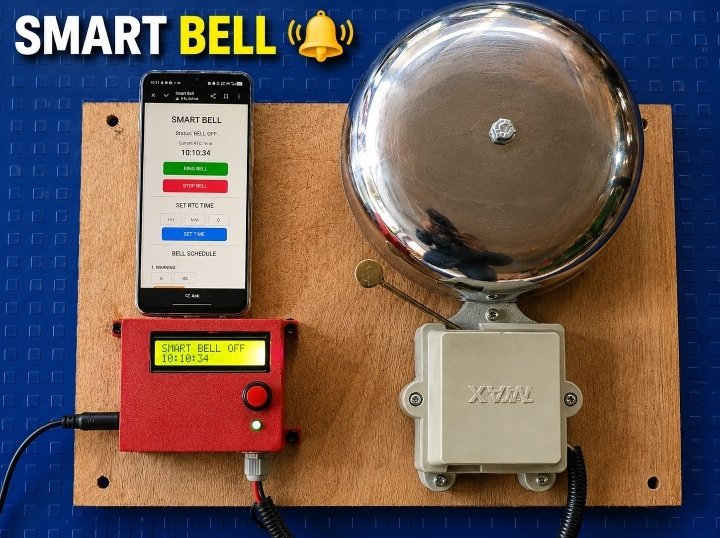
Project Introduction
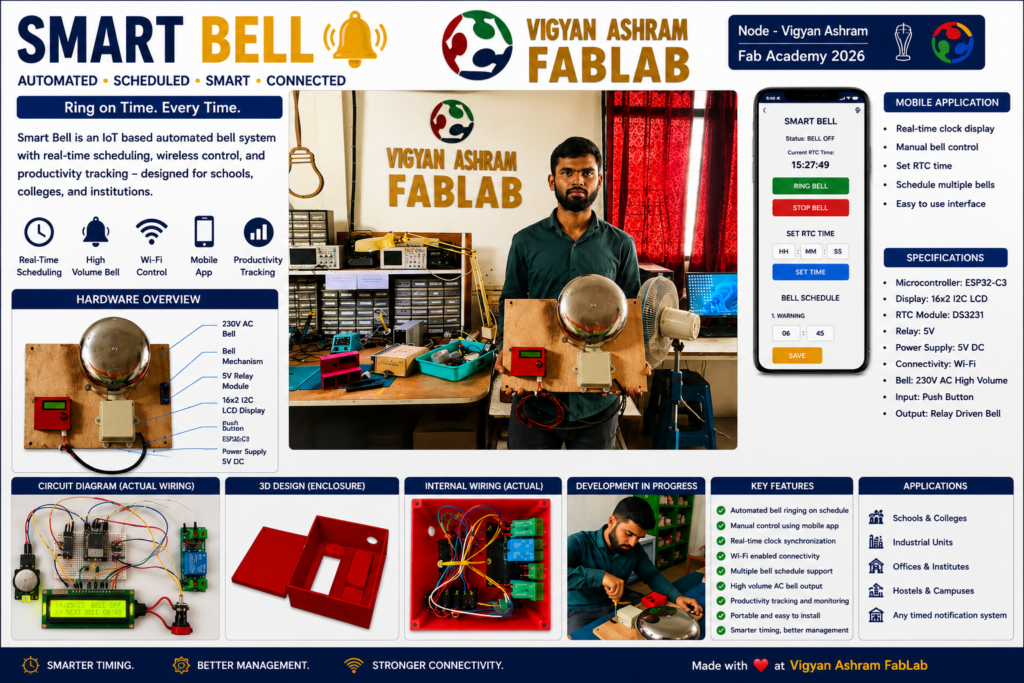
I developed a Smart Bell System to automate the bell operation on campus. The system uses an ESP32, RTC module, relay, 16×2 LCD, LED, push button, and gong bell. The RTC keeps track of the current time, while the ESP32 checks the scheduled timings and activates the relay to ring the gong automatically.
I also included a manual push-button option for immediate bell operation and a mobile web interface for remote control. Through the web interface, I can turn the bell ON or OFF and set or update the bell timings. This system reduces manual effort, avoids timing errors, and makes campus bell operation more convenient, accurate, and reliable.
Problem Statement
In our campus, the bell has to be operated manually at every scheduled time. This requires a person to be present and can sometimes cause delays or mistakes.To solve this problem, we developed a Smart Bell that can automatically ring the bell according to the time set in the code. The bell can also be controlled remotely using a mobile phone, providing greater convenience and flexibility. This system reduces manual effort and makes the campus bell system more accurate, efficient, and easy to manage.
Proposed Solution
I developed a Smart Bell System to make campus bell operation easier.
The system can:
- Set the bell schedule through code.
- Change the bell schedule using a mobile phone.
- Turn the bell ON/OFF from the mobile.
- Operate the bell manually using a push button.
- Ring the bell automatically at the scheduled time.
This system provides automatic, mobile, and manual control in one Smart Bell.
Key Features
- Automatic Bell Operation: The bell rings automatically at scheduled times.
- RTC-Based Timing: The RTC provides accurate time for bell operation.
- Manual Push Button: The bell can be operated manually when required.
- Mobile Web Control: The bell can be controlled remotely using a mobile phone.
- Bell Time Setting: Bell timings can be set or updated through the web interface.
- ON/OFF Control: The bell can be turned ON or OFF through the mobile web page.
- LCD Display: The 16×2 LCD displays the current time and bell status.
- Power LED Indication: The LED remains ON when the system is powered ON and turns OFF when the power is switched OFF.
- Reduced Manual Effort: The system reduces the need for manual bell operation.
- Reliable Operation: The system provides accurate and consistent bell timings.
Working Principle
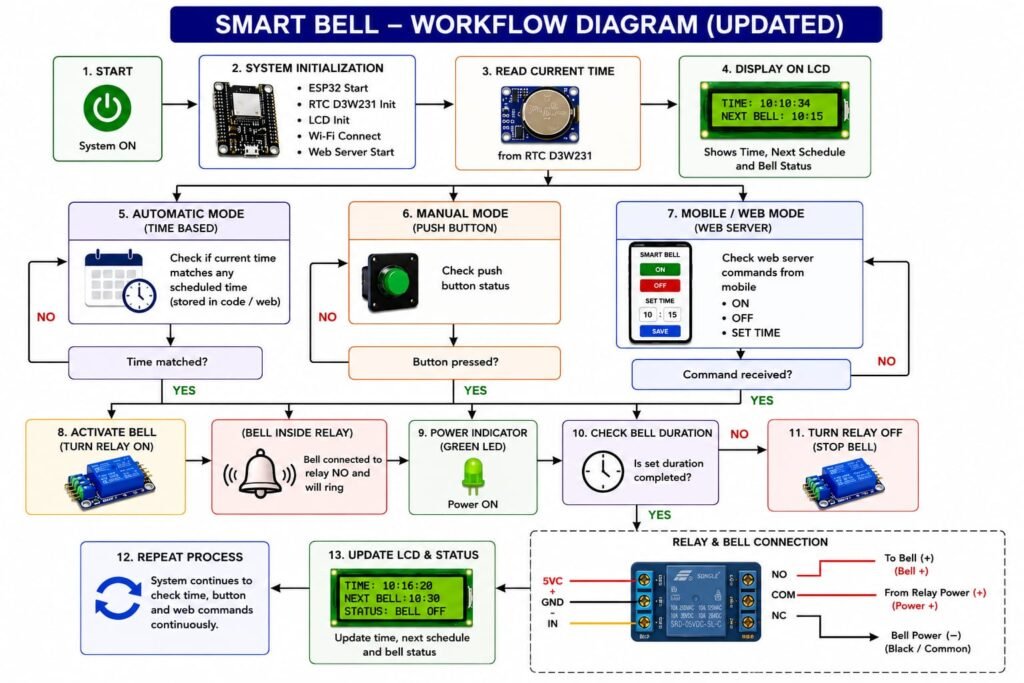
The Smart Bell system is powered by a 5V DC adapter/jack. When the system is switched ON, the ESP32 starts and first connects to the Wi-Fi network. After connecting to Wi-Fi, it initializes the RTC, LCD, relay, push button, and web server. The bell timing schedule is programmed in the ESP32 code, and the RTC provides the current time for checking the scheduled bell timings.
The system can operate in automatic, manual, and web server modes. In automatic mode, the ESP32 compares the current time with the scheduled time and automatically turns ON the relay to ring the bell. In manual mode, the bell can be operated directly using the push button. Through the web server, the user can remotely turn the bell ON or OFF and change the bell timing using a mobile phone or computer connected to the Wi-Fi network. The LCD displays the current time, next bell timing, and bell status. After completing the bell operation, the relay turns OFF and the system continues monitoring for the next command or scheduled time.
Block Diagram
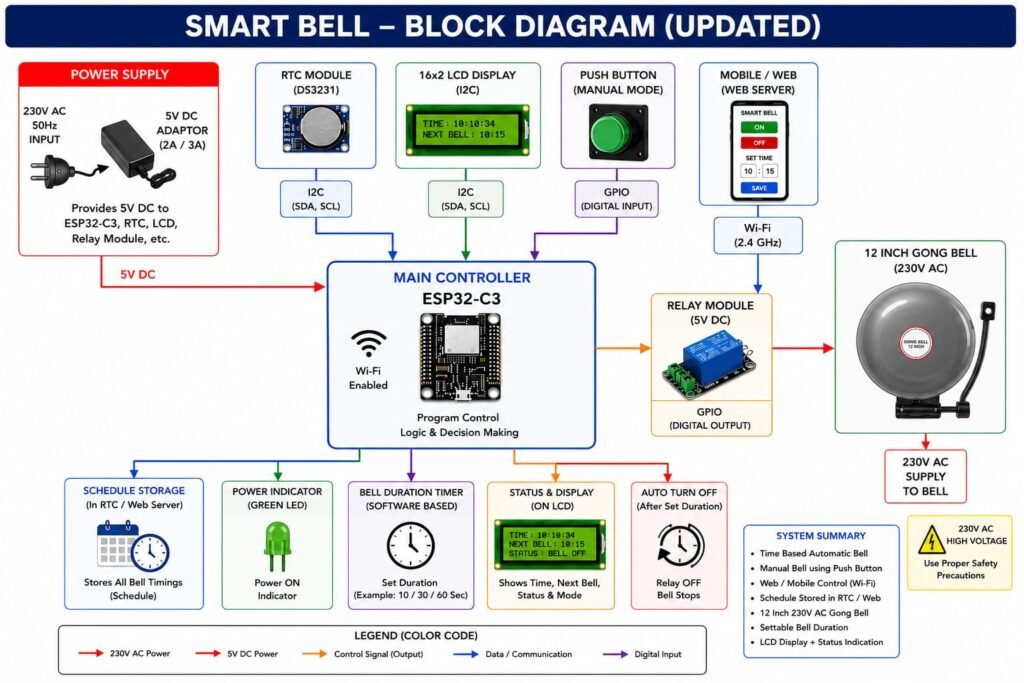
The 5V DC adapter/jack supplies power to the Smart Bell system. The ESP32 is the main controller of the project. It first connects to the Wi-Fi network and starts the web server. The DS3231 RTC module provides the current time to the ESP32, which is used to compare with the bell schedule programmed in the code.
The system has three methods of operation. In automatic mode, the ESP32 checks the programmed schedule and operates the bell at the required time. In manual mode, the user can press the push button to activate the bell. In web server mode, the user can use a mobile phone or computer to turn the bell ON/OFF and change the bell timing.
When the ESP32 receives a scheduled or manual/web command, it activates the relay module, which switches the bell/gong ON. After the required duration, the relay is turned OFF. The 16×2 LCD displays the current time, next bell timing, and operating status. The system then continues monitoring the time, push button, and web commands for the next operation.
5V Adapter → ESP32 → Wi-Fi Connection → RTC Time + Bell Schedule → Automatic / Push Button / Web Control → Relay → Gong Bell
ESP32 → 16×2 LCD → Current Time + Next Bell Time + Bell Status
Expected Outcome
The project is expected to provide a smart and automatic bell system. It will ring the bell at the scheduled time, allow manual control using a push button, and provide ON/OFF and timing control through a web server. The LCD will show the time and bell status. The system should work reliably and safely
Project Development
The project starts with research and selection of components. The required components are collected and the circuit is first connected on a breadboard for testing. The ESP32 is then programmed for Wi-Fi connection, automatic bell timing, push-button control, and web server control. After debugging and successful testing, the components are arranged and connected properly in the project enclosure. Finally, the complete system is assembled and tested for automatic, manual, and web-based bell operation.
Project Development Flow
Research → Components Ordering → Breadboard Testing → Coding → 3D Enclosure Design → 3D Printing→Bell Testing →Wi-Fi/Web Server Integration→ Component Assembly → Final Testing
Research
The Smart Bell project uses an ESP32 to control an electric bell automatically. The system is researched for scheduled timing, manual button control, and Wi-Fi web-server operation. Users can change the bell timing and ring the bell remotely through a mobile phone or computer. The research also includes relay control, circuit design, and safe component assembly.
Components Ordered
After completing the research, I ordered the required components for the Smart Bell project. The components were selected according to the circuit design and project requirements to ensure proper and reliable operation.
- ESP32 Dev Module
- DS3231 RTC Module
- 3.3V Relay Module
- LED
- LCD Display 16×2
- Resistor
- Push Button
- 5V DC Jack
- 5V Adapter
- Jumper Wires
Breadboard Testing
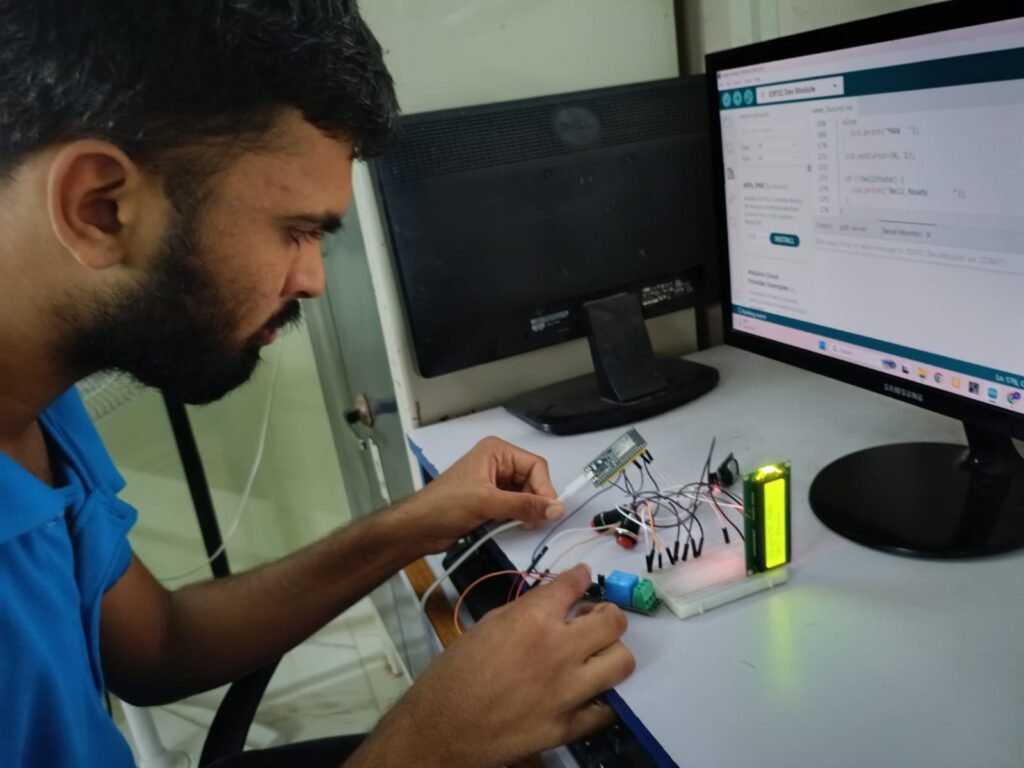
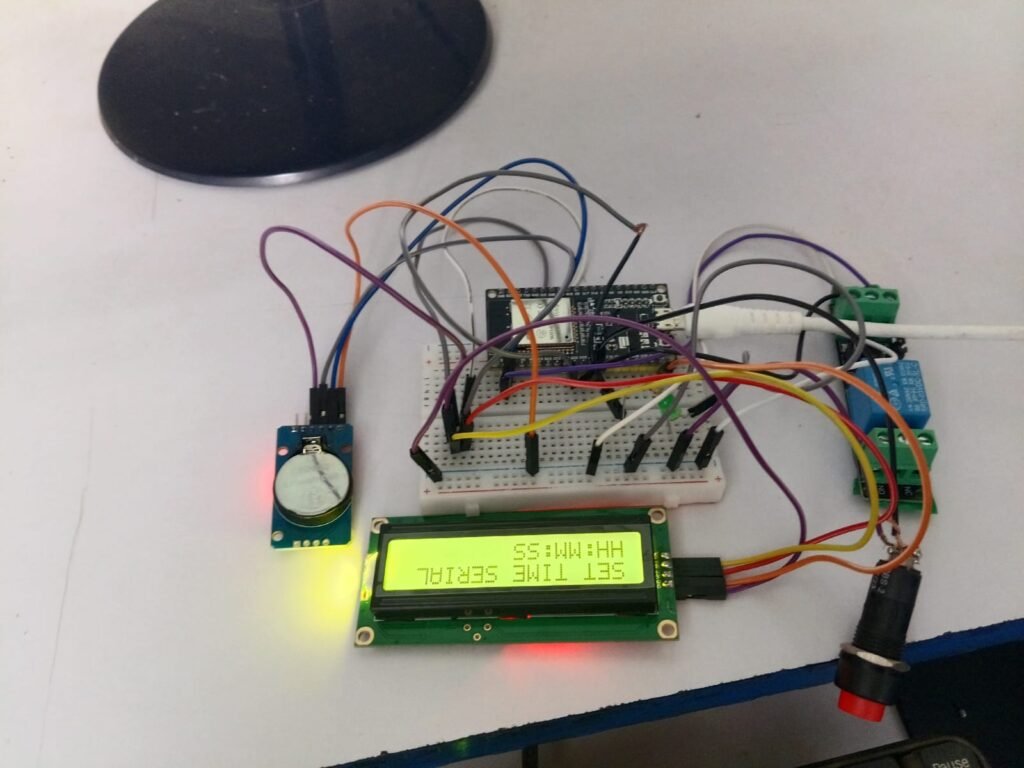
After ordering the required components, I assembled and tested the circuit on a breadboard before making the final assembly. I connected the components according to the circuit design and checked the RTC, LCD, relay, LED, and push button to ensure that each part was working correctly. The connections used during breadboard testing are given below.
| Component | Pin | Connection |
|---|---|---|
| ESP32 Dev Module | — | Main controller |
| DS3231 RTC Module | VCC | ESP32 3.3V |
| DS3231 RTC Module | GND | ESP32 GND |
| DS3231 RTC Module | SDA | GPIO 21 |
| DS3231 RTC Module | SCL | GPIO 22 |
| 3.3V Relay Module | VCC | ESP32 3.3V |
| 3.3V Relay Module | GND | ESP32 GND |
| 3.3V Relay Module | IN | GPIO 26 |
| Push Button | Pin 1 | GPIO 27 |
| Push Button | Pin 2 | GND |
| LED | Anode (+) | GPIO 25 through resistor |
| LED | Cathode (−) | GND |
| 16×2 LCD (I2C) | VCC | 5V |
| 16×2 LCD (I2C) | GND | GND |
| 16×2 LCD (I2C) | SDA | GPIO 21 |
| 16×2 LCD (I2C) | SCL | GPIO 22 |
| 5V DC Jack | + | 5V Adapter + |
| 5V DC Jack | − | 5V Adapter − |
Coding
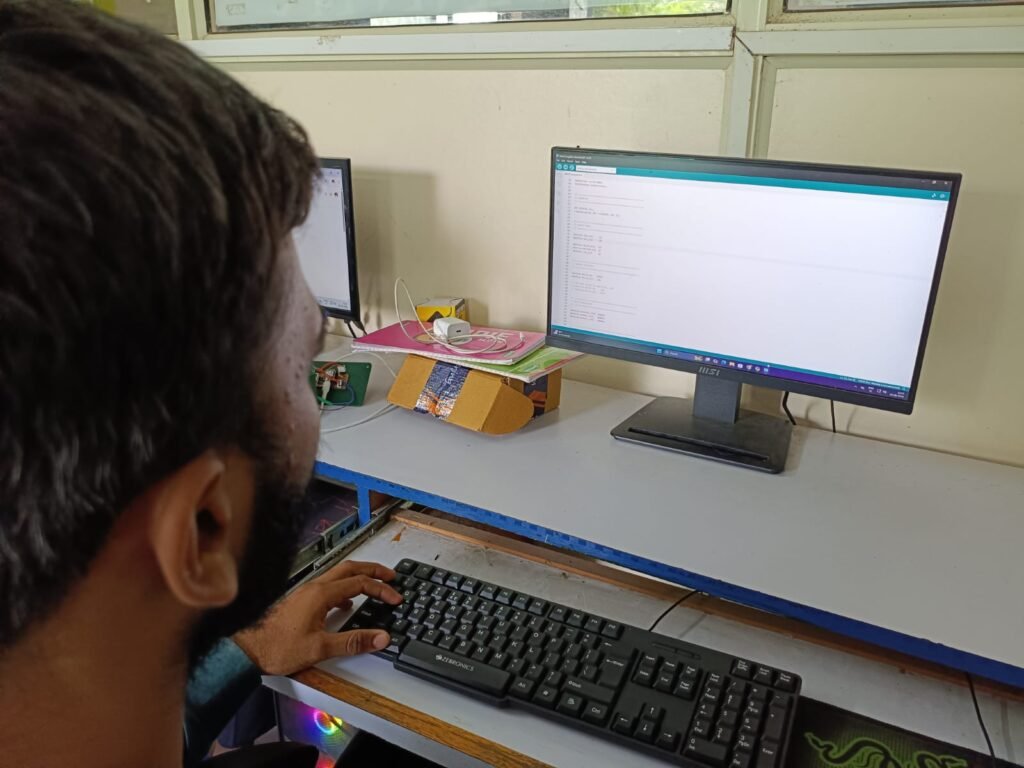
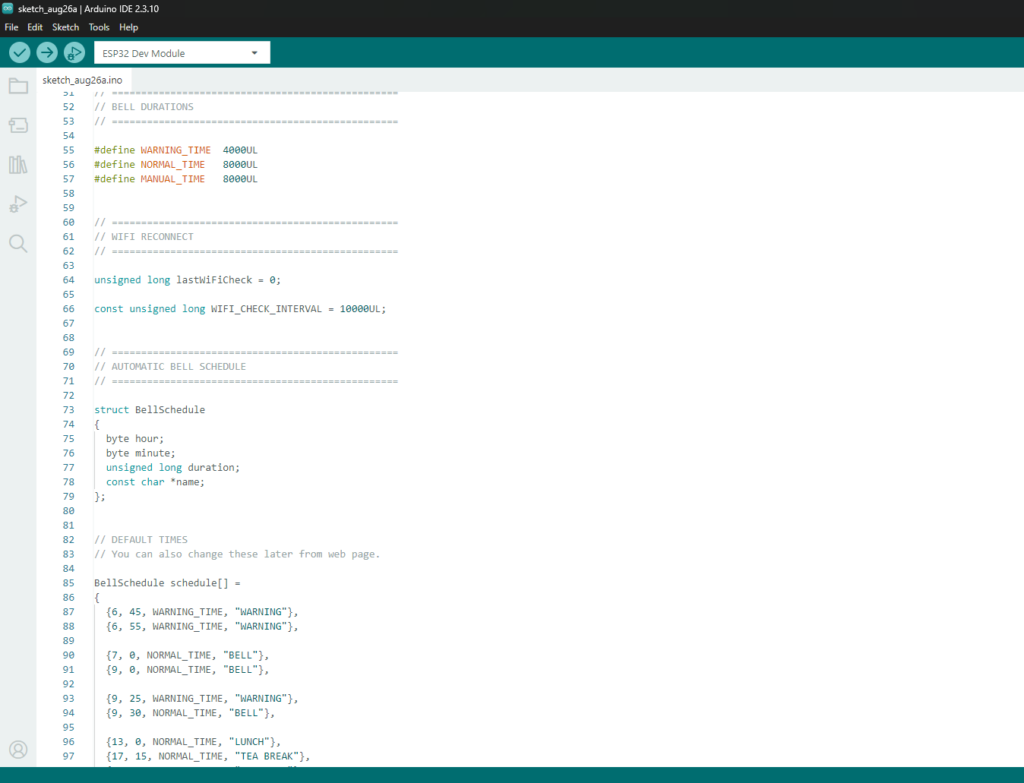
After completing the breadboard testing, I uploaded the corrected program to the ESP32 using the Arduino IDE. The code was developed to control the automatic bell timing, RTC, LCD display, relay, LED, push button, and Wi-Fi web server. After uploading, I checked the system to ensure that the ESP32 was executing the program correctly.
Code
#include <Wire.h>
#include <RTClib.h>
#include <LiquidCrystal_I2C.h>
#include <WiFi.h>
#include <WebServer.h>

// =================================================
// WIFI SETTINGS
// =================================================

const char* ssid = "YOUR_WIFI_NAME";
const char* password = "YOUR_WIFI_PASSWORD";

WebServer server(80);


// =================================================
// MODULES
// =================================================

RTC_DS3231 rtc;
LiquidCrystal_I2C lcd(0x27, 16, 2);


// =================================================
// ESP32 PINS
// =================================================

#define SDA_PIN     21
#define SCL_PIN     22

#define RELAY_PIN   26
#define BUTTON_PIN  27
#define LED_PIN     25


// =================================================
// RELAY
// =================================================

#define RELAY_ON    HIGH
#define RELAY_OFF   LOW


// =================================================
// BELL DURATIONS
// =================================================

#define WARNING_TIME  4000UL
#define NORMAL_TIME   8000UL
#define MANUAL_TIME   8000UL


// =================================================
// WIFI RECONNECT SETTINGS
// =================================================

unsigned long lastWiFiCheck = 0;
const unsigned long WIFI_CHECK_INTERVAL = 10000UL;


// =================================================
// AUTOMATIC BELL SCHEDULE
// =================================================

struct BellSchedule
{
  byte hour;
  byte minute;
  unsigned long duration;
  const char *name;
};

BellSchedule schedule[] =
{
  {6, 45, WARNING_TIME, "WARNING"},
  {6, 55, WARNING_TIME, "WARNING"},

  {7,  0, NORMAL_TIME, "BELL"},
  {9,  0, NORMAL_TIME, "BELL"},

  {9, 25, WARNING_TIME, "WARNING"},
  {9, 30, NORMAL_TIME, "BELL"},

  {13,  0, NORMAL_TIME, "LUNCH"},
  {17, 15, NORMAL_TIME, "TEA BREAK"},
  {18, 30, NORMAL_TIME, "ACTIVITY"},

  {19, 40, WARNING_TIME, "WARNING"},
  {19, 45, NORMAL_TIME, "MEDITATION"},
  {20,  0, NORMAL_TIME, "BELL"}
};

const int TOTAL_BELLS =
  sizeof(schedule) / sizeof(schedule[0]);


// =================================================
// VARIABLES
// =================================================

bool bellRinging = false;

unsigned long bellStartTime = 0;
unsigned long bellDuration = 0;

int lastBellDay = -1;
int lastBellMinute = -1;

bool lastButtonState = HIGH;

unsigned long lastLCDUpdate = 0;


// =================================================
// FUNCTION DECLARATIONS
// =================================================

void startBell(unsigned long duration);
void stopBell();
void printTime(DateTime now);


// =================================================
// WEB PAGE
// =================================================

String getWebPage()
{
  String page = R"rawliteral(
<!DOCTYPE html>
<html>

<head>

<title>Smart Bell</title>

<meta name="viewport" content="width=device-width, initial-scale=1">

<style>

body
{
  font-family: Arial, sans-serif;
  text-align: center;
  background: #f2f2f2;
  margin: 0;
  padding: 30px 10px;
}

.card
{
  background: white;
  width: 320px;
  max-width: 90%;
  margin: auto;
  padding: 25px;
  border-radius: 15px;
  box-shadow: 0px 4px 15px rgba(0,0,0,0.15);
}

h1
{
  color: #333;
  margin-bottom: 20px;
}

.status
{
  font-size: 20px;
  margin: 20px;
}

.time
{
  font-size: 28px;
  font-weight: bold;
  margin: 10px;
}

button
{
  width: 220px;
  padding: 15px;
  margin: 10px;
  font-size: 20px;
  border: none;
  border-radius: 10px;
  cursor: pointer;
}

.ring
{
  background: #28a745;
  color: white;
}

.stop
{
  background: #dc3545;
  color: white;
}

.settime
{
  background: #007bff;
  color: white;
}

input
{
  width: 55px;
  padding: 10px 5px;
  font-size: 18px;
  text-align: center;
}

</style>


<script>

function updateData()
{
  fetch("/status")
  .then(response => response.text())
  .then(data =>
  {
    document.getElementById("status").innerHTML = data;
  });


  fetch("/time")
  .then(response => response.text())
  .then(data =>
  {
    document.getElementById("currenttime").innerHTML = data;
  });
}

setInterval(updateData, 1000);

window.onload = updateData;

</script>

</head>


<body>

<div class="card">

<h1>🔔 SMART BELL</h1>


<div class="status">

Status:

<span id="status">

Loading...

</span>

</div>


<div>

Current Time:

<div class="time"
id="currenttime">

00:00:00

</div>

</div>


<a href="/ring">

<button class="ring">

🔔 RING BELL

</button>

</a>


<a href="/stop">

<button class="stop">

STOP BELL

</button>

</a>


<hr>


<h2>SET RTC TIME</h2>


<form action="/settime"
method="get">

<input
type="number"
name="hour"
min="0"
max="23"
placeholder="HH"
required>

:

<input
type="number"
name="minute"
min="0"
max="59"
placeholder="MM"
required>

:

<input
type="number"
name="second"
min="0"
max="59"
placeholder="SS"
value="0"
required>


<br>


<button
type="submit"
class="settime">

SET TIME

</button>


</form>

</div>

</body>

</html>
)rawliteral";

  return page;
}


// =================================================
// WEB SERVER FUNCTIONS
// =================================================

void handleRoot()
{
  server.send(200, "text/html", getWebPage());
}


void handleRing()
{
  Serial.println("WEB: RING BELL");

  startBell(MANUAL_TIME);

  server.sendHeader("Location", "/");
  server.send(303);
}


void handleStop()
{
  Serial.println("WEB: STOP BELL");

  stopBell();

  server.sendHeader("Location", "/");
  server.send(303);
}


void handleStatus()
{
  if (bellRinging)
  {
    server.send(200, "text/plain", "BELL RINGING");
  }
  else
  {
    server.send(200, "text/plain", "BELL OFF");
  }
}


// =================================================
// SEND CURRENT RTC TIME TO WEB PAGE
// =================================================

void handleTime()
{
  DateTime now = rtc.now();

  char timeString[9];

  sprintf(
    timeString,
    "%02d:%02d:%02d",
    now.hour(),
    now.minute(),
    now.second()
  );

  server.send(200, "text/plain", timeString);
}


// =================================================
// SET RTC TIME FROM WEB PAGE
// =================================================

void handleSetTime()
{
  if (
    !server.hasArg("hour") ||
    !server.hasArg("minute") ||
    !server.hasArg("second")
  )
  {
    server.send(400, "text/plain", "Invalid Time");
    return;
  }


  int hour =
    server.arg("hour").toInt();

  int minute =
    server.arg("minute").toInt();

  int second =
    server.arg("second").toInt();


  if (
    hour < 0 ||
    hour > 23 ||
    minute < 0 ||
    minute > 59 ||
    second < 0 ||
    second > 59
  )
  {
    server.send(400, "text/plain", "Invalid Time");
    return;
  }


  // Get current date from RTC

  DateTime oldTime =
    rtc.now();


  // Change only time

  rtc.adjust(
    DateTime(
      oldTime.year(),
      oldTime.month(),
      oldTime.day(),
      hour,
      minute,
      second
    )
  );


  DateTime newTime =
    rtc.now();


  // Prevent automatic bell repeating
  // immediately in the same minute

  lastBellDay =
    newTime.day();

  lastBellMinute =
    newTime.minute();


  Serial.print("WEB TIME SET: ");

  printTime(newTime);


  server.sendHeader("Location", "/");

  server.send(303);
}


// =================================================
// WIFI CONNECT
// =================================================

void connectWiFi()
{
  Serial.println();
  Serial.println("Connecting to WiFi...");


  WiFi.mode(WIFI_STA);

  WiFi.begin(ssid, password);


  lcd.clear();

  lcd.setCursor(0, 0);
  lcd.print("Connecting WiFi");


  int attempts = 0;


  while (
    WiFi.status() != WL_CONNECTED &&
    attempts < 20
  )
  {
    delay(500);

    Serial.print(".");

    attempts++;
  }


  if (WiFi.status() == WL_CONNECTED)
  {
    Serial.println();
    Serial.println("WIFI CONNECTED!");

    Serial.print("IP ADDRESS: ");

    Serial.println(WiFi.localIP());


    lcd.clear();

    lcd.setCursor(0, 0);

    lcd.print("WiFi Connected");


    lcd.setCursor(0, 1);

    lcd.print(WiFi.localIP());


    delay(2000);
  }

  else
  {
    Serial.println();
    Serial.println("WIFI FAILED!");

    lcd.clear();

    lcd.setCursor(0, 0);

    lcd.print("WiFi Offline");


    lcd.setCursor(0, 1);

    lcd.print("Auto Bell Works");


    delay(2000);
  }
}


// =================================================
// WIFI RECONNECT
// =================================================

void checkWiFi()
{
  if (
    millis() - lastWiFiCheck <
    WIFI_CHECK_INTERVAL
  )
  {
    return;
  }


  lastWiFiCheck = millis();


  if (WiFi.status() != WL_CONNECTED)
  {
    Serial.println("WiFi Disconnected");

    Serial.println("Trying Reconnect...");


    WiFi.disconnect();

    WiFi.begin(ssid, password);
  }
}


// =================================================
// SETUP
// =================================================

void setup()
{
  Serial.begin(115200);

  delay(1000);


  Serial.println();
  Serial.println("================================");
  Serial.println("SMART BELL SYSTEM");
  Serial.println("================================");


  // RELAY

  pinMode(RELAY_PIN, OUTPUT);

  digitalWrite(RELAY_PIN, RELAY_OFF);


  // LED

  pinMode(LED_PIN, OUTPUT);

  digitalWrite(LED_PIN, HIGH);


  // BUTTON

  pinMode(BUTTON_PIN, INPUT_PULLUP);

  lastButtonState =
    digitalRead(BUTTON_PIN);


  // I2C

  Wire.begin(SDA_PIN, SCL_PIN);


  // LCD

  lcd.init();

  lcd.backlight();

  lcd.clear();


  lcd.setCursor(0, 0);

  lcd.print("SMART BELL");


  lcd.setCursor(0, 1);

  lcd.print("Starting...");


  delay(1500);


  // RTC

  if (!rtc.begin())
  {
    lcd.clear();

    lcd.setCursor(0, 0);

    lcd.print("RTC ERROR!");


    lcd.setCursor(0, 1);

    lcd.print("CHECK WIRING");


    while (1)
    {
      digitalWrite(RELAY_PIN, RELAY_OFF);

      delay(1000);
    }
  }


  if (rtc.lostPower())
  {
    Serial.println("WARNING: RTC LOST POWER!");
  }


  // READ RTC

  DateTime now =
    rtc.now();


  lastBellDay =
    now.day();

  lastBellMinute =
    now.minute();


  // WIFI

  connectWiFi();


  // WEB SERVER

  server.on("/", handleRoot);

  server.on("/ring", handleRing);

  server.on("/stop", handleStop);

  server.on("/status", handleStatus);

  server.on("/time", handleTime);

  server.on("/settime", handleSetTime);


  server.begin();


  Serial.println("WEB SERVER STARTED");


  digitalWrite(
    RELAY_PIN,
    RELAY_OFF
  );


  bellRinging = false;


  lcd.clear();

  showLCD(now);
}


// =================================================
// LOOP
// =================================================

void loop()
{
  // WEB SERVER

  server.handleClient();


  // WIFI RECONNECT

  checkWiFi();


  // READ RTC

  DateTime now =
    rtc.now();


  // LCD UPDATE

  if (
    millis() - lastLCDUpdate >= 250
  )
  {
    lastLCDUpdate = millis();

    showLCD(now);
  }


  // AUTOMATIC BELL

  checkAutomaticBell(now);


  // PHYSICAL BUTTON

  checkButton();


  // BELL TIMER

  if (bellRinging)
  {
    if (
      millis() - bellStartTime >=
      bellDuration
    )
    {
      stopBell();
    }
  }


  delay(10);
}


// =================================================
// PRINT TIME
// =================================================

void printTime(DateTime now)
{
  if (now.hour() < 10)
    Serial.print("0");

  Serial.print(now.hour());

  Serial.print(":");


  if (now.minute() < 10)
    Serial.print("0");

  Serial.print(now.minute());

  Serial.print(":");


  if (now.second() < 10)
    Serial.print("0");

  Serial.println(now.second());
}


// =================================================
// LCD DISPLAY
// =================================================

void showLCD(DateTime now)
{
  lcd.setCursor(0, 0);


  if (bellRinging)
  {
    lcd.print("SMART BELL ON   ");
  }
  else
  {
    lcd.print("SMART BELL OFF  ");
  }


  lcd.setCursor(0, 1);


  if (now.hour() < 10)
    lcd.print("0");

  lcd.print(now.hour());

  lcd.print(":");


  if (now.minute() < 10)
    lcd.print("0");

  lcd.print(now.minute());

  lcd.print(":");


  if (now.second() < 10)
    lcd.print("0");

  lcd.print(now.second());


  lcd.print("        ");
}


// =================================================
// AUTOMATIC BELL
// =================================================

void checkAutomaticBell(DateTime now)
{
  if (
    lastBellDay == now.day() &&
    lastBellMinute == now.minute()
  )
  {
    return;
  }


  for (
    int i = 0;
    i < TOTAL_BELLS;
    i++
  )
  {
    if (
      now.hour() == schedule[i].hour &&
      now.minute() == schedule[i].minute &&
      now.second() < 2
    )
    {
      Serial.print("AUTOMATIC BELL: ");

      Serial.println(schedule[i].name);


      startBell(
        schedule[i].duration
      );


      lastBellDay =
        now.day();

      lastBellMinute =
        now.minute();

      break;
    }
  }
}


// =================================================
// BUTTON
// =================================================

void checkButton()
{
  bool buttonState =
    digitalRead(BUTTON_PIN);


  if (
    lastButtonState == HIGH &&
    buttonState == LOW
  )
  {
    Serial.println("MANUAL BUTTON");


    startBell(
      MANUAL_TIME
    );


    delay(150);
  }


  lastButtonState =
    buttonState;
}


// =================================================
// START BELL
// =================================================

void startBell(
  unsigned long duration
)
{
  digitalWrite(
    RELAY_PIN,
    RELAY_ON
  );


  digitalWrite(
    LED_PIN,
    HIGH
  );


  bellRinging = true;


  bellStartTime =
    millis();


  bellDuration =
    duration;


  Serial.print("BELL ON: ");

  Serial.print(
    duration / 1000
  );

  Serial.println(" seconds");
}


// =================================================
// STOP BELL
// =================================================

void stopBell()
{
  digitalWrite(
    RELAY_PIN,
    RELAY_OFF
  );


  digitalWrite(
    LED_PIN,
    HIGH
  );


  bellRinging = false;


  Serial.println("BELL OFF");
}
3D Enclosure Design
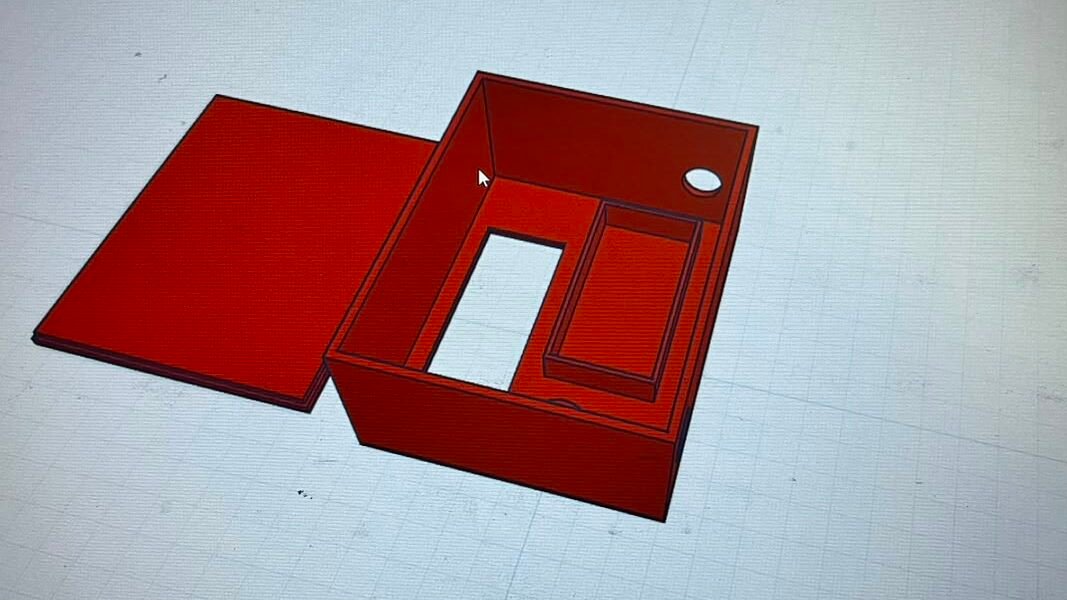
After testing the system and successfully uploading the corrected code, I designed a 3D-printed enclosure for the Smart Bell. The enclosure was designed to securely hold and protect all the components, with proper openings for the LCD display, push button, power jack, and wiring. This made the final Smart Bell compact, neat, and safe.
3D Printing
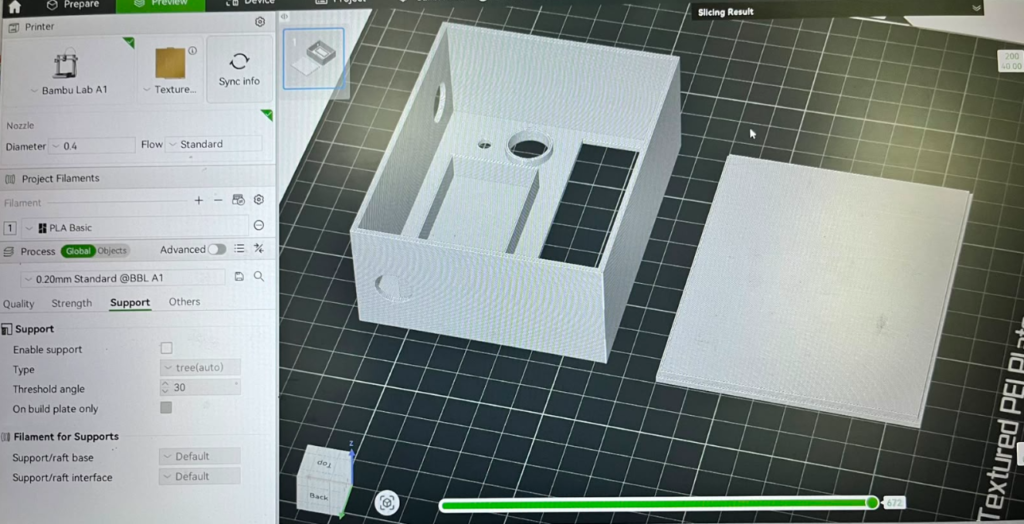
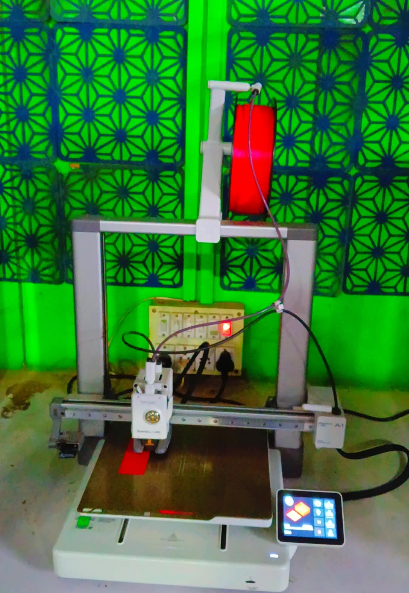
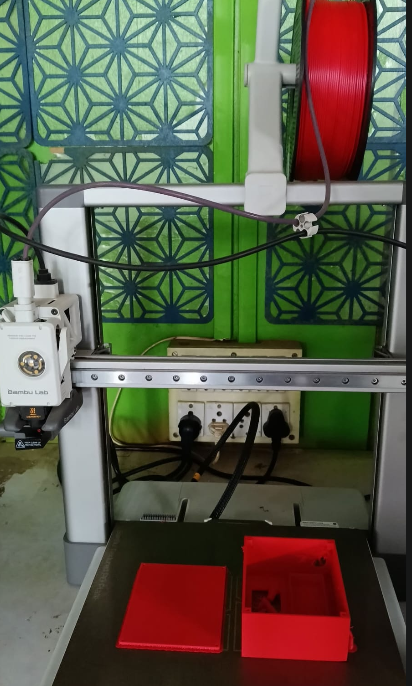
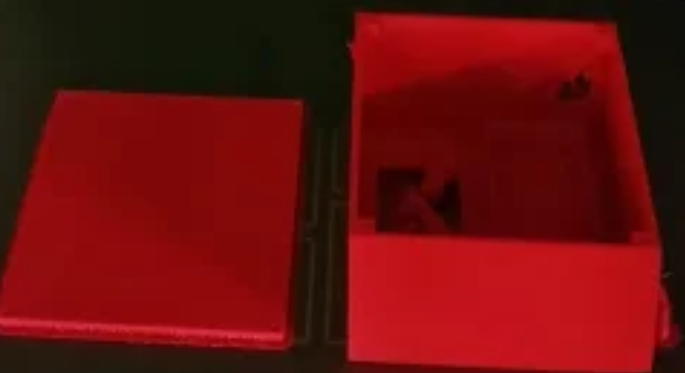
After completing the Smart Bell enclosure design in Tinkercad, I exported the 3D model and prepared it for printing using Bambu Studio. I used the Bambu Lab A1 3D printer to print the enclosure. The final print used approximately 70 g of PLA+ filament and took around 2 hours 2 minutes to complete. After printing, I checked the enclosure to ensure that the PCB, LCD, buttons, and other components fitted properly inside it.
| Printing Details | Information |
|---|---|
| Design Software | Tinkercad |
| Slicing Software | Bambu Studio |
| 3D Printer | Bambu Lab A1 |
| Material | PLA+ |
| Filament Used | 70 g |
| Print Time | 2 hours 2 minutes |
Wi-Fi / Web Server Integration
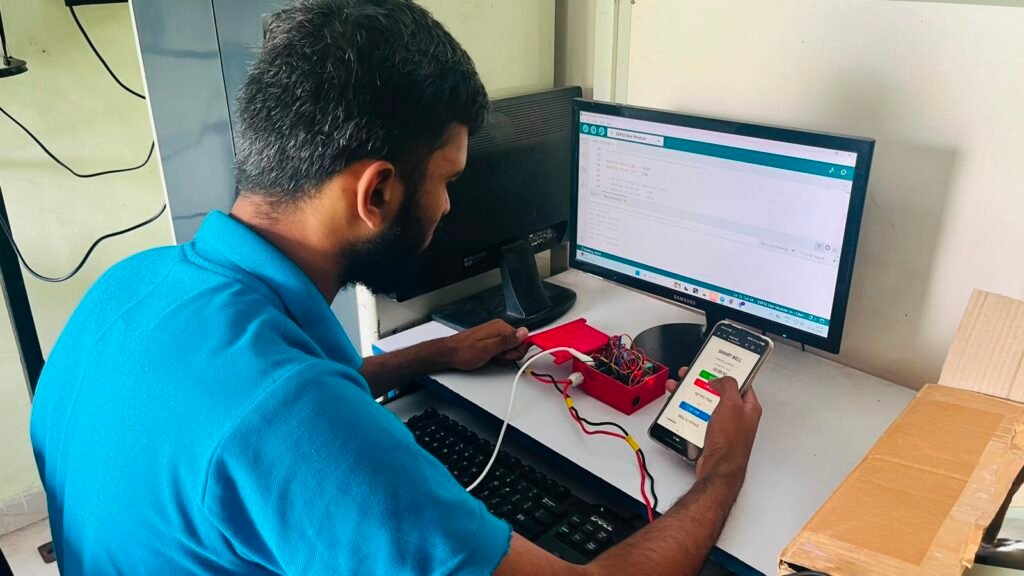
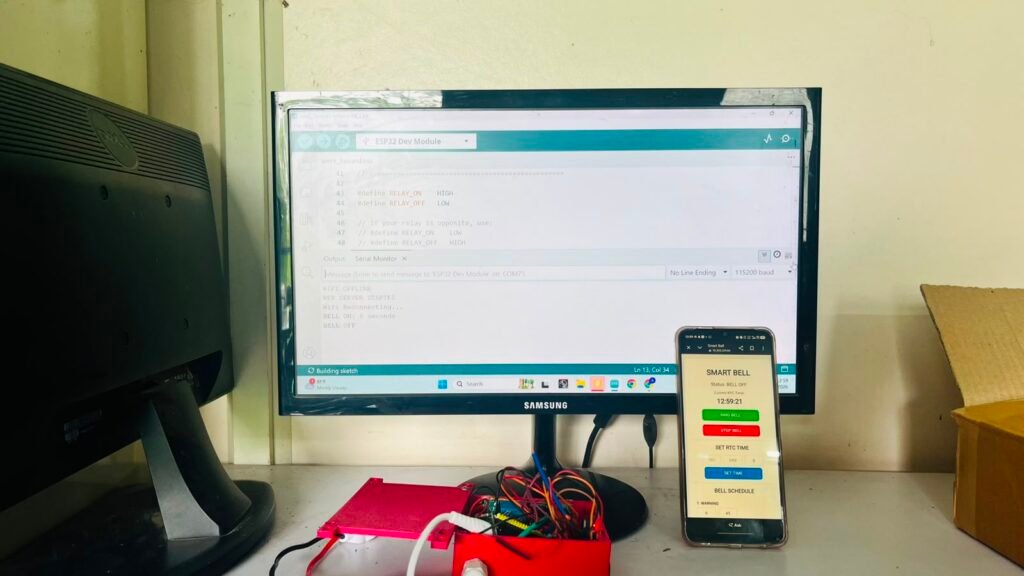
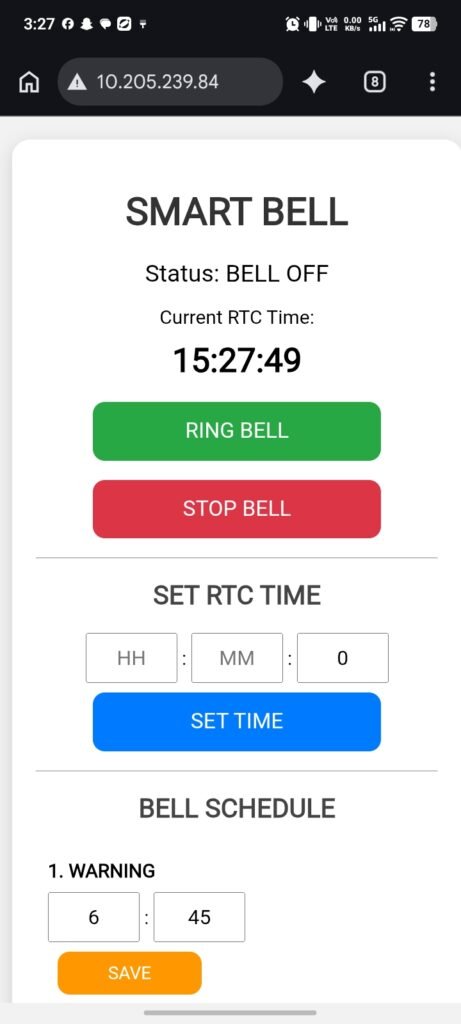
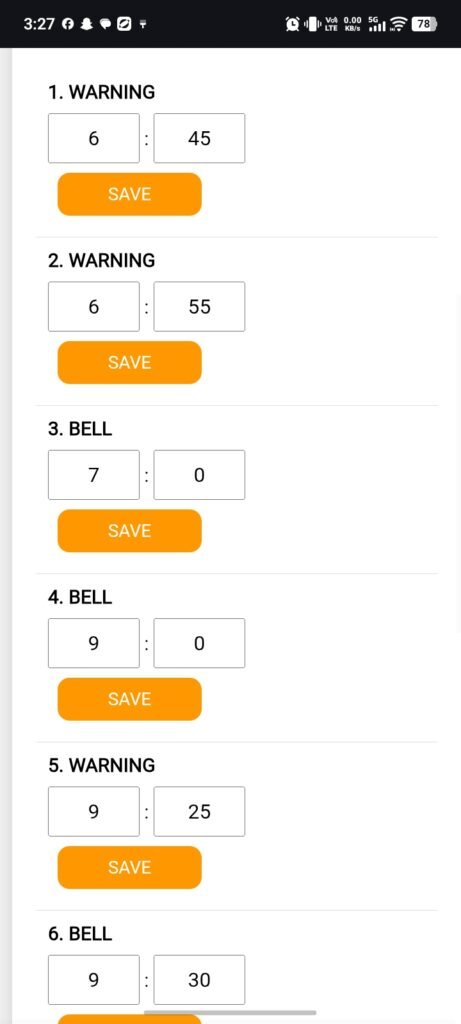
After uploading the code, I connected the ESP32 to Wi-Fi and integrated the web server. The web server allows the user to view and change bell timings, set the ringing duration, and ring the bell manually from a mobile phone or computer. The updated settings are sent to the ESP32, which controls the bell through the relay.
Smart Bell Wi-Fi Connection and Operation
1)First, turn on the mobile hotspot.
2)Change the mobile hotspot name (SSID) to SmartBell.
3)Set the hotspot password to 123456789.
4)Turn on the Smart Bell. The ESP32 will automatically connect to the configured Wi-Fi network.
5)Connect your mobile phone to the same Wi-Fi network.
6)Open a web browser such as Google Chrome.
Enter the IP address: 10.56.159.84
7)Open http://10.56.159.84.
8)The Smart Bell Web Control Panel will open.
From this web page, you can operate and manage the Smart Bell, including controlling and setting the bell timings
Component Assembly
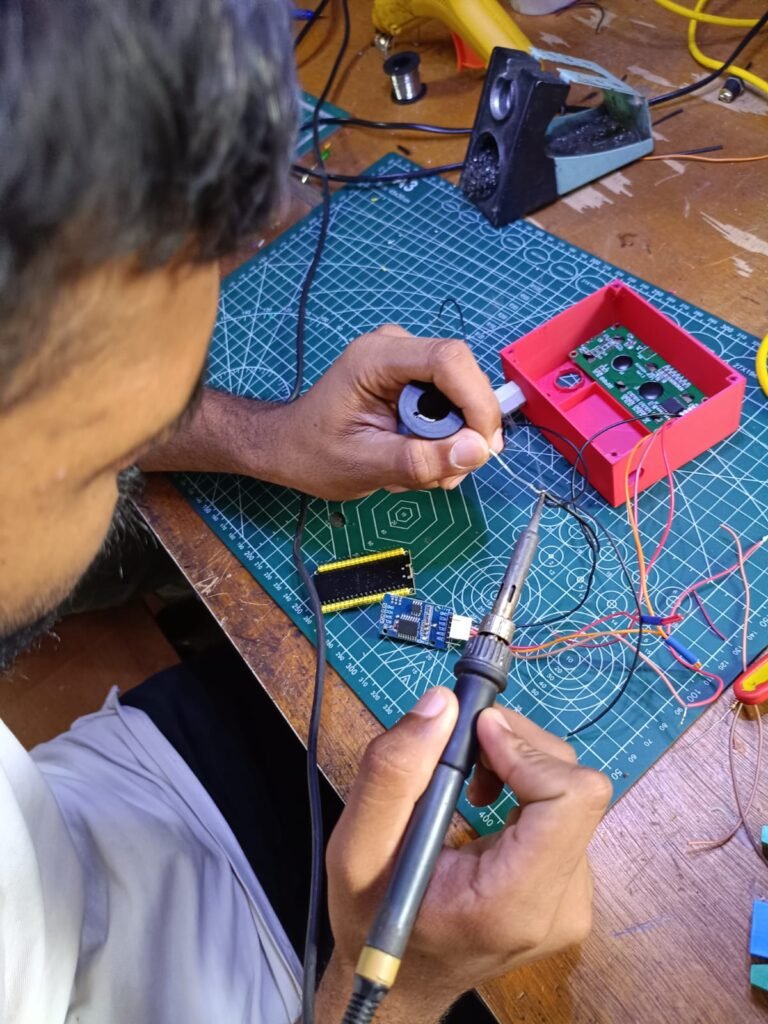
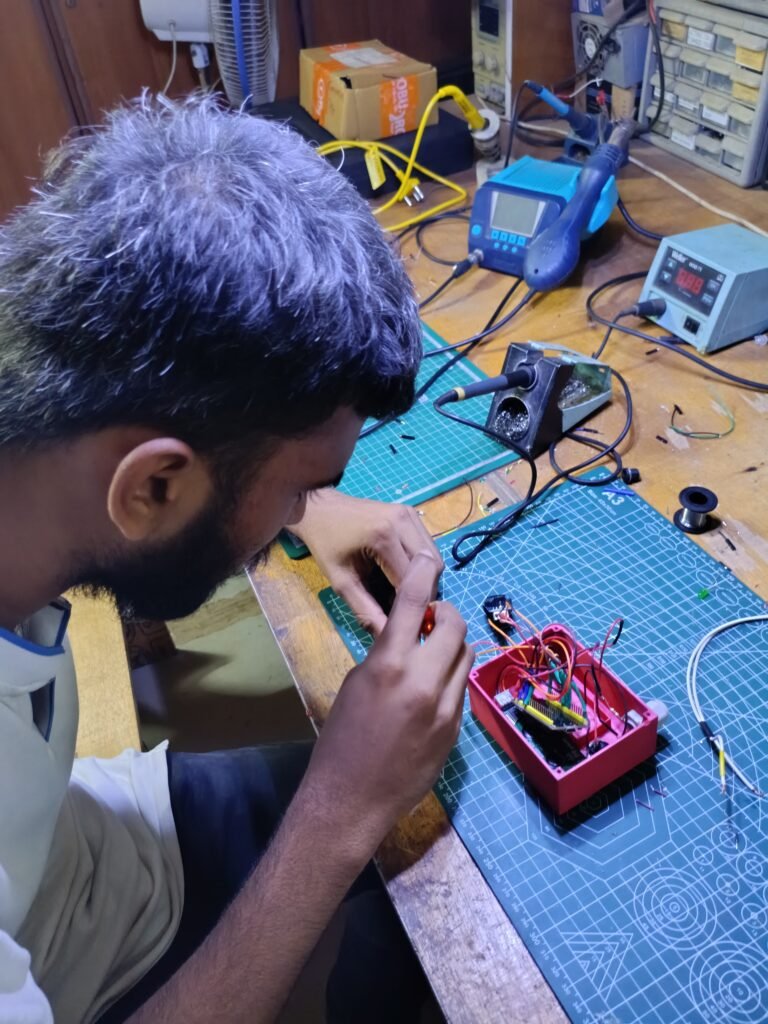
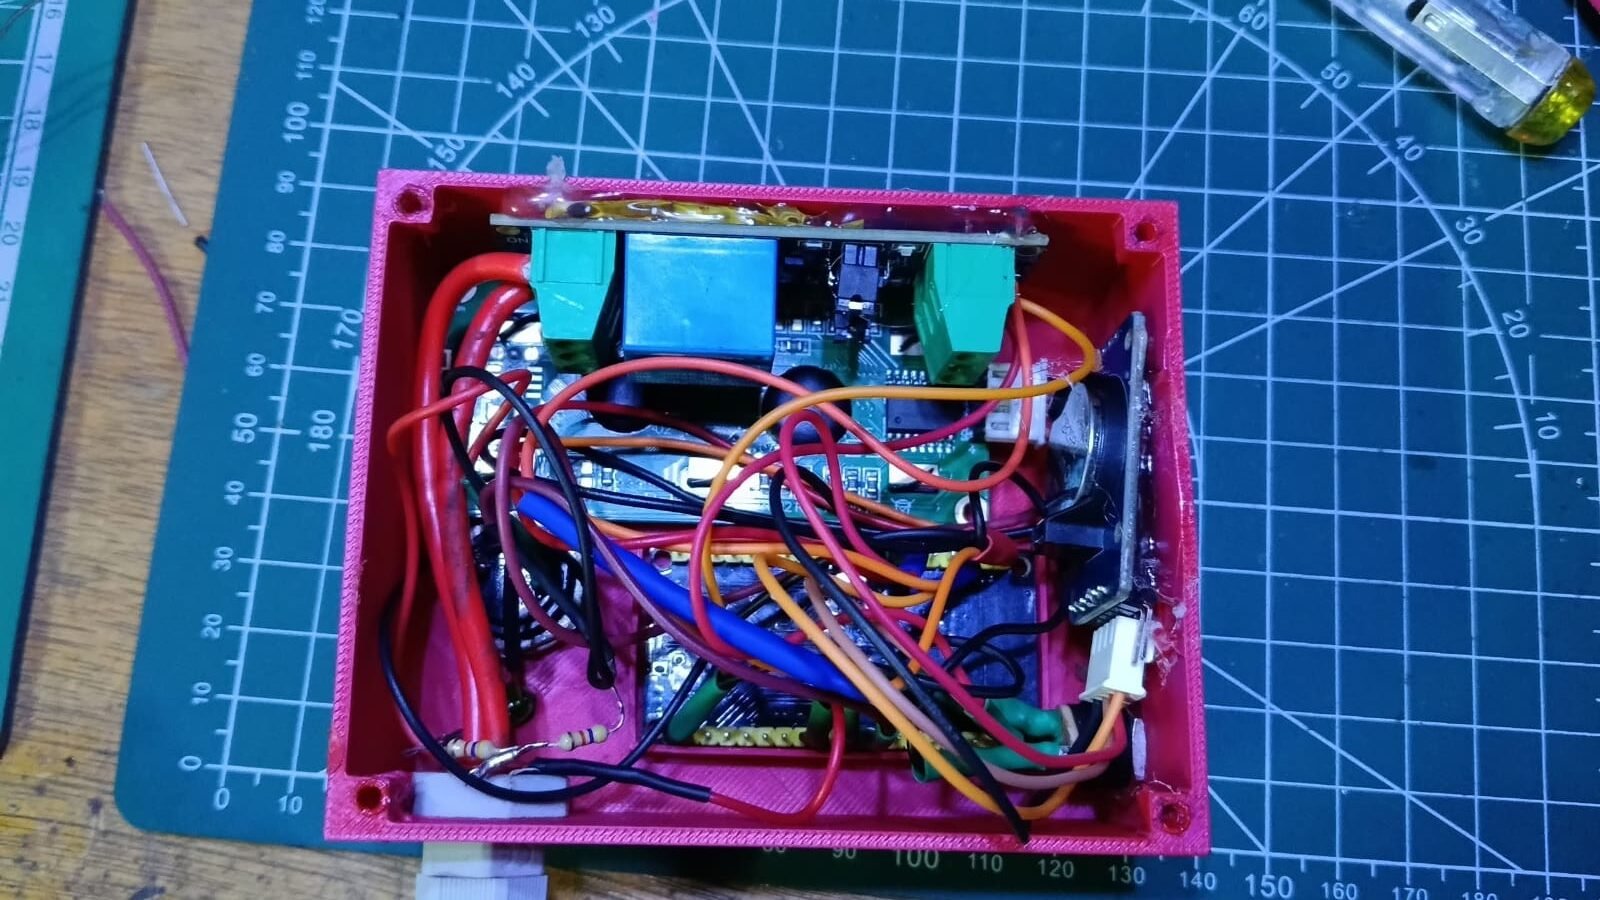
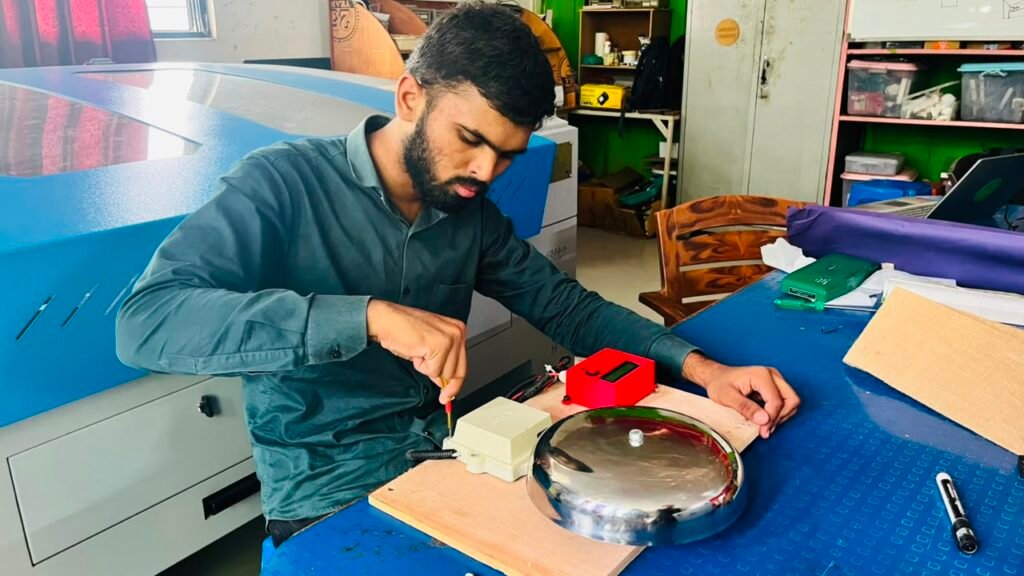
After completing the Wi-Fi and web server integration, I assembled all the components into the 3D-print . The ESP32, DS3231 RTC, relay module, 16×2 LCD, LED, push button, and power connection were properly placed and connected. The wiring was arranged neatly, and all connections were checked before proceeding to the final testing.
Final Testing
After completing the component assembly, I performed the final testing of the Smart Bell. I checked the automatic bell timing, manual push button, LCD display, RTC, Wi-Fi web server, relay, and bell operation. I also tested changing the bell timing and ringing the bell through the web server. All functions were checked to ensure that the Smart Bell operates properly, reliably, and as expected.
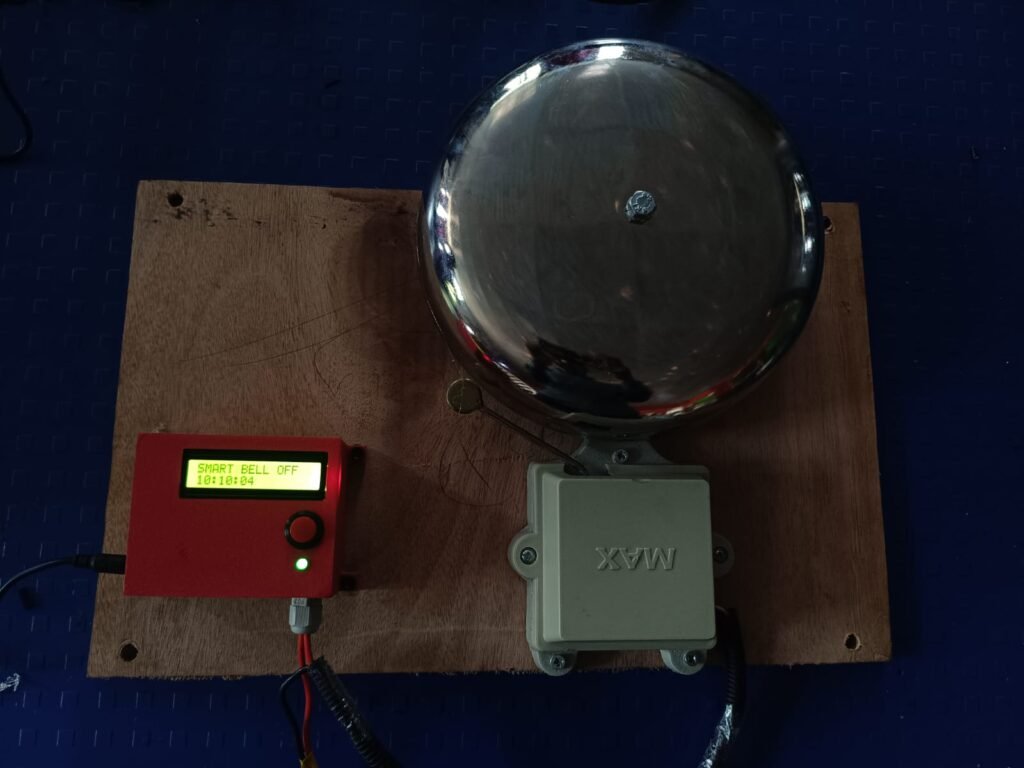
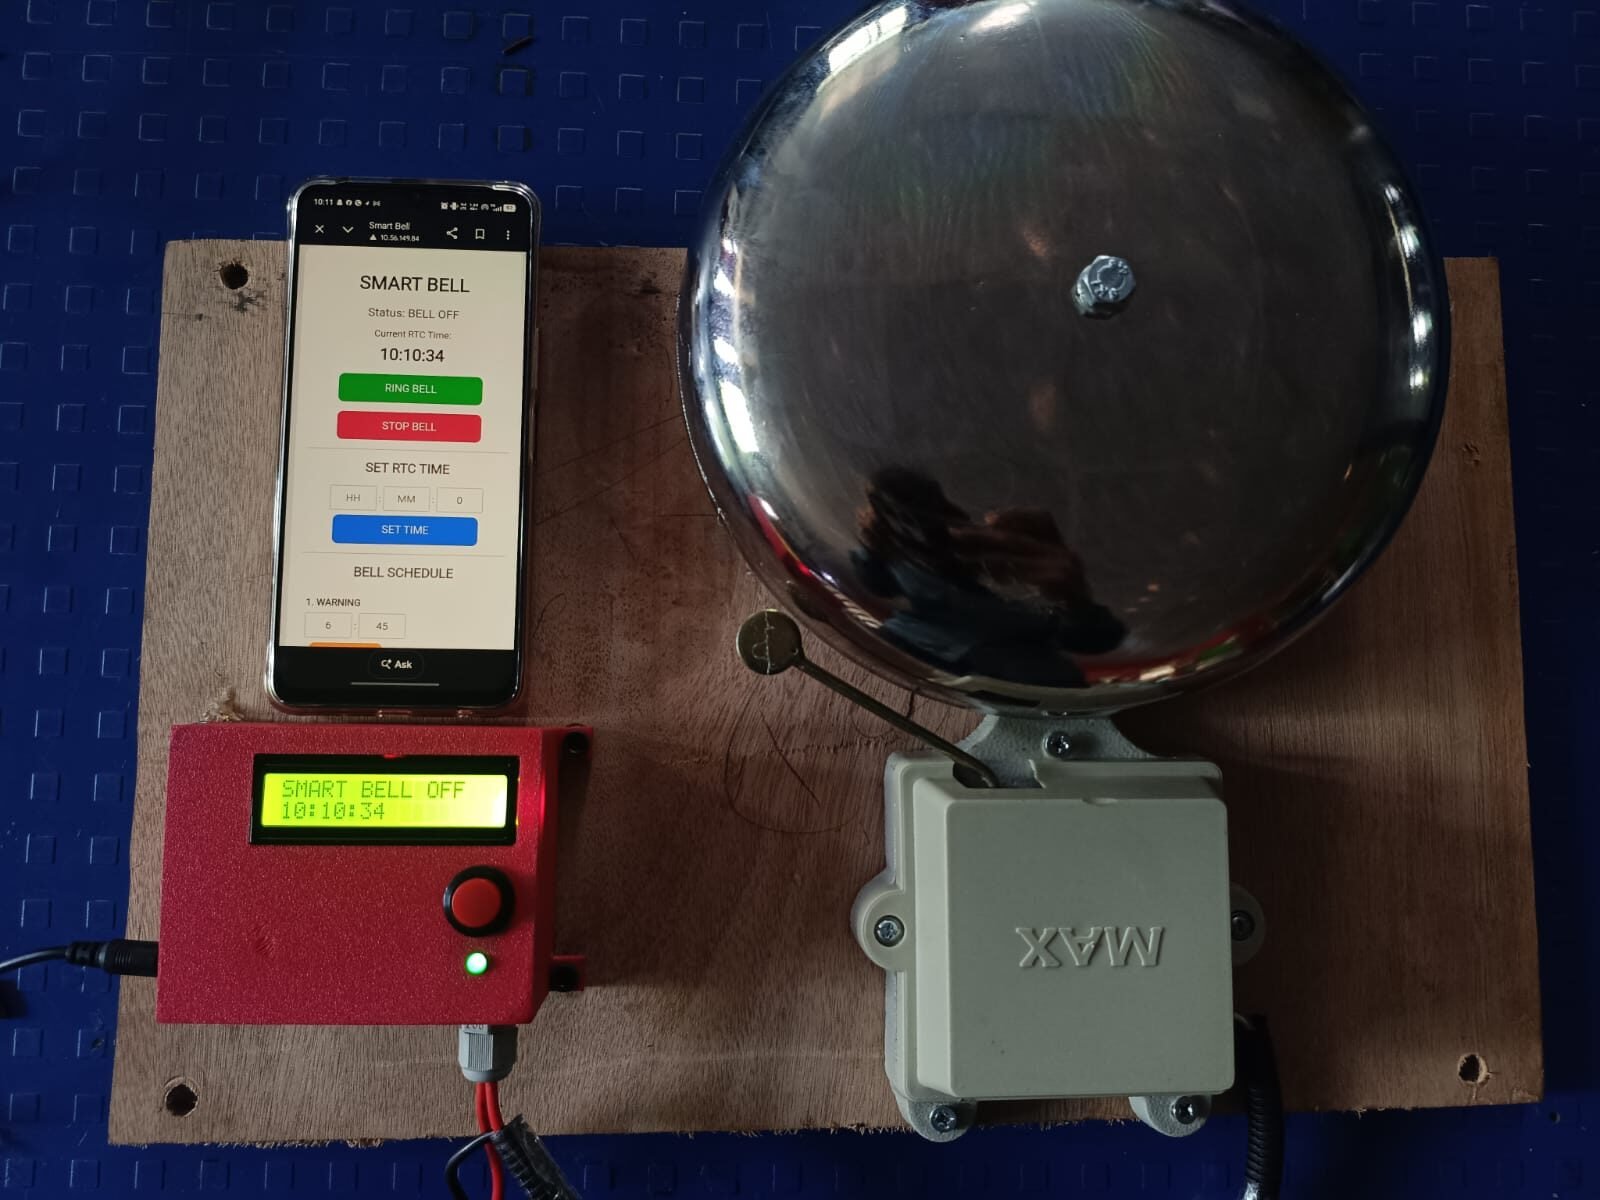
The Smart Bell works using an ESP32 Dev Module as the main controller. The DS3231 RTC provides accurate time for automatic bell scheduling, while the 16×2 LCD displays the current time and system status. The bell can be operated in three ways: automatically according to the scheduled time, manually using the push button, or remotely through the Wi-Fi web server. The web server allows the user to change bell timings and ring the bell manually. When a ring command is received, the ESP32 activates the relay, which operates the bell for the set duration. After ringing, the relay turns OFF and the system continues monitoring for the next command or scheduled time
Testing and Results
The Smart Bell was tested after completing the assembly to verify that all functions were working correctly. The automatic timing, DS3231 RTC, 16×2 LCD, manual push button, relay, LED, Wi-Fi connection, and web server were tested individually and together. The bell successfully rang at the scheduled time, responded to the manual push button, and could also be controlled through the web server. The bell timing could be changed through the web server, and the updated settings worked correctly. Overall, the testing showed that the Smart Bell operated properly and reliably as intended.
Bill of Materials & Project Cost
| Sr. No. | Component | Qty. | Cost (₹) |
|---|---|---|---|
| 1 | ESP32 Dev Module | 1 | 400 |
| 2 | DS3231 RTC Module | 1 | 219 |
| 3 | 3.3V Relay Module | 1 | 150 |
| 4 | 16×2 I2C LCD | 1 | 165 |
| 5 | Push Button | 1 | 10 |
| 6 | LED | 1 | 5 |
| 7 | Resistor | 1 | 2 |
| 8 | 5V DC Jack | 1 | 15 |
| 9 | 5V Adapter | 1 | 150 |
| 10 | Jumper Wires | 1 set | 70 |
| 11 | PLA+ Filament | 70 g | 70 |
| 12 | Electric Bell | 1 | 1,500 |
| 13 | 3D-Printed Enclosure | 1 | Included in PLA |
| Total Project Cost | ₹2,756 |
Approximate component and material cost: ₹2,756
Challenges and Solutions
During the Smart Bell project, I faced some challenges. First, the DS3231 RTC was not showing the correct real time, so I checked the wiring and corrected the RTC code and time settings. Second, the relay was not working properly, so I checked the power supply, GPIO connection, and relay control code. I also faced Wi-Fi connection problems, which were solved by checking the Wi-Fi credentials and correcting the ESP32 web-server code. After making these corrections, the system worked properly.
Conclusion
The Smart Bell project was successfully developed using an ESP32, DS3231 RTC, relay, LCD, push button, and Wi-Fi web server. The system can ring the bell automatically according to the scheduled time, manually using the push button, and remotely through the web server. The user can also change the bell timing through the web interface. After solving issues related to the RTC, relay, and Wi-Fi connection, the final system was tested successfully. Overall, the project provides a simple, reliable, and flexible solution for automatic and remote bell control.
Presentation Slide.