INTRODUCTION
A Flat Bed Solar Dryer is a simple and effective solar drying system used to remove moisture from agricultural products using solar energy. It consists of a flat drying bed where materials are spread, and a transparent cover that allows sunlight to enter while trapping heat inside. This method is mostly used for drying of vegetables, herbs and other agricultural products.
WORKING PRINCIPLE
The working principle of Flat Bed solar Dryer is based on the greenhouse effect and natural convection.
1)The dryer has a transparent cover (Glass or Plastic) that lets sunlight in.
2)A black surface inside the dryer absorbs the sunlight and converts it into heat.
3)The air inside the dryer gets warm, creating a hot environment around the product placed on the drying bed.
4)The heat causes the moisture in the food to evaporate.
5)The moist air moves through vents (windows) and fresh air enters, helping the drying process continue.
ADVANTAGES OF FLAT BED SOLAR DRYER
1)Energy efficient
2)Better quality drying (Protects products from dust and contamination)
3)Faster drying time
4)Prevents nutrient loss
5)Minimizes Post-harvest losses
25/02/2025
We had a meeting with Dixit Sir, Prasad Sir, and Abhijeet Sir, during which we were assigned a few tasks:
1)The first assignment was to learn the design, objectives and working of Arti Bamboo dryer.
2)Second assignment was to learn the design of the Nandini flat bed dryer.
26/02/2025
We started working on the design and several calculations required for the flatbed dryer, such as the volume , Surface area and Loading capacity of the dryer.
28/02/2025
Abhijeet Sir informed us that the new dryer will be constructed using polycarbonate sheets. We then calculated how many polycarbonate sheets would be required to build this dryer.
Why polycarbonate?
1)Polycarbonate sheets allows maximum sunlight to pass through, ensuring efficient heating of the dryer.
2)They trap the heat inside the dryer, creating a greenhouse effect, which speeds up the drying process.
3)Unlike glass, polycarbonate sheets are shatter-resistant, making them safer and long-lasting.
4)Polycarbonate sheets have UV-resistant coating, which protects the crops from harmful UV rays while still allowing heat to pass through.
5)They are lightweight, making them easier to install and transport compared to glass.
6)They can withstand rain, wind, and temperature changes, making them ideal for outdoor use.
01/03/2025
We calculated the dimensions of all the components of Flat bed dryer.
6 ft=5
2ft=2
1ft=2
3ft=2
2.75ft=2
0.5ft=2
https://docs.google.com/spreadsheets/d/1uhZ4UjhvVsAYzP1fbmWgs7KIG2loTDQ5nQat-O82JGQ/edit?usp=sharing
02/03/2025
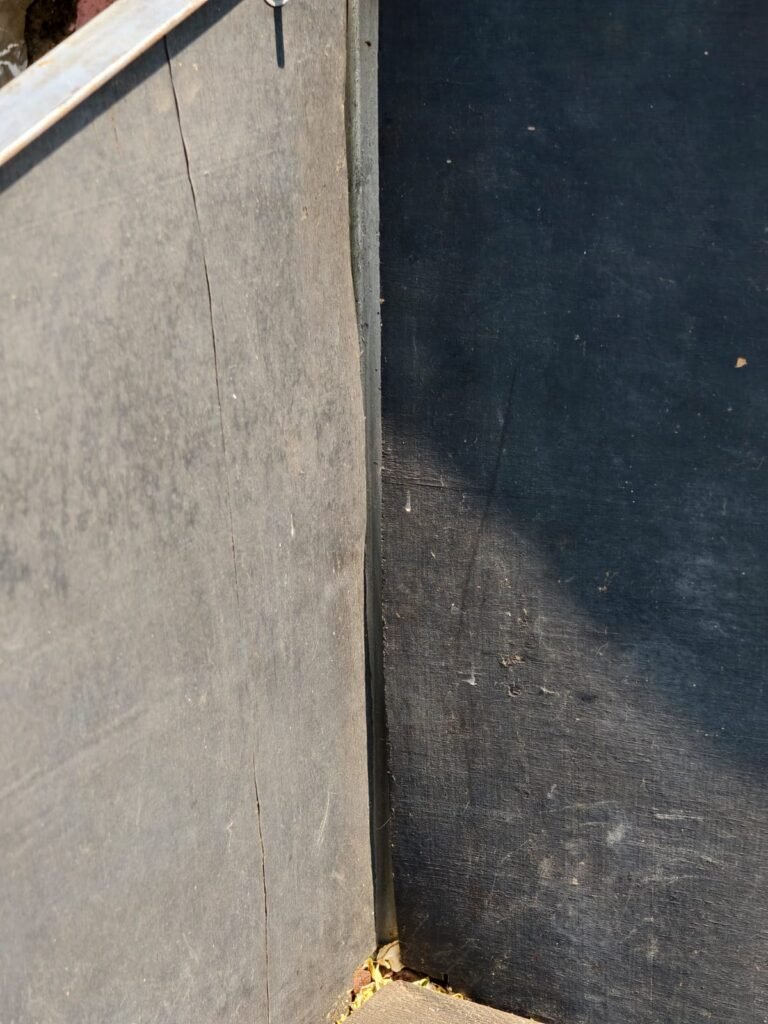
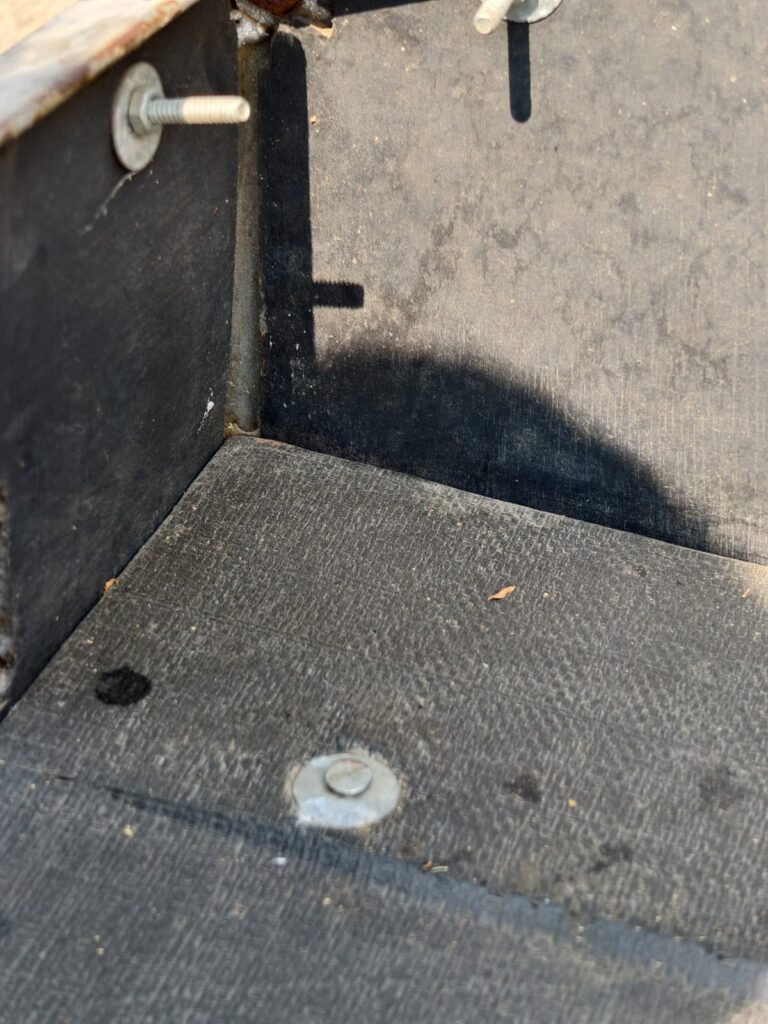
We personally inspected the previous flat bed dryer.
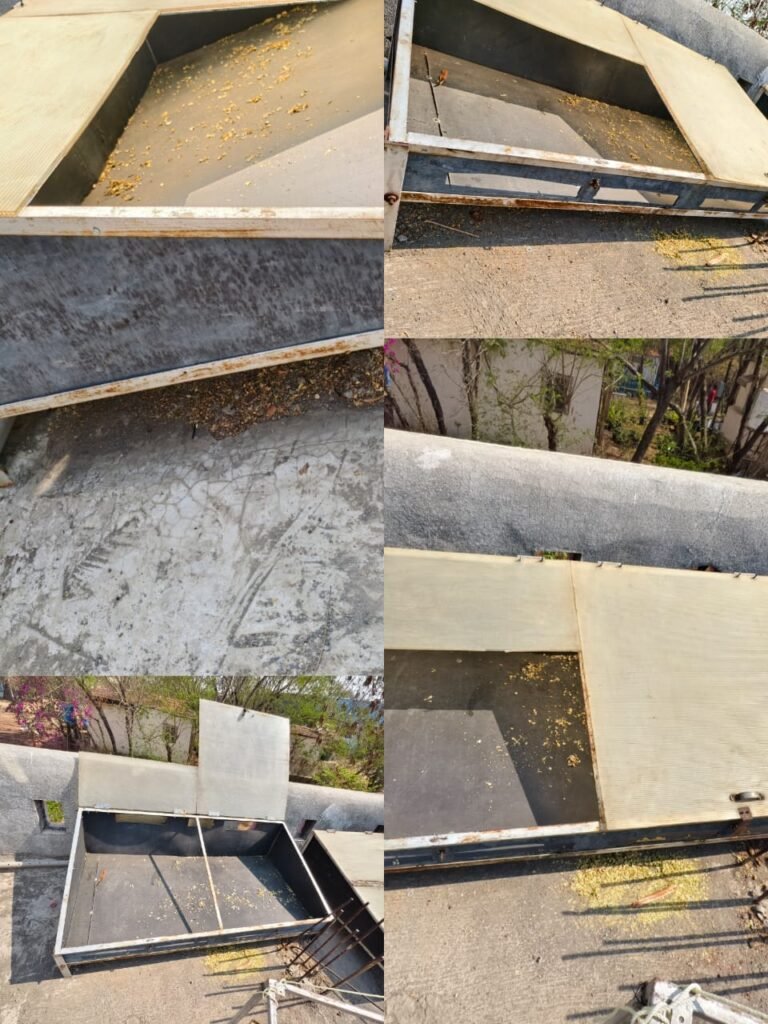
In the previous flat bed dryer, several issues led to heat loss, with the main concern was the gaps between two plywood sheets. To address this problem, we have to find possible solutions to minimizes the heat loss and enhance overall efficiency of the dryer.
Gaps found in the dryer:
04/03/2025
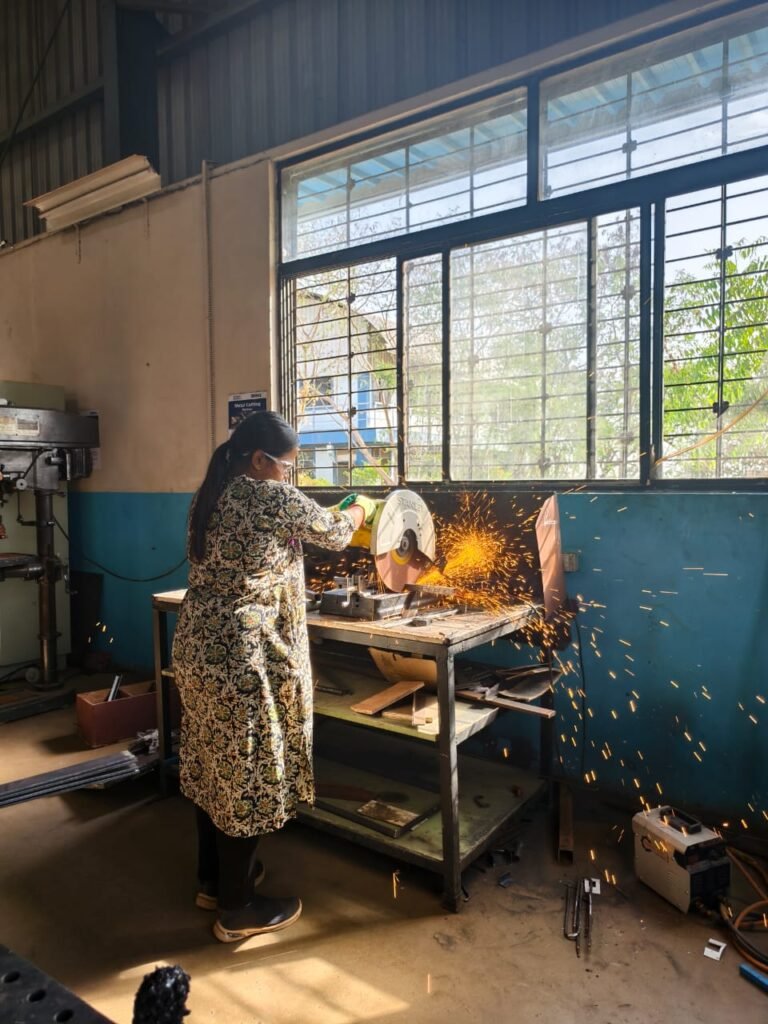
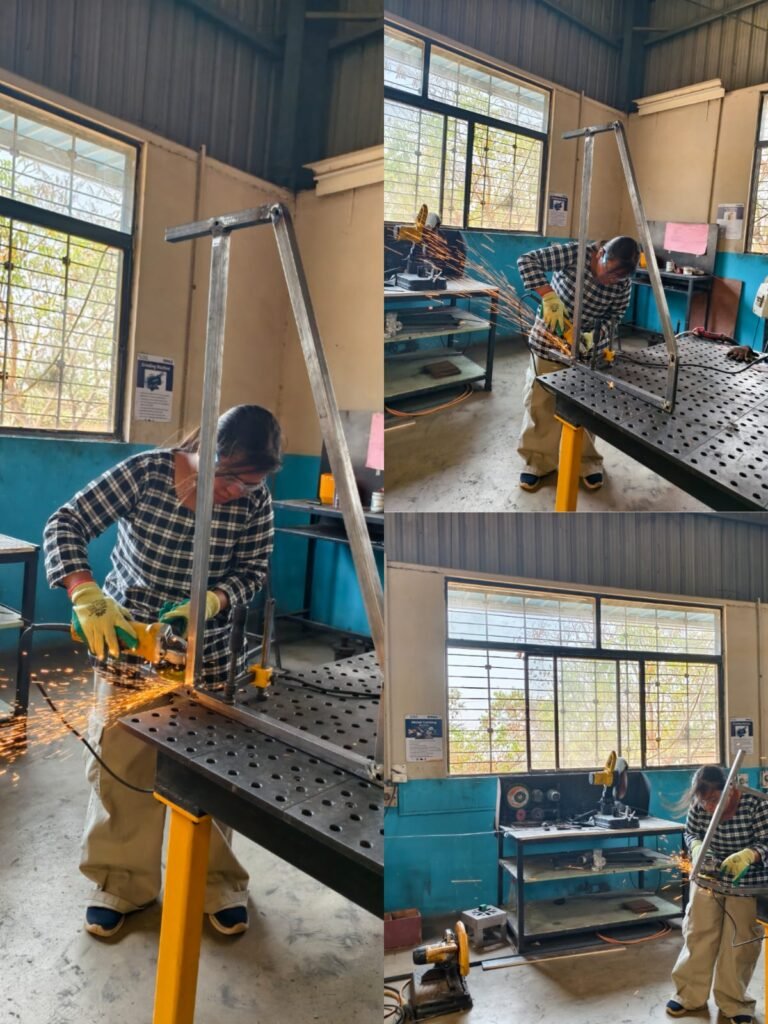
We started the fabrication of the flat bed dryer. We cut the square tubes to the required specifications, incorporating the modifications we had made.
Modifications made:
1)Polycarbonate sheets will be used.
2)Instead of L angle square tubes will be used.
3)Polycarbonate sheets will be inserted using slits, rather than being drilled and secured with nuts and bolts.
4)The entire dryer will be designed to be foldable.
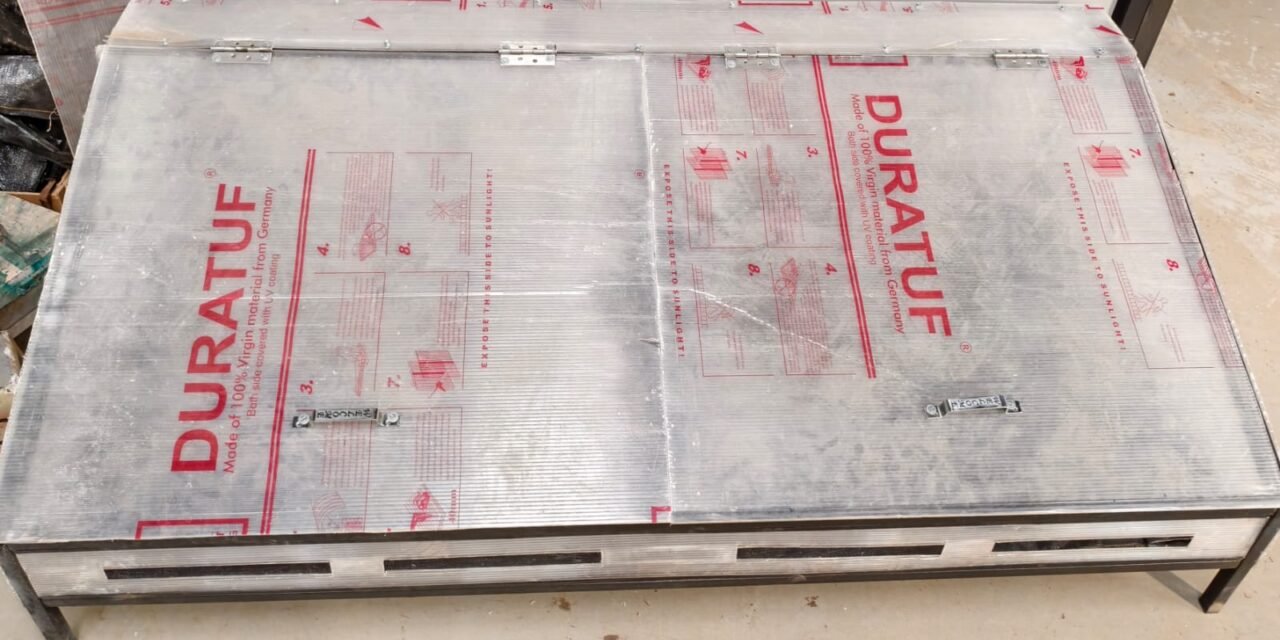
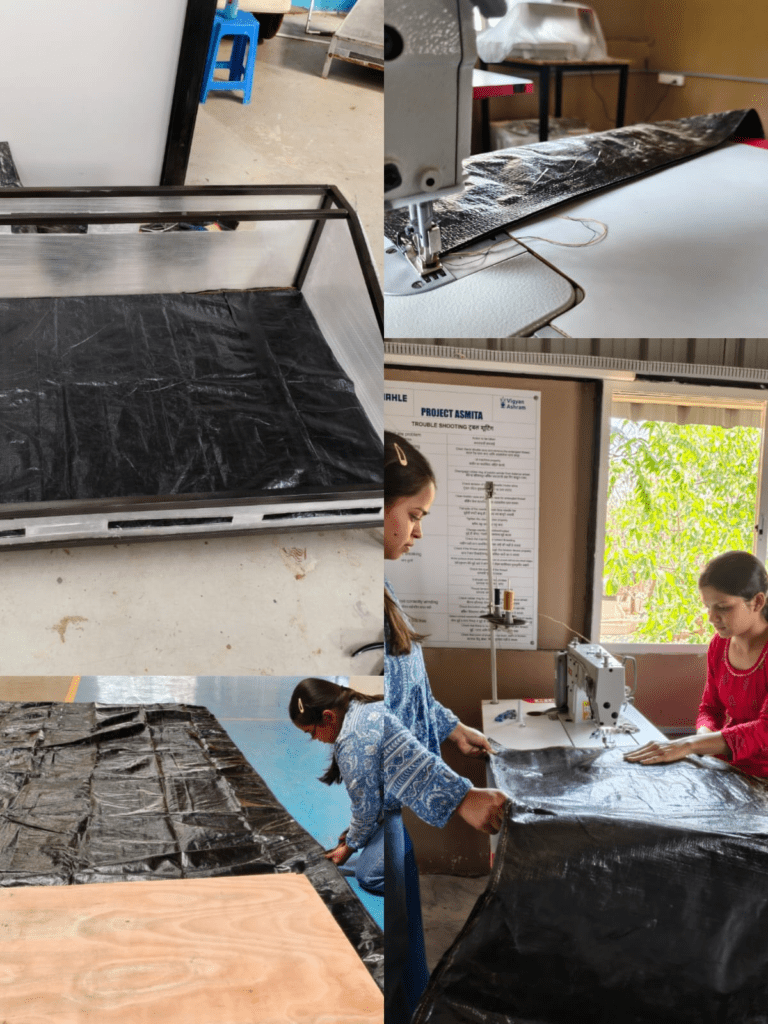
5)Instead of painting the plywood, we choose to cover it with a 350 micron black paper sheet.
08/03/2025
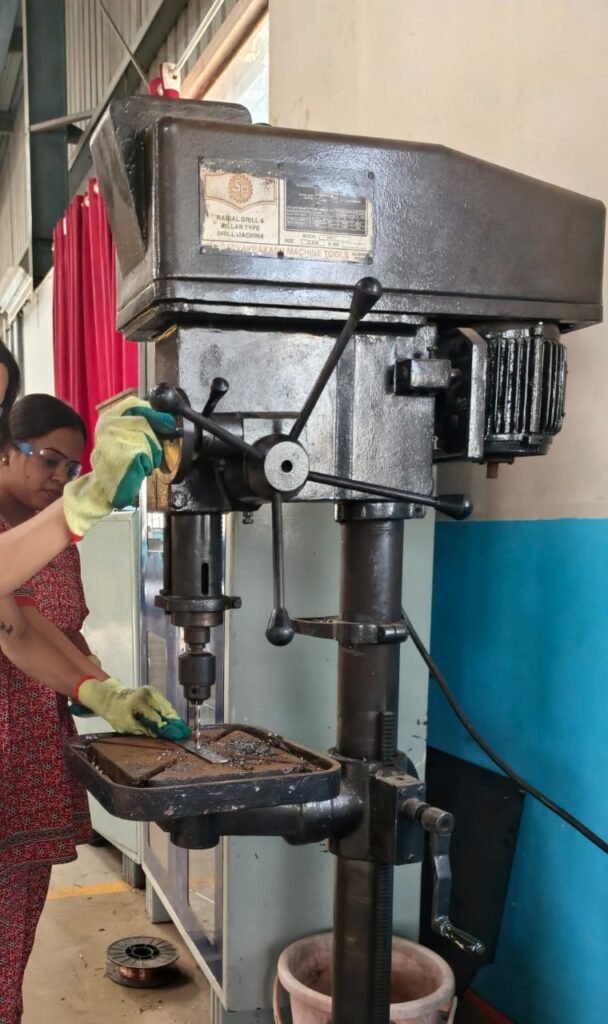
We finished grinding and polishing of the square tubes used for dryer.
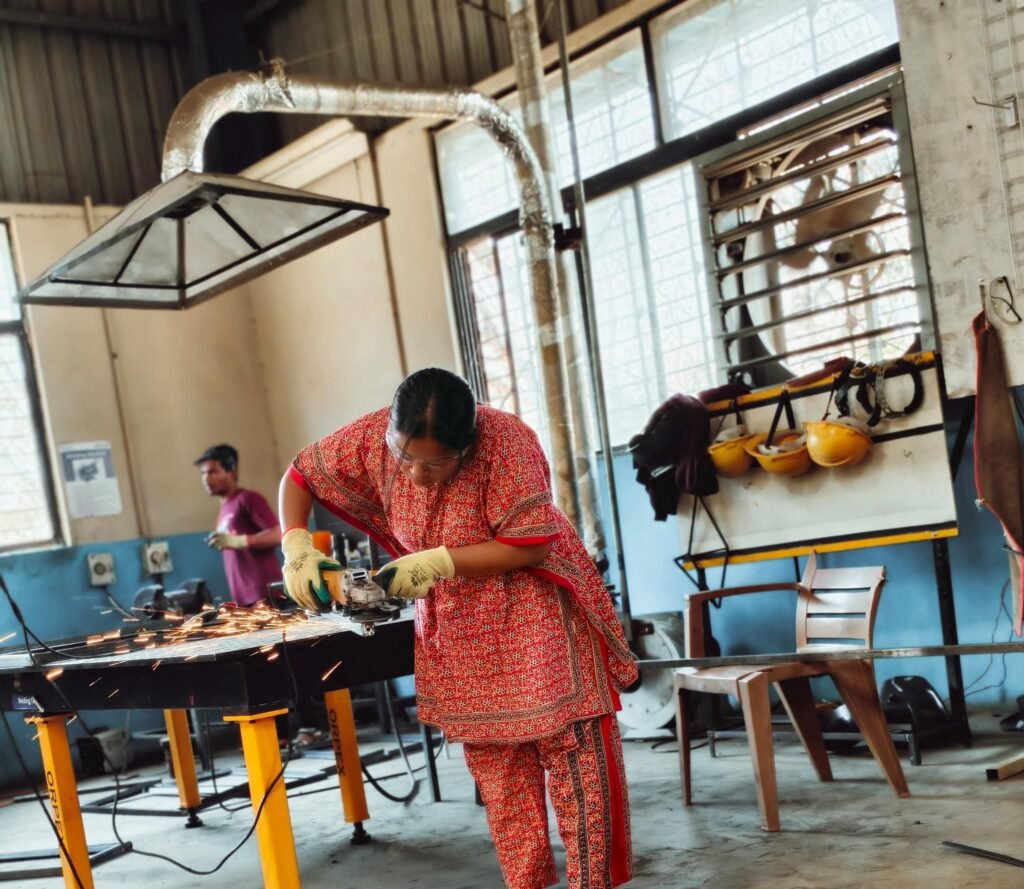
Also did drilling.
11/03/2025
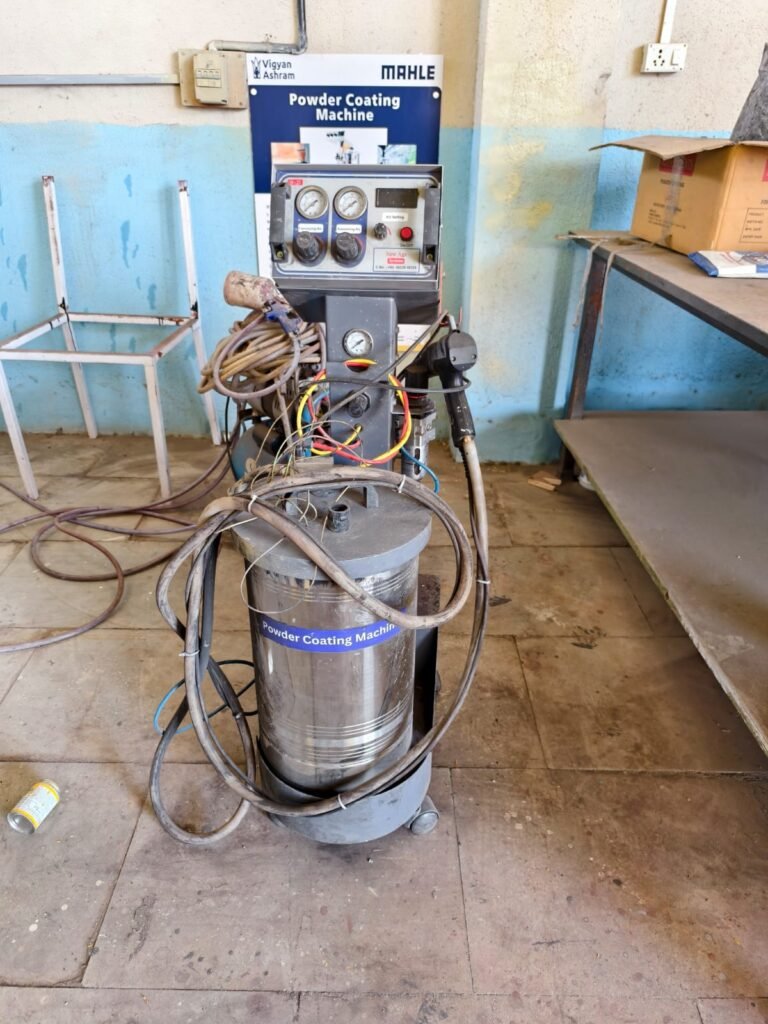
We get the information about Powder coating.
Powder coating is a dry finishing process used to apply a durable and protective layer to metal and some other materials. Instead of using liquid paint, a fine powder (made of plastic, pigments, resin, etc..) is sprayed onto the surface using an electrostatic charge. This makes the powder stick to the object evenly. After that, the coated object is kept in oven, where the powder melts and forms a smooth, hard coating.
Advantages of Powder coating:
1)strong and long lasting.
2)Weather proof
3)Gives better finishing.
12/03/2025
We experienced some issues with the frame and had to recreate it. The cutting and grinding of the new frame are now complete.
12/03/2025
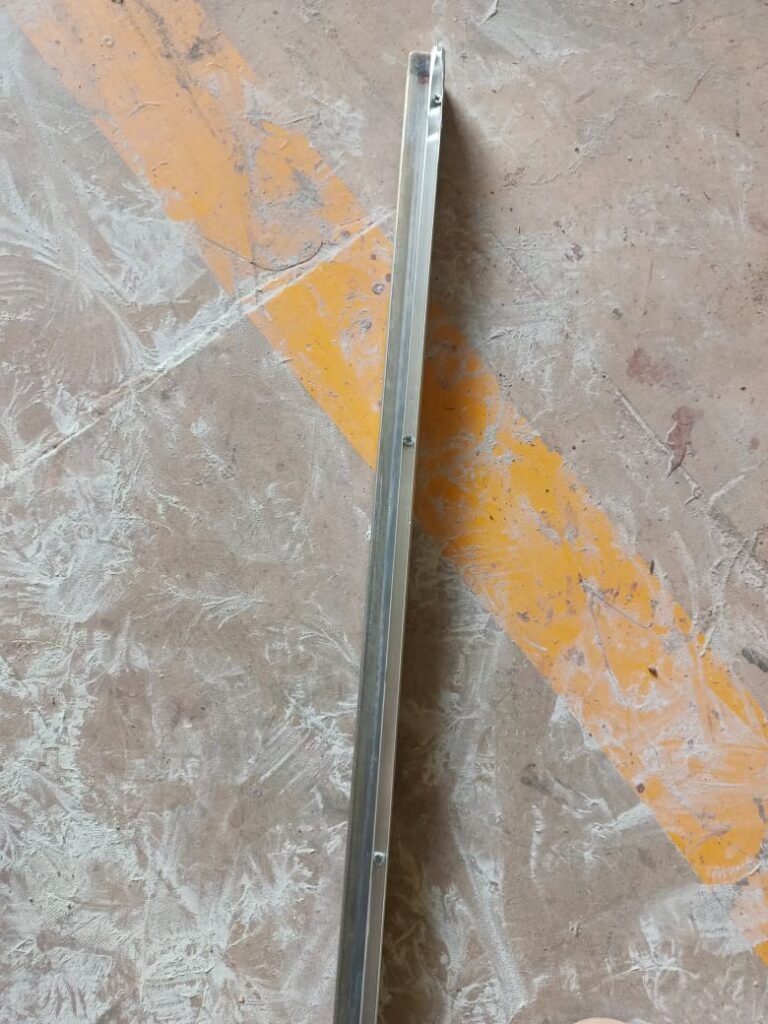
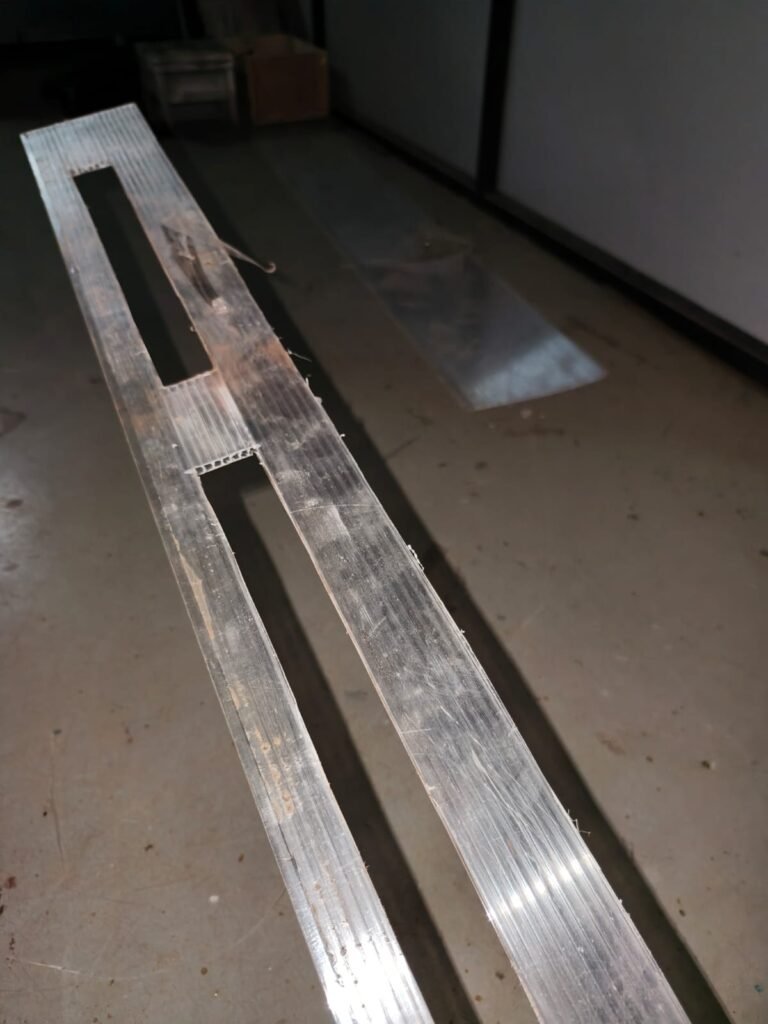
We cut the polycarbonate sheets according to the dimensions.
- 6*2.75=1
- 6*0.5=2
- 6*1.5=1

15/03/2025
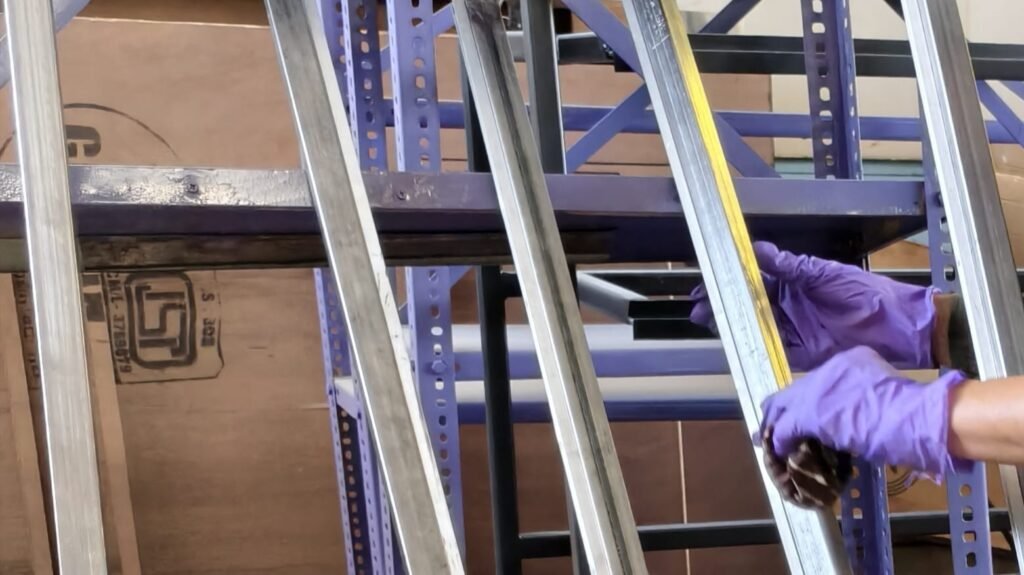
We drilled slits to insert the polycarbonate sheets. Once the slits were drilled, we carefully inserted the polycarbonate sheets making sure they fit evenly and precisely. With the sheets, we were able to see our model starts to look better. We continued to work on the details, adding supports and making adjustments as needed until the polycarbonate sheets are fitted perfectly.
16/03/2025
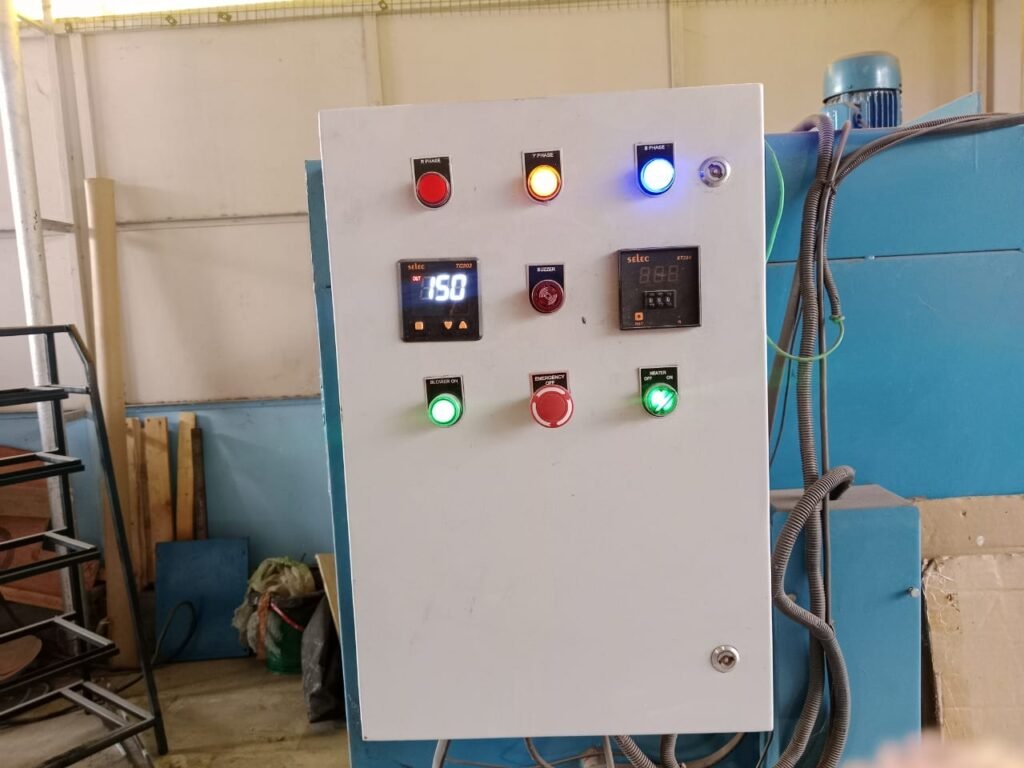
To prepare our frame structure for powder coating, firstly we smoothed out the surface using sandpaper to create a uniform finish. Next, we applied a diluted acid solution(100:1 water-to-acid ratio) to all components of the frame. The acid treatment was allowed to sit for 15 minutes before being wiped with a damp cloth. The components then dried completely. Once dry, we proceeded with the powder coating process. After completion the coated components were kept in the oven (at 36 degree Celsius) until 150 degree Celsius temperature is obtained. Once the temperature of 150 degree Celsius is reached , we turned off the heater. As it was evening, we also switched off the blower and opened the top window of the oven to ensure ventilation. The powder coated materials were then left inside the oven overnight to cooled down slowly and naturally.
1)Acid application:
2)Powder coating:

3)In the oven:
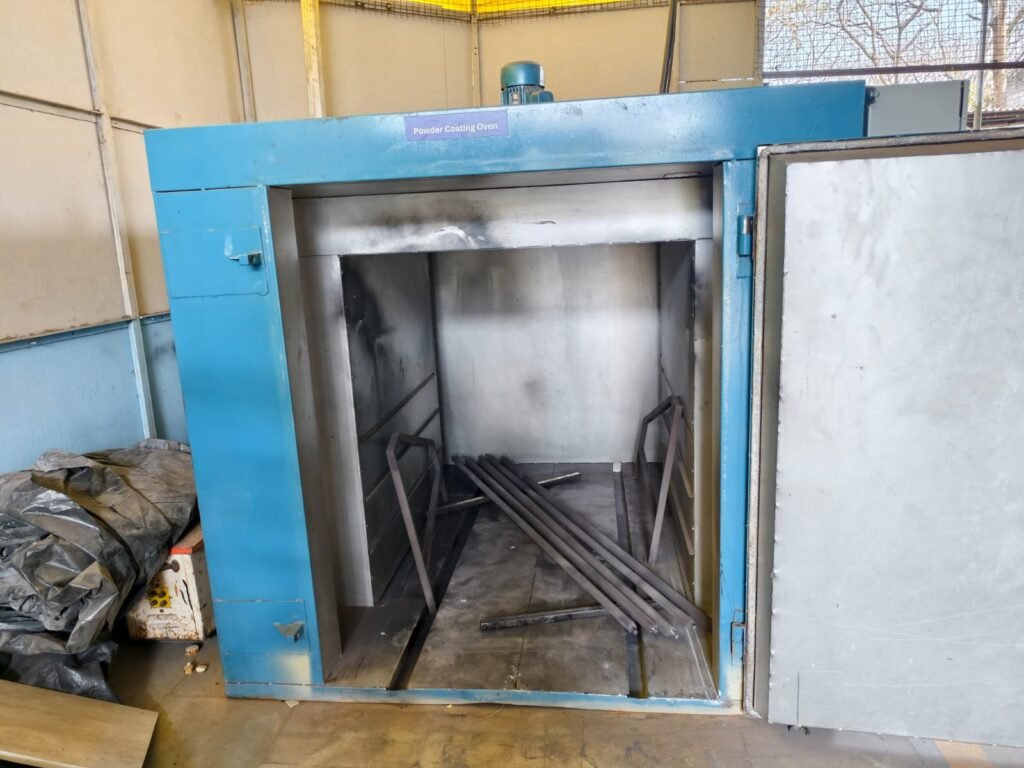
4)Initial temperature:
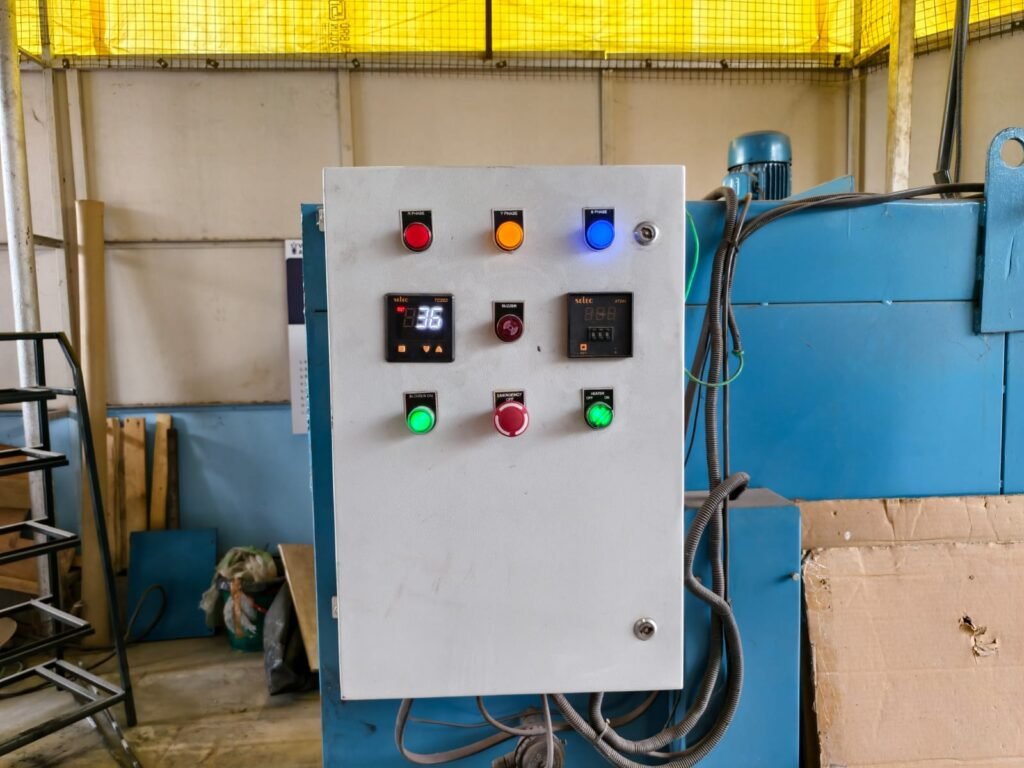
5)Final temperature:
17/03/2025
After completion of powder coating we then carefully removed the components from the oven.

We used a wood cutter machine to cut the plywood sheet to 6* 3 feet, which would serve as the base of the solar dryer.
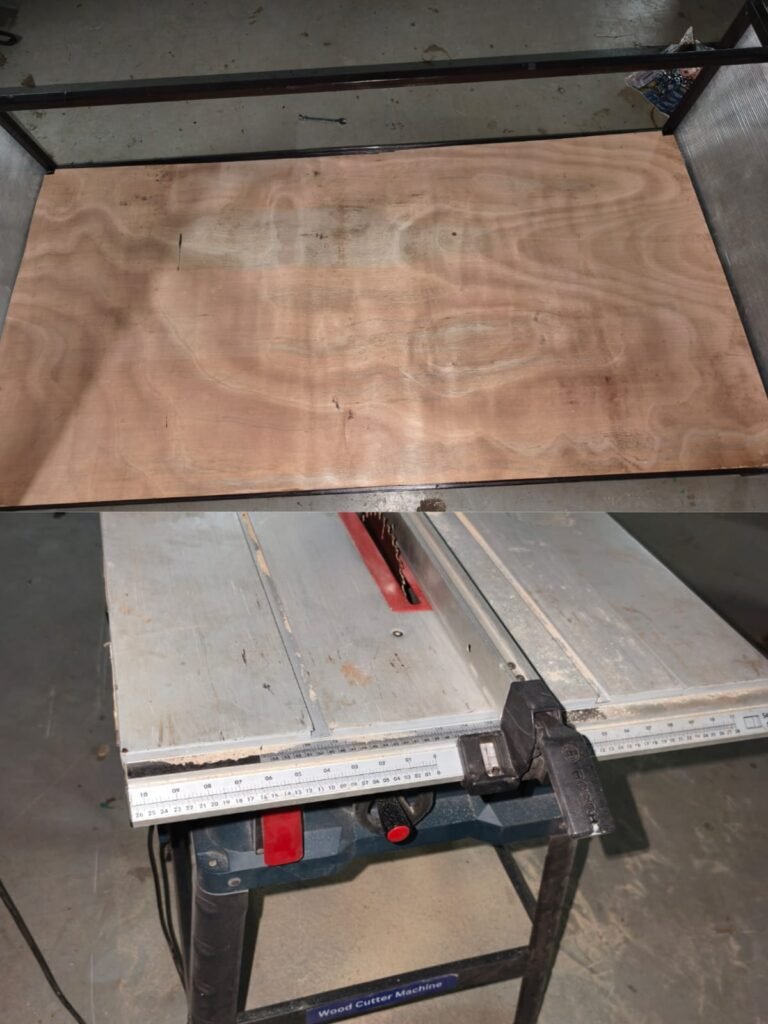
Vents were also made for proper air circulation.
Front vents: 4 vents 32*3.5 cm
Back vents: 3 vents 41*8 cm
19/03/2025
We carefully cut a black paper sheet according to the dimensions of plywood, ensuring a precise fit. The black paper cover was then placed over the plywood, providing a dark, heat absorbing surface that would help to optimize the solar dryer’s performance. With the cover in place, the base of the dryer was now done.
21/03/2025
After completing the initial powder coating process, we conducted a thorough inspection of the flat bed dryer components and were upset to find that there were still a few spots left uncoated.

This meant that the components were not fully protected against corrosion and wear, which could compromise the overall performance and longevity of the dryer. To address this issue, we decided to repeat the entire powder coating process, starting from scratch. We carefully cleaned and prepared the components again, ensuring that they were free from dust, oils, and other contaminants that could affect the coating’s adhesion. Next, we applied the powder coating, making sure to cover all surfaces evenly and thoroughly. Finally, we cured the coating in the oven, allowing it to harden and bond with the metal. By repeating the entire process, we were able to achieve a flawless, uniform coating that would provide optimal protection and durability for the flat bed dryer components.

22/03/2025
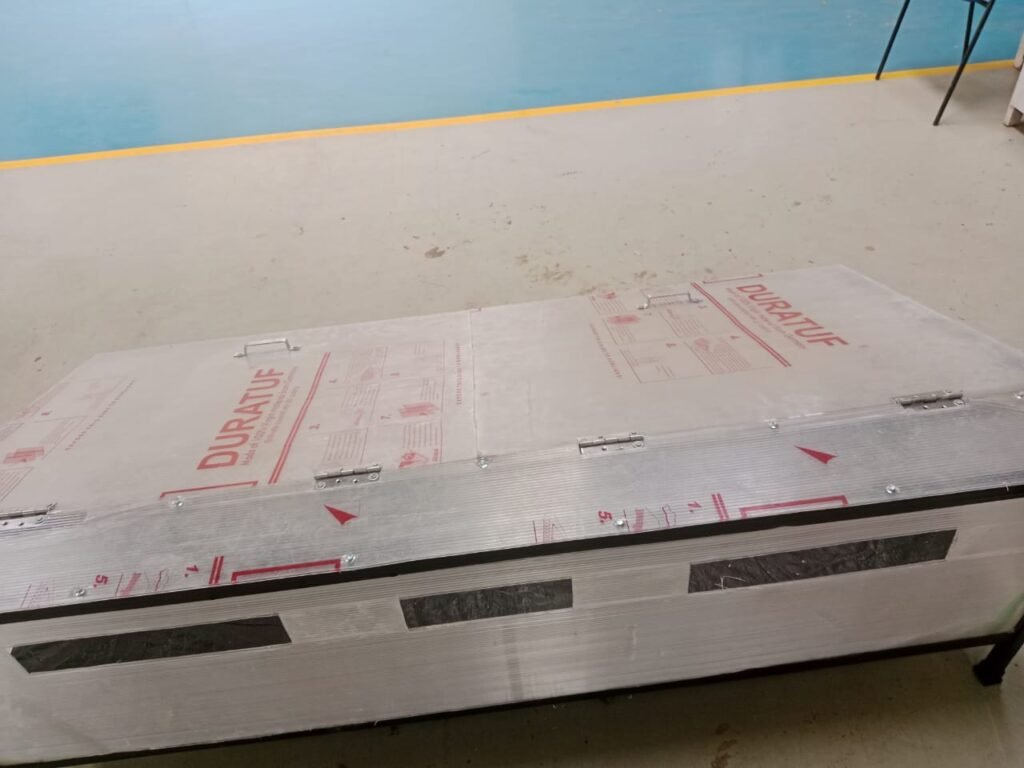
With the powder coating process complete, we moved on to the next stage of assembling the flat bed dryer. One of the crucial steps was attaching the hinges to the door, which would enable smooth and secure opening and closing. To accomplish this task, we utilized a driller, which provided the necessary precision and power to drill holes for the hinge screws. Carefully positioning the hinges on the door, we marked the spot where the screws would be inserted. Then, with the driller, we created pilot holes for the screws, ensuring they were perfectly aligned and spaced. Finally, we screwed the hinges into place, making sure they were securely fastened to the door.

23/03/2025
With the hinges securely attached to the door of the flat bed dryer, our next task was to install the handles. This was a critical step, as the handles would provide a secure grip for operators to open and close the door safely. To ensure proper placement, we took precise measurements to determine the optimal position for the handles. We carefully considered the ergonomic requirements, taking into account the height, angle, and spacing of the handles to facilitate comfortable and efficient operation. Once we had confirmed the measurements, we marked the door with a template, indicating the exact spot where the handles would be attached. With the markings in place, we proceeded to drill pilot holes for the screws, followed by securely fastening the handles to the door. After tightening the screws, we double-checked the handles to ensure they were firmly attached, evenly spaced, and perfectly aligned.

24/03/2025
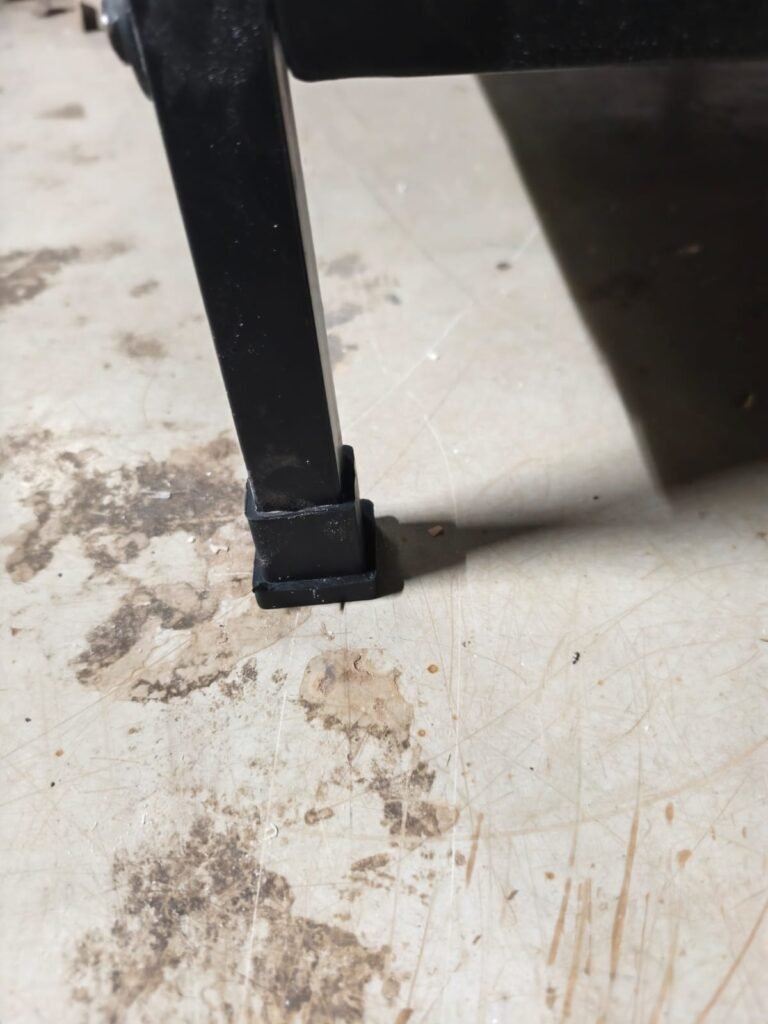
As the final step in completing the flat bed dryer, we installed rubber legs, also known as floor protectors or leg caps, onto the ends of the dryer’s legs. These rubber legs provided a protective barrier between the metal legs and the floor, preventing scratching, scuffing, and damage to the floor’s surface. We simply slipped the rubber legs onto the ends of the legs, ensuring a snug and secure fit. With the rubber legs in place, the flat bed dryer was now fully assembled.
25/03/2025
With the successful completion of the assembly process, the flat bed dryer was finally ready for operation.

04/04/2025
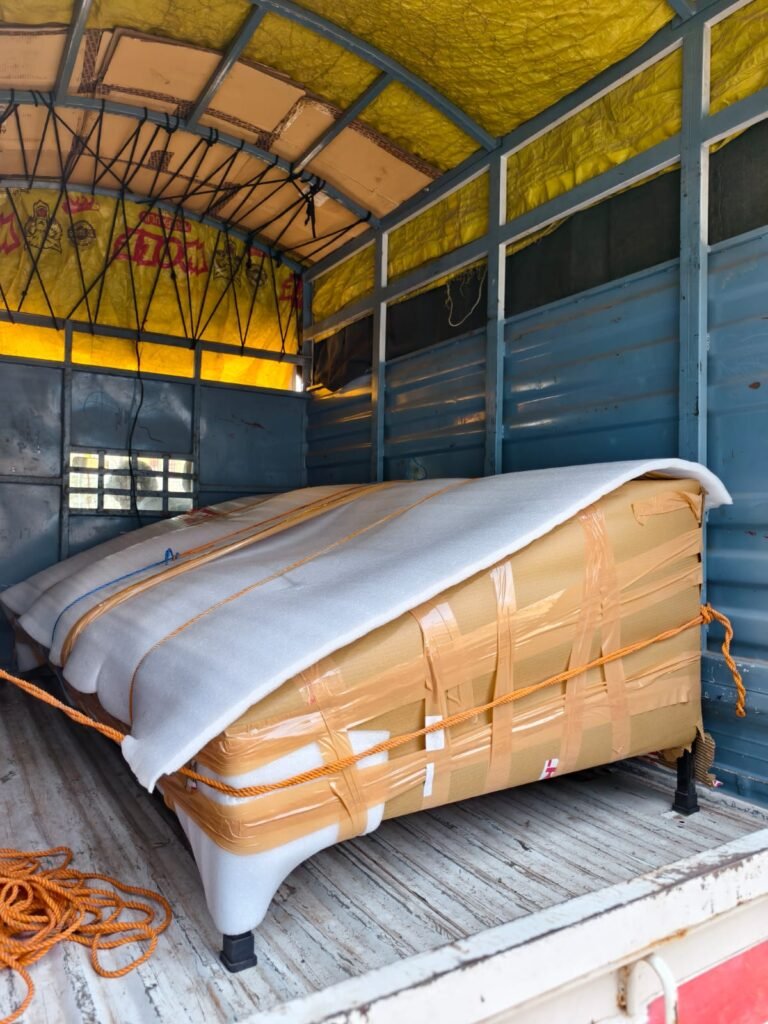
To ensure the safe transportation of the flat bed dryer, we took precautionary measures by wrapping it with foam and securing it with tape. This protective covering helps absorb shocks, prevents scratches, and minimizes potential damage during transit, ensuring the dryer arrives at its destination in good condition.
05/04/2025
We safely send the flat bed dryer to the customer.

