- Introduction:-
“INDIA” A country of variety food. The food experiences vary based on the landscape and climate, not to mention historic immigration patterns, spices, trade links, rulers and religions, the wide range of cultural and traditional traditions. When we look at India’s landscape, we can observe a lot of differences in each state. We can notice the effects of the climate on the food and clothing of that state. Every state or village has its special own food.
As we think of ‘ Vidarbha ‘ first of all, we remember the oranges of Nagpur. Vidarbha is in the central part of India where there is a harsh summer. We all know that Mango is a seasonal fruit in India. The season mangoes grow is dry winter and hot summer, with that everyone knows that ‘ Shewai ‘ is eaten in Vidarbha along with mango juice, but another similar dish is made in Vidarbha named as ” Sargunde “.
The question arised, what Sargunde is ? How it looks and how to make it?
So for that, you can go to the link given below and watch.
LINK:- https://www.youtube.com/watch?v=IgdffWzyJkw&t=374s


- Problem Statement :
It takes a lot of skill to make sargunde. Sargunde making is a very complicated and troublesome method, so it is made in very small quantities and it is disappearing day by day.
- Objectives :
- Making it available due to the unavailability of the Surgunde machine.
- Reducing the hassle of making Sargunde.
- Reduce the processing time to make Sargunde by manual operation.
- Discussion :
It is important to experiment to experience the pain points, what problems you face during manual operations ? and how much capital will be needed to design your experiment ? and how it will work and where you will get it better result ?
You must have understood something by watching the video and we did some experiments based on the conclusions drawn from the discussion.
- Experimental setup:-
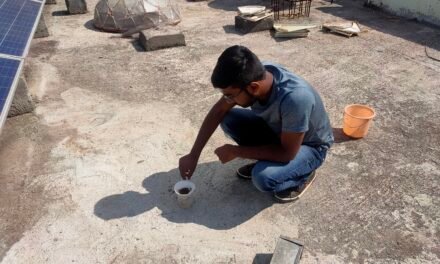
We did an experiment to find out how the sargunde machine would work, Measured the length of the Sargunda thread. The shewai machine is rotated by hand and the thread of sargunda coming down appears to be rotated on a stick.


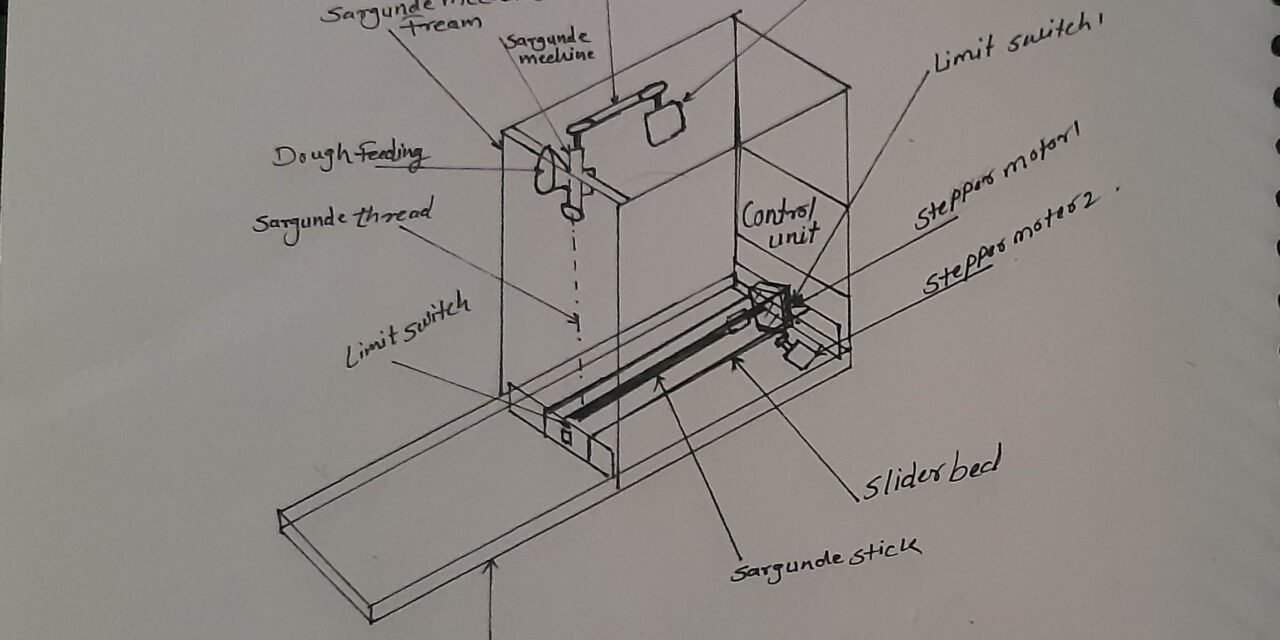
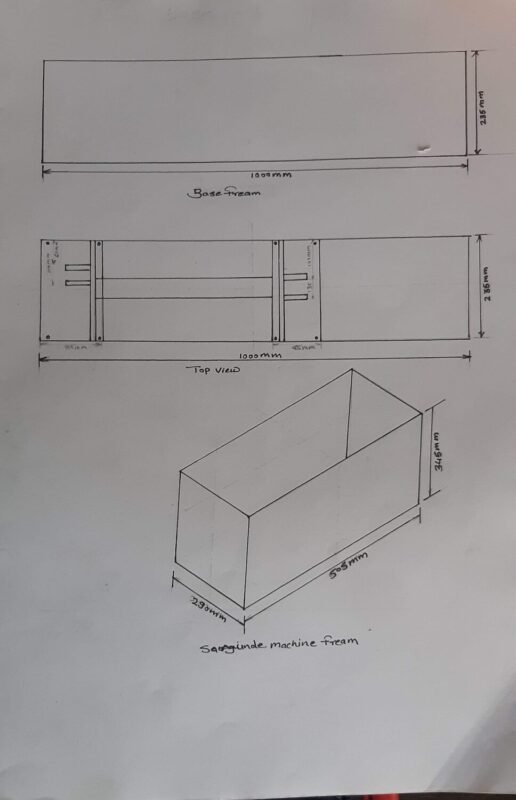
- General Sketch :

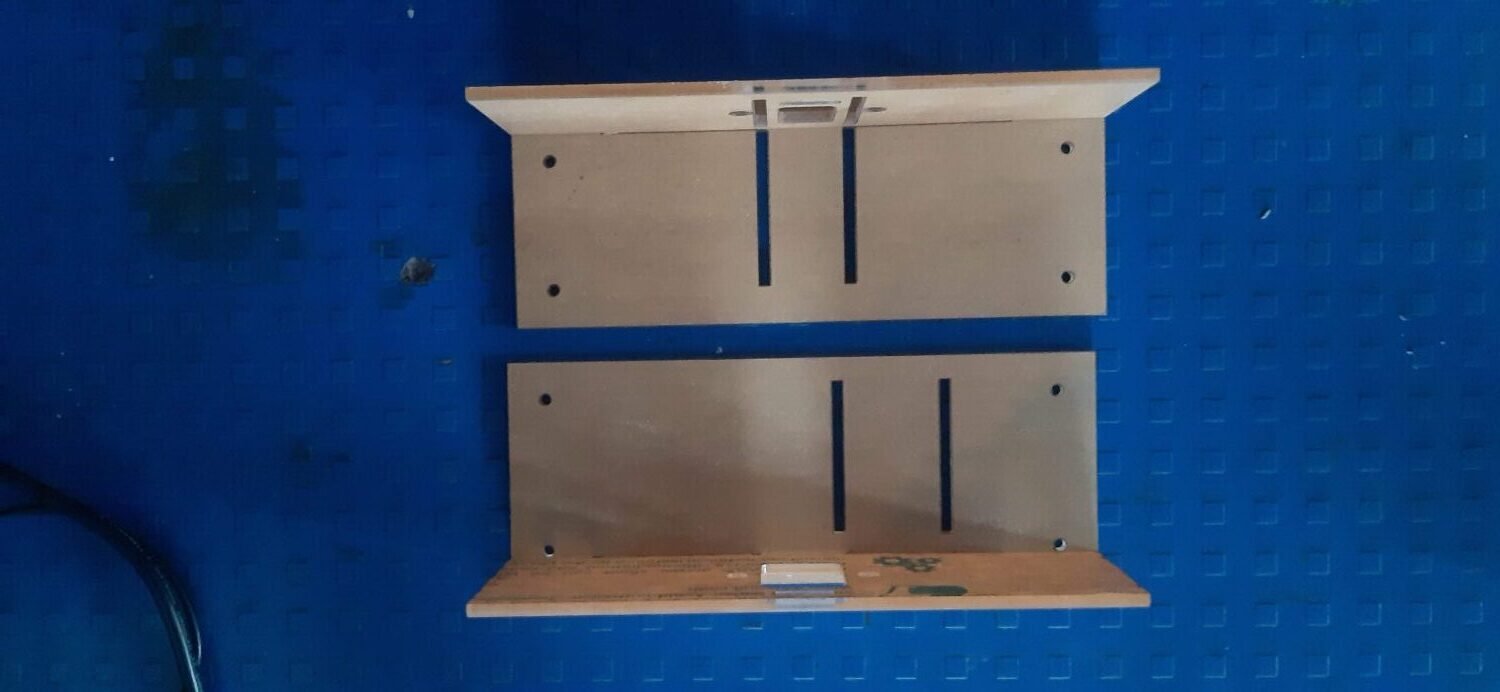
- Parts skeches;-
If you want to make a model as shown in the figure above, I need to draw the diagram of each part and decide how long and wide it is. Determining the length-width of each part will not cause many difficulties in CAD modeling or Fabrication.

Process flow chart:- This system has two processes, the first is the driving system and the second is the rotary and horizontal driving system.

Moter selection calculation:- This system will require a motor for the first driving system because I use a shewai machine. When we put the dough into the shewai machine, we need a motor to rotate the shewai machine, To turn that shewai machine, the motor has to take out how much power it needs to be thrown, this will require some calculations.

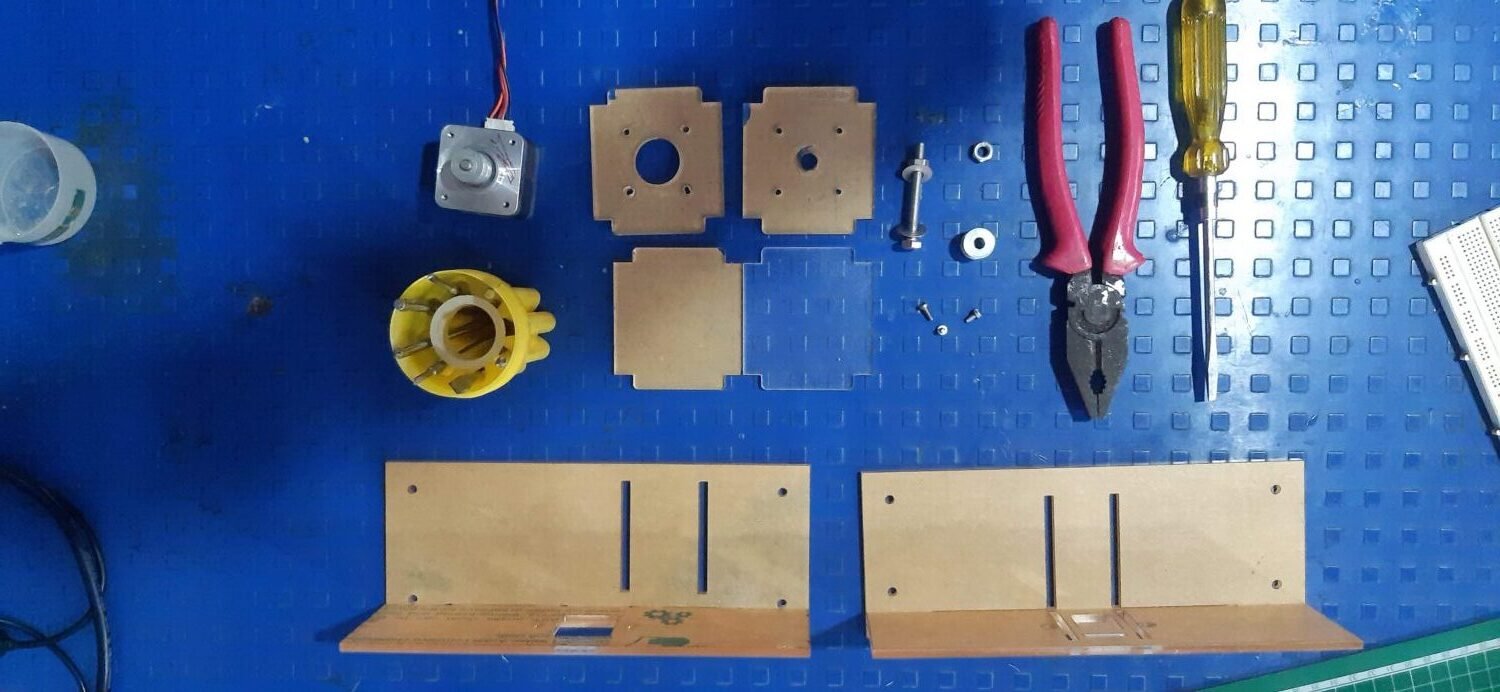
- CAD Modelling :
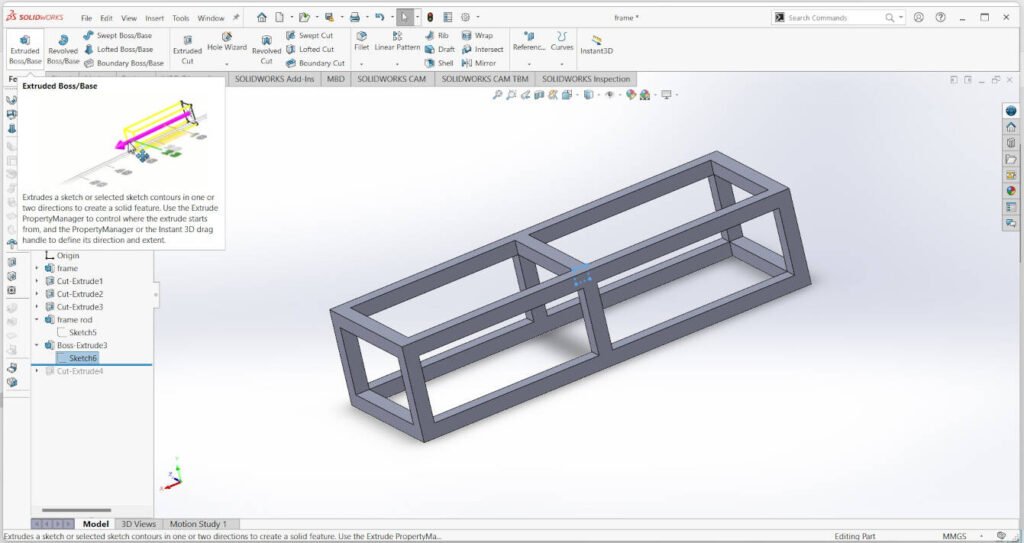


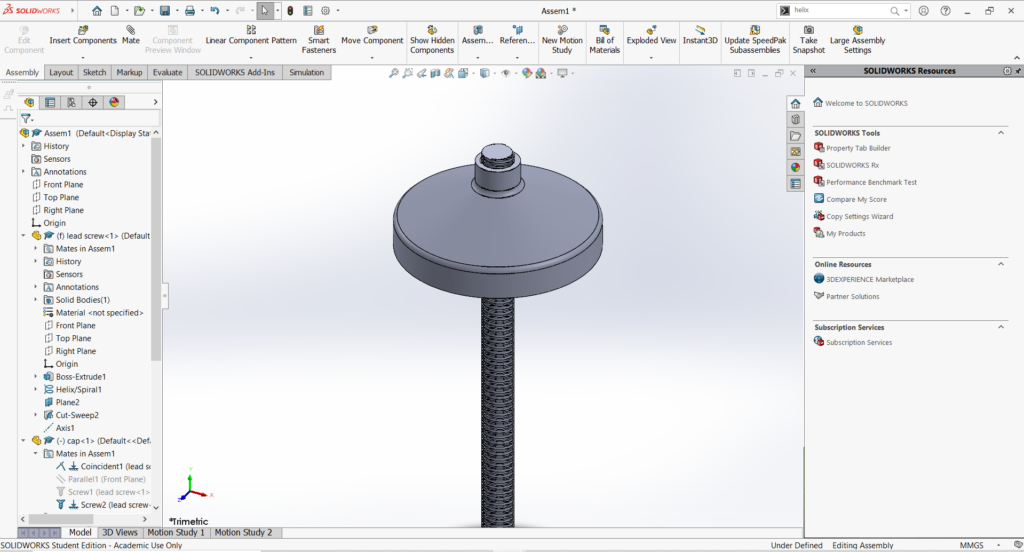
Mainframe

Fabrication;-
1 step
I made a simple frame of square tube. Then I mounted a viper motor and a shewai machine on it.


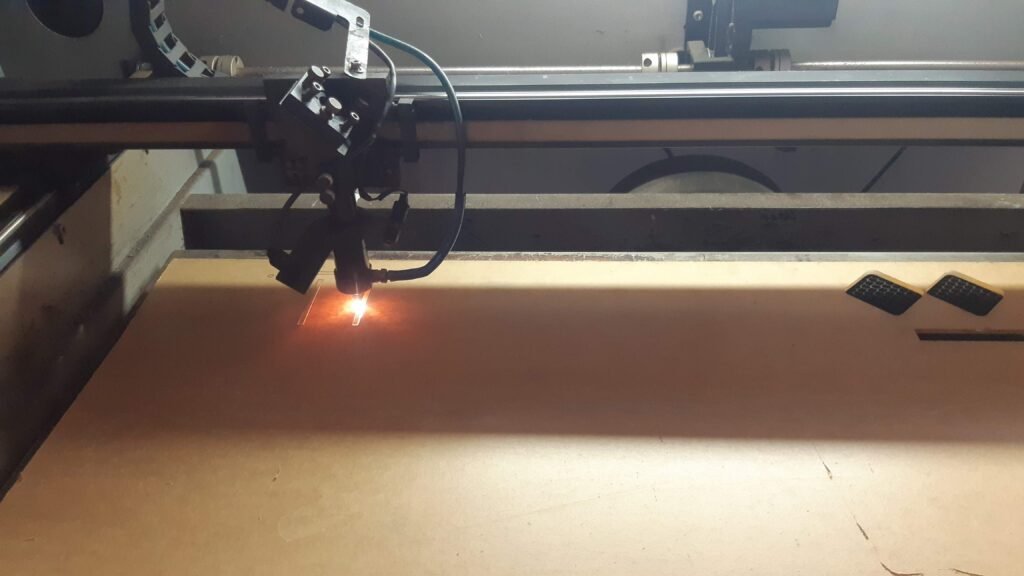
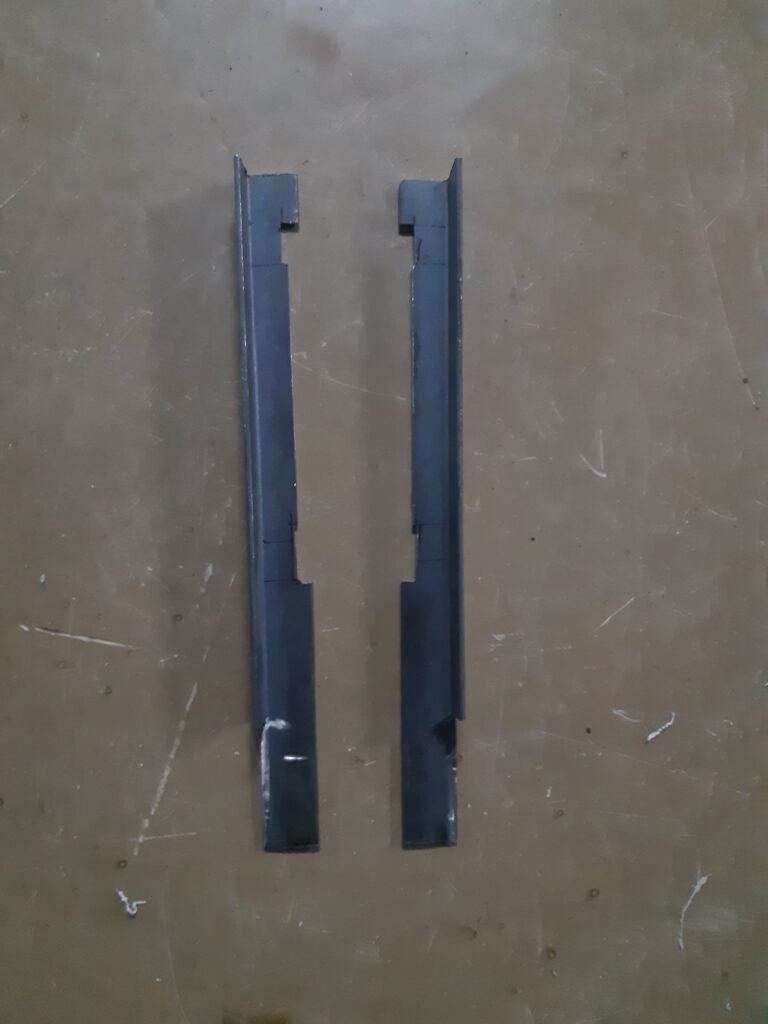
I chose acrylic sheet to make some parts, as acrylic sheet is easy to machine and we have a laser cutting machine available in our fab lab.

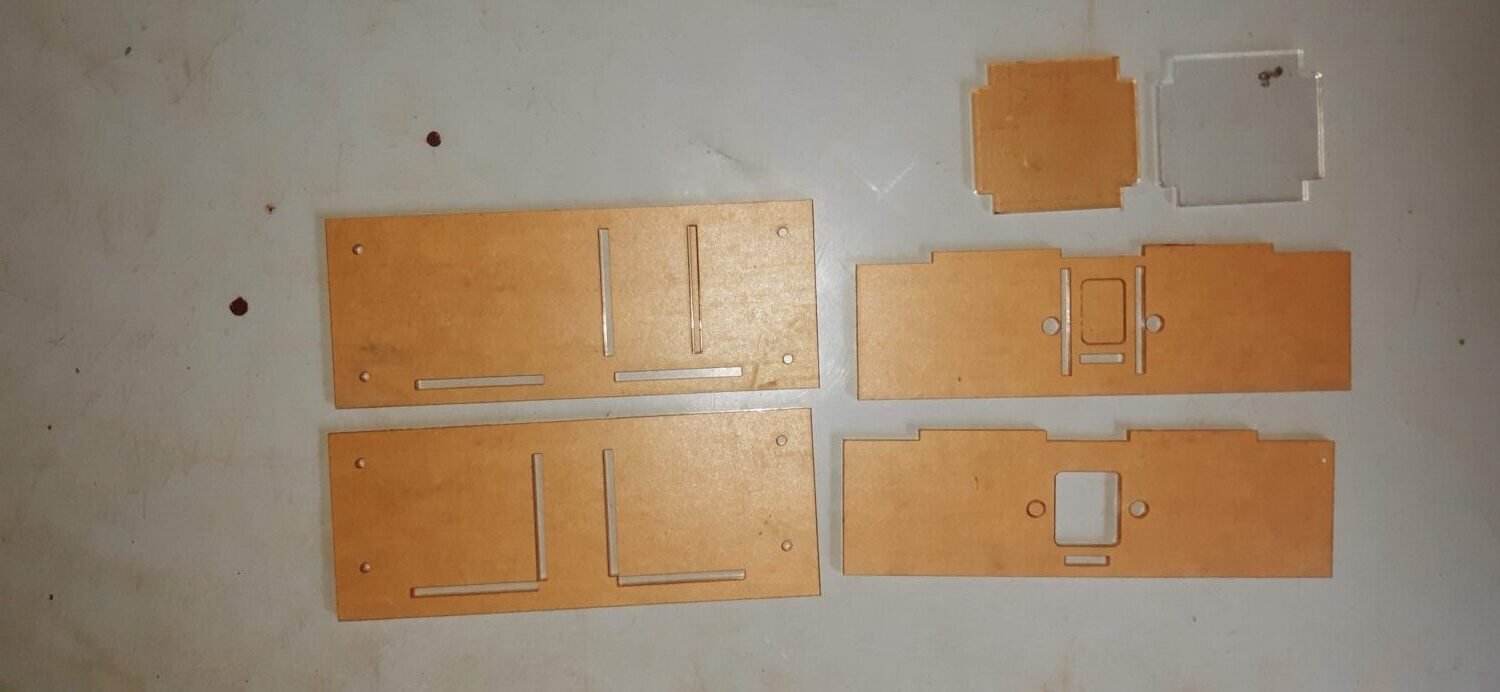
I joined the acrylic parts together with press fit.

Then I made a slider mechanism for the stepper motor. To make the slider mechanism I used SS shaft rod(8mm), linear ball bearing(8mm), timing belt and pulley

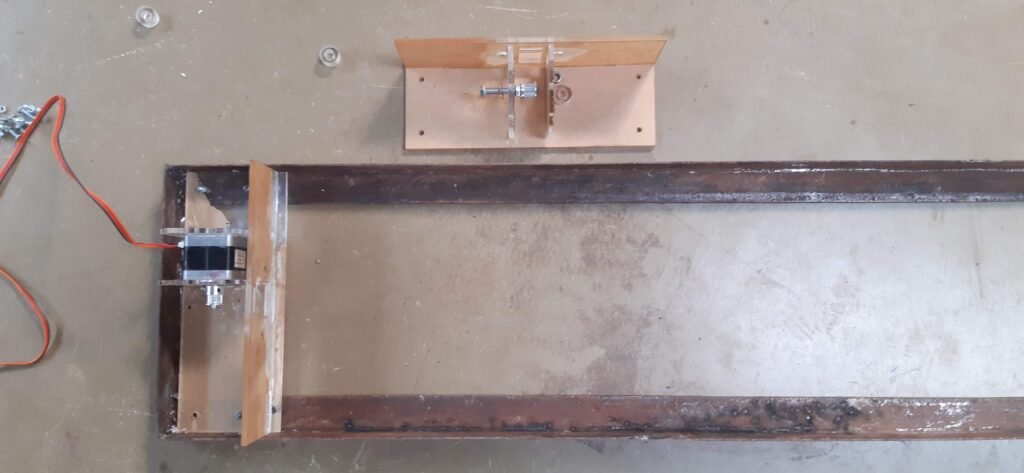
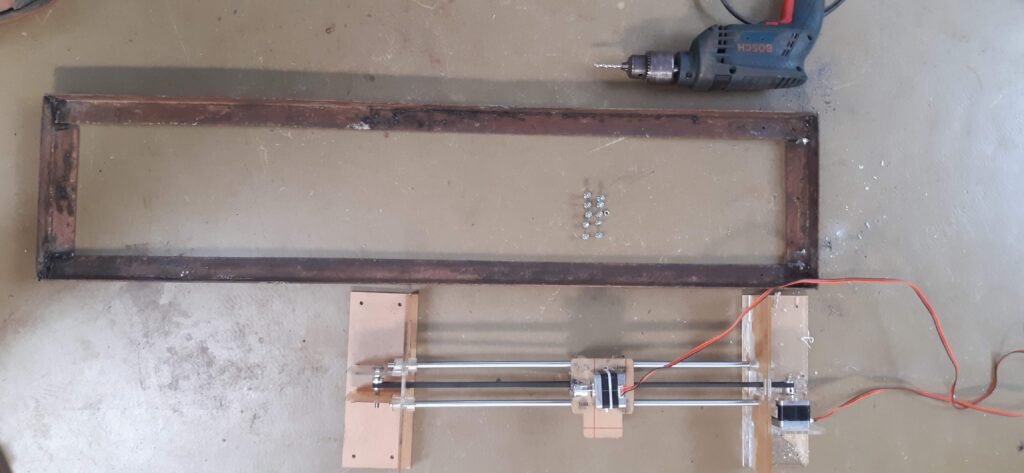

Then I welded the square tube frame with the slider mechanism.
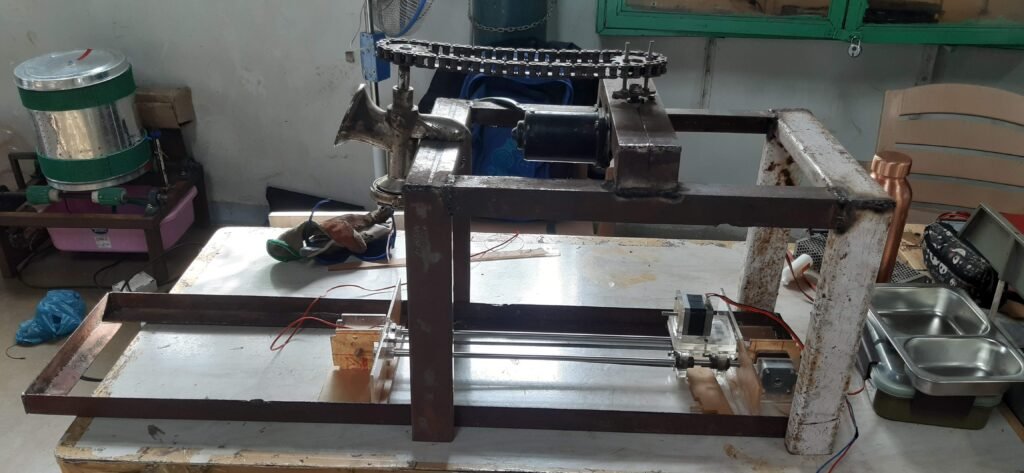
Then I performed few trials on the system to check the texture and continuity of the Surgunde thread.
Outcome: Texture and continuity was good. It was needed to press the dough by hand to get a proper continuity of the thread. So I decided to make a automatic setup for pressing the dough while making the threads.
After discussion about pressing the dough automatically we came up with the solution to use sav-maker/murukulu maker.

We decided to use a stepper motor to rotate the lead screw of the shewai maker. This will provide automatic pressing of dough inside the sav maker. It was needed to straighten the lever of the shewai maker to mount the stepper motor on it.

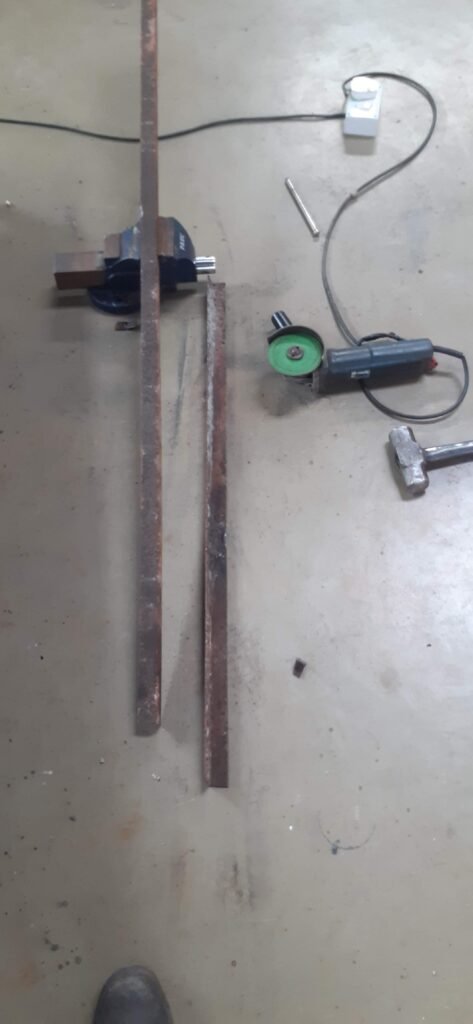
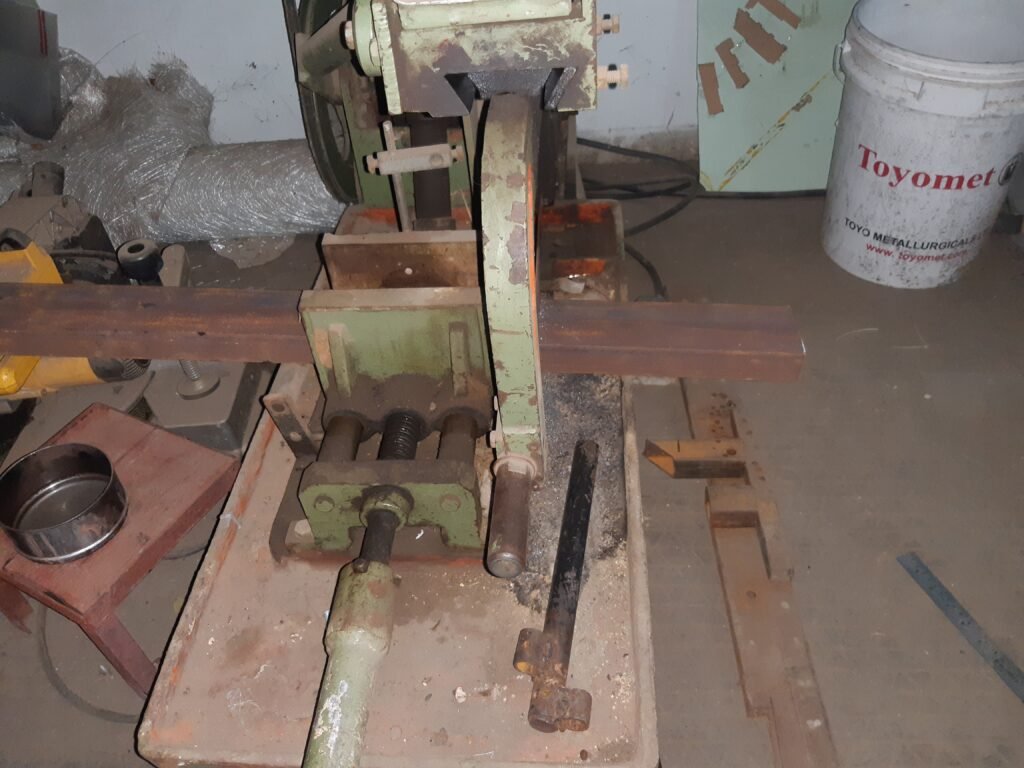
With this system, I created a trail. I found that the stepper motor is unable to provide the required torque to press the dough. So I decided to use a DC wiper motor. It’s been a challenge for me to figure out how to attach this Shewai machine to my frame. Then I found a solution. but first I used Mild Steel C Angle Cut on a metal cutting machine. This cut piece is welded to the main frame.
I decided to use a U-shaped clamp to fix the front side of the frame.

In the next step, I attached the extruder to the Shewai machine, so I used the UCP204 Pillow Block Mounted Bearing, 2 Bolt, 20mm inside diameter, Set screw Lock, Cast Iron, Metric,Trapezoidal Lead Screw Single Start Threaded Rod T10 500mm Pitch 2mm Lead 10 TR10 with brass nut and chain sprocket.
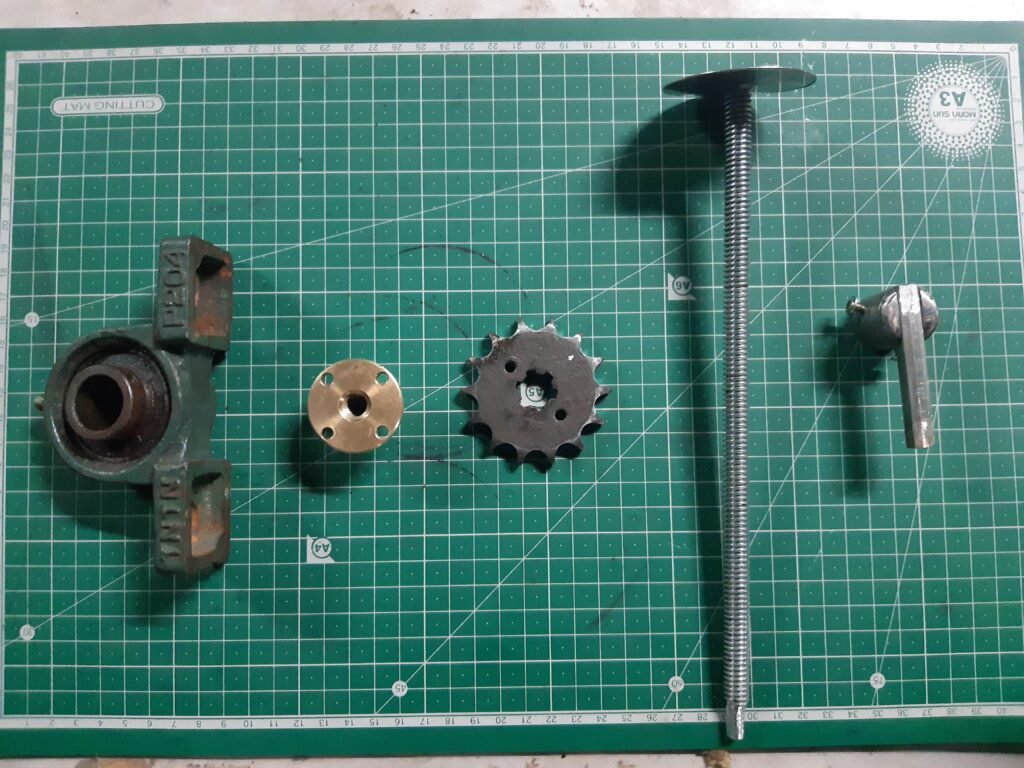
brass nut fix in UCP204 Pillow Block Mounted Bearing,

in next step this bearing attached with frame. so first I use MS Square tube(20*20) and L-angle welded and drilling with drill machine.
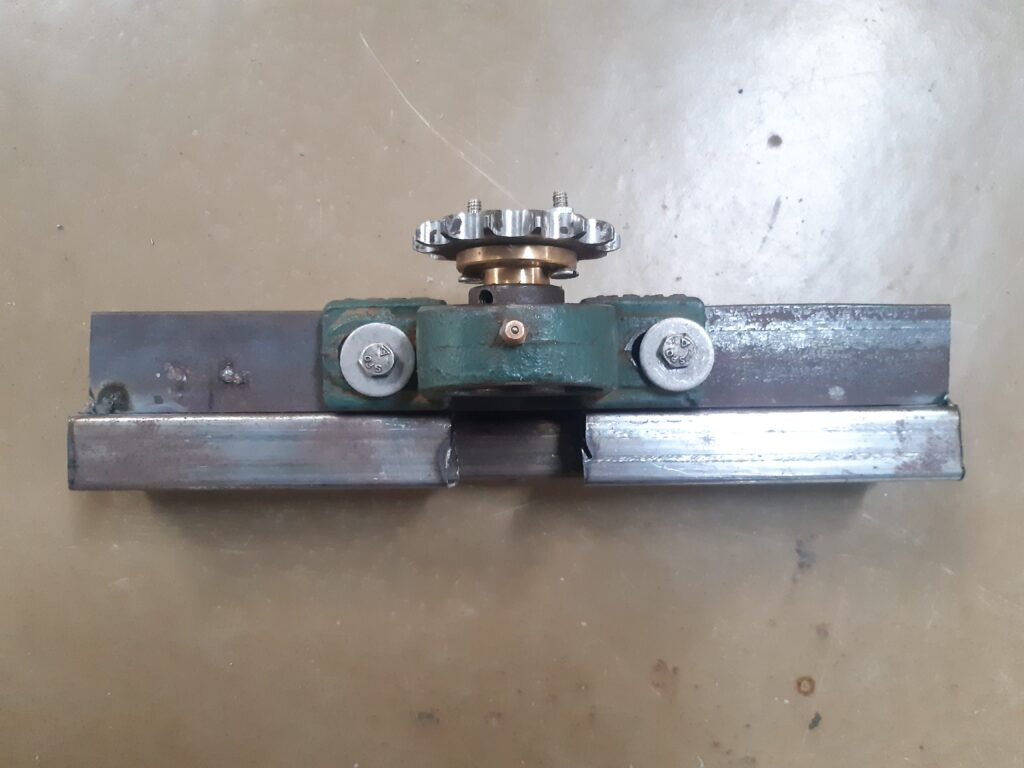

Next, this bearing is attached to the machine frame with the help of a nut-bolt.

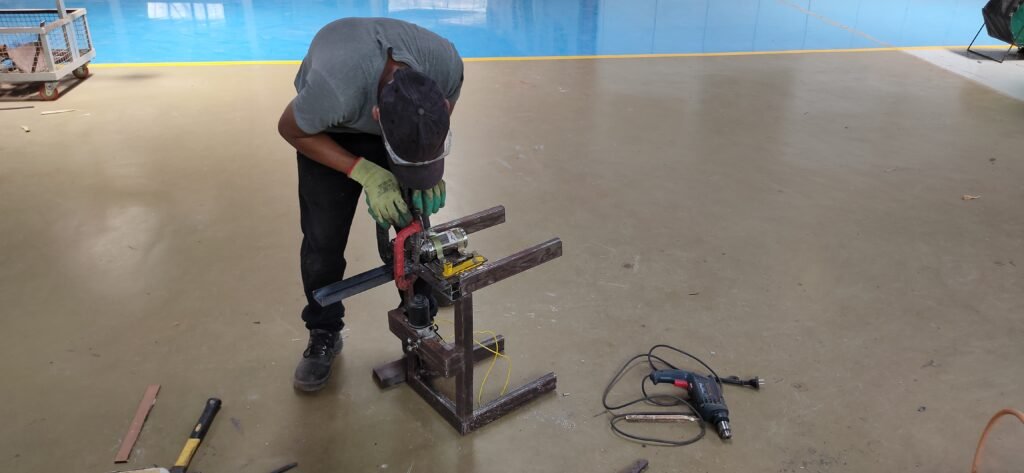
After connecting the motor with the assembly test, it works or not.
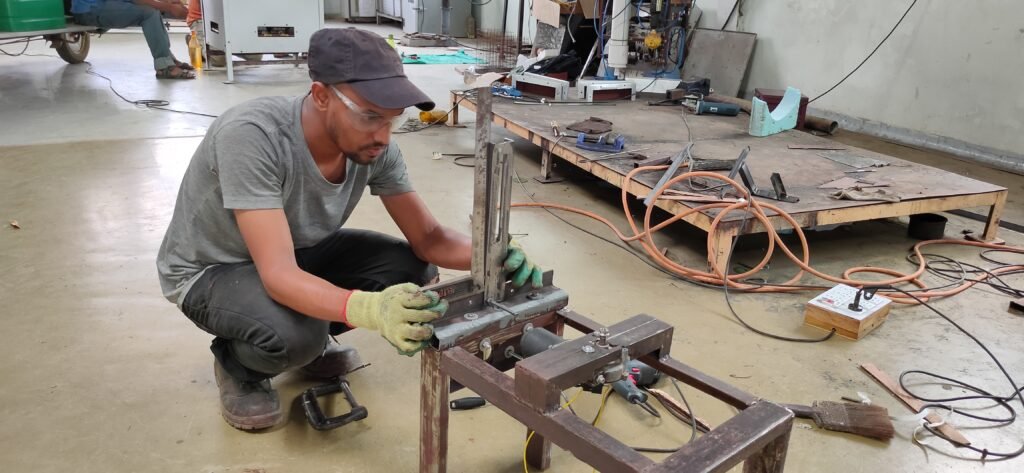
Next i need a support for the lead screw and plunger lock mechanism when lead screw moving up and down. i use l-angle ms bar and welded and grinding .


this fitted in machine
after drilling fixed with nut and bolt and cheek prefect fitting and vertical Straight lines with the help of Aluminum Right Angled Set Square Tool.
in this case i need a nut/ to hold on a lead screw so i design a nut on lath machine.


this part fixed on the lead screw

after that test the machine with insider dough in the sheawai machine.
Issues while on trail:-
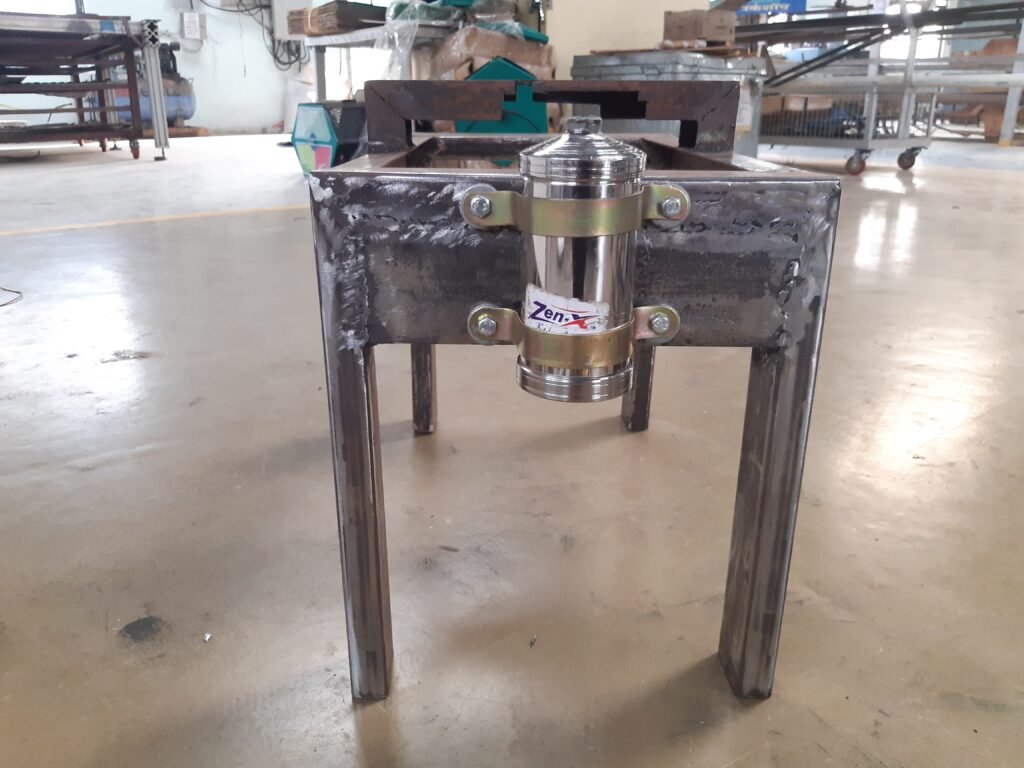
cylindrical part slip from the mechanic. This issue was how to be solved so I discussed it with my friends and fab lab members. Everyone different suggested me. so I decided slightly to support the downside on the cylinder.
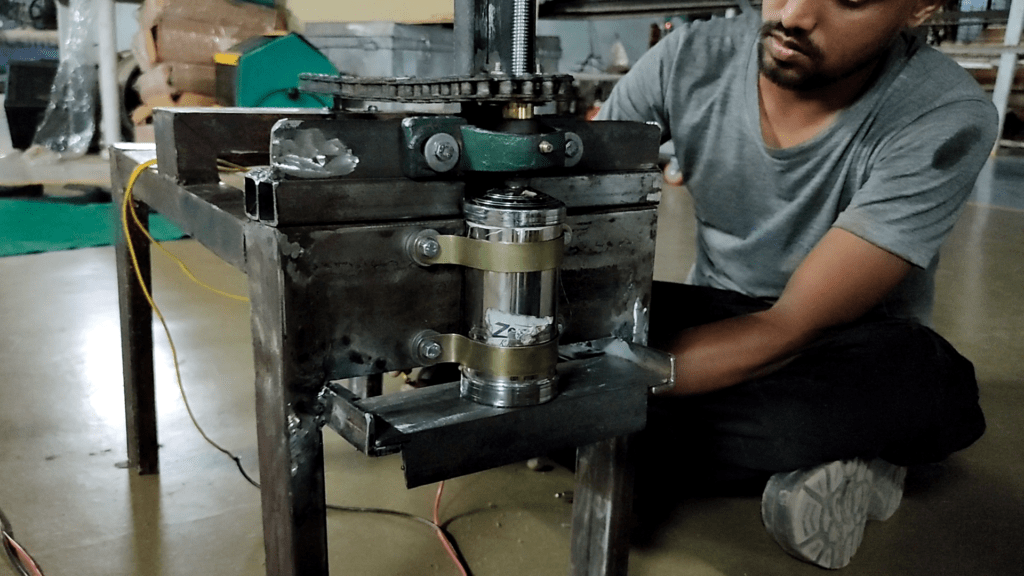
Issue Resolved : The above image shows small support on the cylindrical part after checking whether it’s working properly or not.
After a successful trial, every component is disassembled and painted metal parts.
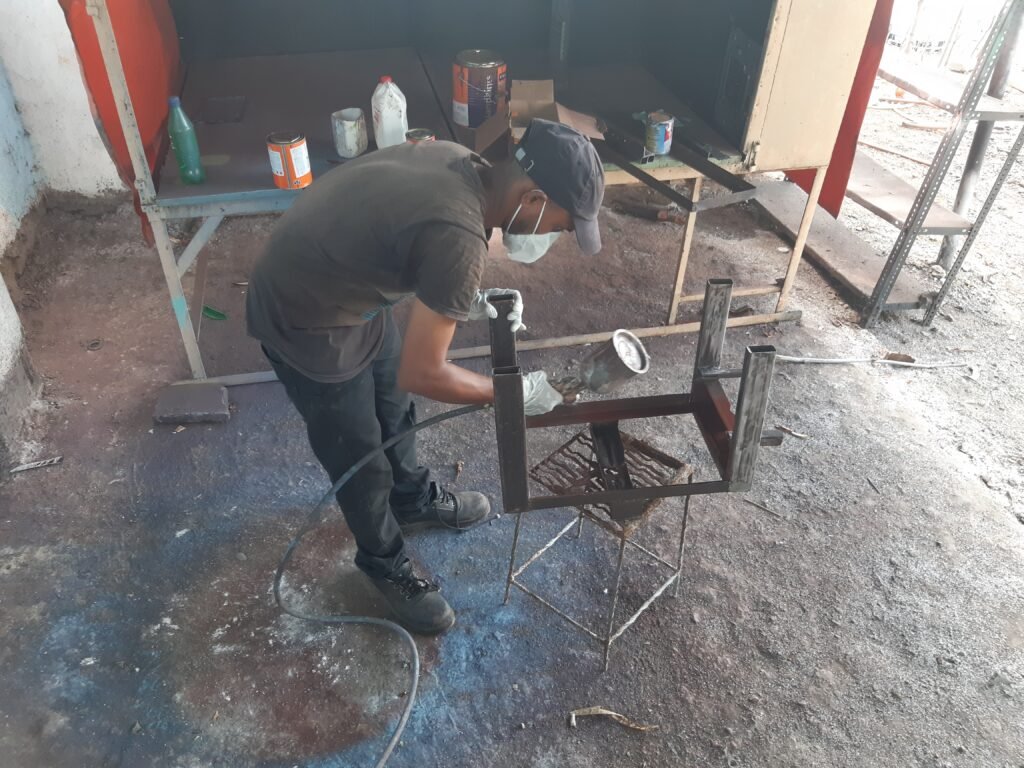


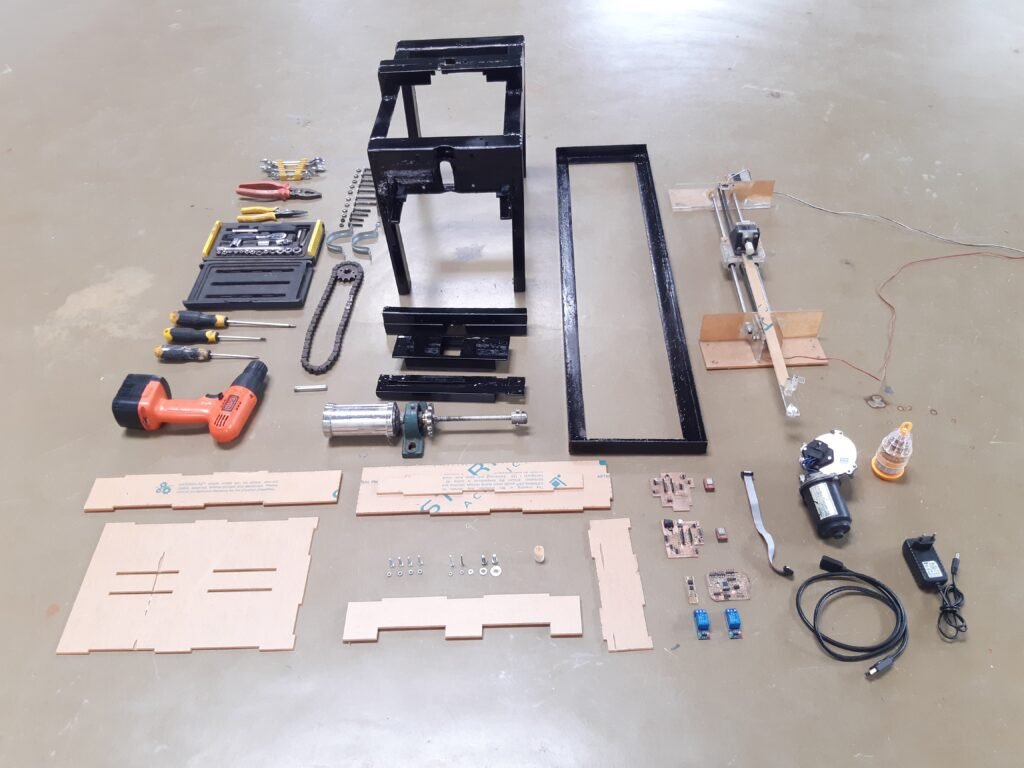
after painted assemble all part.

