1. Introduction
After arriving here at Vigyan Ashram, I was given the project of Aeroponics. At that time I didn’t know anything about Aeroponics.
So how do you approach a project about something you are a total stranger about ?
First, google is your friend. You don’t know about Aeroponic, then put the name Aeroponics on Google research bar.
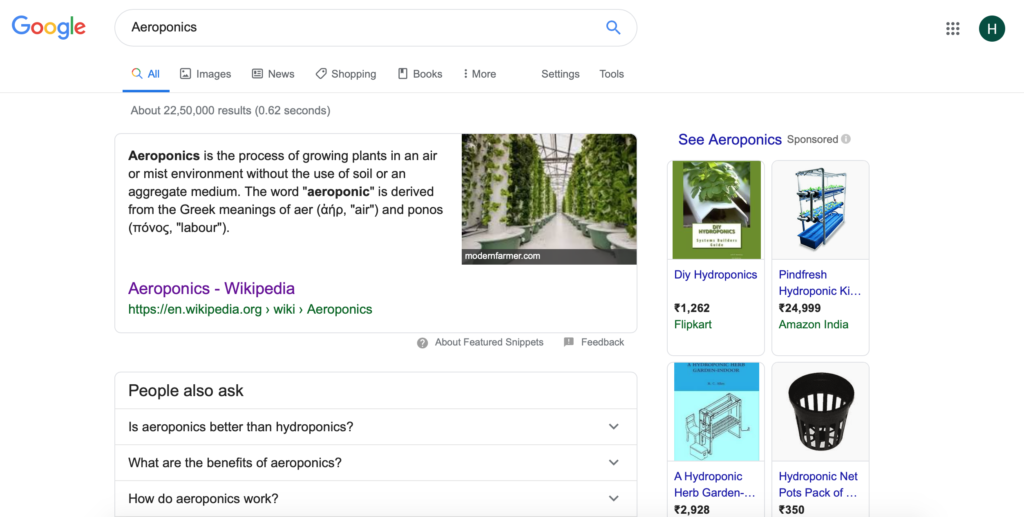
You will be surprised by all the informations you can find. I was myself surprised, I never heard of Aeroponics before and it is actually becoming a big thing with High tech Farm.
As it is mention on Wikipedia, Aeroponics is the process of growing plant in the air, in a mist environment, without soil and any pesticides. The main goal is to use less water, to allow the plants to grow faster and during the whole year. This technique could allow agriculture to become more environmental friendly and in the future be able to sustain the needs of a growing population.
1.1 Get to know Aeroponics
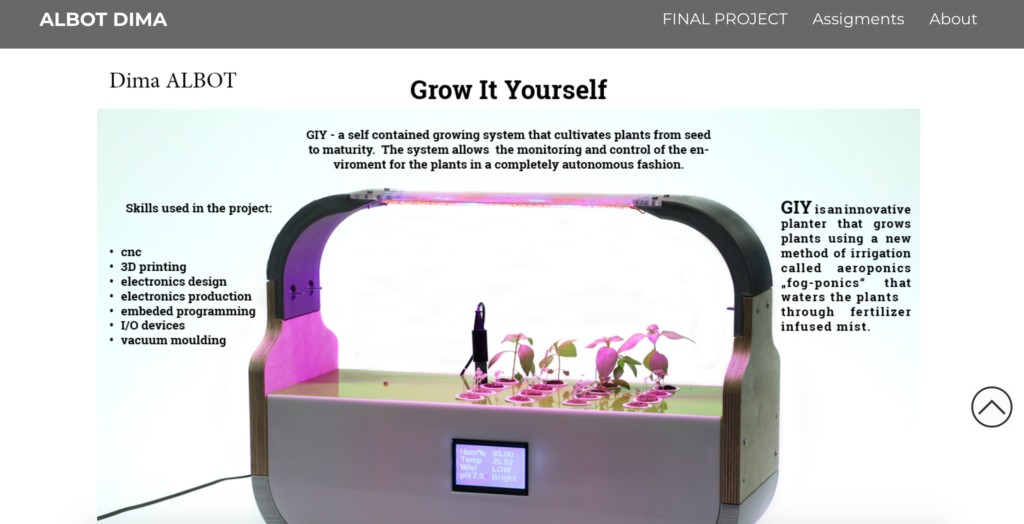
As a starter base we had to look at what others did in the past. Albot Dimas, a young student worked on a project of Aeroponics in a FabLab, and all his work is detailed in a report.
Secondly we had some images of a High pressure Aeroponic system from a Chinese guy.

We rapidly came to the conclusion that there was many types of Aeroponics system, indeed there is 3 principal :
1.1.1 Low pressure Aeroponic system
Low Pressure Aeroponics (LPA), is defined as a form of Hydroponics in which the root zone is suspended in a chamber with nozzles which delivers nutrients through a spray. The droplet size is not exact. These systems typically use a plastic spray nozzle, and a typical fountain pump to get their spray out of the nozzles.
ADVANTAGES
- Simple, easy to DIY
- Grows plants faster than other forms of Hydroponics.
- Cheap to build
INCONVENIENTS
- If issues arise in the system (power outage) you lose your plants in hours
- Clogged sprayers
There are not very many disadvantages to LPA as you can see above. These systems are not the best for larger plants and larger systems. The sprayers can get clogged from the plants roots. These are mainly used for cloning. They do a fantastic job at cloning plants.
1.1.2 High pressure Aeroponic system
High Pressure Aeroponics (HPA) is defined as a form of Hydroponics in which the roots are suspended in a chamber with nozzles that delivers nutrients through a mist to the roots between 5-80 micrometers. Most argue that the range is smaller (20-50 micrometers). This mist is usually derived from some form of pump (typically a diaphragm pump such as a reverse osmosis pump). This type of system usually has a PSI of 80-150PSI to attain the droplet size. Also, it uses specialized misting heads to attain the correct mist droplet size ( nozzle size around 0.4 mm). Research from NASA shows that at the 20-50 micron size, the roots can grab the water/nutrient solution right out of the air and instantly absorb them without any wasted energy.
ADVANTAGES
- Superior crop
- Of all current methods, this grows plants upwards of 20% faster
- Uses the least amount of water, of any system
- Uses least amount of nutrients of any system
INCONVENIENTS
- If issues arise in the system (power outage) you lose your plants in minutes
- Most finicky form of Hydroponics
- Super expensive
- Clogged sprayers
High Pressure Hydroponics is great for big crops, or those seeking the highest quality crop in smaller scale environments / hobbyist
1.1.3 Fogponics
Fogponics is a form of Aeroponics. It is basically the same concept, except you are using vaporized nutrient solution in the 5-30µm particle size range. This form of Hydroponics is not as popular as Aeroponics, but that is only because this is a relatively newer form of Hydroponics. These systems are typically made up of an ultrasonic fogger, a pump, water, and the system to hold the roots above the fog. One thing to note is your plants do not actually have to have their roots touching the fog you see since it is actually sucking it up. There are a lot of people who have failed perfectly good systems by adding a fan because the roots were not touching the fog.
ADVANTAGES
- The plants grow faster.
- The nutrients are easier for the plants to absorb.
- Use less nutrients and water.
- Not very much space is needed.
- Great learning experience. This method has a lot of things that help you learn more about Hydroponics in general.
- This is semi-mobile.
- Fairly cheap to build.
- Depending on setup, disease is cut down from other forms of Hydroponics.
INCONVENIENTS
- If issues arise in the system (power outage) you lose your plants in minutes
- Regular cleaning and sanitation is required.
- Salt buildup is common, and it can stop a system from functioning properly.
- Roots develop over time smaller, thinner, and weaker than LPA or HPA.
Suggestions for best use: Cloning. Fogponics is very cheap to build, plants grow very fast, they are getting vapors at almost the size of what they need to absorb them. This means that the plant has to work less. You can build a quick easy setup from a rubbermaid storage box, pump, and vaporizer from Ebay as a beginning DIY.
1.1.4 Conclusion
We chose, for the prototype version to go with a Low pressure ( LPA) system. Moreover, we wanted to have the smallest droplet size possible with a low cost nozzle and a pump with does not required a pressurized tank.
2. Choice of Design
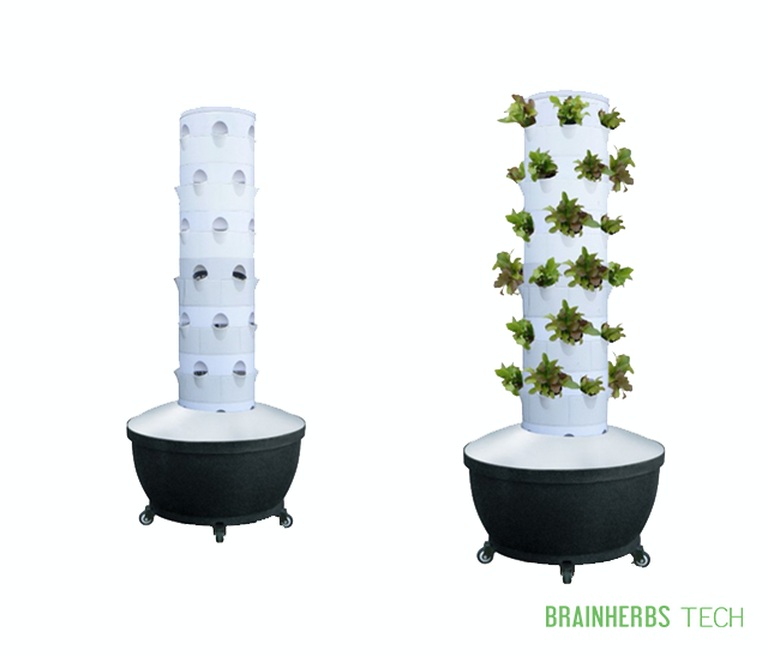
After looking online, I saw that you can also do Aeroponics vertically, which means you have pipe tower , with your plants growing on the side.
2.1 Vertical or not ?
2.1.1 Vertical Aeroponics
ADVANTAGES
- Takes less space on the ground
- Looks nicer
- You can grow more plants on a smaller space.
- Can be DIY
- Because of the pipe height the mist will become thinner when hitting the roots.
INCONVENIENTS
- Needs more hight space.
- A bit more complicated to build.
- Big roots could block the mist in the pipe.
- The plants will not have the same mist regarding the height.
2.1.2 Horizontal Aeroponics
ADVANTAGES
- Easy to build
- Can DIY for low price
- Small height
- Each plants have the exact amount of mist.
INCONVENIENTS
- Take a lot of ground space
- If you increase the plant number then your system becomes bigger
- The roots are closer to the misters / fogger.
2.1.3 Conclusion
I decided to go for a vertical Design, I was feeling more inspired by this design. A lot of people are doing DIY horizontal system, but not a lot of peoples are doing DIY vertical Aeroponics. Some companies are selling Vertical tower but for a very expensive price. So I took the challenge to design and prototype a low cost Aeroponic tower.
2.2 1st Design
Without doing further research I took my pen and did a quick sketch of what could be our DIY Tower :
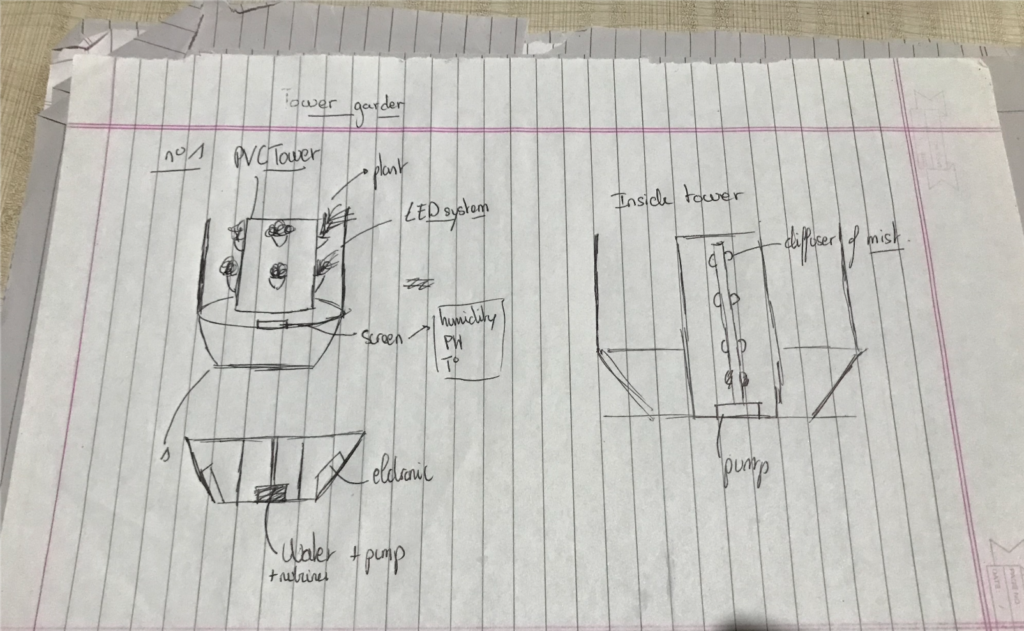
So obviously this won’t be the final design. I find it always interesting to sketch a first design, to understand better the system, to see what’s wrong and to be able to show/ explain to people its always better with sketches.
2.2.1 What is wrong in the first design
- As we want to make this prototype small, the pipe diameter will be small as well ( around 6 inch) , so putting 4 plants on the same level would probably not be the best idea because the roots touch others and block the mist .
- With the same reflection , we came to conclusion that putting a vertical pipe inside with mister nozzle on the side would be useless and too close to the roots. Another alternative is to put only one mister nozzle at the bottom part of the pipe misting upwards.
- For Waterproof reasons , it would be better to place the electronics components outside the “gamela” and thus put the water directly in the “gamela” and not in the pipe. That way we could also cut the pipe a bit shorter.
- A submersible pump can not generate enough pressure to create mist. So we have to take and outside pump.
2.3 Conclusion
My first error was to jump too soon into the design, I have take too much time to think about a design without knowing the all the mechanics behind. Moreover, making this 1st design allowed me to see what was wrong, it’s always easier to see it on paper directly from a sketch.
3. From sketch to 1st prototype
Without further waiting I started the assembly of the 1st prototype, the idea was to build a first working prototype using mostly component that we already had or create it ourselves ( 3D / laser cut … ) to be as cheap as possible.
3.1 Building the tower (1st prototype)
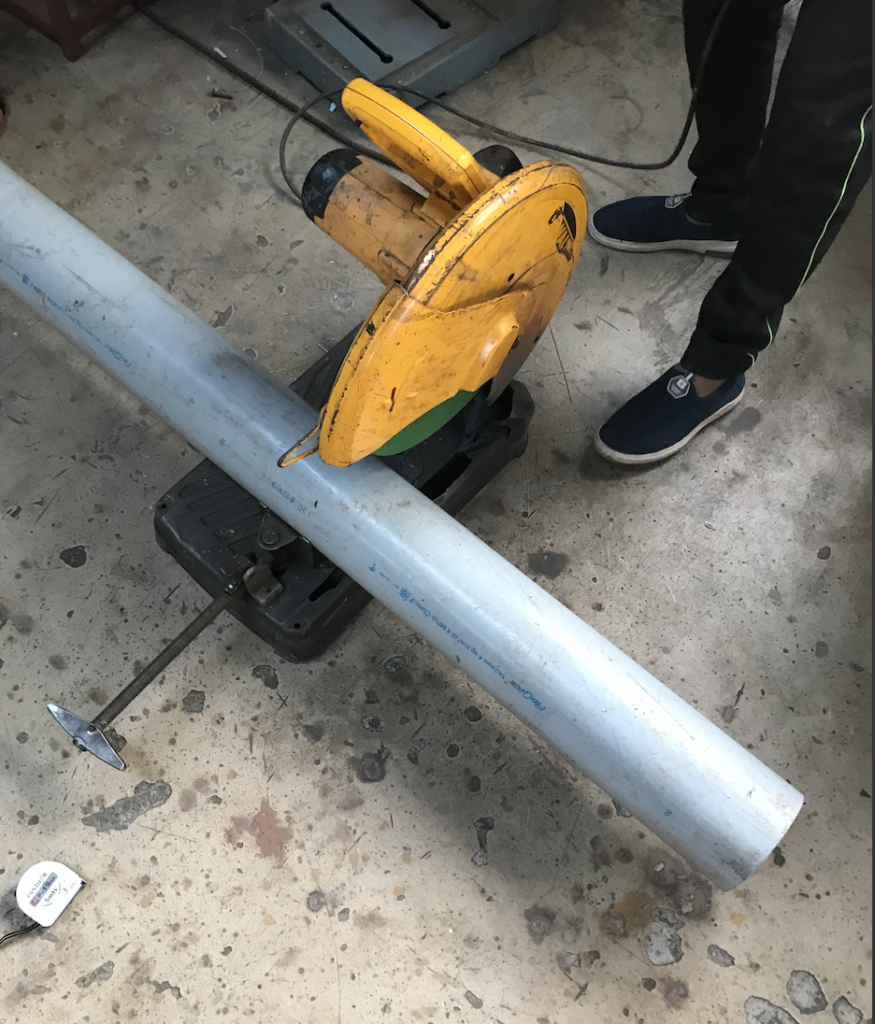
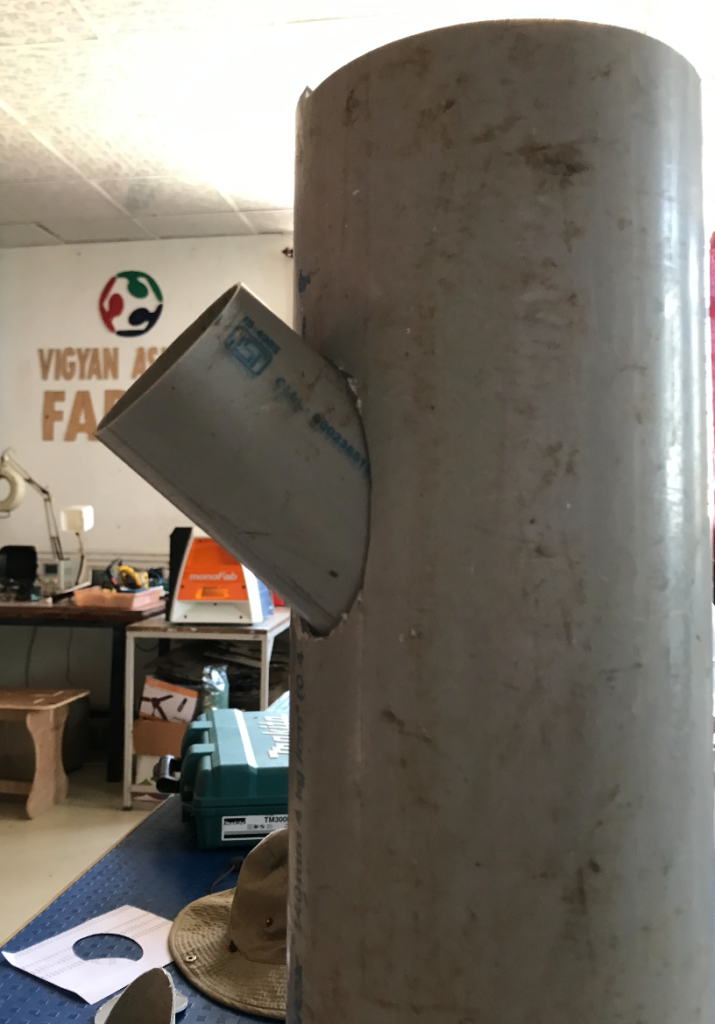
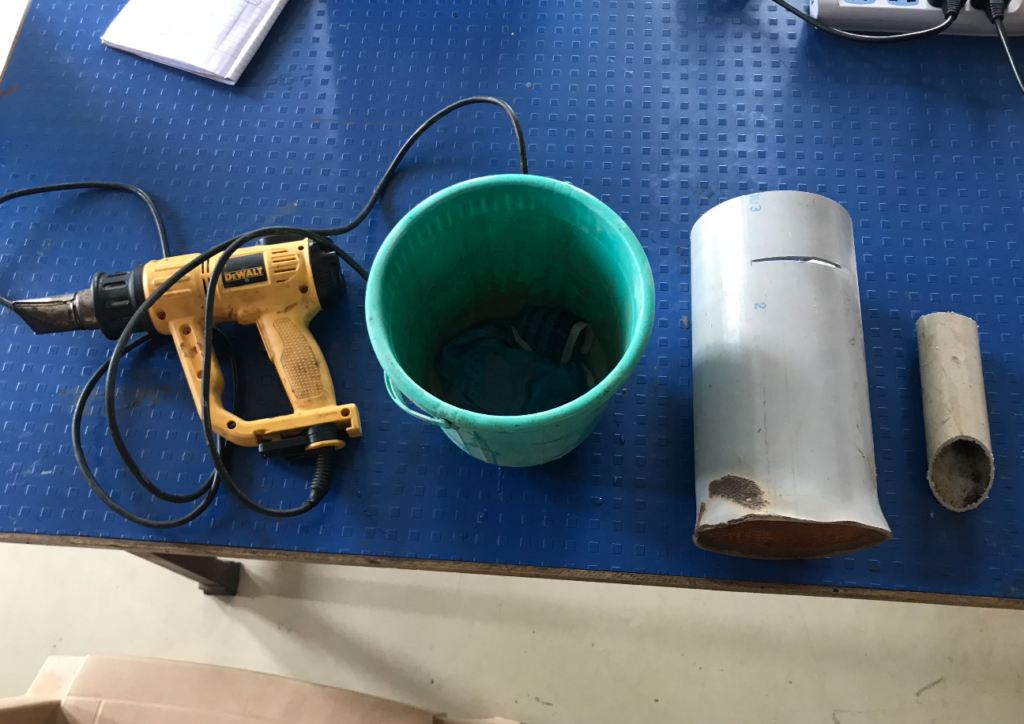
I started with the PVC tower. The idea was to put PVC elbow pipe on the side of a vertical PVC pipe to create a “vertical tower” to host the plants. As mentioned in the design section, I was thinking of a 6 inches PVC pipe for the main tower. Luckily we had such pipe in the garbage, ready to be reuse, a bit more than 2 meters high, more than enough for me.
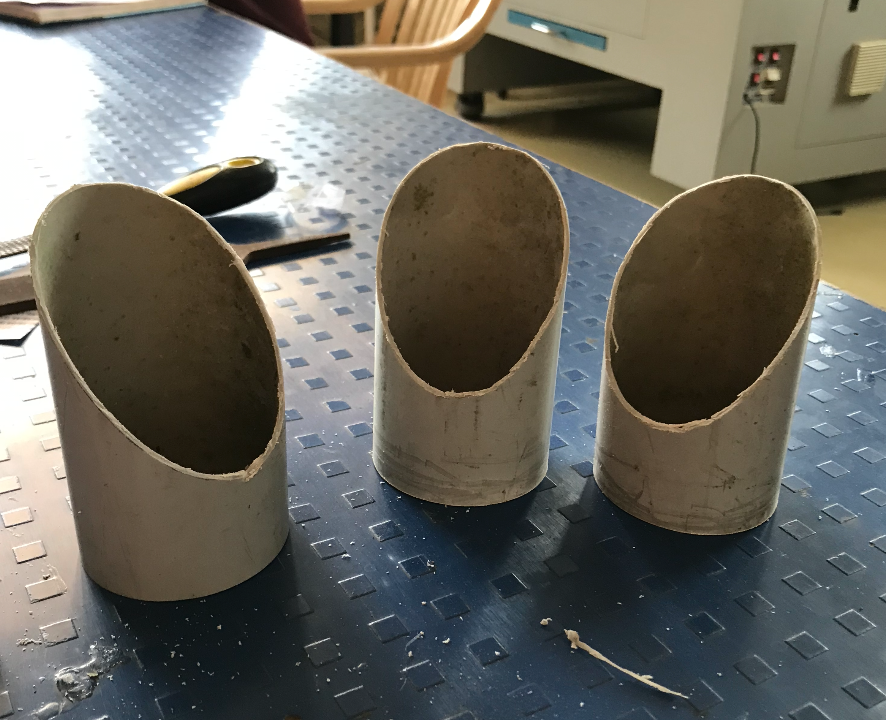
I have cut, with a circular saw a small pipe of 30cm high.
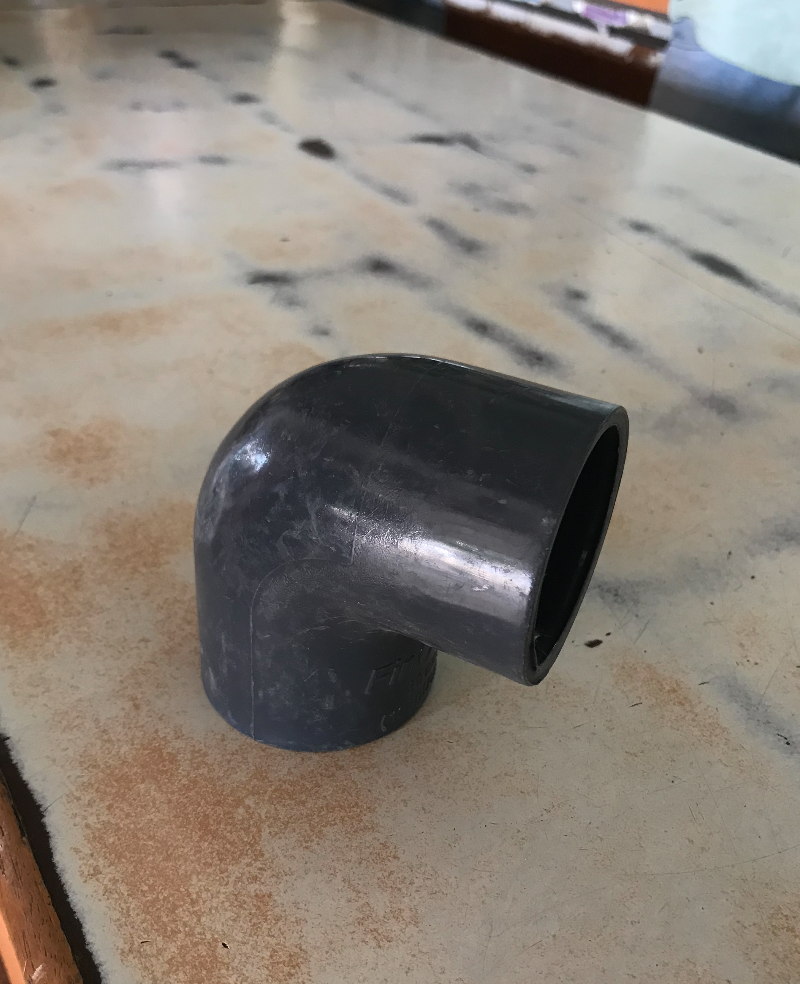
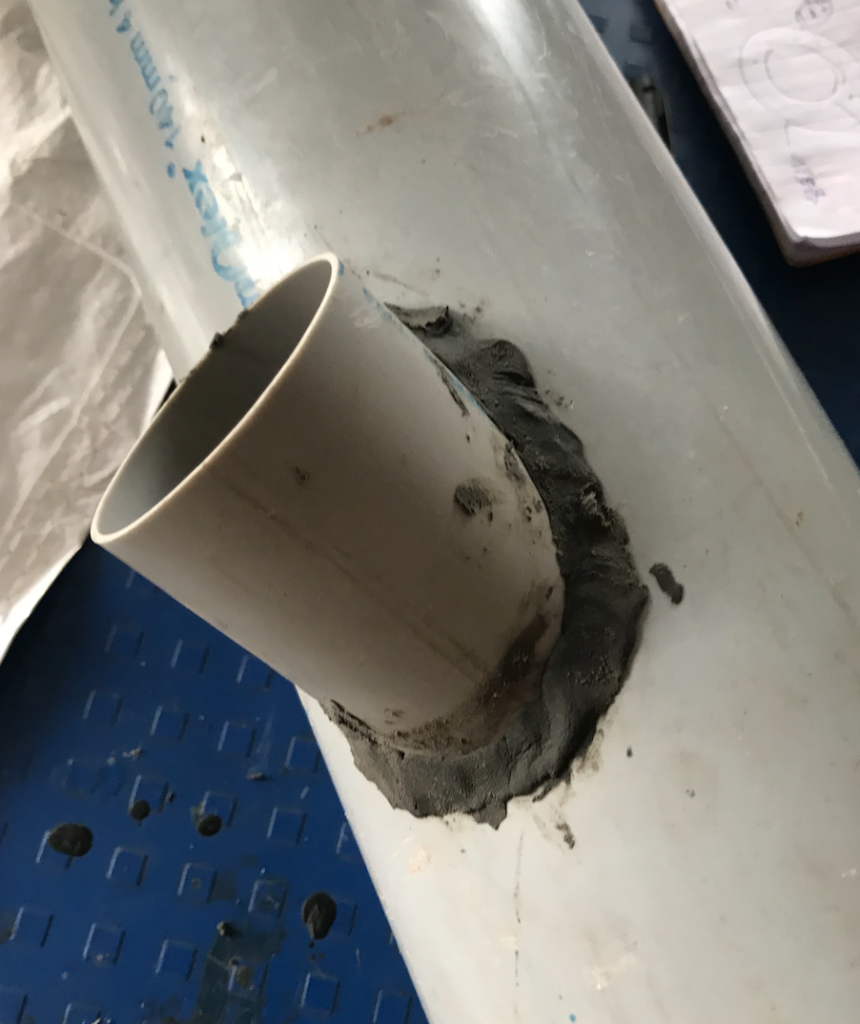
For the elbow pipes, I used one found in the garbage, the diameter ( X cm) was matching quite well. To be able to put a net cup inside the elbow pipes and to allow the roots to be suspended in the air in the big PVC pipe, I have cut the elbow pipe in half ( to make 2 pipes with angle of 45°). I have also created a hole in the PVC pipe with the dimension on the elbow pipe to be able to fit the elbow pipe inside.
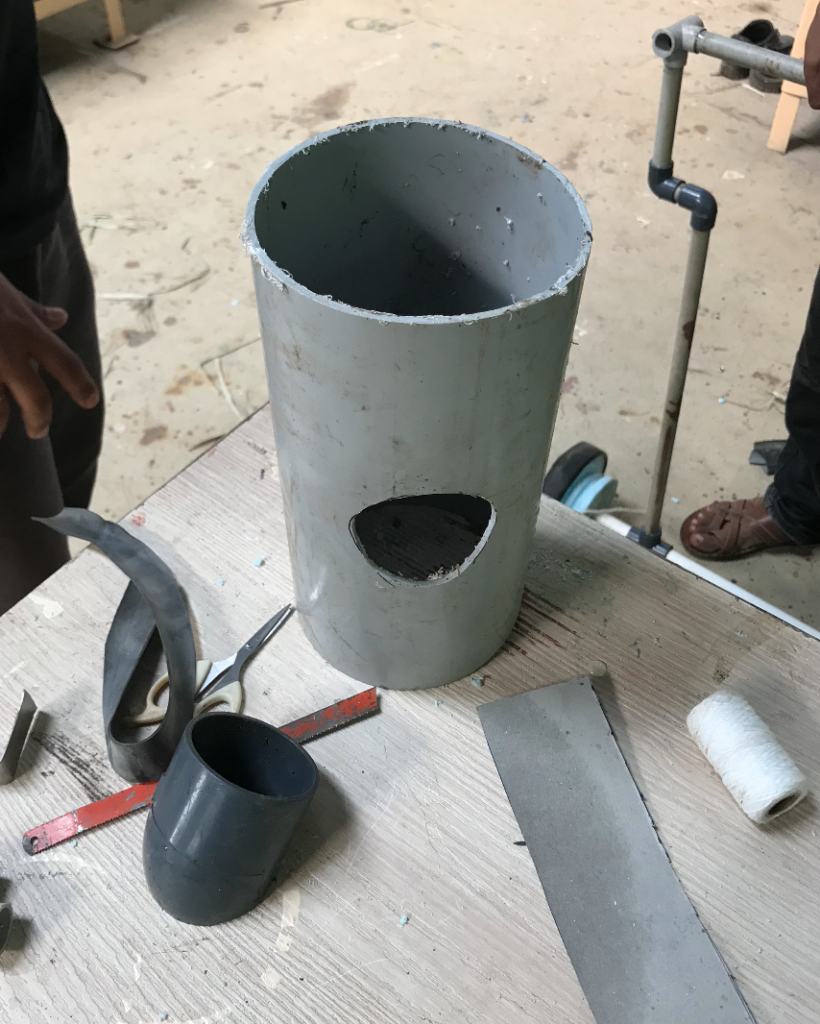
To fix both parts, I have used M-seal, a fixing material use for plumbing issues and waterproof solutions. A box of M-seal cost 10 ₹ and with one box you can almost fix 2 pipes. It’s easy to apply , its cheap, really waterproof , hold the pipes well but its really ugly. Overall its a good solution for fixing the pipes in our prototype, but we might have to think about something else for the final version.
3.2 Difficulties
The process took a lot a time to just fix 1 elbow pipe and I wasn’t satisfied with the result. For the hole in the big pipe we just did a circular shape hole, but the elbow pipe, because it is 45° angle cut, doesn’t have a circular profile, so both are not matching together. To fix both part we used a lot more M-seal than normally and the result is far from being nice.
On the paper, this idea of PVC pipe tower was good, just cut holes on the PVC tower and fix elbow pipes to hold the plants on the sides, realty was a bit more complicated, mainly because of the tools available we couldn’t cut properly the PVC holes.
3.3 Acrylic tower design
I was really demotivated by this PVC trial and decided to design a Tower with CAD software. By that time we had a lecture on how to use the different machines in FABLAB and I directly saw the potential of acrylic with the laser cutting machine. To design the tower I used SolidWorks. I only used CatiaV5 in the past but SolidWorks is not much different and the design was not so complicated.
The first thing that I realized is that acrylic can not be bend, so it is impossible to replicate the PVC tower. The design and to be change into a rectangular shape tower.


With this design, everything was shape properly and connect together perfectly.
Moreover, the cost of acrylic plate is quite high, and “Design is not just what it looks like and feels like, design is how it works ” – Steve Jobs. Our prototype didn’t have to look nice , it needed to be functional. So we didn’t cut those acrylic plate and I returned to the PVC pipe.
4. Choice of Pump and nozzle
Before jumping into another assembly for the tower, I wanted to choose the pump and the mister which could create the desire mist. According to the mister I will be able to set the height of our prototype ans the number of plant.
Why not the opposite ? True, it would more logical if I had set up my design and the choose the right pump/mister for it. The only problem is that here in Pabal you can not find everything you want, only a few shops are selling 1 or 2 models of pump and mister. You can buy from Amazon but its again more costly and you dont know if it will suit your system. Here at Vigyan Ashram we have a few pump and misters system and I wanted to test them first to see if it could match.
4.1 Choice of pump
Submersible pump
ADVANTAGES
- Cheap
- In the water, doesn’t take extra space
- Good for pumping , sprinkling system.
- Available here
- Quiet
- It never has to be primed
INCONVENIENTS
- The outer pressure is not high
- Seals can become corroded
- Can heat the water if overuse
Outside pumps
ADVANTAGES
- More efficient (outlet pressure is higher)
- Perfect for misting system
- Doesn’t heat the water
INCONVENIENTS
- More expensive
- Mostly available in Pune or Amazon
- Has to be primed
- Can be loud
- Not waterproof
- Take more space as it is outside
After doing a lot of research we saw that the optimal droplet size to grow plants with aeroponics was around 20-50 microns. To achieve that , you need a pump which can deliver around 110 PSI with a 0.4mm mister nozzle. Such system is really high quality and thus really expensive
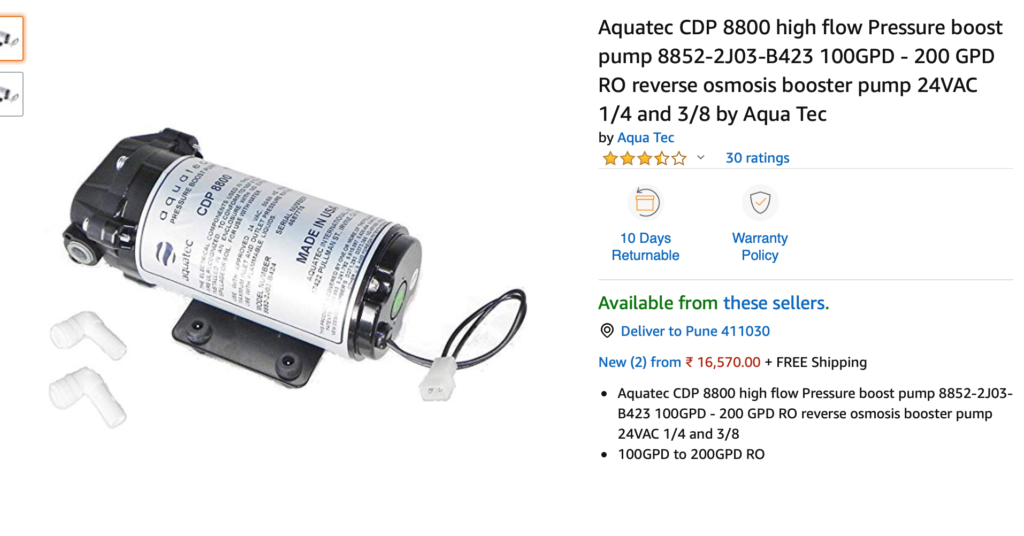
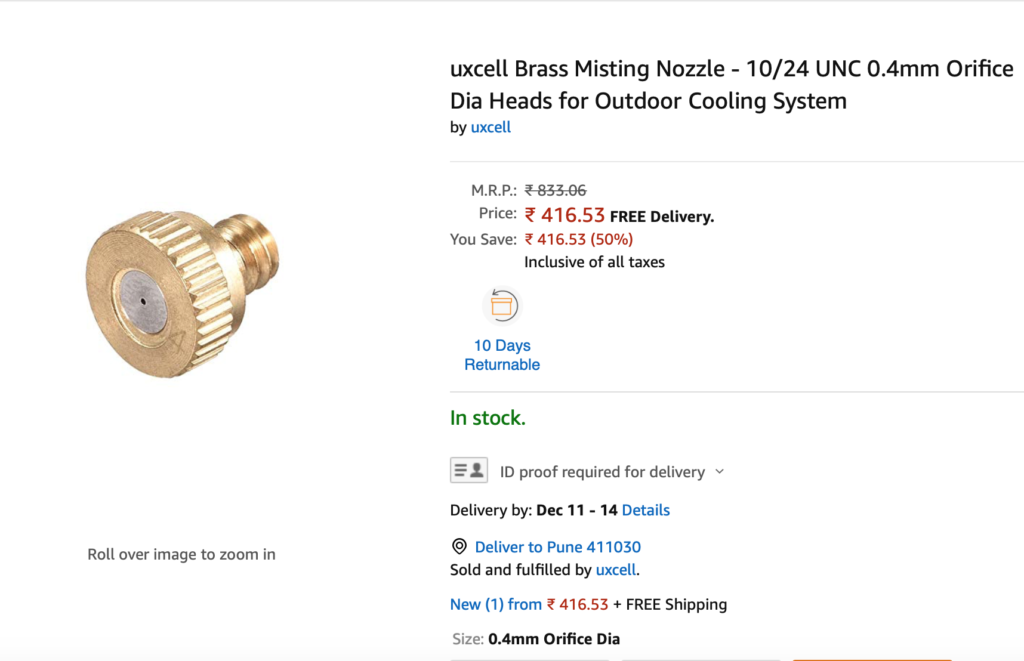
Such pump and mister were used by the Chinese guy in order to deliver those 50 microns droplet. I quickly realized that such a system would not be possible for us, first being too expensive and secondly because such a pump require a pressure tank. As we just wanted to make a prototype to test Aeroponic growing a few plant , this system was not appropriate.
In Vigyan Ashram, we have a few submersible pumps which are used for many purposes.
We started asking around and we got our first mister. It was looking like that :
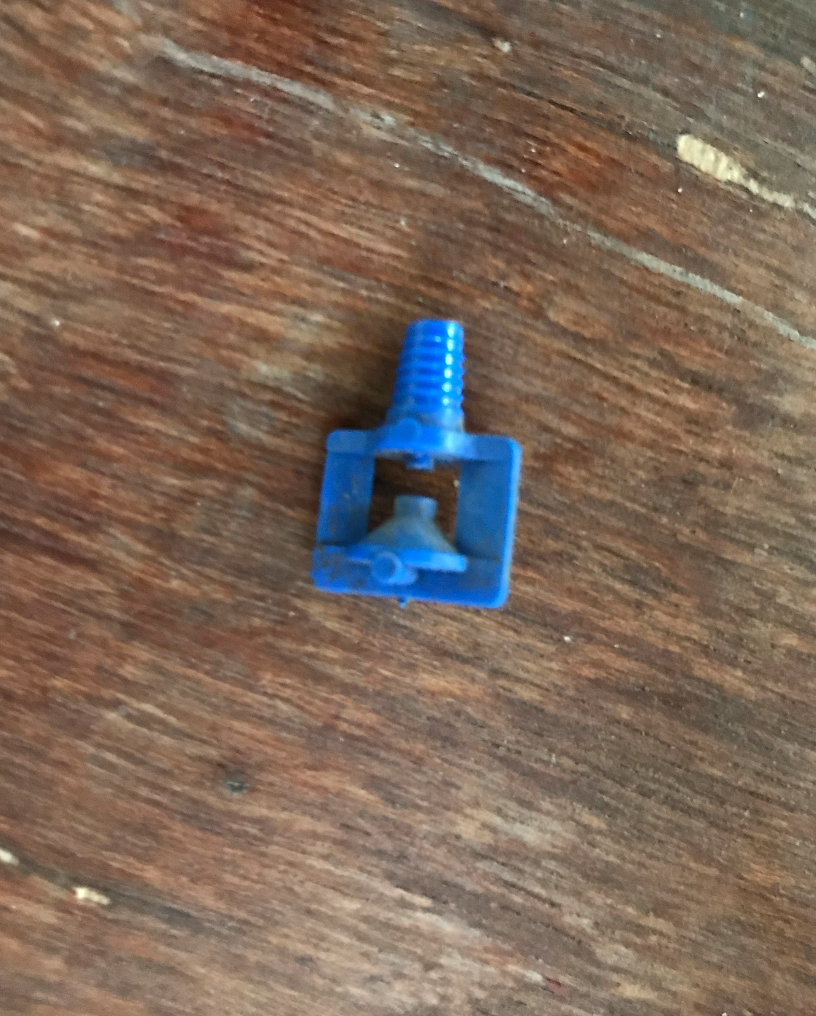
So we took this mister and some test on the submersible pumps available here. The results were catastrophic. First it was really hard to connect it properly to a pipe, it was always leaking somewhere. Secondly, the “mist” created by this mister was acting more like a sprinkler creating huge droplets. Peoples says that this pipe of nozzle is a mister … so it was probably because of the pump which didn’t create enough pressure.
Then, we found an electric sprayer backpack at Vigyan Ashram which was use in the Polyhouse.
After charging the battery and adding some water , we tested it. The mist created by this system was actually quite good and could be sufficient for our system.
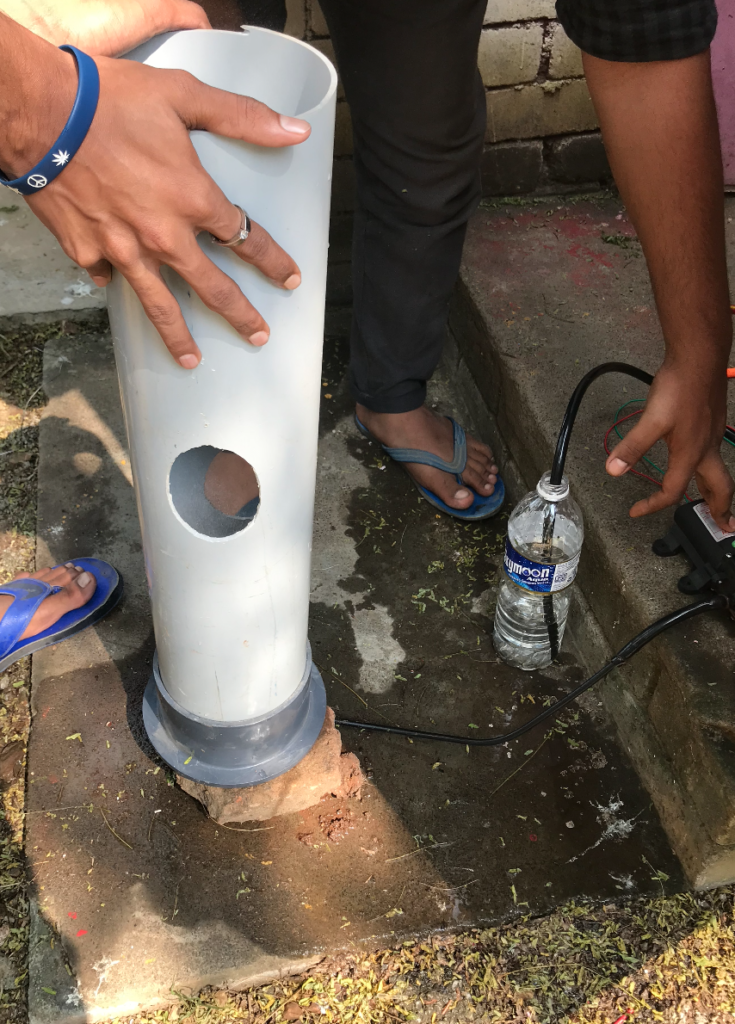
The next step was to test this sprayer in our PVC pipe. So we have put the mister at the bottom of the pipe facing upward. We wanted to see if the mist was spreading well and how high.
Results : The mist was well spread in the pipe and we measured a height of 60cm. Higher than this, the mist is not sufficient enough with this configuration.
As this sprayer system was enough for our Aeroponic tower, we opened it to see which type of pump it was using.
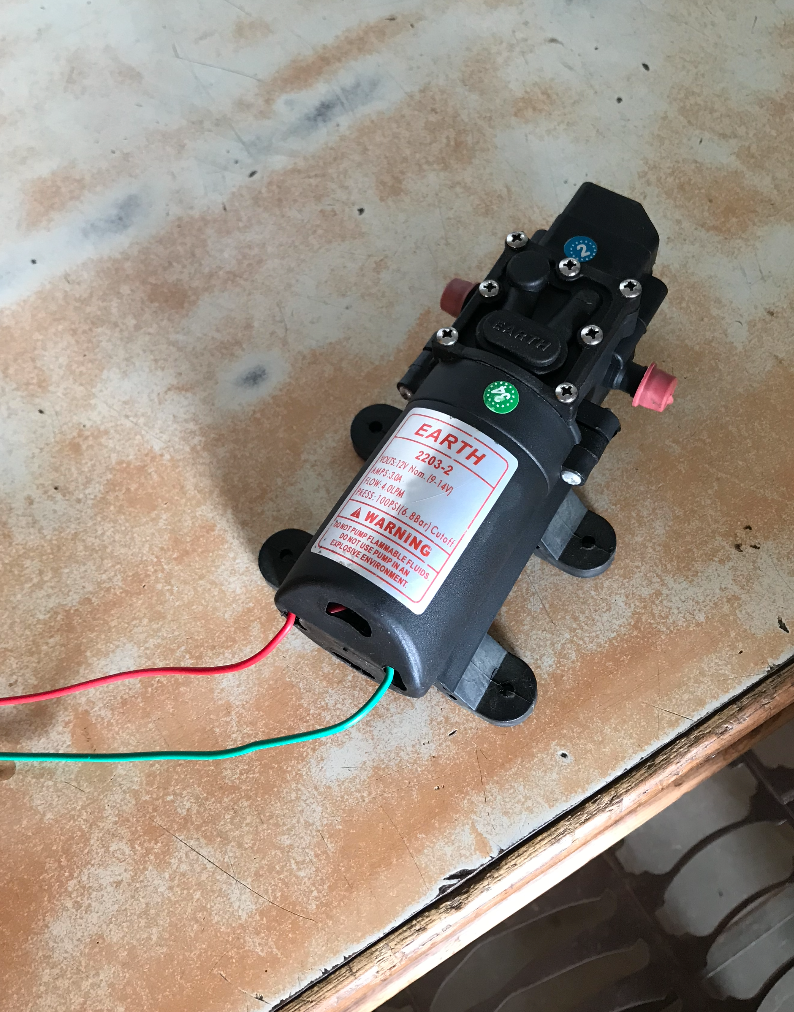
The pump used is an outside pump of 12V and 3 A which is suppose to deliver 100 PSI. I dont really believe this pump deliver an outlet pressure of 100 PSI but the mist created is sufficient.
As this sprayer was purchased in the village, we were able to find this pump as well, so we bought it for 700 ₹.
4.2 Choice of mister nozzle
Now that we had the pump, we needed the correct nozzle. The problem was that we couldn’t get the exact same nozzle as in sprayer because it was only sell in kit. All the shops in Pabal have no mister available, they only have the blue sprinkler as mentioned above.
We got the contact of another Polyhouse in an other Village. So we went there. They actually has 2 mister. The first one was the same as the Blue sprinkler above and the second one was like this :
We have tested there the two mister.
The first one ( blue sprinkler) did a pretty good mist, I was surprised because when we tested it at Vigyan with the pump the mist was not that good. But they were using a 1HP pump, which is very big. We conclude that to get proper mist with this mister you would need a more powerful pump than just the submersible one we had. Also, because of the design, the mist was more oriented horizontally the vertically. For our tower we need a vertical mist.
The second mister presented was the black one above. Just by looking at it, I knew it would be great. And it was, the mist produced by this was really nice and was going higher than the previous one.
The guy there was really nice and we left with the 2 mister to test with our pump.
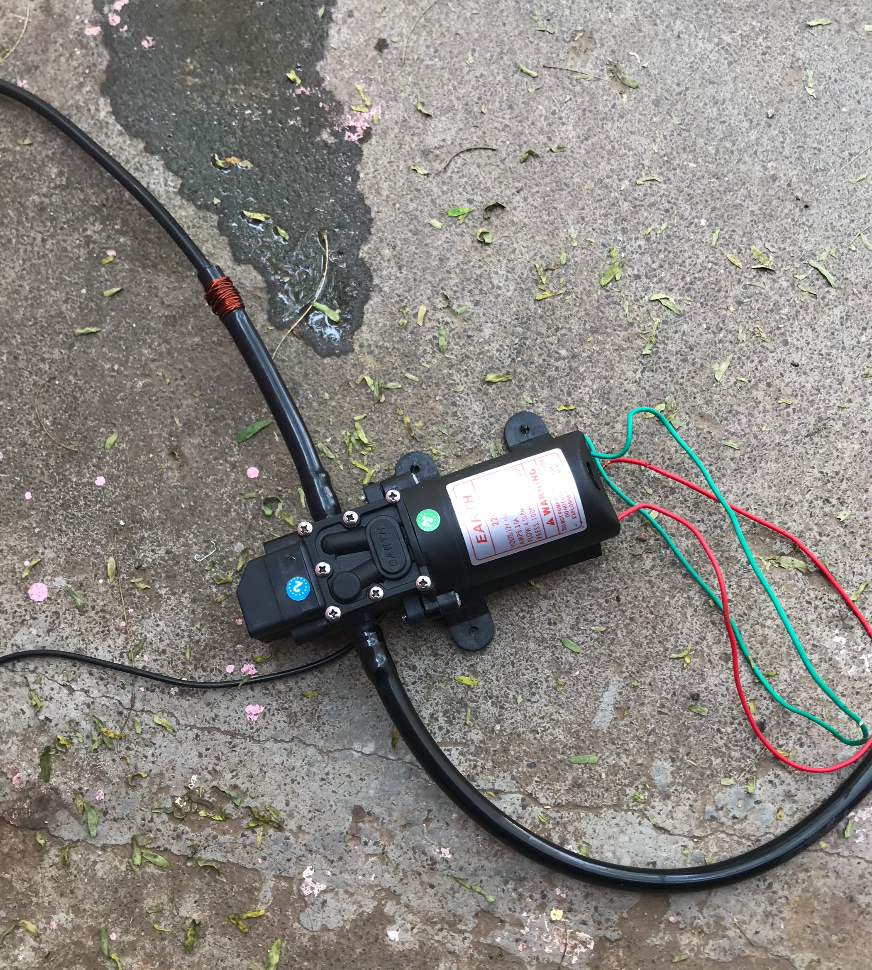
Back to Vigyan, we have test both nozzle with our pump. The connection between the pipes was quite hard to do and it was always leaking.
We tried several methods to tight the pipes together. First we used fin copper cable that we roll around the connection, but it was still leaking. Then we used thicker cable, the connections were really tight and it wasn’t leaking anymore, but the cable was starting to cut the pipe, it wasn’t a durable solution.

We went in the village and found those clips :
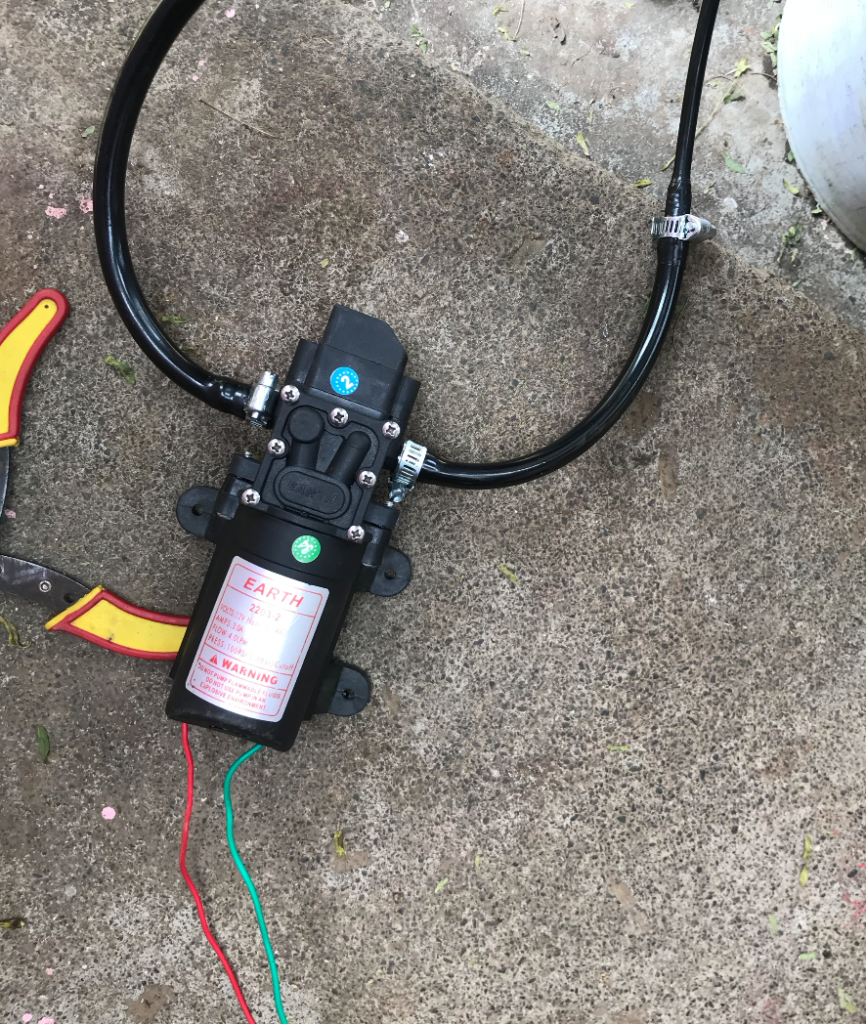
It was working perfectly, and it looked good. As you can see I also added some tape the to right pipe connection (outlet) to be sure that no water will leak.
4.3 Test
4.3.1 Test of mist
Now that we have the pump, the mister nozzle and all the connections are made, we have run some test. First we wanted to check if the height of the mist produce was sufficient when put in the PVC Pipe. We tried with a 60cm pipe. The mist at the top was quite low compare to the one at the bottom.
4.3.2 Test of time
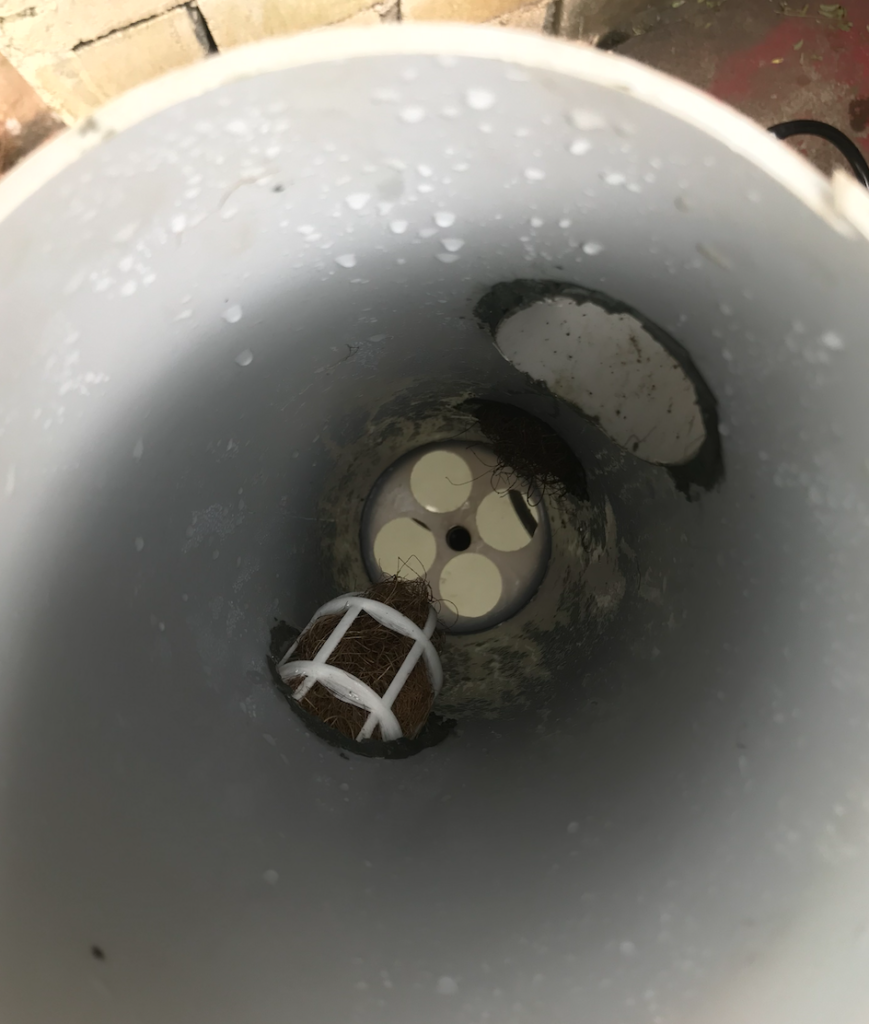
In order to determine the Time required to get enough mist we have put in the 3 holes available some coco peat to see if it was getting enough mist.
After running some test we concluded that with a misting time of 10 seconds, all the coco peat were getting enough mist.
Now that we know that the mist is sufficient and we have the misting time, we wanted to calculate the time to pump 1L of water.
We got he following results:
- 1L – 1min 50 sec
- Takes around 1-2 sec from start of the pump and the first mist
We realized that there was a slight delay to get the mist. This is due to the travel the water has to do in the pipes, and the first time there is no water in the pipes. But after, as there is still water in the pipes, the mist is created almost instantly.
4.3.3 Clogging
For now we didn’t experience any clogging issues with this mister nozzle. We have have to clean sometimes to be sure its always running well.
4.4 Conclusion
After doing a lot of trials and a lot of research, we found a working system, it is not perfect, but it will do just fine for a prototype. The cost of the components are quite cheap and they are working good. Moreover, the mist height is limited and for bigger system we would have to think about another misting solution.
5. Building the tower (2nd prototype)
We took the decision to come back to the PVC pipe. Obviously some improvement had to be done.
- Taking a shoulder elbow pipe is actually unnecessary, if we take a PVC pipe of the same diameter and cut it with an angle of 45°, the result is the same, and it is less cheaper.
- I had to find a way the cut the holes more properly, my main problem was that because of the non circular shape, both pipes were not fitting. I realized that I could make a 3D model of both pipes to see their respective profile and then cut it on paper with laser cutting machine.
- I decided to make 3 holes in the PVC pipe. The height of the pipe is now 60cm. For testing purpose, I decides to make one level for each holes and the upper hole will be on top of the upper one. I want to test if first the upper plant is getting enough mist and second if the the roots from the lower plants are not blocking the mist for the upper root.
5.1 The PVC Tower
Getting the 2 D profile of both pipes sections was actually not that simple , especially because I never used Sheet Metal in CAD software before. After a quick lesson on Sheet Metal design I started designing both parts, and here is the result :


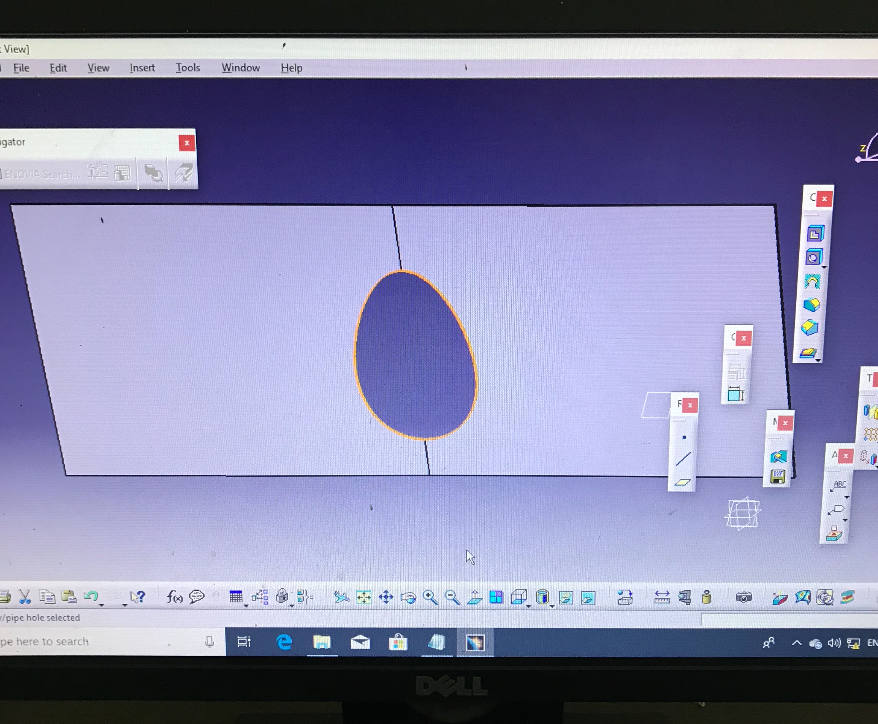
As you can see the shape of the hole is note circular , its more like an egg shape. The Second picture shows the shape of the small pipe profile in 2D. With those design I was able to send them to the laser cutting machine (using .dxf file)
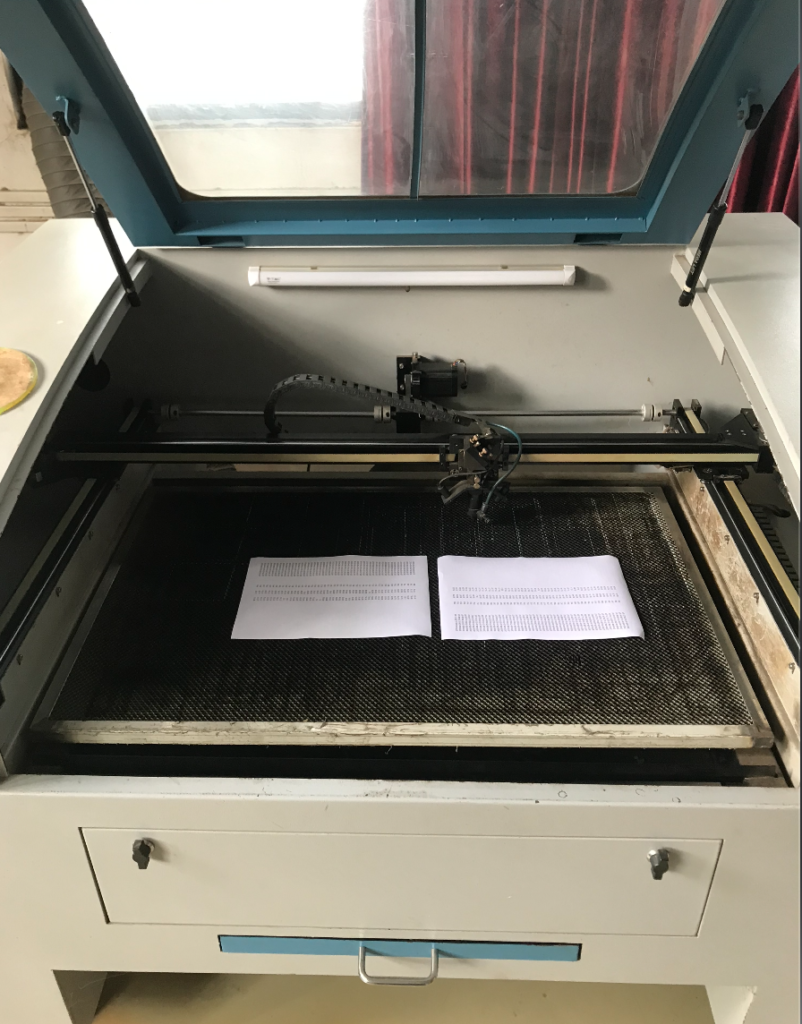
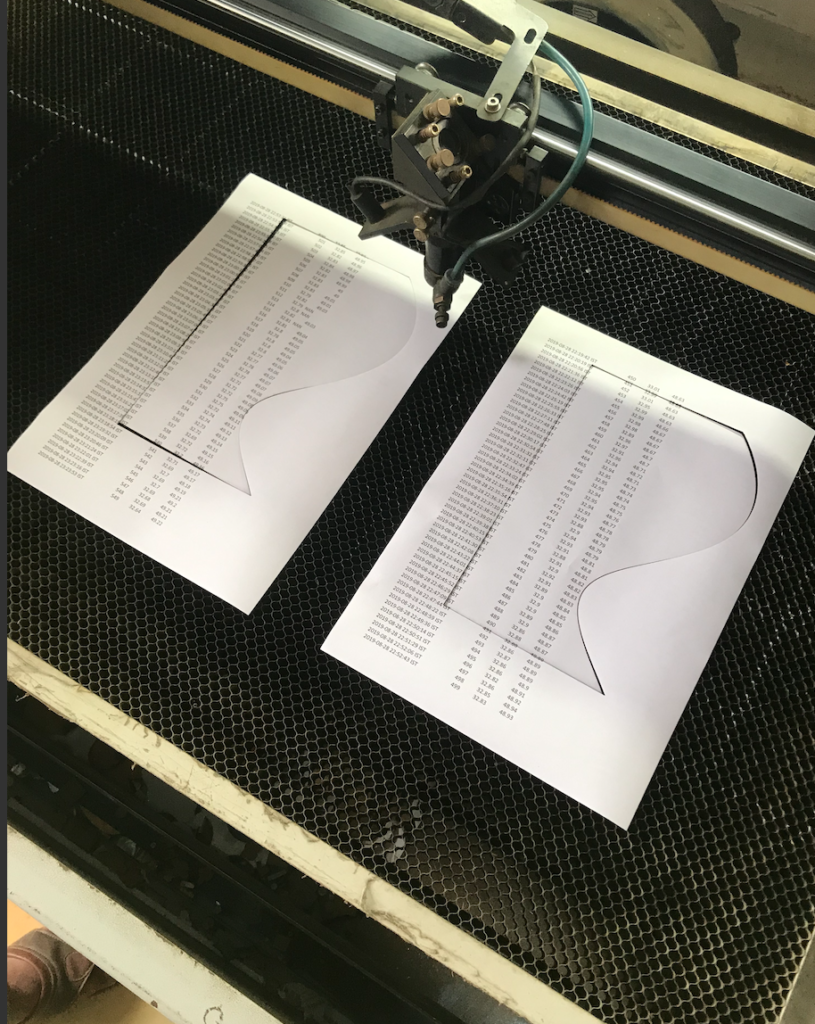
I have cut those shapes on paper to act like a stencil.
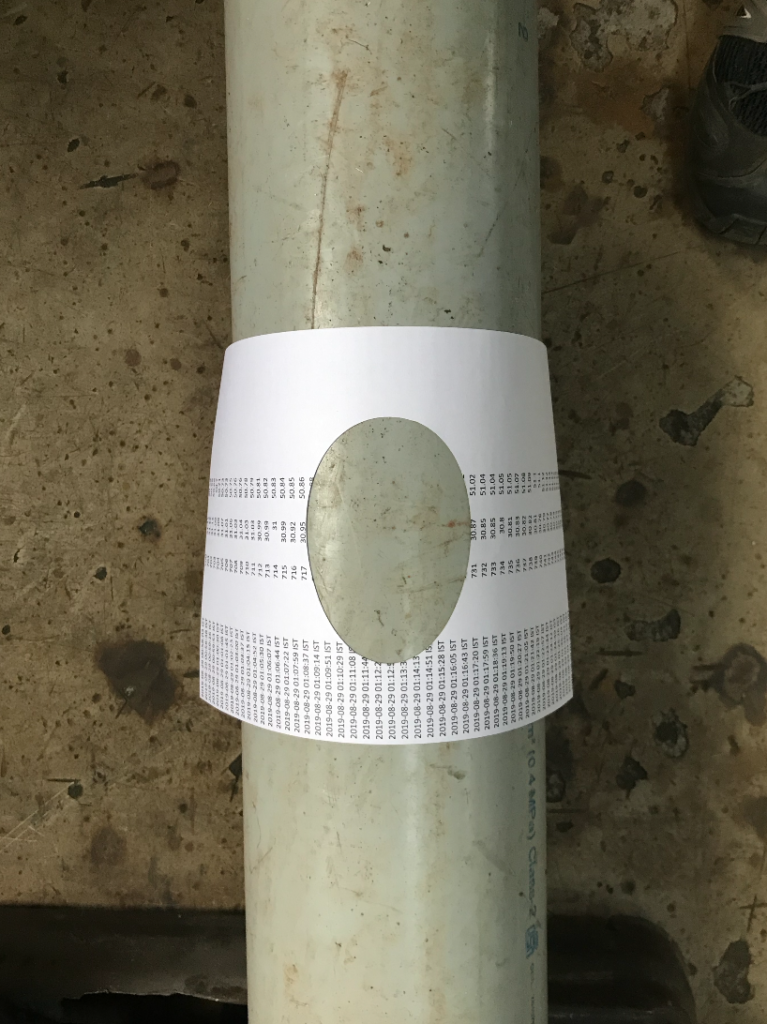
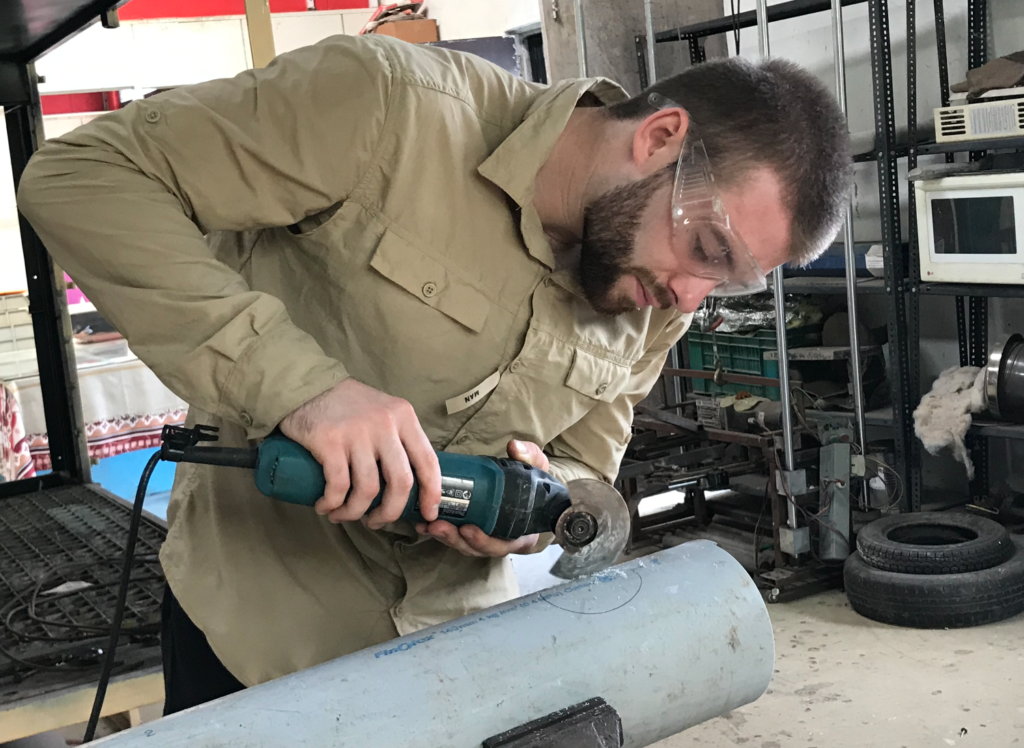
In order to cut those shapes , I have used this time a precise vibrating saw (makita) available in the Fablab. It was much easier and much more precise to cut with this.
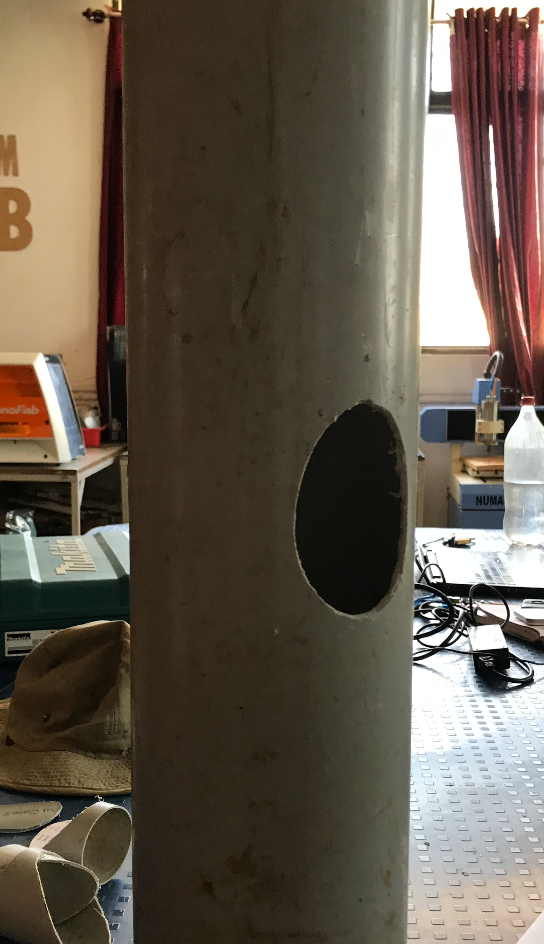
My little army
Now I have cut all the holes and my little army of PVC pipe is ready. To fix everything together I have use once again M-seal. But this Time, because of the design I was able to use only 1 M-seal package for 2 pipes (already a small improvement).
5.2 3D Printed cup
I had the idea to 3D print the cup holder for the plants. I made 3 holes in the pipes so I had to print 3 cups. After taking some measurement I jumped into Fusion360 for the design.
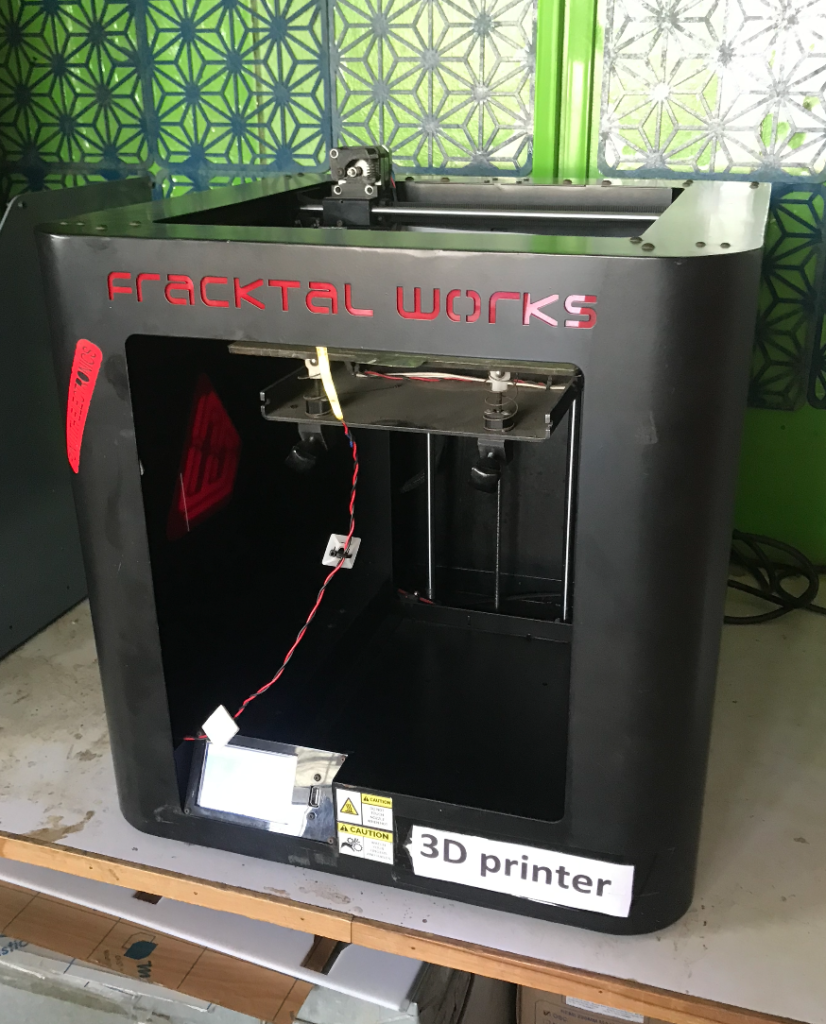
I used the following 3D printer.
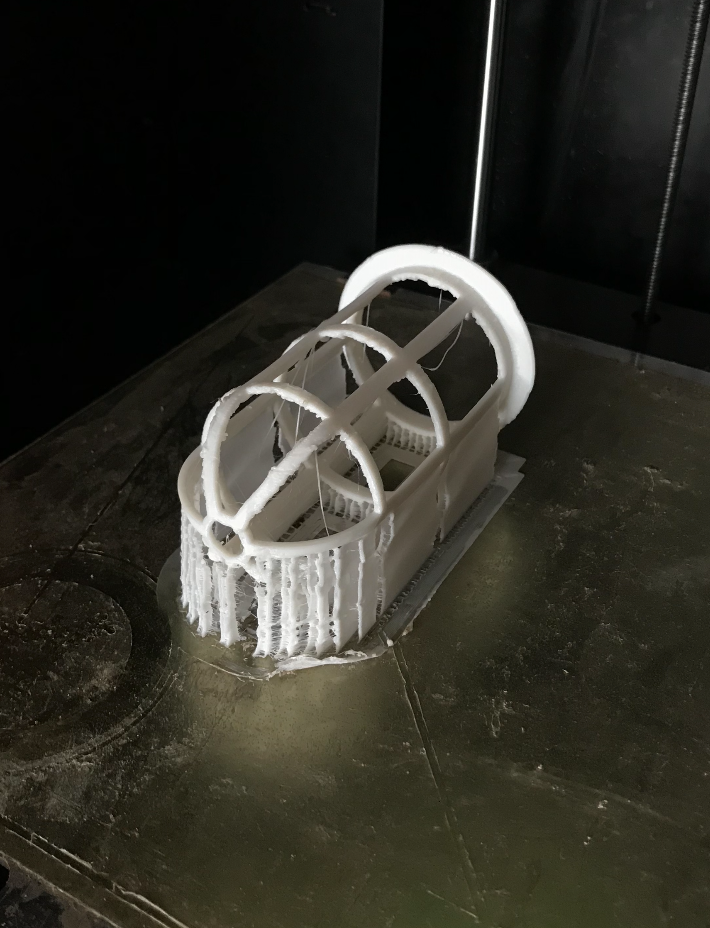
First you have to choose the orientation, I decided to print the cup Vertically because the print time was less than horizontally (3H40 instead of 4H) and thus use less material. Then you have to had a support.
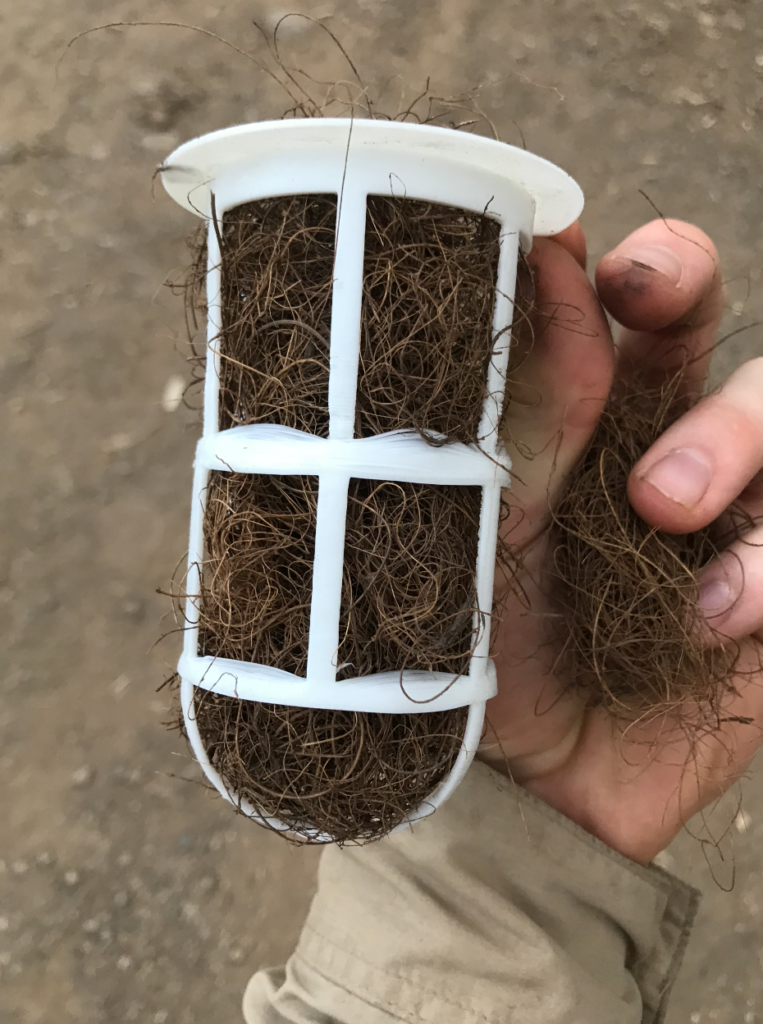
After removing the support, the cup was looking like in the second picture. Not perfect but I was pretty happy with the result. The dimensions were right and it was fitting well in the tower.

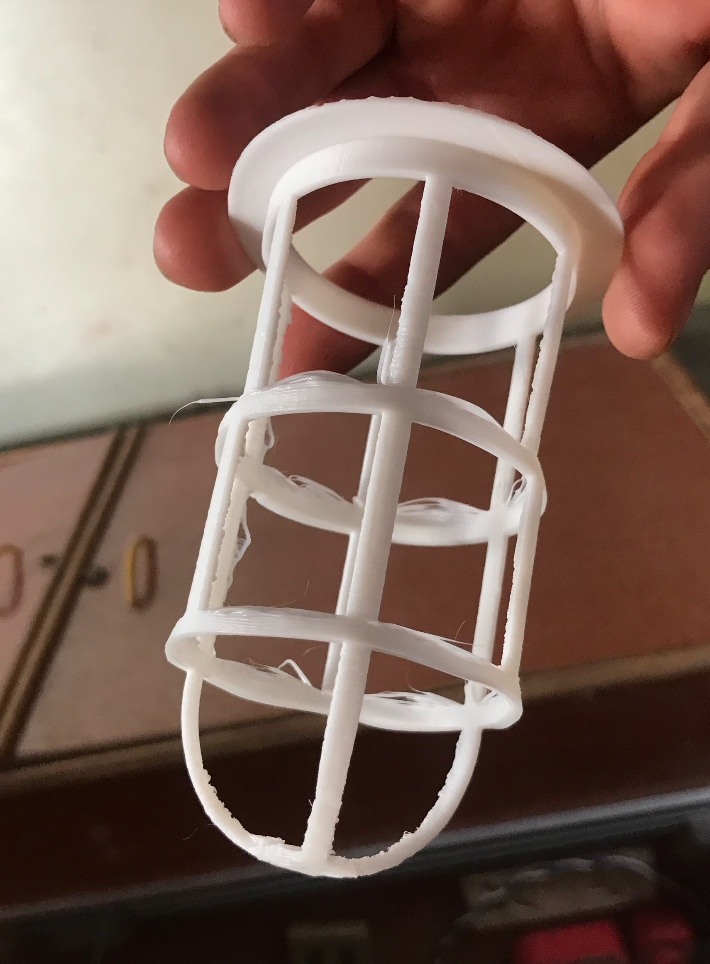
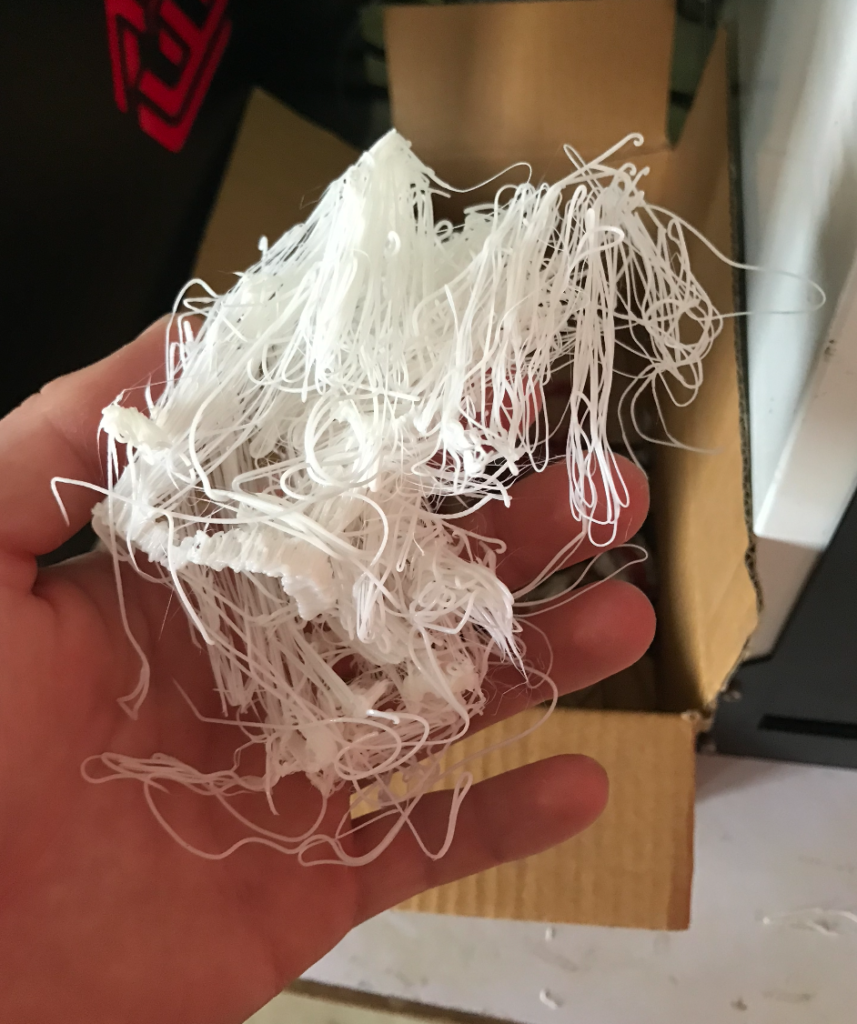
For the second cup I got told to print it horizontally, I didn’t want to do it because the first print was successful and the print time here was longer, so why changing ? In fact I was right, adding that the print time was longer, the final print was actually not that good, as you can see in the picture there was a lot of imperfections, probably due to the orientation and support.

5.3 Tower holder
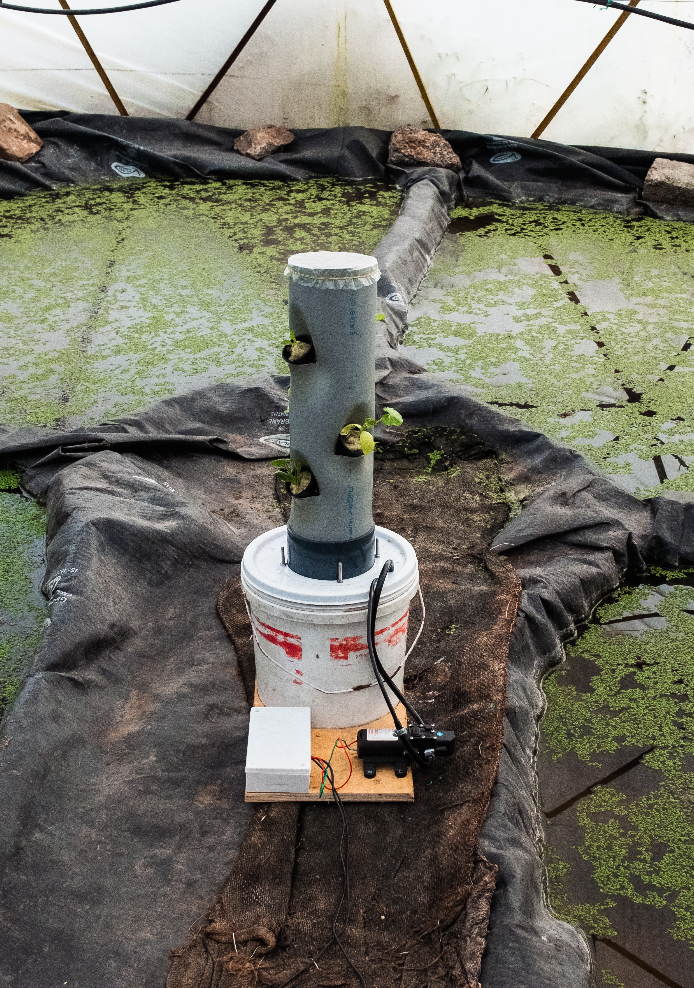
Now that the tower is set , we had to find a bucket to put the water in and a way to fix everything together.
5.3.1 The bucket
The first thing on our bucket list 🙂 was to find an appropriate bucket to store the water and support the tower.
We went to several shops in the village and we weren’t able to find any good bucket / gamela.
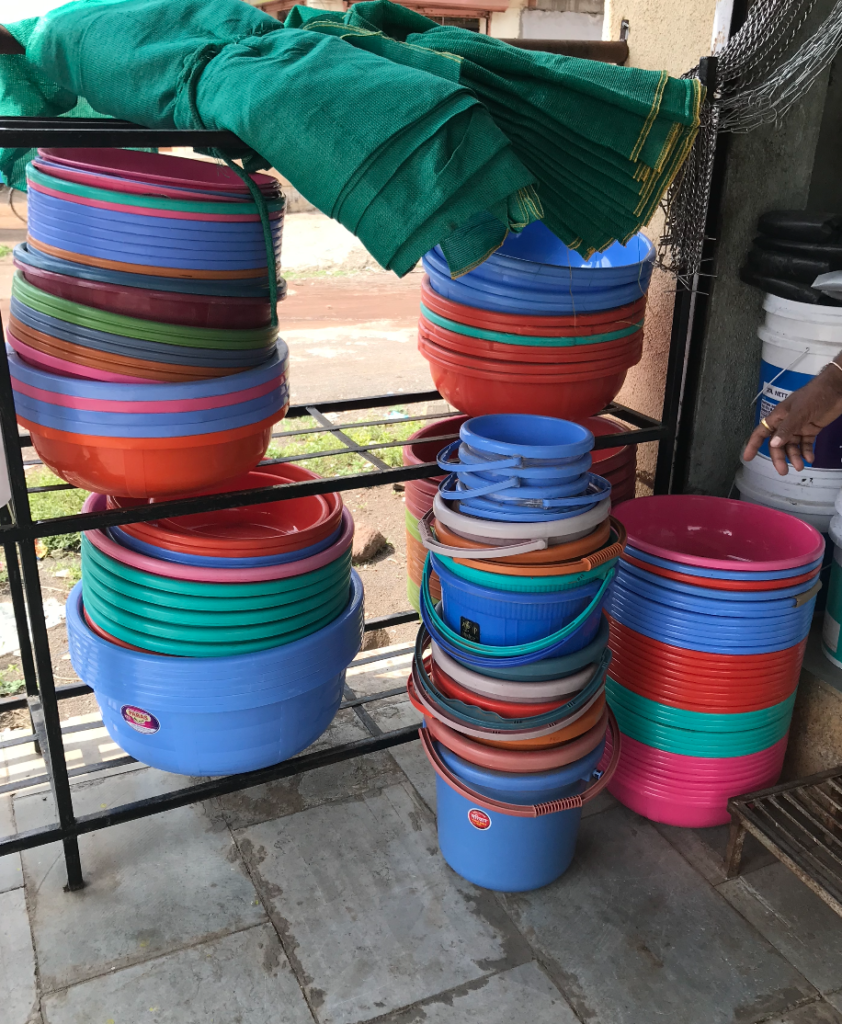
All the buckets looked the same. I wasn’t satisfied because I couldn’t find a way to put the tower on top of those buckets. I needed one with a lid.
Lucky me, I found this paint bucket in the scrap. And it was perfect, it was not too big , not to small, well maintained and it has a lid , just perfect.
After a quick clean it was looking almost new.

In order to fix the PVC pipe we found a pipe holder like this in the village. Make sure you take the right size … we had to go twice there.

The next step was to cut the lid to fit the pipe holder, we designed holes for screws.
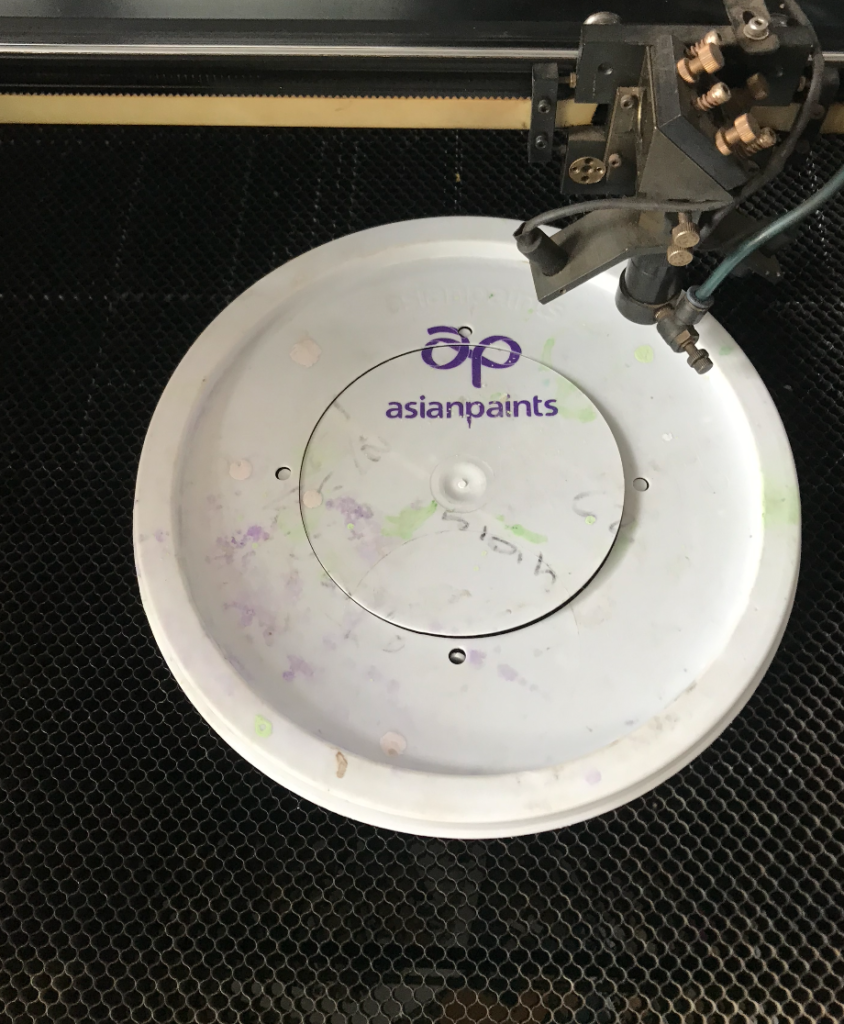
Because the lid is not very strong, we decided to add an acrylic ring.
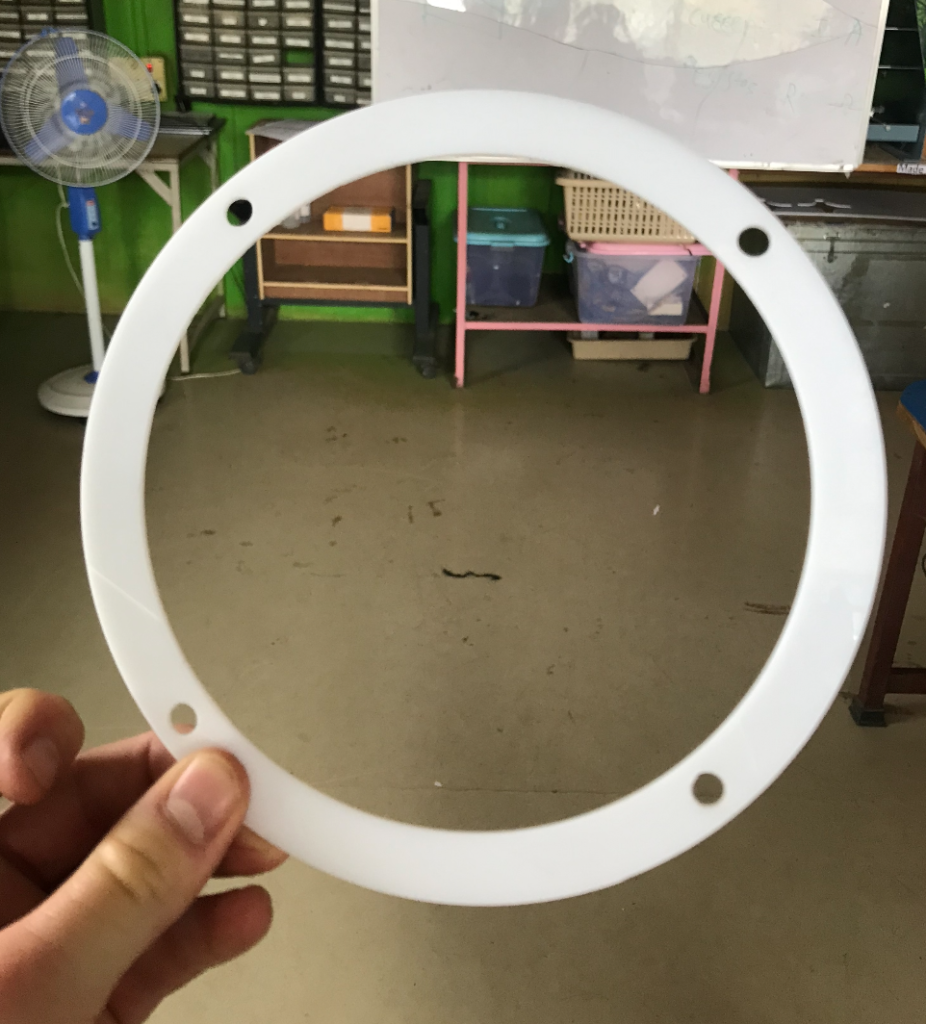
Once

6. Choice of light
I really underestimated the need of light to grow a plant. I knew the basic principle of photosynthesis, that plants leaves absorbs light to convert it into energy in order to grow. But I din’t know much more.
6.1 Basics of photosynthesis
As always, when I don’t know about something, I search online.
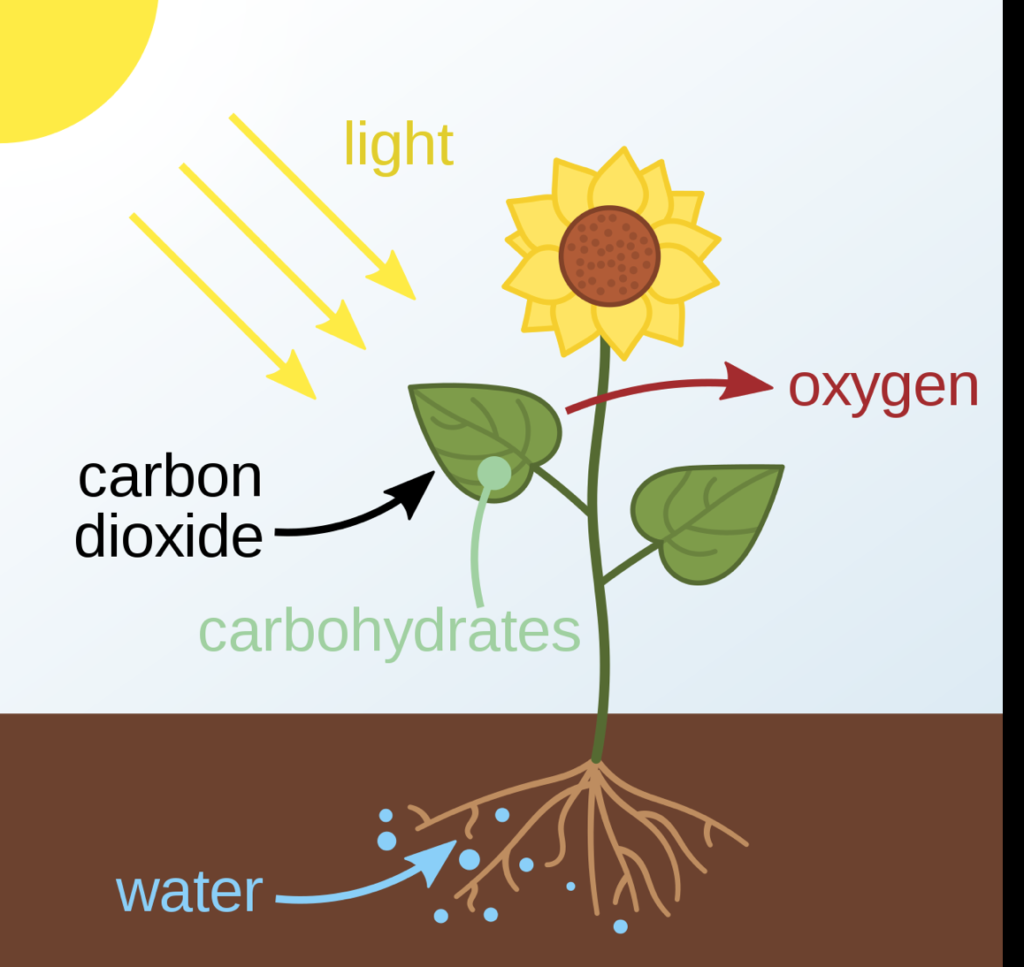
” Photosynthesis is a process used by plants and other organisms to convertlight energy into chemical energy that can later be released to fuel the organisms’ activities. This chemical energy is stored in carbohydrate molecules, such as sugars, which are synthesized from carbon dioxide and water – hence the name photosynthesis, from the Greekφῶς, phōs, “light”, and σύνθεσις, synthesis, “putting together”.[1][2][3] In most cases, oxygen is also released as a waste product. Most plants, most algae, and cyanobacteria perform photosynthesis; such organisms are called photoautotrophs. Photosynthesis is largely responsible for producing and maintaining the oxygen content of the Earth’s atmosphere, and supplies all of the organic compounds and most of the energy necessary for life on Earth.[4] ”
This is the definition of photosynthesis by wikipedia.
So we all know that plants are growing well under sunlight, but it’s when we want to grow inside that things are getting more complicated.
6.2 Artificial light
In order to grow inside, we need artificial light. Some parameters can have a huge impact on plants growth like light intensity and light wavelengths. In order to get the most out of our plant we need to understand those parameters.
6.2.1 Impact of wavelengths of the light
First we need to have a look at the visible light spectrum.

The visible light spectrum ( in nm) goes from around 400 nm with violet light to almost 800 nm with red light. Those are the wavelengths of the visible light than a human eye can see.
If we refer to the energy formula below, the lights needs the most amount of energy possible, so we can easily deduce that the optimal wavelengths are the lowest ones (Violet in the spectrum). But it is not that easy.

In fact we can see with the following graph that the rate of photosynthesis is very high for violet/blue light and red.
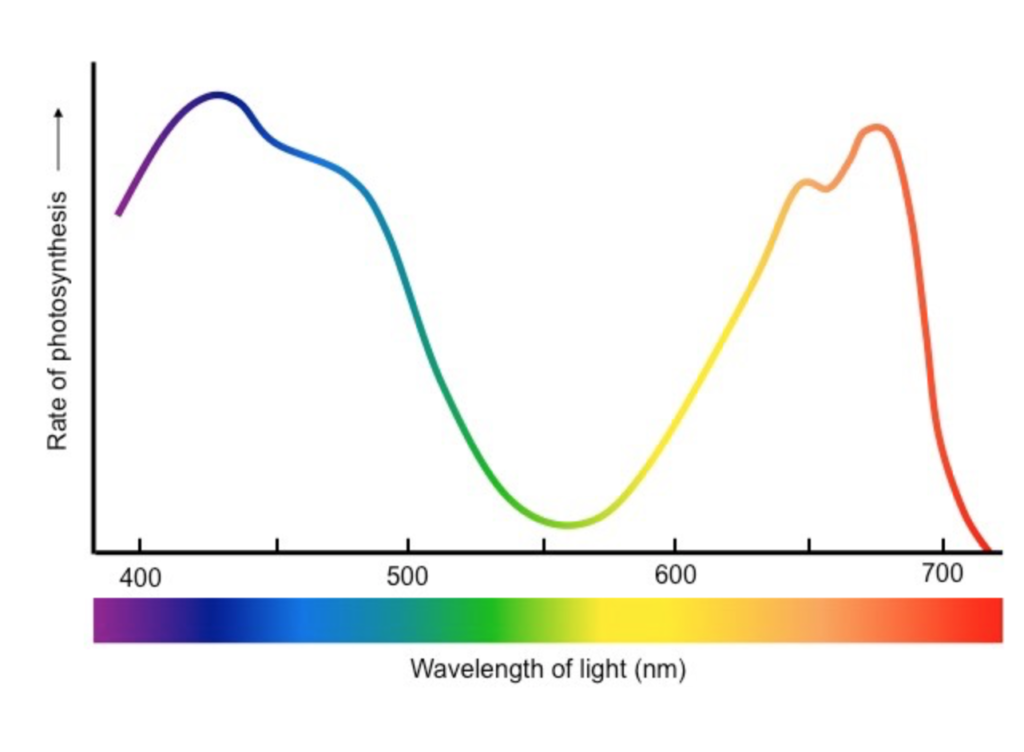
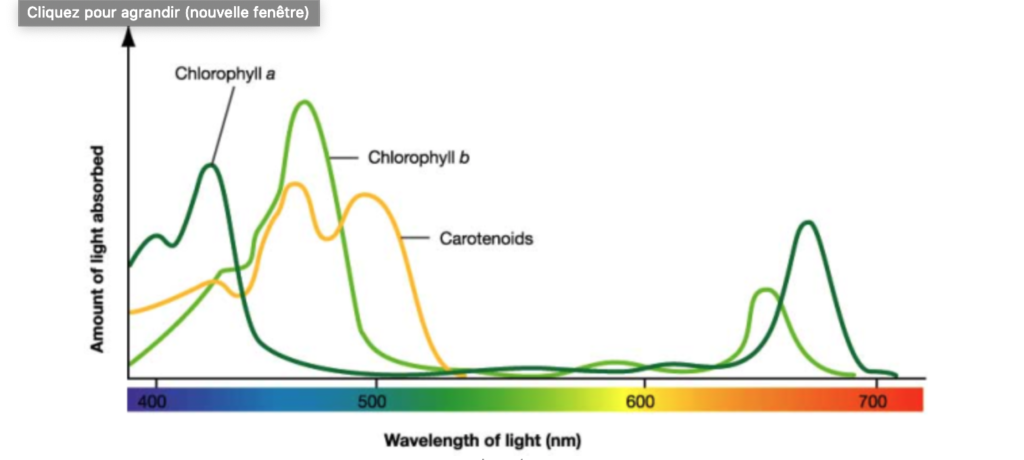
The effect of blue light on plants is directly related to chlorophyll production. Plants that receive plenty of blue light will have strong, healthy stems and leaves.
Red light is responsible for making plants flower and produce fruit. It’s also essential to a plant’s early life for seed germination, root growth, and bulb development.
Wavelengths outside red and blue range are not used by most plants and can contribute to heat build up in plant tissues. The heat can damage plants and even interfere with photosynthesis. At least this is what I have read many times. If this was 100% true, then how the plants could grow under the sun which produce a full light spectrum ?
The reality is a bit different, indeed plant can almost grow under any light source but the outputs will be very different.
The sunlight is very effective for photosynthesis but you can not control it and its sometimes difficult to get the perfect place for the plants. Contrary getting LED bulb is quite easy and you can grow your plants indoors. If you want to get the absolute best out of your plant in a short amount of time, then providing only BLUE/RED light is very efficient, its also energy saving since you only output the needed light.
But I have seen online many experiences showing the different of growth in plants under different types of light. And a full white spectrum LED light was doing really fine.
What has a lot of impact on the plant growth as well , maybe even more than the type of light color you are using is the intensity of light the leaves receives.
6.2.2 Impact of light intensity
Light intensity can have a huge impact on the speed and the way your plant is growing.
If the light intensity is too low then the plants may become leggy and very small.
On the other end if the light intensity is too high then the plants may not be using the light efficiently and thus waste energy. It ca also create leaf burn because the leaves are not able to absorb all the light.
Thus a good light intensity is necessary in order to grow the plants faster and healthier.
As it wasn’t complicated enough, the light intensity needed is depending on which plant you’re trying to grow. So i did some research about basil
It looks like that basil is growing the most by providing light intensity around 400-600 µmol m-2 s-1 (PPFD). PPFD is micromole per second per metersquare. It is based on the number of photons in a certain waveband incident per unit time in a unit area divided by the Avogadro constant.
I dont think we have an instrument at Vigyan ashram to measure the light intensity. For the system I think I will just have to take the right light source and look online depending on the power (watts) at how far you need to pur the light to get this range of intensity.
7. Choice of water
Which water you use in the system is very important in order to grow plants properly. There is two important parameters to categorize wether the water is good or not, its the PH level and TDS/EC value.
After doing some research, I found this information for Hydroponic basil :
- TDS: 700-980 ppm
- pH range: 5.6–6.6
- Temperature: 65–95ºF (18-35 °C)
Basil, like many culinary herbs, responds favorably to nutrient stress (i.e. low EC) by producing more of the alkaloids that are responsible for its medicinal properties (digestive and sleeping aids, antiseptic).
Erreur ! Nom du fichier non spécifié.
7.1 Water samples test
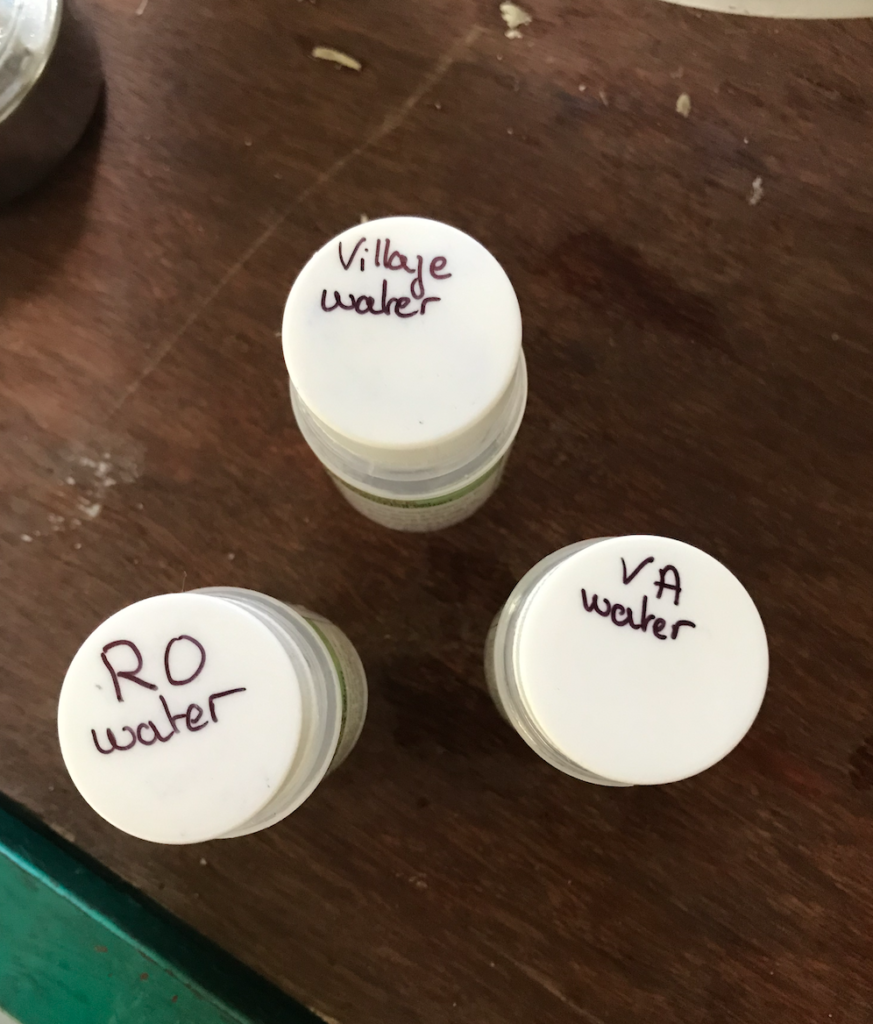
Before adding any nutriment solution to the water, we had to test the EC/TDS and PH of different water samples. We decided at first to test 3 water :
- RO water
- Vigyan ashram dream House filtered water
- Village water
We went to the lab to test our 3 samples. The PH meter was not accurate and wasn’t working properly this day. Wa also couldn’t calculate the EC/TDS value because the electronic instrument weren’t working. We had to wait in order to get a new TDS/EC calculator.
One we got the new EC/TDS test equipment we could finally begin our tests.
RO water
Test 1
Test2
Test3
TDS (ppm)
21
24
22
PH
7.01
7.02
7.02
Temp (°C)
24.9
24.1
24.4
VA water
Test 1
Test 2
Test 3
TDS (ppm)
175
192
188
PH
8.22
8.22
8.20
Temp (°C)
24.9
24.1
24.4
We had some difficulties calibrating the PH test equipment at first. It is a bit fastidious, since you have to first calibrate the PH meter with 3 buffer solutions ( PH 7 – PH 4 – PH 9.2 ) and between each calibration or test you have to clean with distill water.
We choose to not test the village water since this water is worst than the Vigyan ashram dream House filtered water. For our system we will use only RO water mix with a nutriment solution.
7.2 Nutriment solution
Because in Aeroponic you are growing your plants without soil, you need to provide the necessary nutriment in the water in order to give the plants the nutriment they need.
” The amounts of potassium (K) and calcium (Ca) are relatively high in the edible portion of the basil plant. For this reason, the ratio of K:Ca in the nutrient solution needs to be kept at a reasonably high level—close to 1:1.
While potassium and calcium are directly rated to the oil levels and flavor in the foliage, nitrogen (N) is essential for leaf yields and needs to maintained at all times, while magnesium (Mg) should be at levels of at least 50 ppm as there is a direct relationship between Mg content, yield and composition of the essential oils that make up much of the characteristic basil flavor and aroma “
Here at Vigyan ashram, we got a nutriment supplement N19-P19-K19 as shown below.
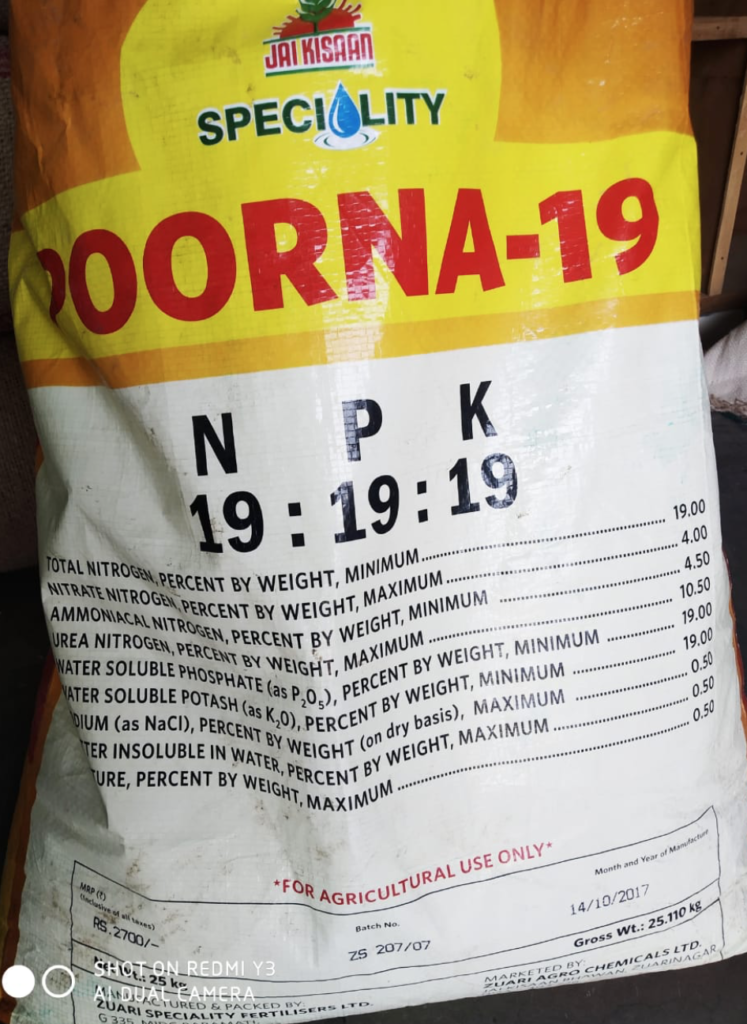
It is not quite exactly what the basil needs on paper, but we got told that this solution is good fro growing plants , and we were not gonna spend lot of money on nutriment solution for a prototype.
So we decided to run some solution test with this N19-P19-K19 in order to get a solution with a TDS around 800 ppm.
Solution
25g NPK /500ml RO
1g NPK / 100ml RO
1g NPK / 200ml RO
TDS (ppm)
2452
1484
876
PH
not tested
4.83
5.05
The Third solution was almost what we were looking for, the only problem was the PH level, it was too low. By doing those test we realized that the N19-P19-K19 is an acidic solution. In order to get a PH in between we will need to add an PH raiser.
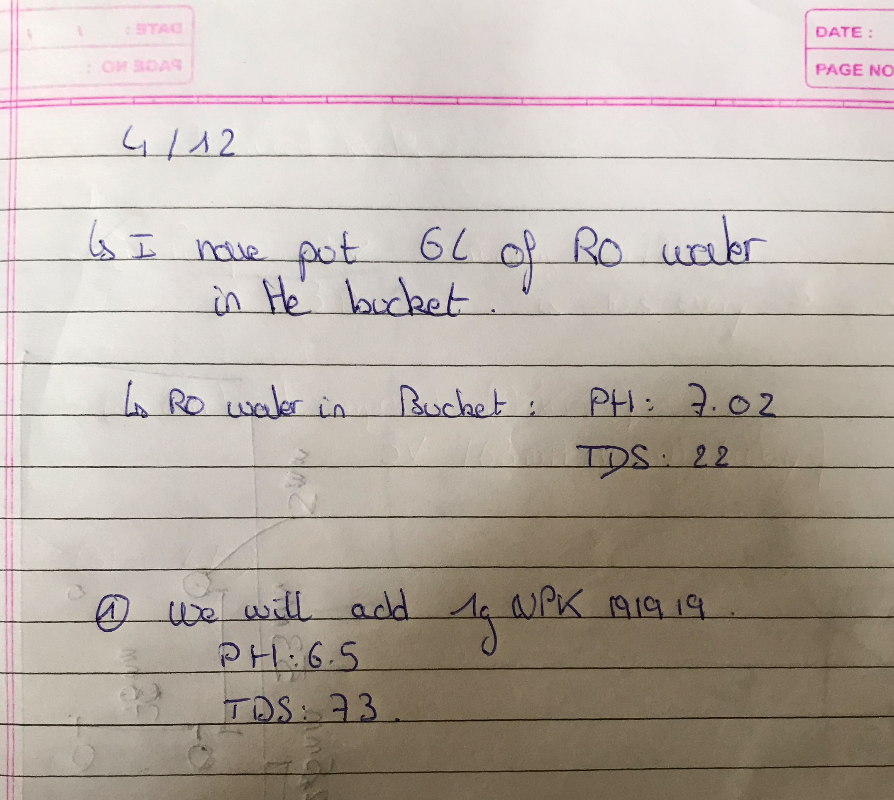
In the mean time we have put the third solution into the bucket. We needed 3L of solution, so we have put 15g of N19-P19-K19 into 3L of RO water and we got the following solution :
- TDS : 910 ppm
- PH : 5.10
The PH was a bit low but I wanted to try without adding any PH raiser. I have also read that Basil can be grow at low PH, but should not be less than 5.
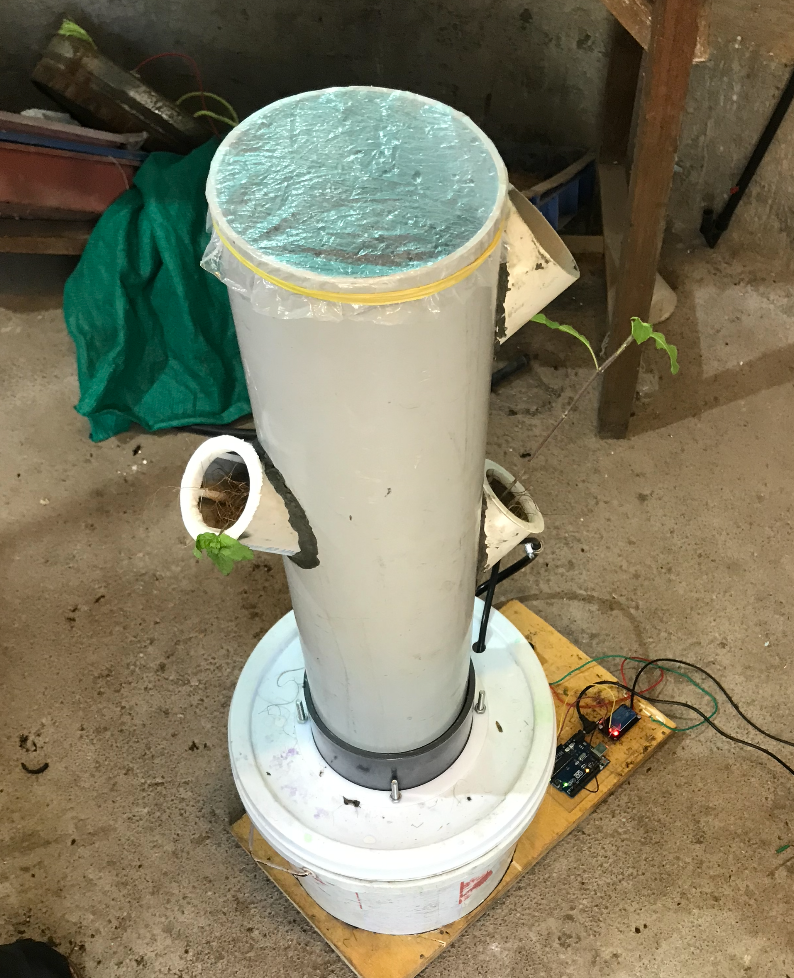
8. First trial
The tower prototype was now completed. But we had 2 major issues. The first one was were to put it to have a good growing environment and the second one was the light.
Here at Vigyan we dont have powerful LED Bulb/ panel sufficient for growing inside plants. We didn’t want to spend a lot of money to build a perfect environment (temp/humidity/ light) for just the prototype… and maybe we were wrong.
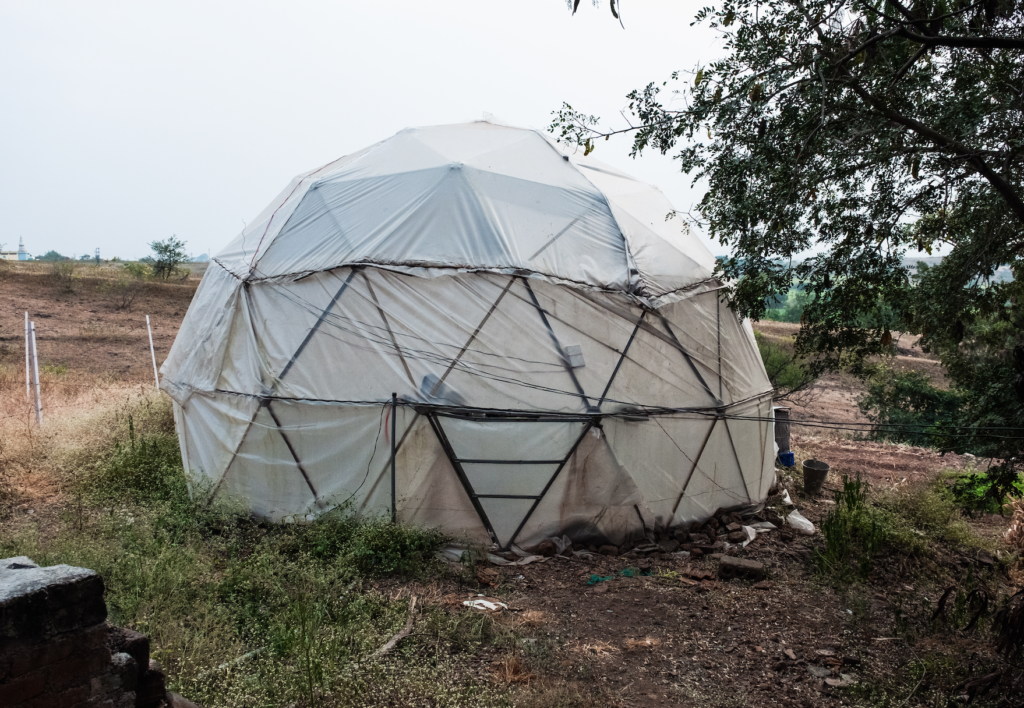
First we have decided to but the Prototype in a dome (BSF dome) under a 9W LED bulb (which is obviously to low). The light was a white light ans to recreate a Blue/Red light we wrapped the LED Bulb with Blue and Red gelatin paper.
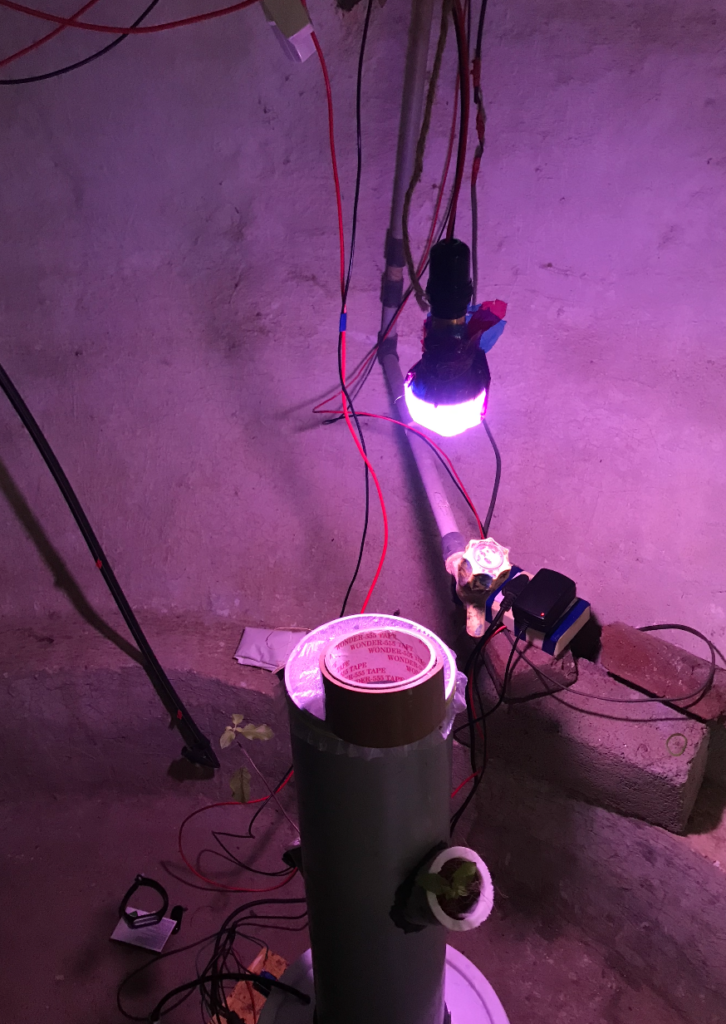
The plants were first growing in the dome for 4 days with normal water and some leaves started actually growing.
But then after 4 days we added the nutriment solution to the bucket, the TDS raised from 20 ppm to 970 ppm and PH fall from 7.03 to 5.10. We also placed the prototype outside because there was some power issues in the dome.
After 2 days the plants were starting to die …
We had a talk with Dixit Sir who explained us more about Osmosis and reverse Osmosis. Basically there is a membrane in the roots which allow the plants to suck water and to use the nutriment, by changing radically the solution, the osmosis couldn’t happen and even if we were misting the roots, the plant was not using any water. In addition we have put the plants outside in direct sunlight, where the temperature was really warm, so they got dehydrated really fast.
I also realized that after a week the 3.5 liter of water in the bucket were gone.
The last thing that I noticed is that the roots were always really wet and we could see big droplets on it. I have read that putting a high misting time is not necessary better for the plants. Because by increasing the misting time, you give the roots more mist and this mist is sticking together to form bigger droplets, thus you loose the fin water droplets you were looking for. Also by misting more, you allow the water to evaporate faster.
There was also a problem with our plants. We directly took Basil from soil, with the roots, cut some leaves and putted it in the system. So we changed suddenly the growing environment which is not good.
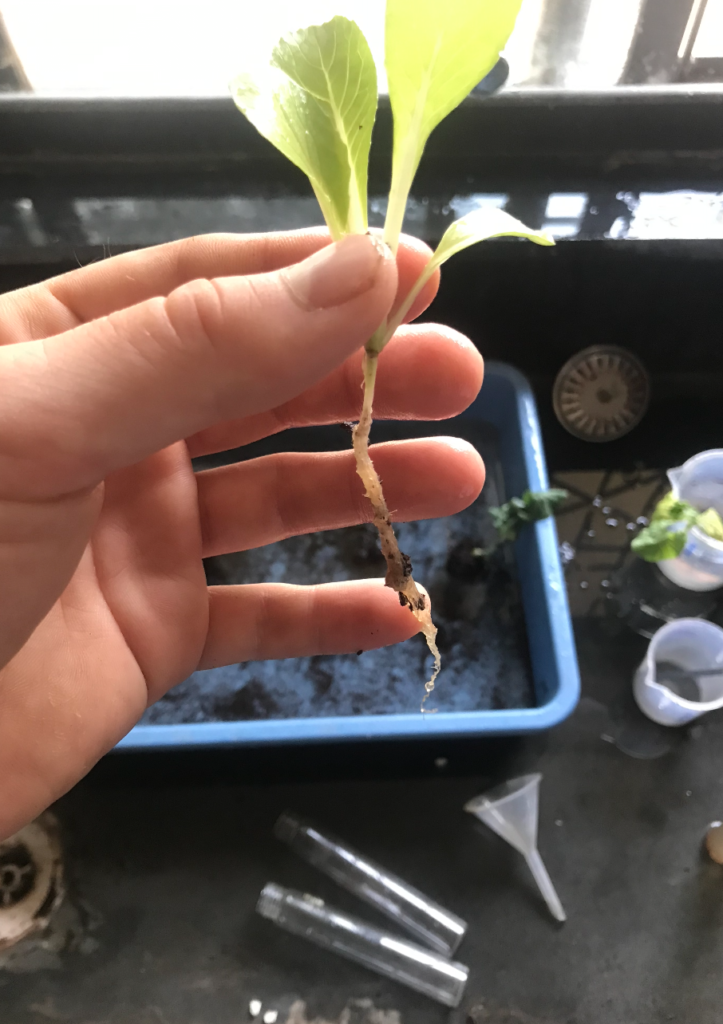
We learn from our mistakes, and after some research I have see that for Aeroponic system you need to grow form the start without soil you plant and put it in the system after 1-2 weeks of growing when you have nice thin white roots coming from the bottom.
I have then decided to put some Basil in pots just with water and wait at least a week to see if I could also get those white roots.
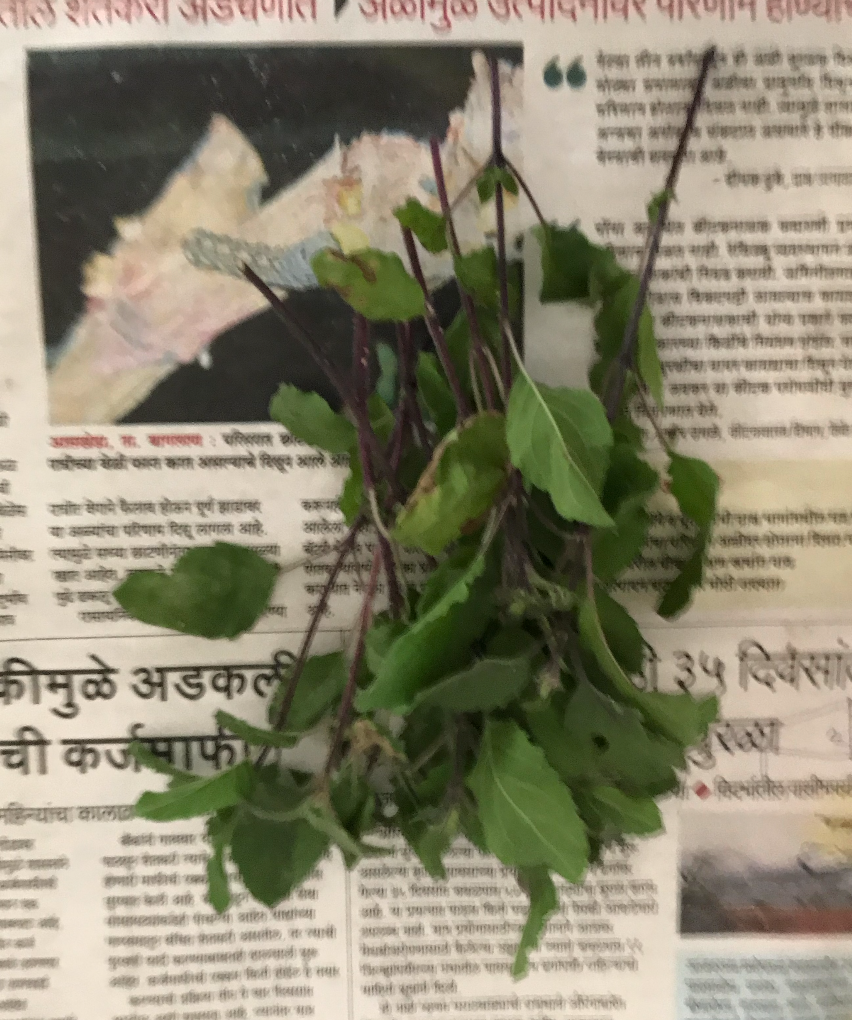
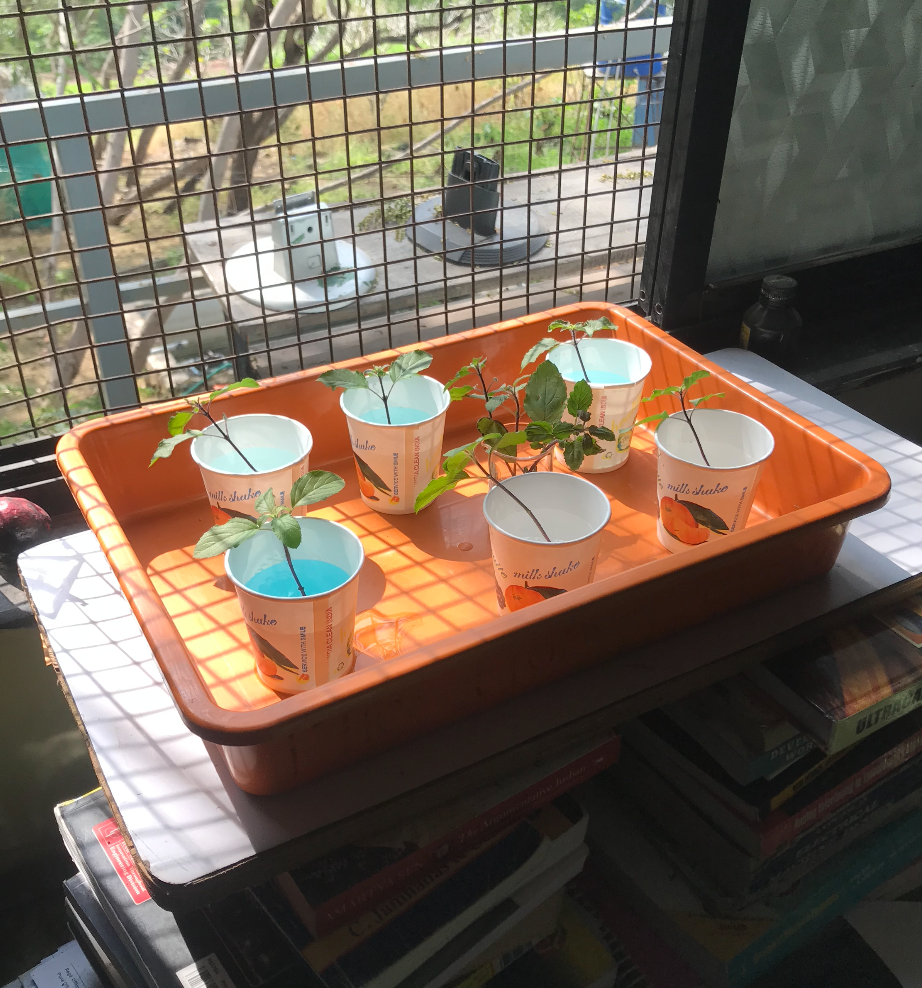
9. Second Trial
9.1 Improvements done
9.1.1 The Tower
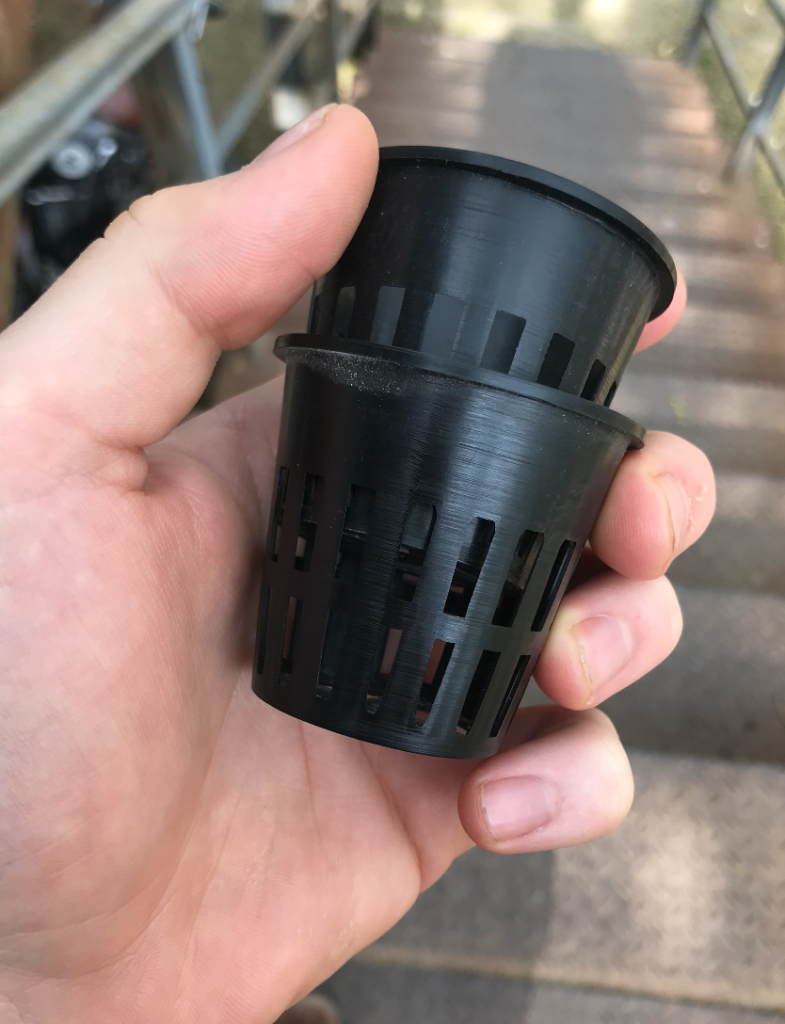
I wanted to change to tower, I found that the tower was too high for only 3 plants. The 3D print of the net cup was taking to much time so we ordered online some net cup for only 340 for 30 cups.
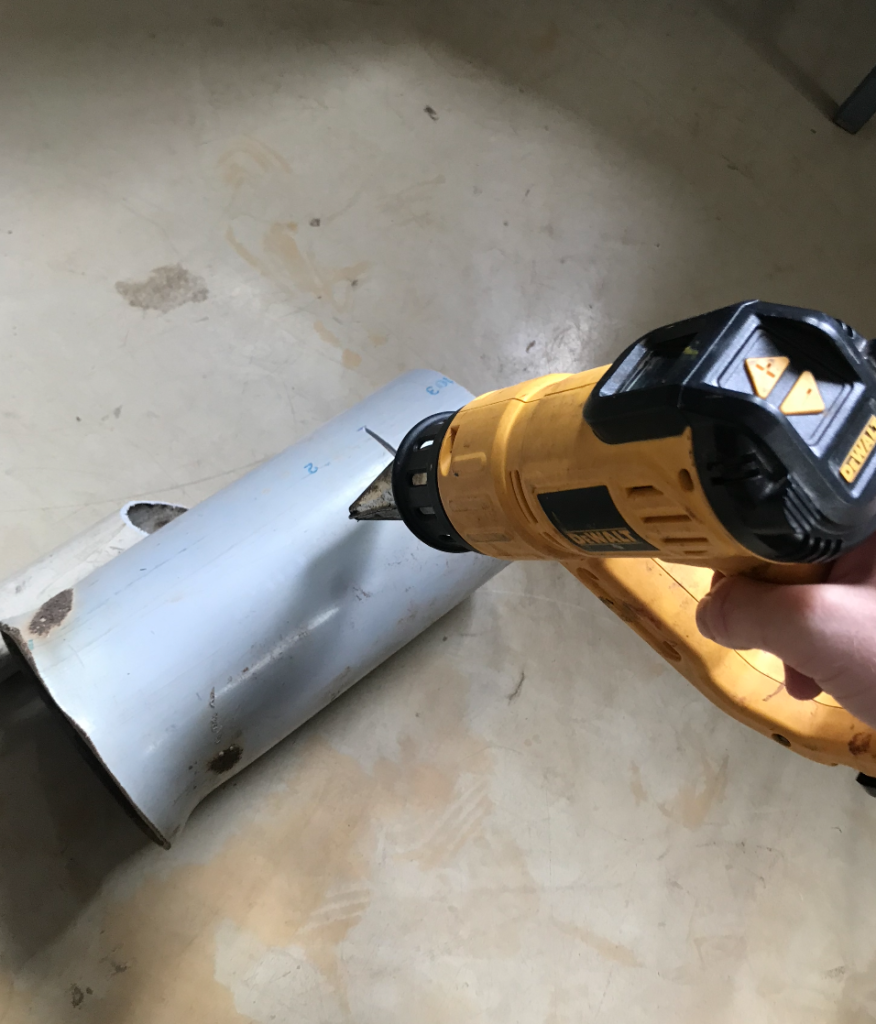
I have seen on a you tube video that a guy was making holes in a PVC tower with a hot gun and a cylindrical tube. I wanted to try the technique since you didn’t need to get the pipe properly and there was not assembly involved. I made sure that the holes I created were fitting the 2 inches net cup we bought.
I have first made some trials on a small PVC to get the correct technique.
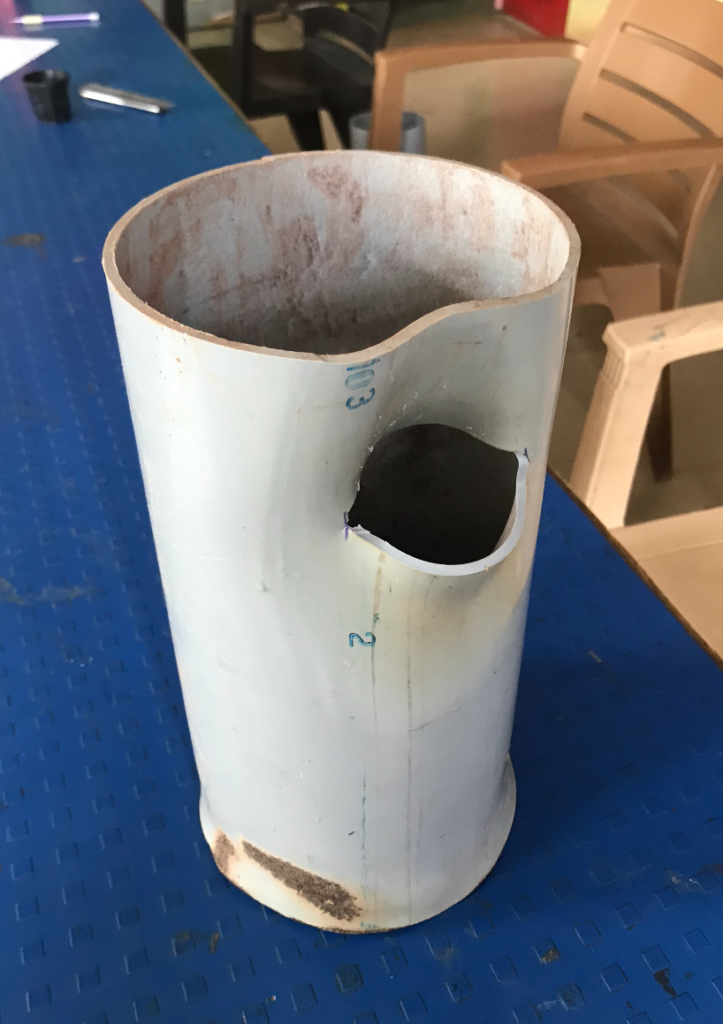
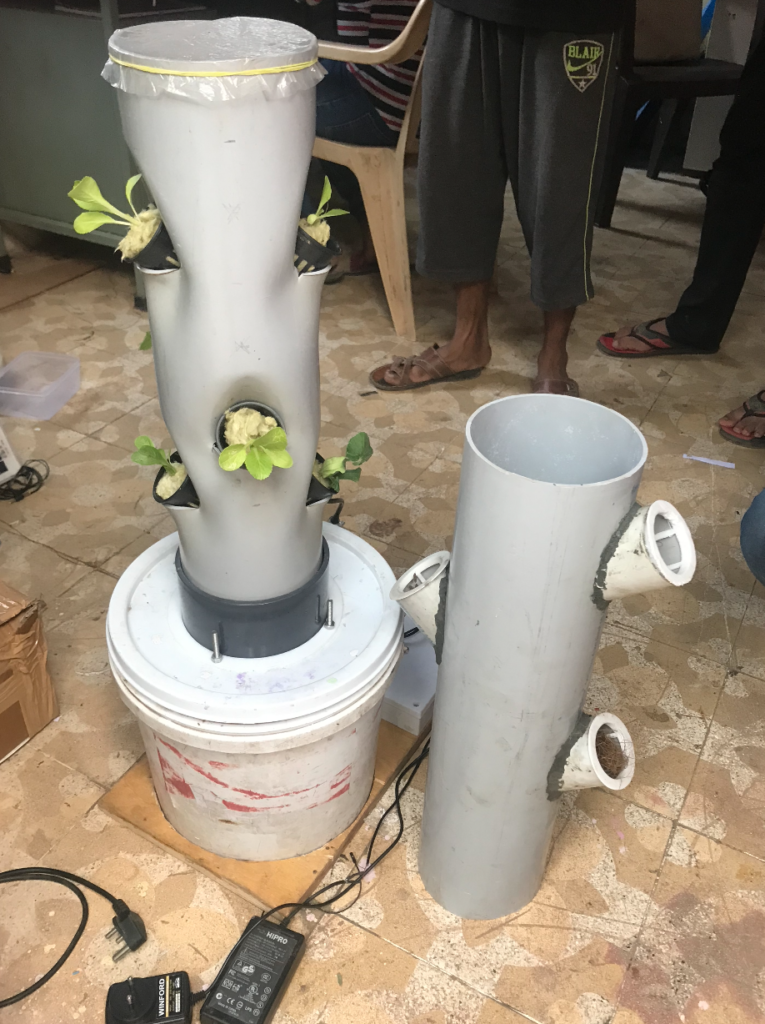
Here is a comparison between the new tower (left) and the old tower (right). A huge improvement have been made.
9.1.2 The water solution
I decided to add just a tiny bit of N19-P19-K19 to not change the growing environment too much, I will add more and more during the growing process.
9.1.3 The environment
As I was talking with Bhanudas, he advise me to put my system in the Azolla dome. Because of the location , the dome gets sunlight all day, the temperature is warm and the humidity is high. The conditions are good for our system.
I went to the dome with him and the sensors were showing a temperature of 27°C and a humidity of 67% at 12AM (it was particularly sunny that day). We will have to see if the temperature Indies the dome is not too high during a sunny day.
I will try to take a pictures of each plant every day at the same time to see the growth.
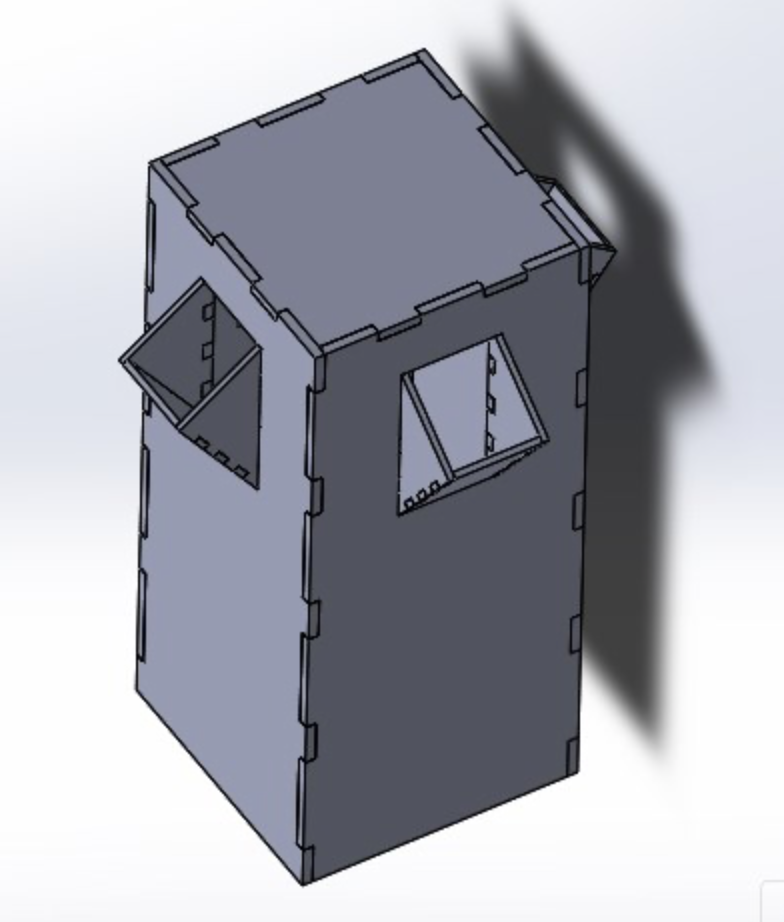
Because of the new environment, we had to cover the electronics. I designed and laser cut an acrylic box to be sure that the electronics are cover from humidity and water.

9.1.4 The plants
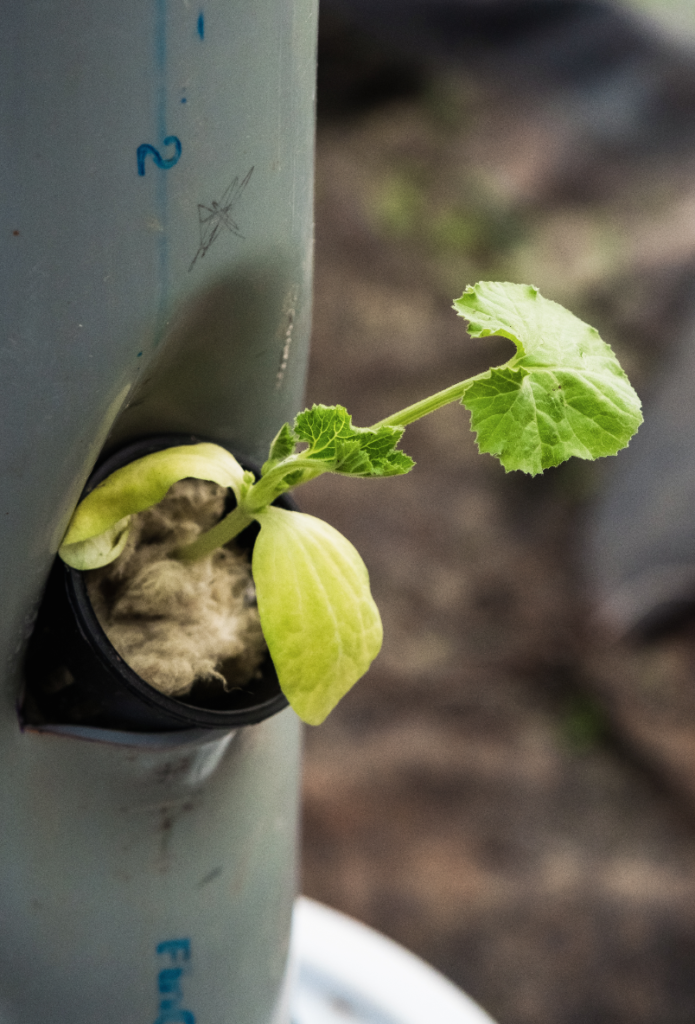
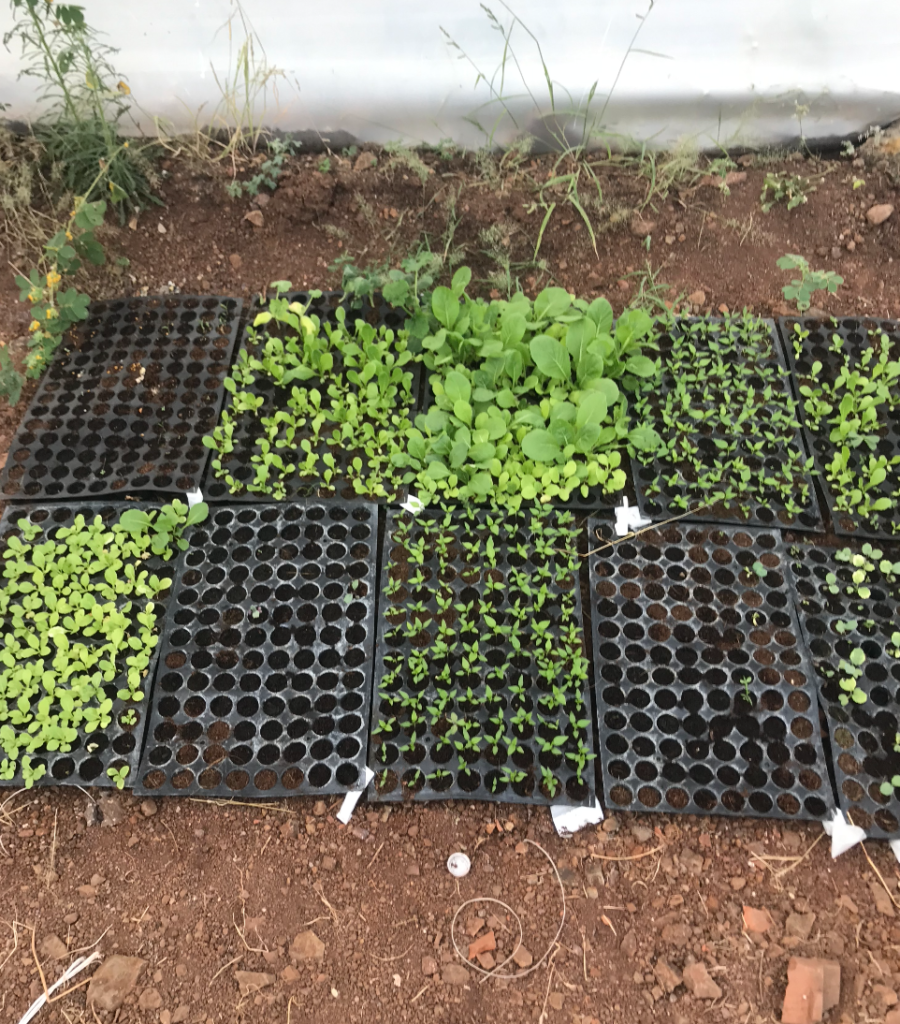
I already explained my procedure for getting plants ready in the system, but in the meantime I needed plants for the new system. Hopefully, Bhanudas is growing plant since 2 weeks inside the playhouse and they are perfect for my system, there is lettuce, cucumber, cabbage and more. He has plant the seed in coco medium and spray them with only water since then.
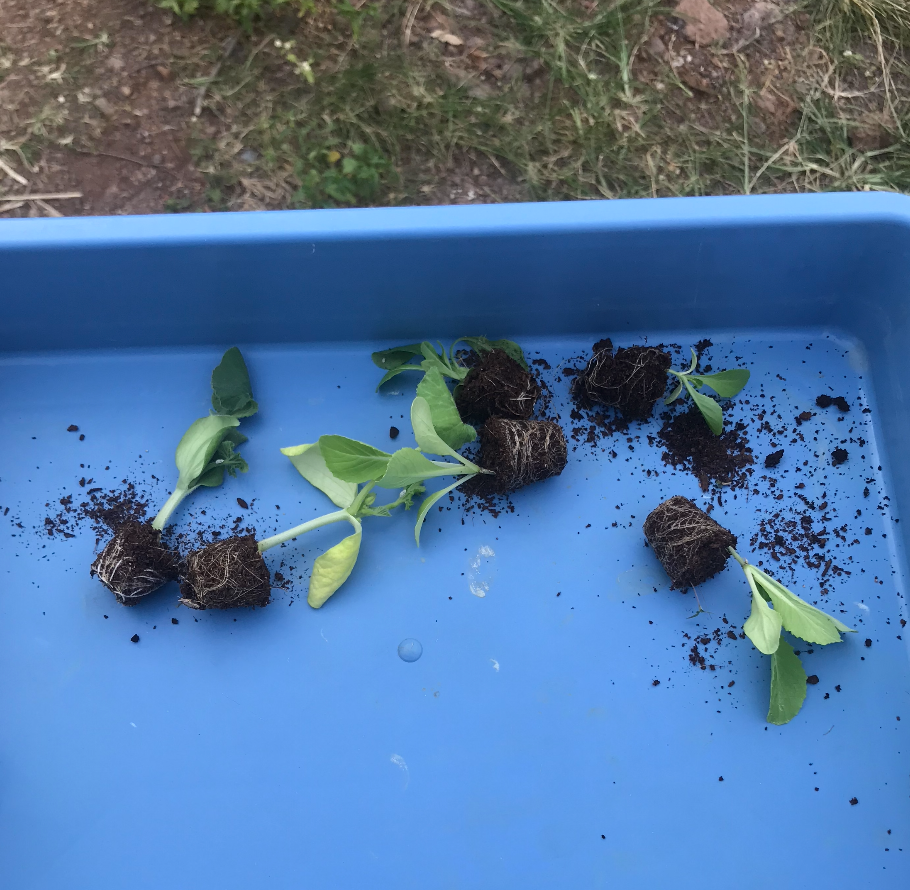
I will put the roots in the water to release them from the coco medium in order to put them in rock wool.

9.1.5 Electric consumption
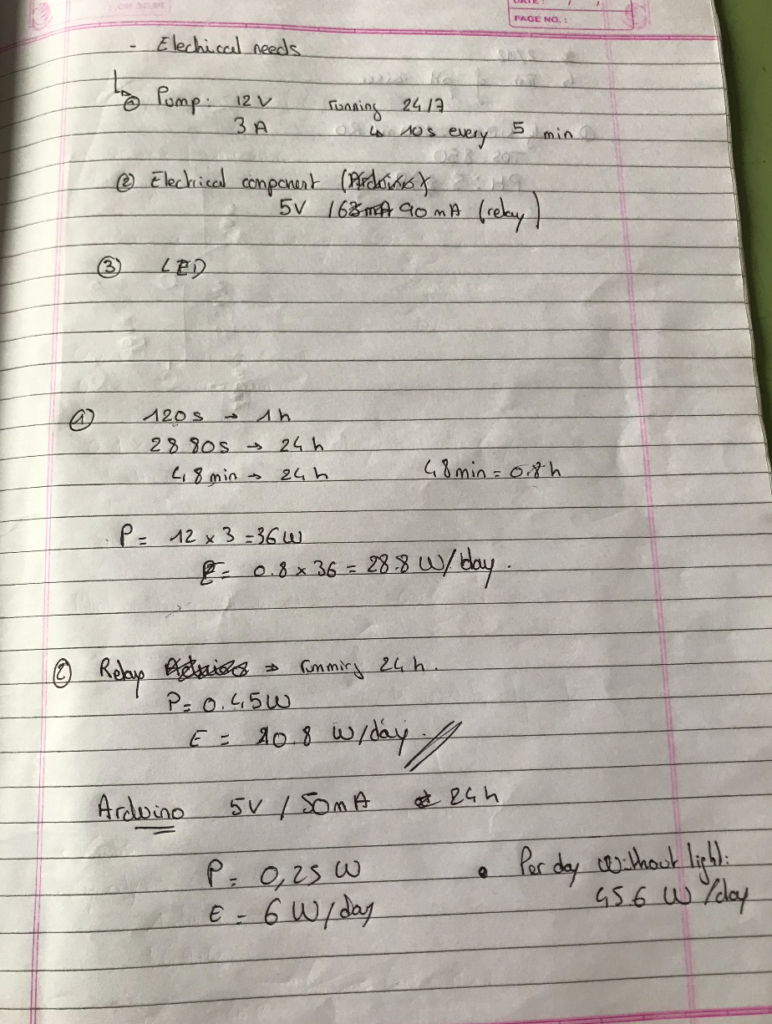
By running the system in the dome under sunlight, with a misting interval of 10sec every 5 min (which is relatively high) the power consumption is 45.6 W/day.
My idea was to run the all system on solar energy so it could be self sufficient. For that we would need a 50 W solar panel and an external battery to store the energy during the night, since the system needs to run 24/7.
9.2 Results
Time to grow / quality / LOD ( Loss on drying)
10. Spinach Tower garden
As the first prototype was running in the Dome, I got the task to try a slightly bigger system. The goal was to see if we were able to build a system that could on harvest give around 2Kg of spinach.
10.1 The design
To be able to grow a lot more spinach, I needed to change the design. 2 main options came in my mind :
- To build a slightly larger tower and higher
- To build a very large tower.
In the current system, the mister from the bottom is not able to deliver mist to the two plants on the top. With only one mister from the bottom, it is not possible to have a high tower. Thus if I wanted to build a higher tower with PVC pipes, I would have to think about another misting system.
In the village I found those big blue barrel, and they were perfect for our spinach system. I could use the same method for the holes (heat gun) as I did on the PVC, but this time for approximately 50 holes.
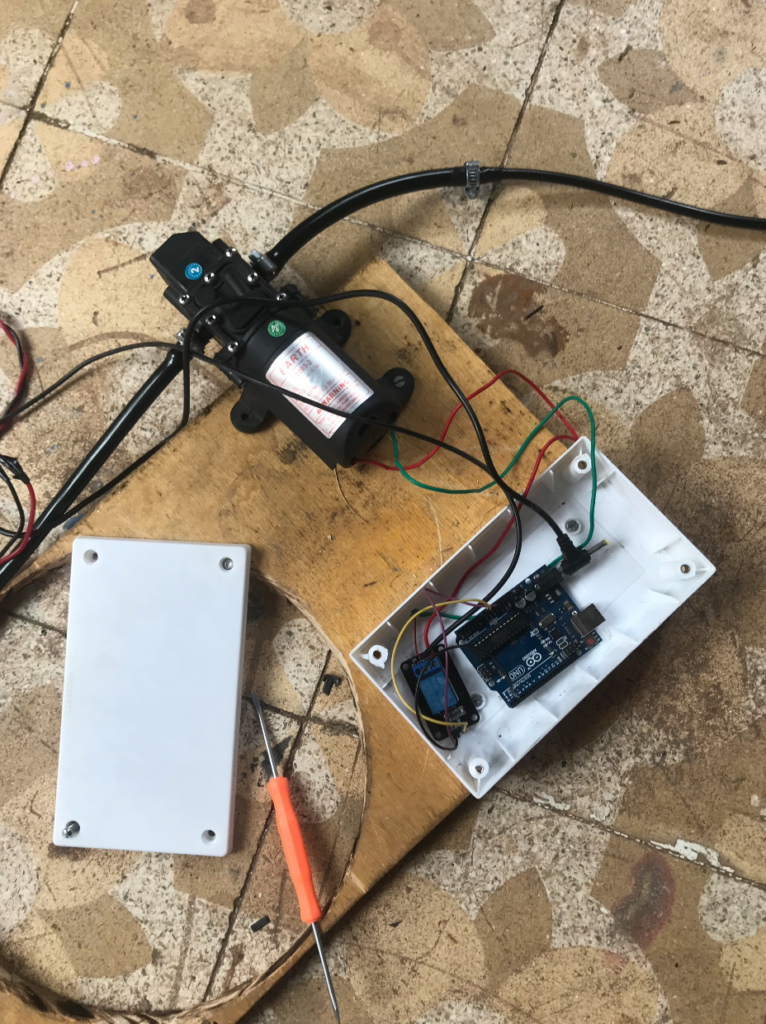
Thanks to the space on top of the barrel, we can fix all the component (pump, Arduino, relay, mister) so everything is perfectly tight.
10.2 mister
We were also looking a another mister because our current system would have not been able to deliver enough mist inside the barrel.
We found in a shop a 4 head mister nozzle. We tested it with the same pump as the previous system and it was running really smooth by creating a fine mist. Because of the 4 head it was able to almost mist at 360 degrees. And by letting the mister on for some time (approx. 15-20 sec) we were able to get mist across the all barrel.
The mister will be hanging from the top of the barrel facing down.