Preparation of .stl file for 3D printing
Hi friends..
I want to share my experience and software use for preparing .stl file for 3D printer. As we talk about my college then we have makerBot , Ultimaker and stratasys.
The basic procedure of 3D printing is like you have to design 3D modelling by using different software like 123d autodesk, solidWorks, Solidedge, Catia, Fusion 360, OnShape…and many more. Once your 3D file getting ready then convert it into .stl file format. If you are new to this software then go to “save as ” option and save your part or assembly file as .stl file format. If everything is good then printer will print your file with given finishing settings. Actually I am new to operate MakerBot Replicator Z18.
I was working on Acucraft and ultimaker printers. Both are good and user-friendly but they never give superfine surface. Actually this wasn’t fault of printer. These printers ignore the error which is placed in your design files. I don’t know but you have to confirm before your printing that your file correct or not. It possess any errors or not. It is important because printer takes too much time to print your file. And it uses material also..So, before printing make sure that your file must be correct.
Now, we prepare design file and we save our design as .stl file…now I want to check my file correct or not. In simple way I want to repair my .stl file. Then what kind of efforts should I do?
Well, I have prepare solidWorks file for 3D printing then as I mentioned before I was saving that file as .stl file format. Then I ask my senior who is Fab lab manager (Mr. Amit Sharma sir) to check my design file and told me if any changes required. He told me Dipali, your file possess design error. You have to check first and then print your part on printer.

It is very hectic to redesign 3D file and make everything is good. Then he told me that you can repair your file by using grab cad software. I was searching that how to fix that stl file error in grab cad. But it needs to sign in your account and all boring stuff. Then I was moving towards the Netfabb software. If you have account in autodesk then just type Netfabb download and after login download the natfabb software on your system. They will put mail for you, that you have licence and all stuff. I was using free trial version. Once you install this software then open file option and click on new project option.
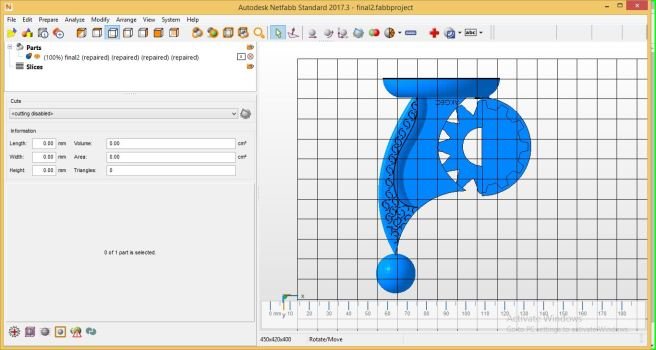
Then select add part and click on Boolean operation. It will shows error part or 3D printer will not support print that part in red color. If this happen then click prepare option placed in toolbar. Then click on repair part. Your part will be showing like this…

Then check all the views ..

Then export your file as stl format. All printers supports .stl format files only.

And here congratulation! you are successfully repairing your file.
Here the time for the printing. I made a mistake. I directly put .stl file to the makerbot. But firstly, you have to call that file in maker bot print. Then add support and infill of material.
