Student Name: Shravani Sandeep Mahajan
Introduction
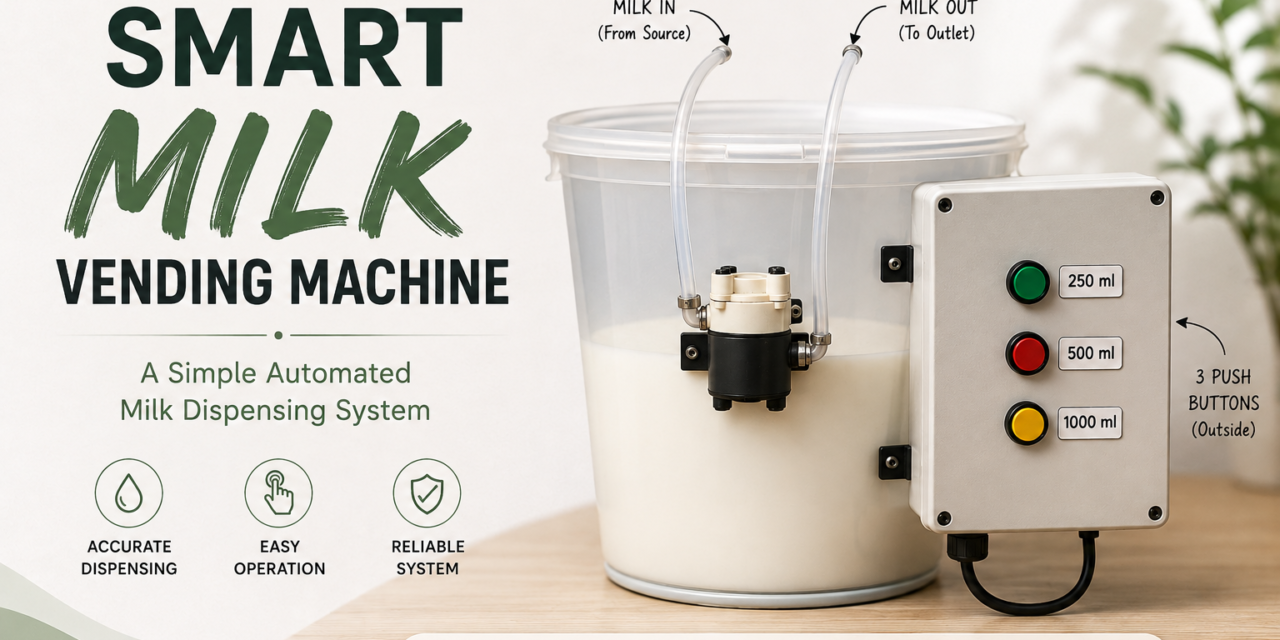
The Automatic Milk Vending Machine is my final project. The aim of this project is to create a simple, low-cost and automated system for dispensing a selected quantity of milk.
In a traditional milk dispensing process, the quantity is measured manually. I wanted to develop a system where the user can simply press a button and the machine automatically dispenses the selected quantity.
The main controller used in this project is the XIAO ESP32-C3. Three push buttons are used to select different quantities of milk. A relay module is used to control a 12V pump, and an OLED display is used to show the selected quantity and dispensing status.
The physical structure of the project is based on a bucket. The pump and tubes are arranged for the milk-flow system, while the electronic control components are kept separately from the milk-flow area.
The project combines embedded programming, electronics, input/output control, relay control, pump control, PCB design, soldering, 3D design, 3D printing and final assembly.
Problem Statement
In manual milk dispensing, the required quantity of milk is measured by a person. Because the process is manual, there can sometimes be small differences between the requested quantity and the actual quantity dispensed.
Manual dispensing also requires the operator to measure the milk each time a different quantity is requested. This makes the process less convenient and less automated.
Therefore, I wanted to develop a simple system where the user can select a predefined quantity using a push button and the machine can automatically control the pump to dispense the required amount.
Reason I Chose This Project
I chose this project because I wanted to develop a practical system that could solve a real-world problem.
I was interested in combining electronics, programming, mechanical components and fabrication into one complete working project. The milk vending machine allowed me to use the XIAO ESP32-C3, OLED display, push buttons, relay, pump, power supply and tubing together.
Through this project, I also wanted to understand how a microcontroller receives an input, processes that input and controls a real-world output such as a pump.
Objectives
The main objective of this project is to develop an automated milk dispensing system that can dispense predefined quantities of milk using push buttons.
The other objectives are:
- To use the XIAO ESP32-C3 as the main controller.
- To provide three different milk quantity options.
- To control the pump automatically.
- To use an OLED display for user feedback.
- To automatically stop the pump after the selected dispensing time.
- To design and fabricate a PCB.
- To create a suitable physical arrangement for the components.
- To learn embedded programming and hardware interfacing.
- To test and calibrate the pump for different quantities.
Proposed Solution
To solve the problem, I developed an automatic milk vending machine using the XIAO ESP32-C3 as the main controller.
I programmed the XIAO ESP32-C3 to receive input from three push buttons. Each button represents a different milk quantity. When a button is pressed, the controller identifies the selected quantity and activates the relay.
The relay controls the 12V pump. The pump runs for the programmed time and then automatically stops.
The OLED display provides feedback to the user by displaying the selected quantity and the dispensing status.
The complete system therefore allows the user to select the required quantity and receive milk without manually controlling the pump.
Rough Project Planning
Before starting the actual circuit design, I first made a rough diagram of the project.
The purpose of the rough diagram was to understand the basic arrangement of the components and the milk-flow path. I planned the position of the bucket, pump, tubes, controller, buttons, relay and display.
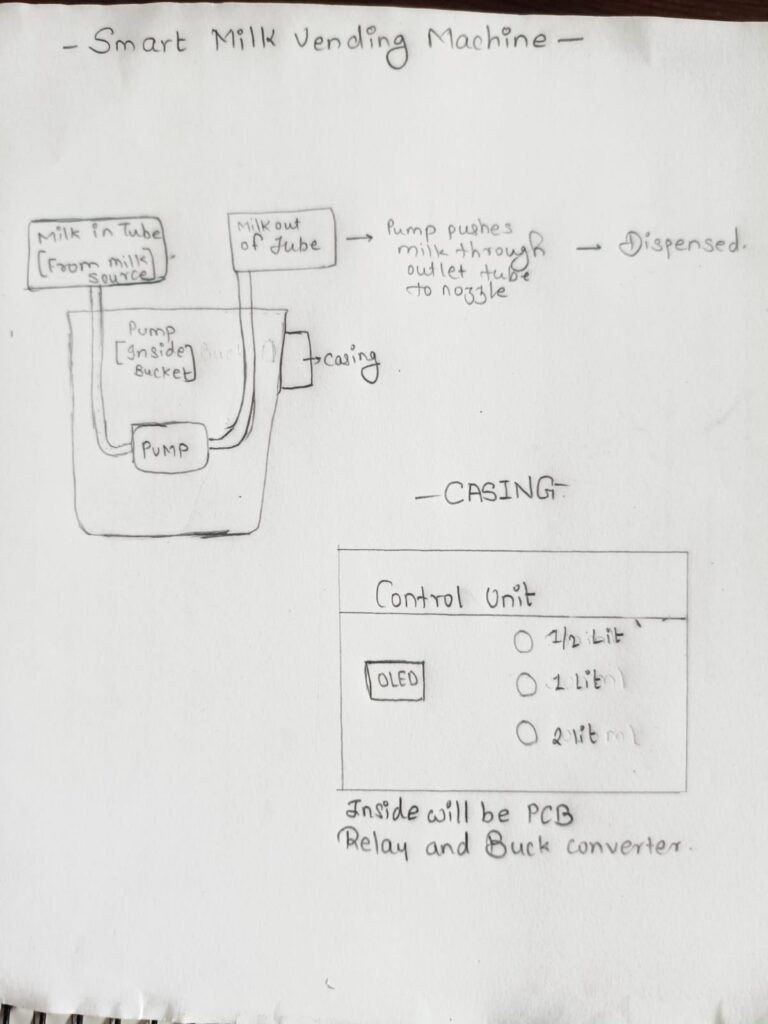
After making the rough design, I used it as a reference for developing the actual circuit and physical arrangement.
Block DiagramThe basic working flow of my project is:
Push Buttons → XIAO ESP32-C3 → Relay → Pump → Milk Outlet
The OLED display is connected to the XIAO ESP32-C3 and provides information to the user.
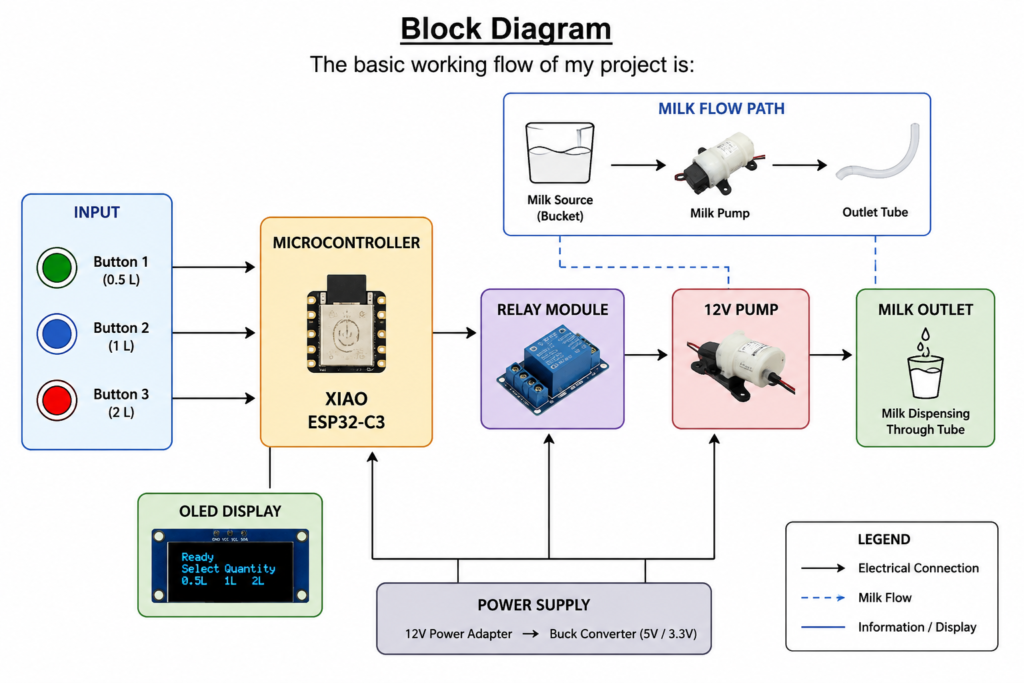
The XIAO ESP32-C3 acts as the main controller. It receives the button input, processes the selected quantity and controls the relay.
Working Principle
When the machine is powered ON, the OLED display shows that the system is ready.
The user selects the required quantity by pressing one of the three push buttons.
The XIAO ESP32-C3 detects the selected button and selects the corresponding dispensing time.
The controller then activates the relay. The relay switches ON the 12V pump, which starts moving milk through the tube toward the dispensing outlet.
After the programmed time is completed, the XIAO ESP32-C3 switches OFF the relay and the pump stops.
The OLED then displays the completion status.
The current quantity selection is:
| Button | Quantity | Pump Time |
|---|---|---|
| Button 1 | 0.5 L | 13.22 seconds |
| Button 2 | 1 L | 26.44 seconds |
| Button 3 | 2 L | 52.88 seconds |
These times are based on the pump calibration and can be adjusted according to the actual flow rate.
Components and Their Purpose
| Component | Purpose |
|---|---|
| XIAO ESP32-C3 | Main controller |
| OLED Display | Displays quantity and status |
| Push Buttons | Select milk quantity |
| Relay Module | Controls the pump |
| 12V Pump | Pumps the milk |
| Buck Converter | Provides required voltage |
| 12V Power Adapter | Main power source |
| Silicone Tubes | Carry the milk |
| Bucket | Main milk container/body |
Components Used and Cost
| Sr. No. | Component | Quantity | Unit Price | Total |
|---|---|---|---|---|
| 1 | XIAO ESP32-C3 | 1 | ₹735 | ₹735 |
| 2 | OLED Display | 1 | ₹200 | ₹200 |
| 3 | 12V DC Pump | 1 | ₹200 | ₹200 |
| 4 | Relay Module | 1 | ₹200 | ₹200 |
| 5 | Momentary Panel Mount Push Button | 3 | ₹25 | ₹75 |
| 6 | Buck Converter | 1 | ₹63 | ₹63 |
| 7 | 12V Power Adapter | 1 | ₹209 | ₹209 |
| 8 | Silicone Tube | 2 | ₹10 | ₹20 |
| Grand Total | ₹1,702 |
Individual Component Testing
After collecting the components, I first tested every component separately.
The purpose of this step was to confirm that the components were working properly before connecting them together.
I tested the XIAO ESP32-C3, OLED display, push buttons, relay, 12V pump, buck converter and power supply individually.
Testing the components separately helped me identify problems at an early stage and made the later complete-system testing easier.
Testing the Push Button
After checking the basic components, I tested the push button with the XIAO ESP32-C3.
The purpose of this test was to check whether the controller could correctly detect the button press.
I used an LED as an output indicator. When the button was pressed, the LED turned ON, and when the button was released, the LED turned OFF.
Code Used for Push Button Testing
#define BUTTON_PIN D0
#define LED_PIN D3

void setup() {
  pinMode(BUTTON_PIN, INPUT_PULLUP);
  pinMode(LED_PIN, OUTPUT);
}

void loop() {
  if (digitalRead(BUTTON_PIN) == LOW) {
    digitalWrite(LED_PIN, HIGH);
  } else {
    digitalWrite(LED_PIN, LOW);
  }
}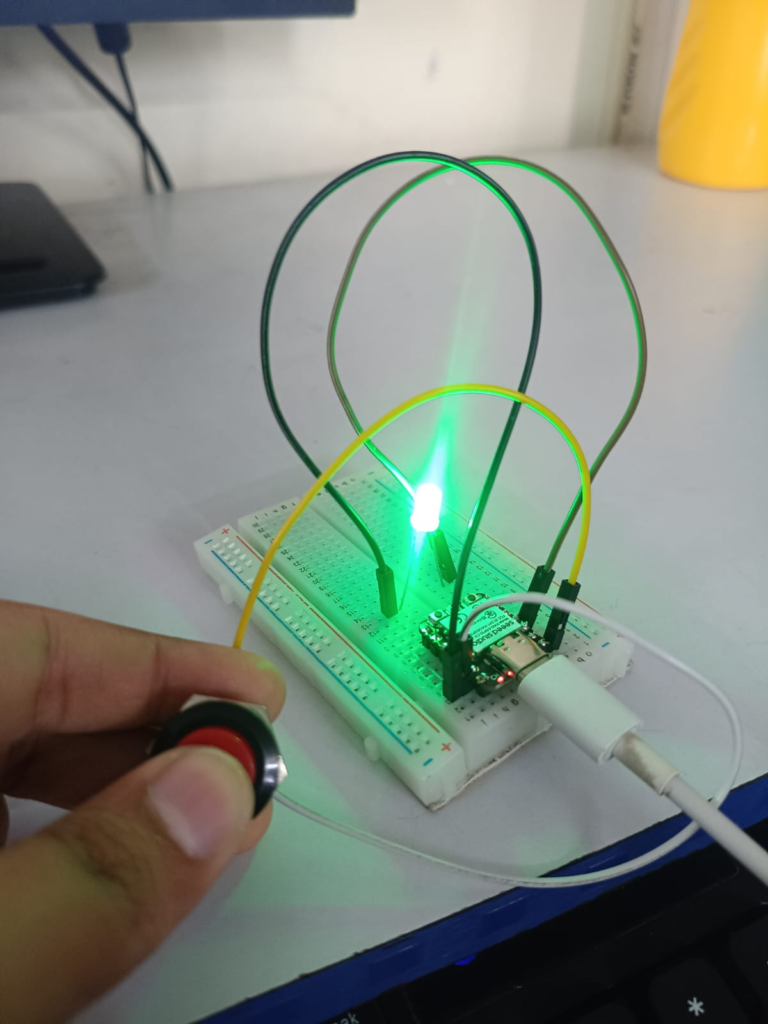
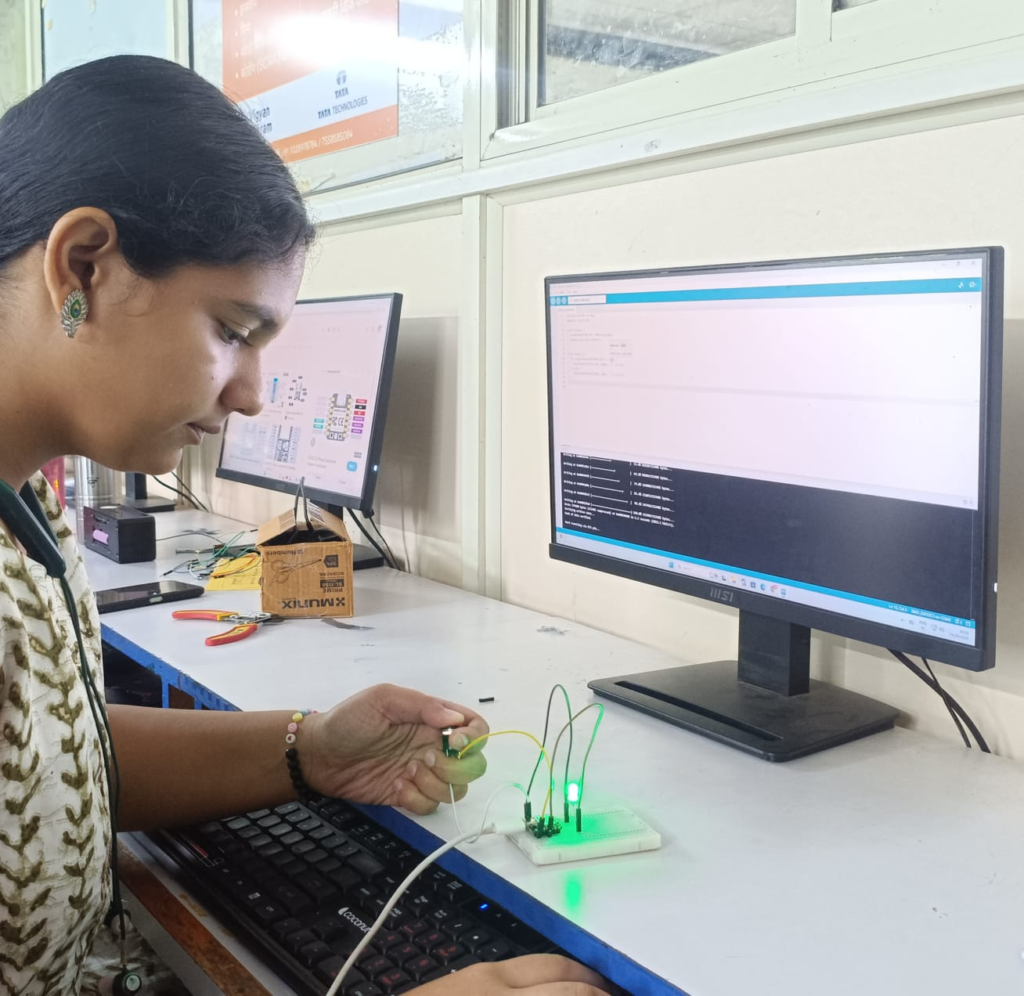
This confirmed that the XIAO ESP32-C3 could detect the button input correctly.
Testing the OLED Display
Next, I tested the OLED display separately.
The OLED was connected to the XIAO ESP32-C3 using I2C communication.
The connections were:
- SDA → D4
- SCL → D5
- VCC → 3.3V
- GND → GND
I uploaded a simple program to display text on the OLED. This allowed me to confirm that the display and I2C communication were working correctly.
Code Used for OLED Testing
#include <Wire.h>
#include <Adafruit_GFX.h>
#include <Adafruit_SSD1306.h>

#define SDA_PIN D4
#define SCL_PIN D5

Adafruit_SSD1306 display(-1);

void setup() {
  Wire.begin(SDA_PIN, SCL_PIN);

  display.begin(SSD1306_SWITCHCAPVCC, 0x3C);

  display.clearDisplay();

  display.setTextSize(2);
  display.setTextColor(WHITE);

  display.setCursor(10, 15);
  display.println("Hi");

  display.setCursor(10, 40);
  display.println("Shravani");

  display.display();
}

void loop() {
}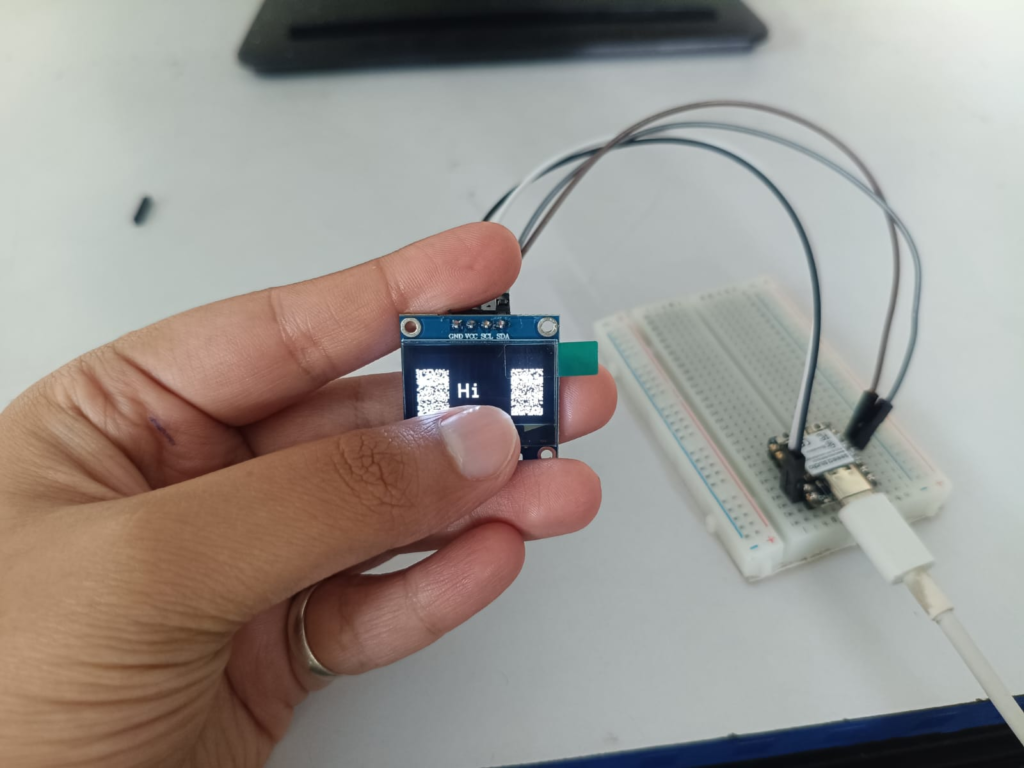
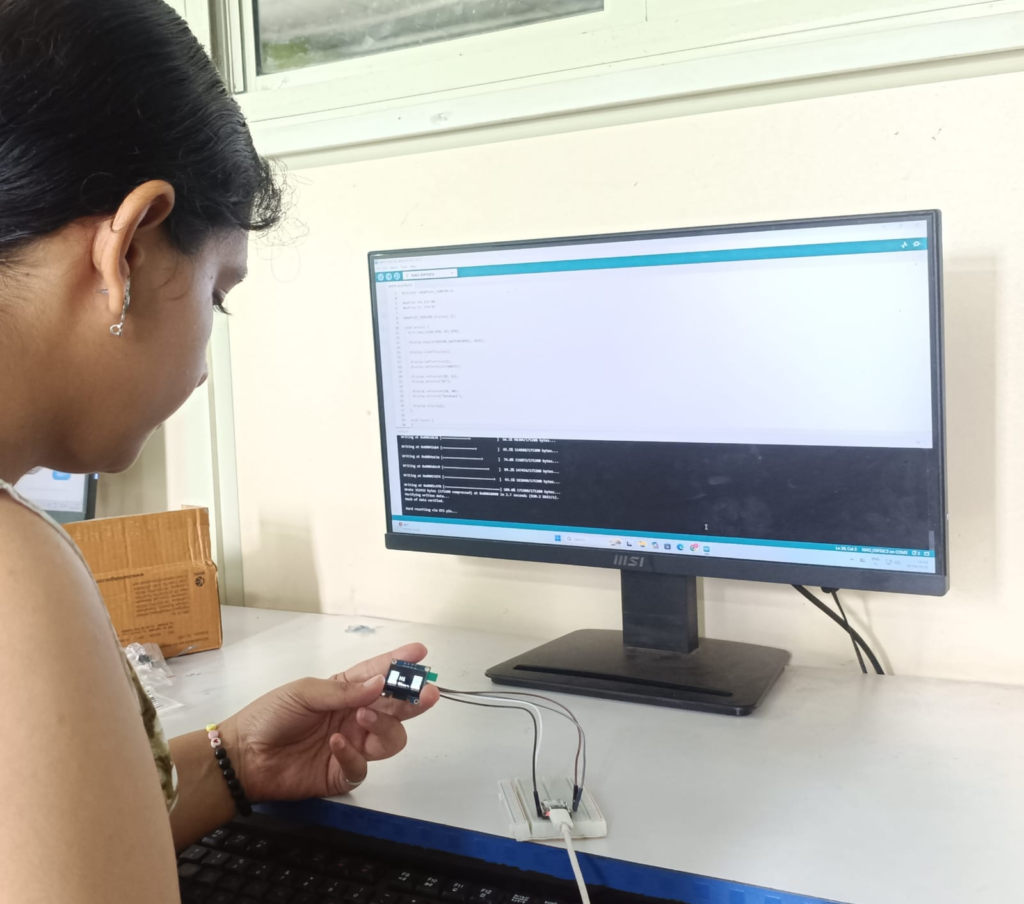
After this test, I confirmed that the OLED was working correctly.
Relay Testing
After testing the button and OLED, I tested the relay module.
The relay was connected to the XIAO ESP32-C3 and controlled using a digital output.
I checked whether the relay could switch ON and OFF correctly. This test was important because the relay would later be used to control the pump.
Pump Testing
I then tested the 12V pump separately.
The purpose of this test was to confirm that the pump was receiving the correct power and could move liquid through the silicone tube.
I also checked the tube arrangement and flow direction.
Combining the Components
After confirming that the individual components were working, I connected them together.
I connected the push buttons, OLED, relay and XIAO ESP32-C3 and then tested their combined operation.
At this stage, I focused on making sure that the controller could receive the button input and control the relay while also displaying information on the OLED.
Final Pin Connections
After testing the components, I finalized the pin connections.
| Component | XIAO ESP32-C3 Pin |
|---|---|
| Relay IN | D0 |
| Button 1 | D1 |
| Button 2 | D2 |
| Button 3 | D3 |
| OLED SDA | D4 |
| OLED SCL | D5 |
| OLED VCC | 3.3V |
| OLED GND | GND |
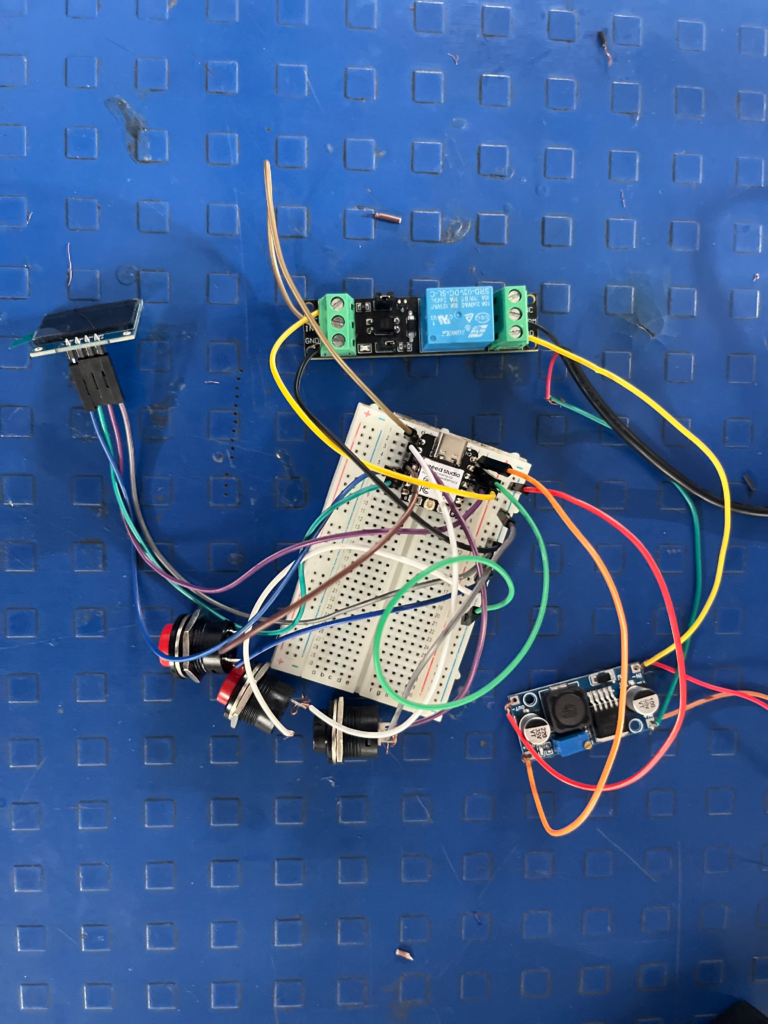
Final Programming
After the individual tests were successful, I started developing the final program for the milk vending machine.
The final program was written to control the complete system.
The code performs these main functions:
- Detects the three push buttons.
- Selects the required milk quantity.
- Displays the selected quantity on the OLED.
- Turns ON the relay.
- Starts the pump.
- Runs the pump for the selected time.
- Turns OFF the relay.
- Stops the pump.
- Displays the completion message.
Final Project Code
#include <Wire.h>
#include <Adafruit_GFX.h>
#include <Adafruit_SSD1306.h>

// ---------- PIN CONNECTIONS ----------

#define BUTTON1 D1
#define BUTTON2 D2
#define BUTTON3 D3

#define RELAY D0

#define OLED_SDA D4
#define OLED_SCL D5

// ---------- OLED ----------

#define SCREEN_WIDTH 128
#define SCREEN_HEIGHT 64

Adafruit_SSD1306 display(SCREEN_WIDTH, SCREEN_HEIGHT, &Wire, -1);

// ---------- RELAY LOGIC ----------

#define RELAY_OFF LOW
#define RELAY_ON HIGH


// =================================================
// SETUP
// =================================================

void setup() {

  pinMode(BUTTON1, INPUT_PULLUP);
  pinMode(BUTTON2, INPUT_PULLUP);
  pinMode(BUTTON3, INPUT_PULLUP);

  pinMode(RELAY, OUTPUT);

  // IMPORTANT: Motor/relay OFF when adapter is plugged in
  digitalWrite(RELAY, RELAY_OFF);

  // OLED
  Wire.begin(OLED_SDA, OLED_SCL);

  if (!display.begin(SSD1306_SWITCHCAPVCC, 0x3C)) {
    while (true);
  }

  // Startup screen - NO DELAY
  display.clearDisplay();
  display.setTextColor(SSD1306_WHITE);

  display.setTextSize(2);
  display.setCursor(35, 15);
  display.println("Hii");

  display.display();

  // Immediately show ready screen
  showReady();
}


// =================================================
// LOOP
// =================================================

void loop() {

  // ---------- BUTTON 1 ----------
  if (digitalRead(BUTTON1) == LOW) {

    delay(50);

    if (digitalRead(BUTTON1) == LOW) {

      // 0.5 Liter = 13.22 seconds
      dispenseMilk(13220, "0.5 L");

      while (digitalRead(BUTTON1) == LOW) {
        delay(10);
      }
    }
  }


  // ---------- BUTTON 2 ----------
  if (digitalRead(BUTTON2) == LOW) {

    delay(50);

    if (digitalRead(BUTTON2) == LOW) {

      // 1 Liter = 26.44 seconds
      dispenseMilk(26440, "1 Liter");

      while (digitalRead(BUTTON2) == LOW) {
        delay(10);
      }
    }
  }


  // ---------- BUTTON 3 ----------
  if (digitalRead(BUTTON3) == LOW) {

    delay(50);

    if (digitalRead(BUTTON3) == LOW) {

      // 2 Liter = 52.88 seconds
      dispenseMilk(52880, "2 Liter");

      while (digitalRead(BUTTON3) == LOW) {
        delay(10);
      }
    }
  }
}


// =================================================
// MILK DISPENSING
// =================================================

void dispenseMilk(unsigned long milliseconds, const char* quantity) {

  // ---------- DISPENSING SCREEN ----------

  display.clearDisplay();
  display.setTextColor(SSD1306_WHITE);

  display.setTextSize(2);
  display.setCursor(25, 5);
  display.println(quantity);

  display.setTextSize(1);
  display.setCursor(25, 35);
  display.println("Dispensing...");

  display.display();


  // ---------- RELAY ON ----------

  digitalWrite(RELAY, RELAY_ON);

  delay(100);


  // ---------- COUNTDOWN ----------

  unsigned long startTime = millis();

  while (millis() - startTime < milliseconds) {

    unsigned long elapsed = millis() - startTime;
    unsigned long remaining = milliseconds - elapsed;

    int remainingSeconds = (remaining + 999) / 1000;

    display.clearDisplay();
    display.setTextColor(SSD1306_WHITE);

    display.setTextSize(1);
    display.setCursor(35, 5);
    display.println("DISPENSING");

    display.setTextSize(2);
    display.setCursor(25, 20);
    display.println(quantity);

    display.setCursor(50, 45);
    display.print(remainingSeconds);
    display.print("s");

    display.display();

    delay(100);
  }


  // ---------- RELAY OFF ----------

  digitalWrite(RELAY, RELAY_OFF);

  delay(100);


  // ---------- SUCCESS MESSAGE ----------

  display.clearDisplay();
  display.setTextColor(SSD1306_WHITE);

  display.setTextSize(1);

  display.setCursor(25, 10);
  display.println("MILK GIVEN");

  display.setCursor(15, 30);
  display.println("SUCCESSFULLY!");

  display.display();

  delay(3000);

  showReady();
}


// =================================================
// READY SCREEN
// =================================================

void showReady() {

  display.clearDisplay();
  display.setTextColor(SSD1306_WHITE);

  display.setTextSize(1);

  display.setCursor(30, 5);
  display.println("MILK MACHINE");

  display.setCursor(20, 22);
  display.println("SELECT QUANTITY");

  display.setCursor(5, 42);
  display.println("B1=.5L B2=1L B3=2L");

  display.display();
}
Testing the Final Code
After uploading the final code, I tested each button.
Button 1 was tested for 0.5 litre, Button 2 for 1 litre and Button 3 for 2 litres.
I checked whether the OLED displayed the correct selection and whether the relay activated the pump.
Pump Timing Calibration
The pump flow rate determines how much milk is dispensed in a given time.
Therefore, I tested the pump for different durations and measured the amount of milk dispensed.
Based on the testing, I programmed the following values:
| Quantity | Programmed Time |
|---|---|
| 0.5 L | 10 seconds |
| 1 L | 20 seconds |
| 2 L | 30 seconds |
The timing can be adjusted further if required to improve the dispensing accuracy.
Circuit Design
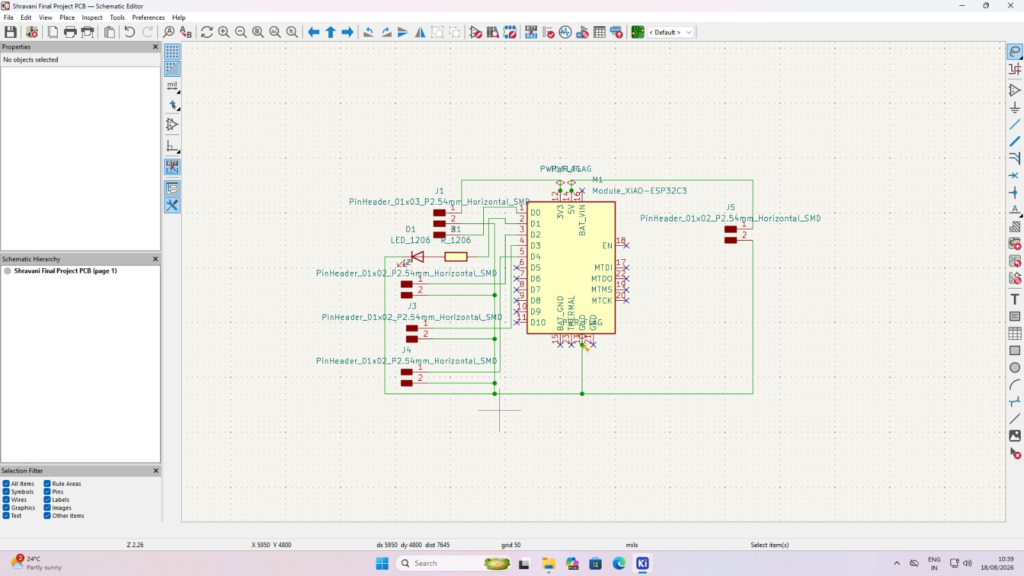
After the complete circuit was working on the temporary setup, I started preparing the final circuit design.
I created the circuit according to the tested connections so that the components could later be connected through a PCB.
PCB Editor
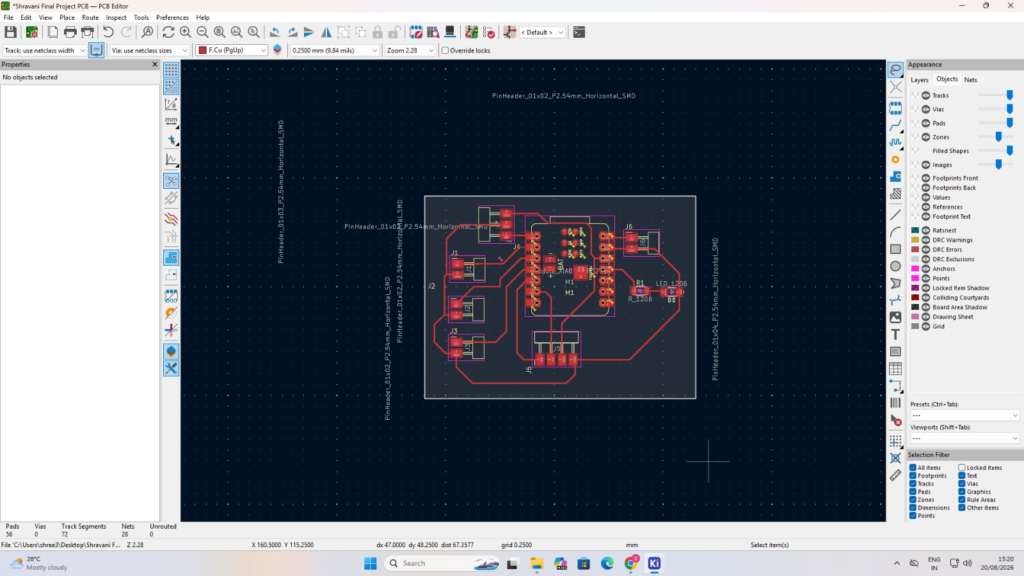
3D View Of PCB
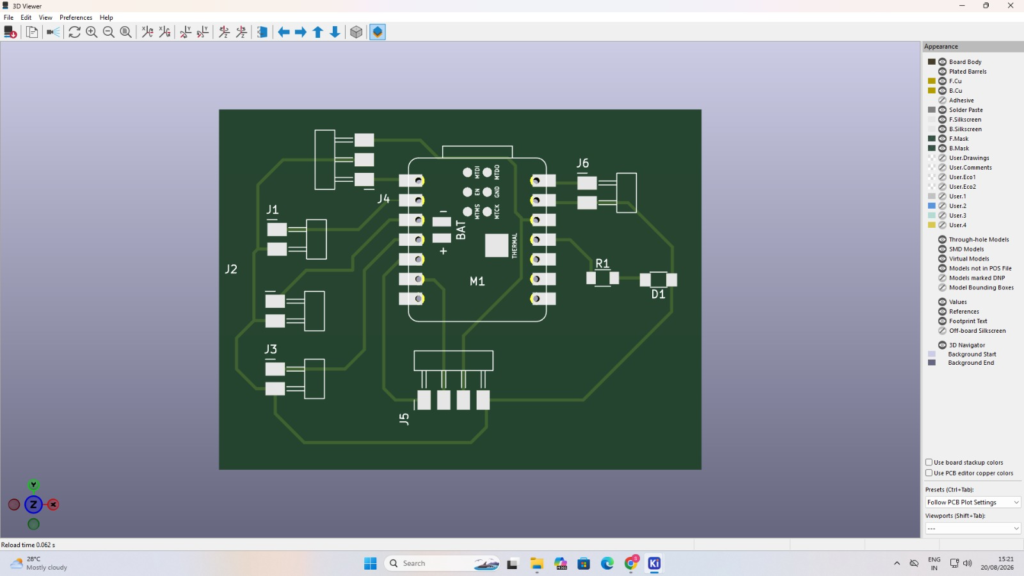
PCB Design Using KiCad
First, I created the schematic and added the required components.
Then I assigned footprints to the components.
After that, I moved the components into the PCB layout and arranged them according to the required connections and physical space.
I then routed the PCB tracks.
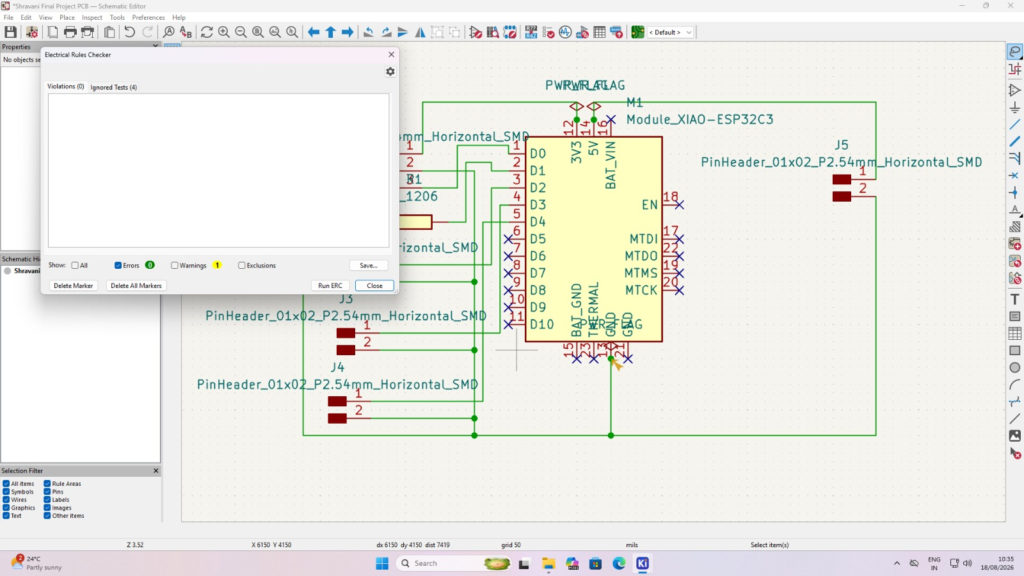
After completing the routing, I checked the PCB design for connection and layout problems.
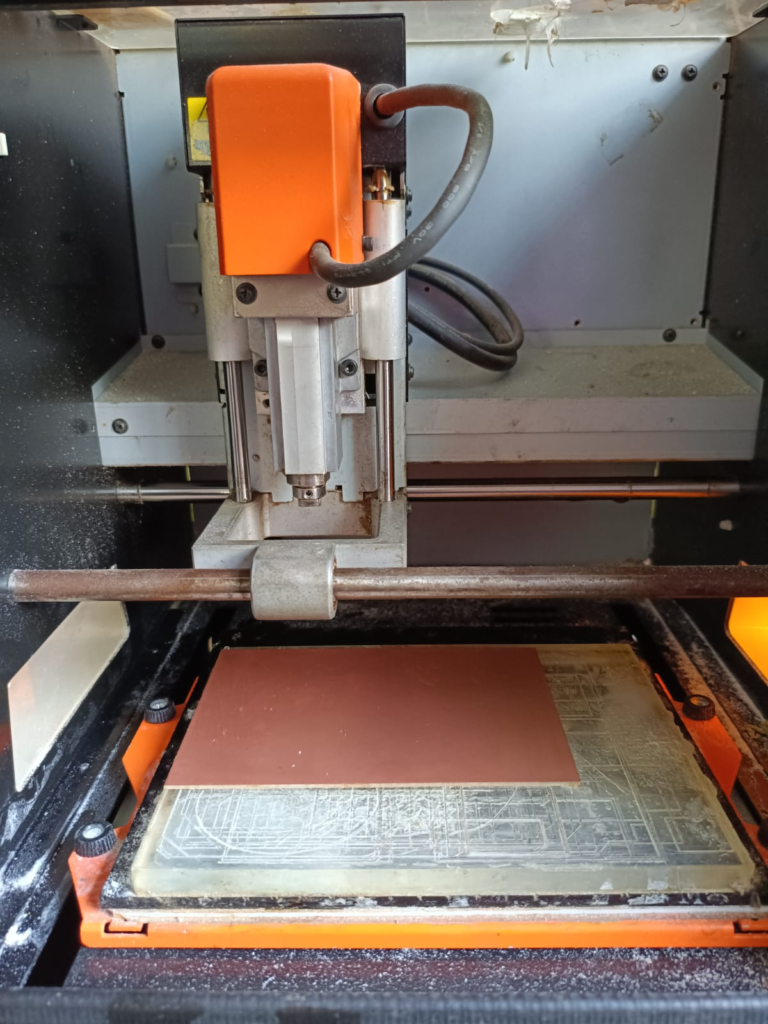
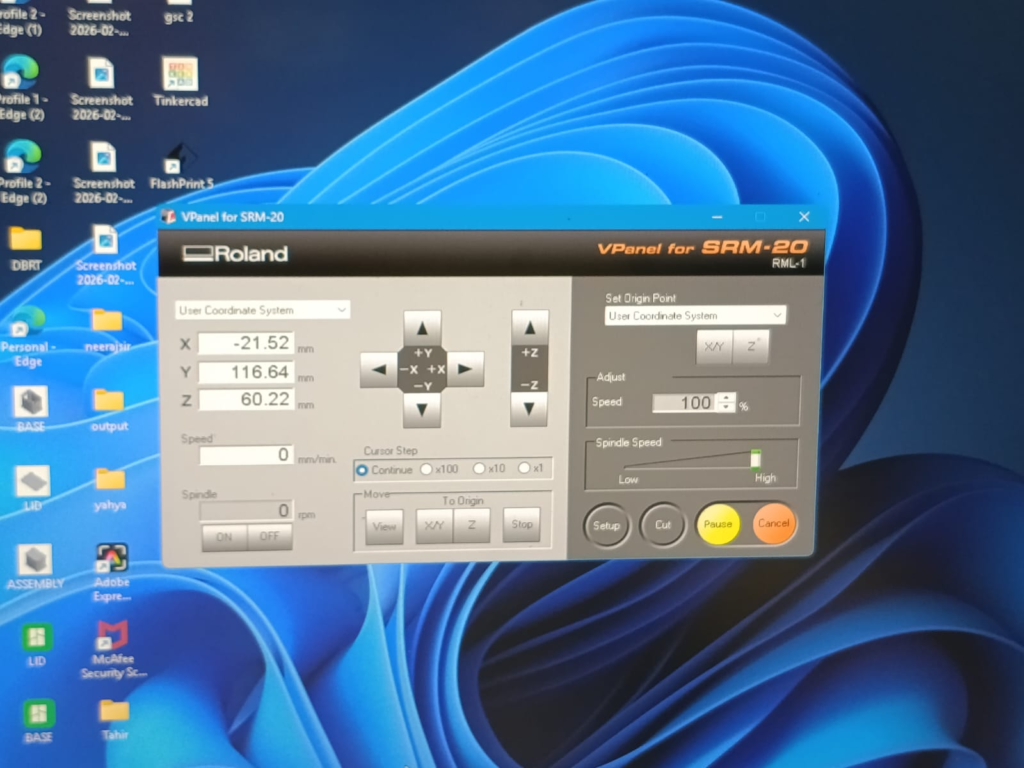
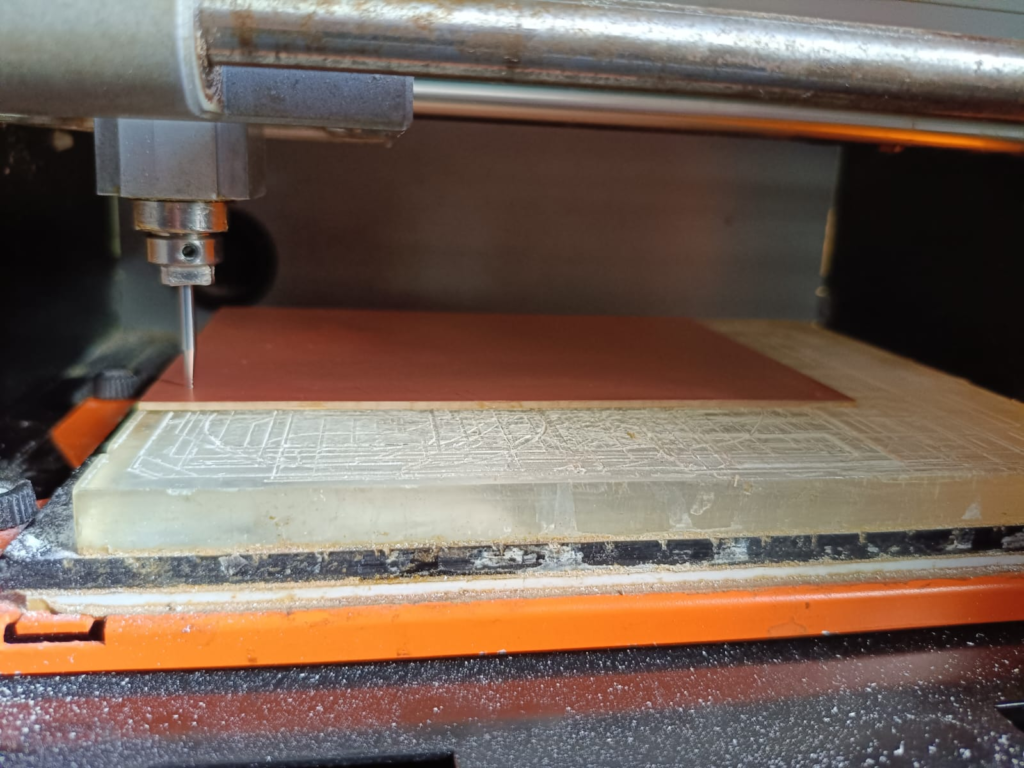
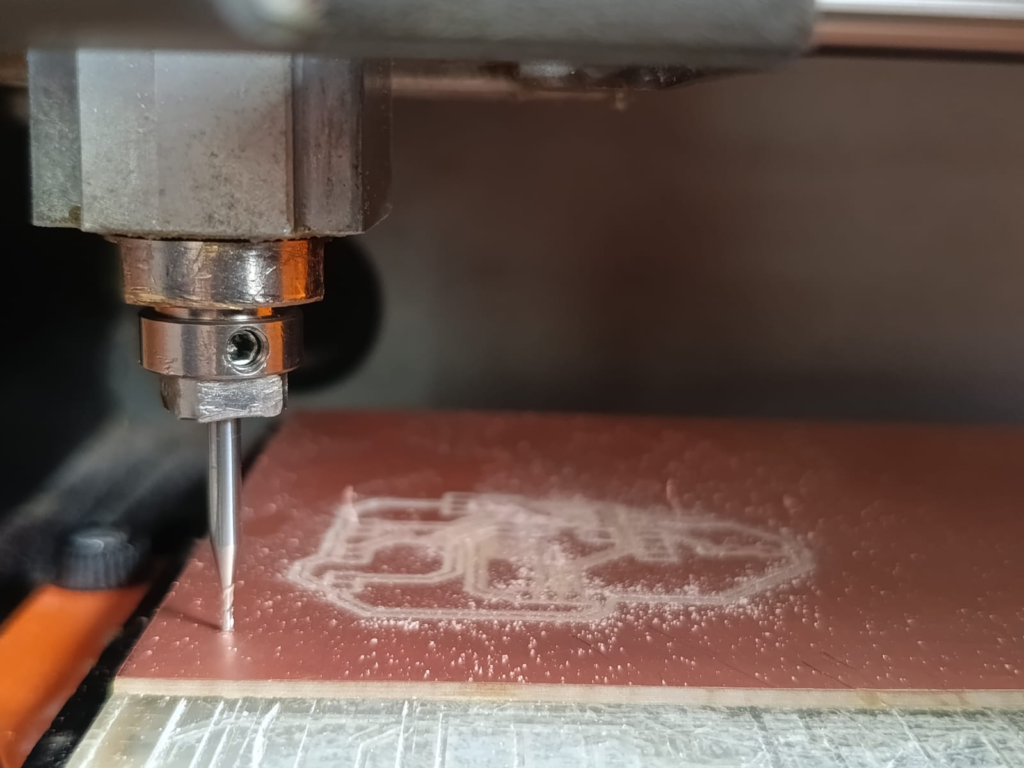
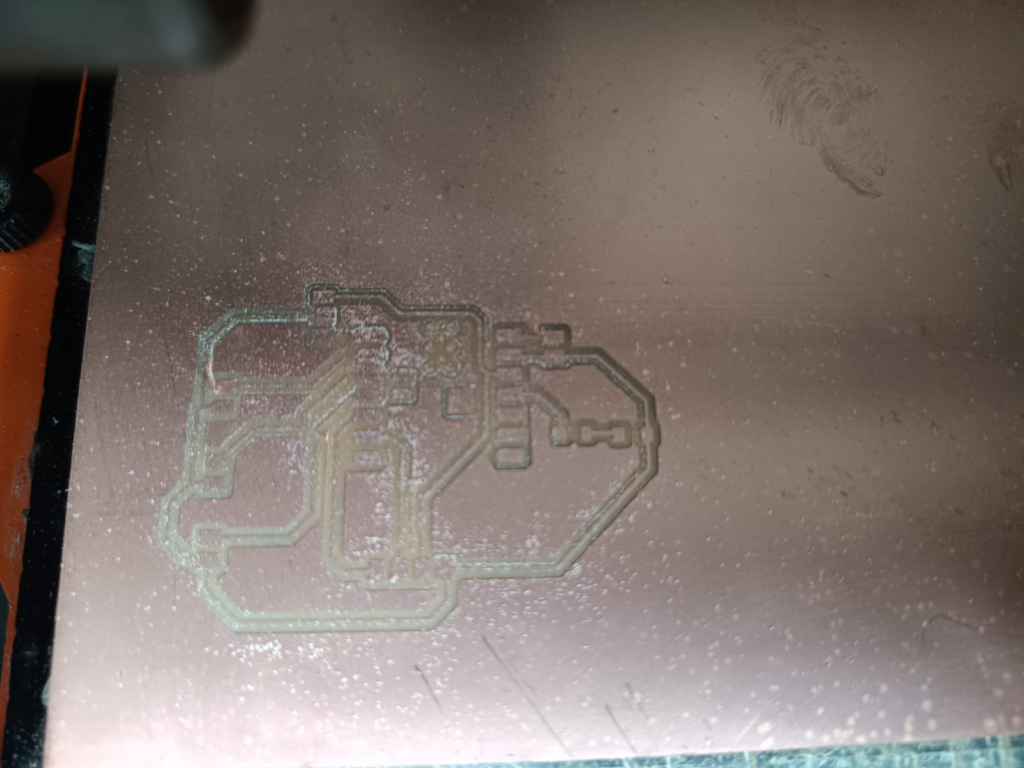
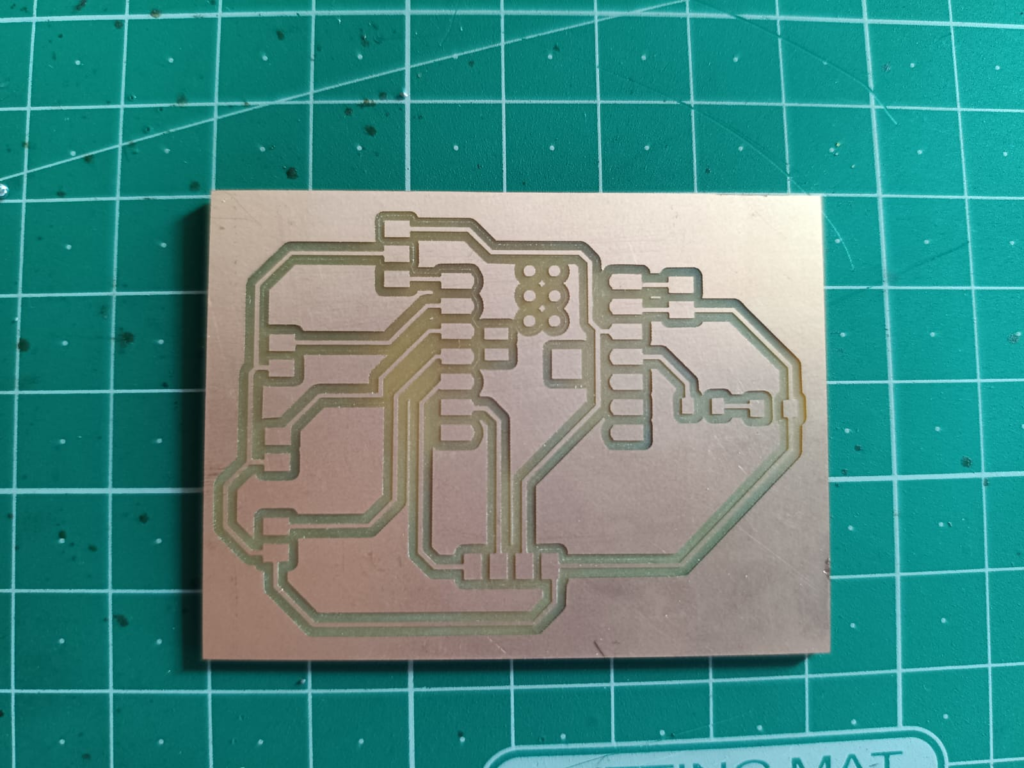
PCB Fabrication
After completing the PCB layout, I prepared the design for fabrication.
The PCB was fabricated according to the final design. After fabrication, I visually checked the tracks and pads.
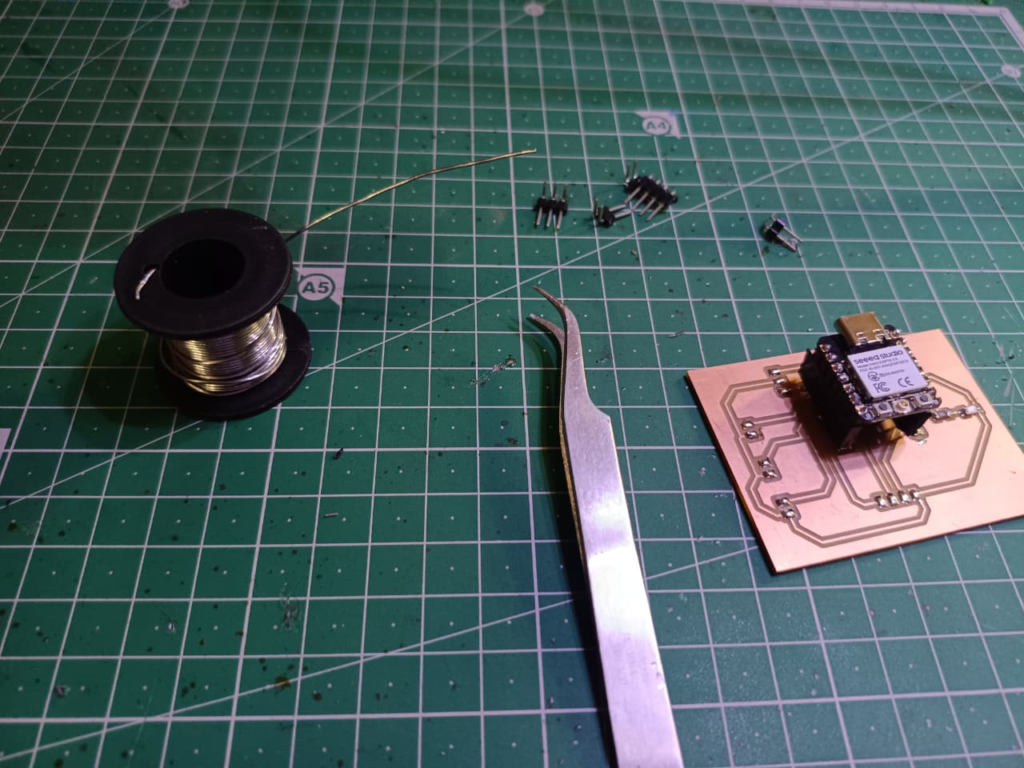
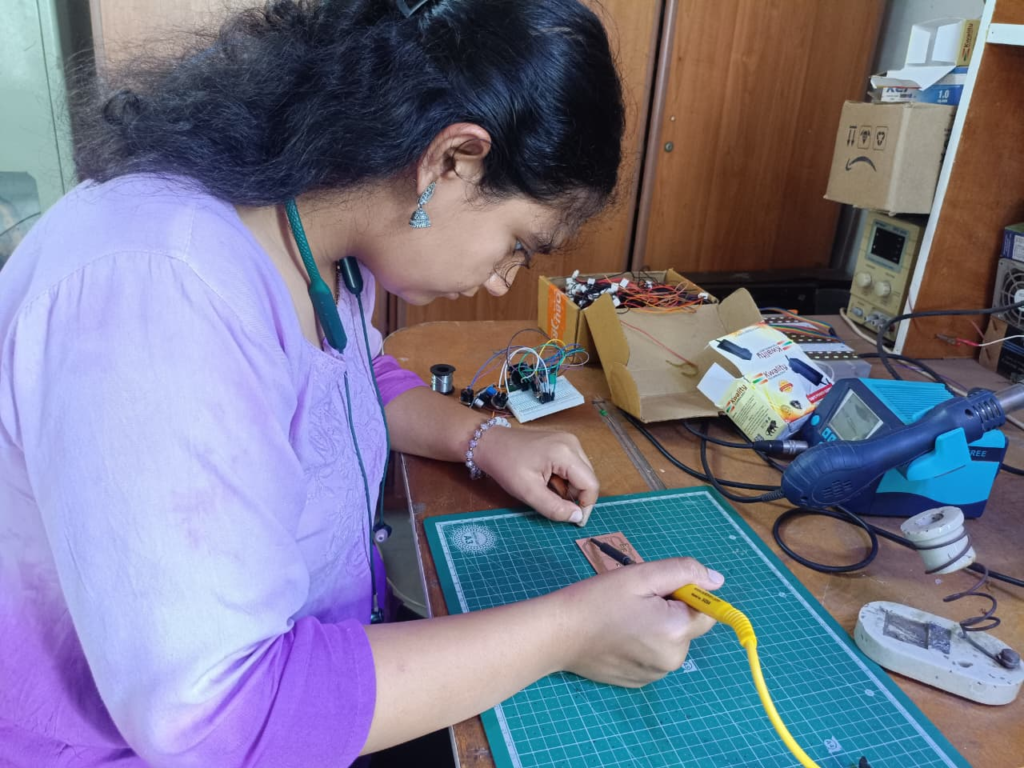
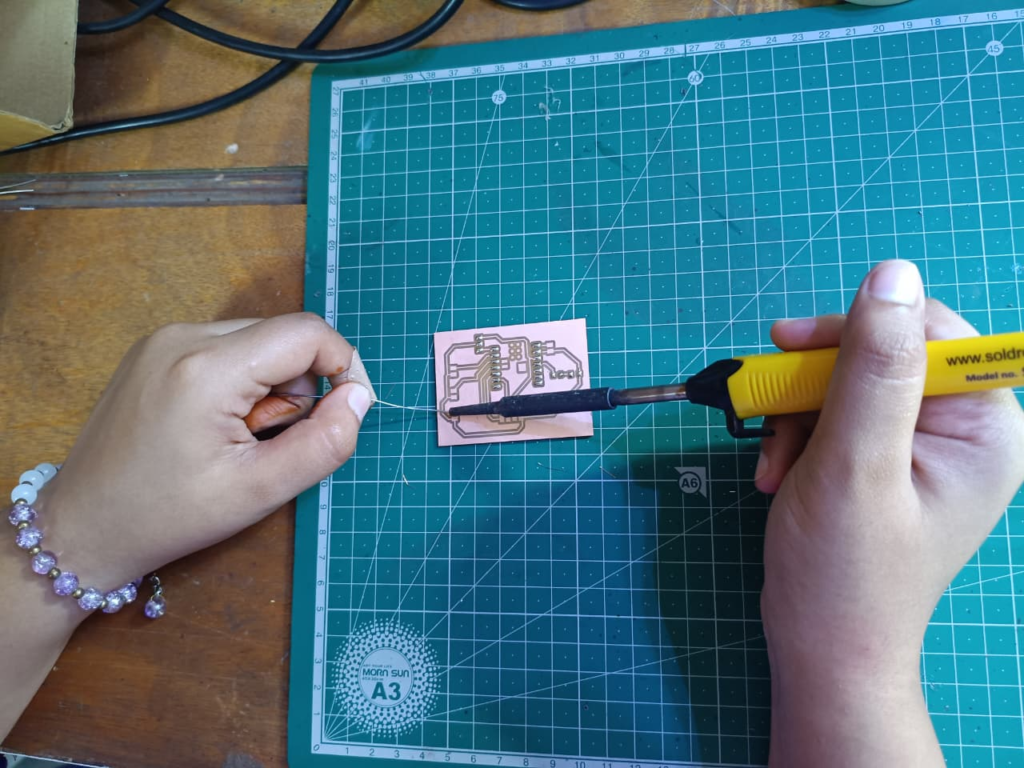
Soldering
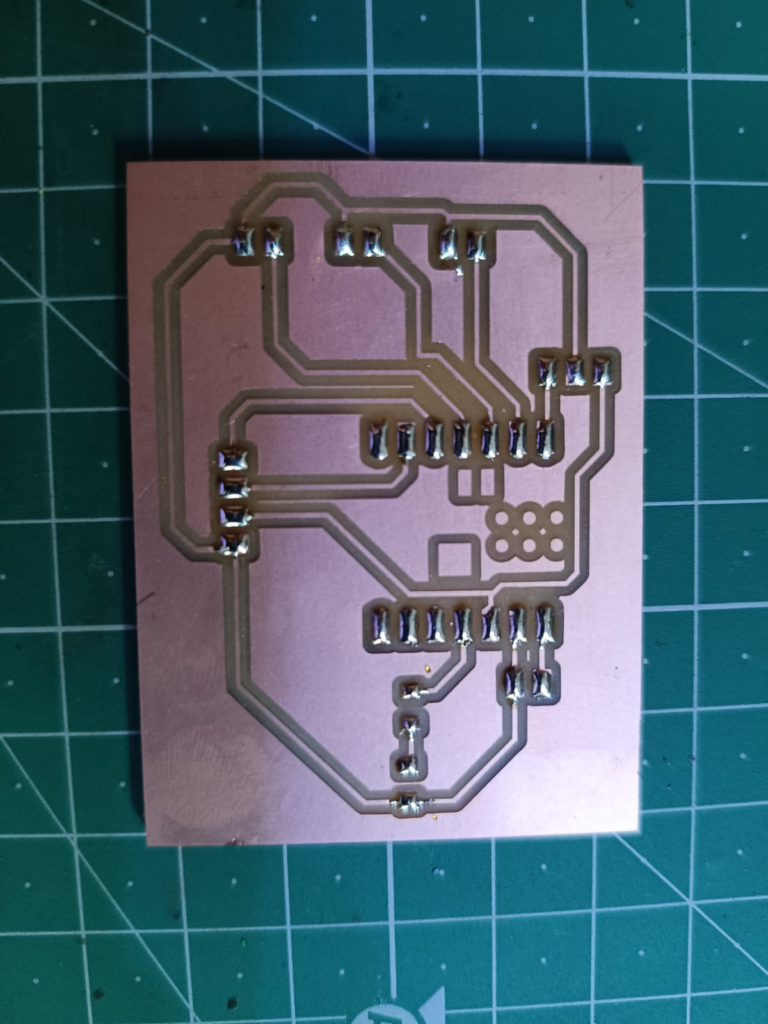
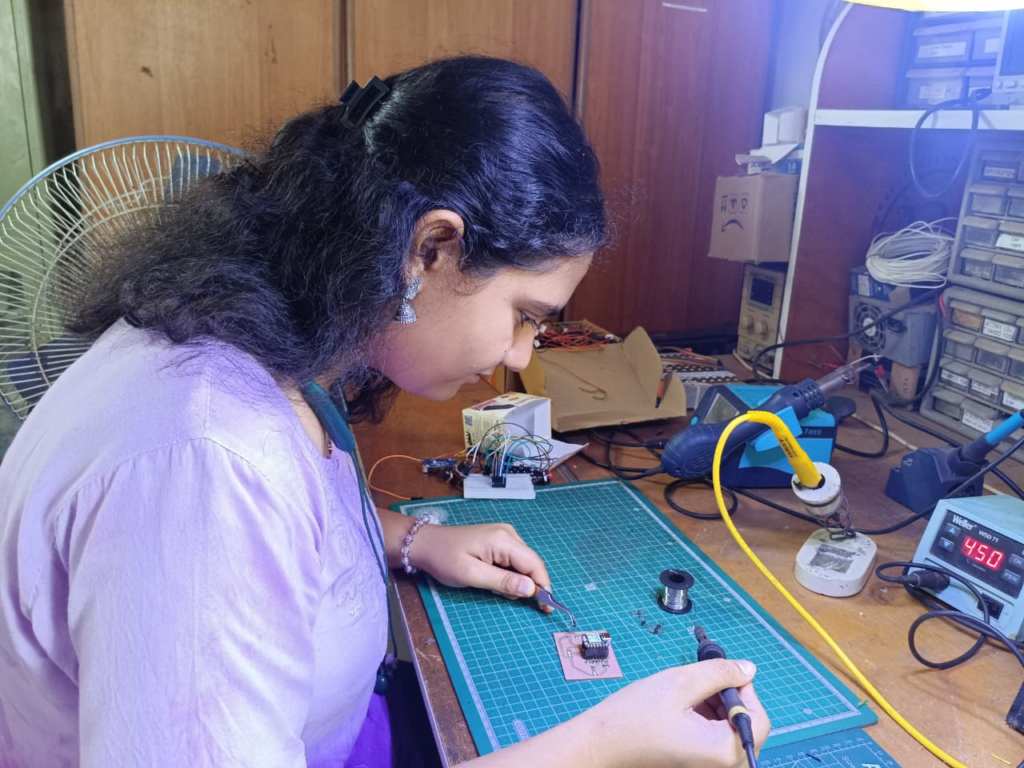
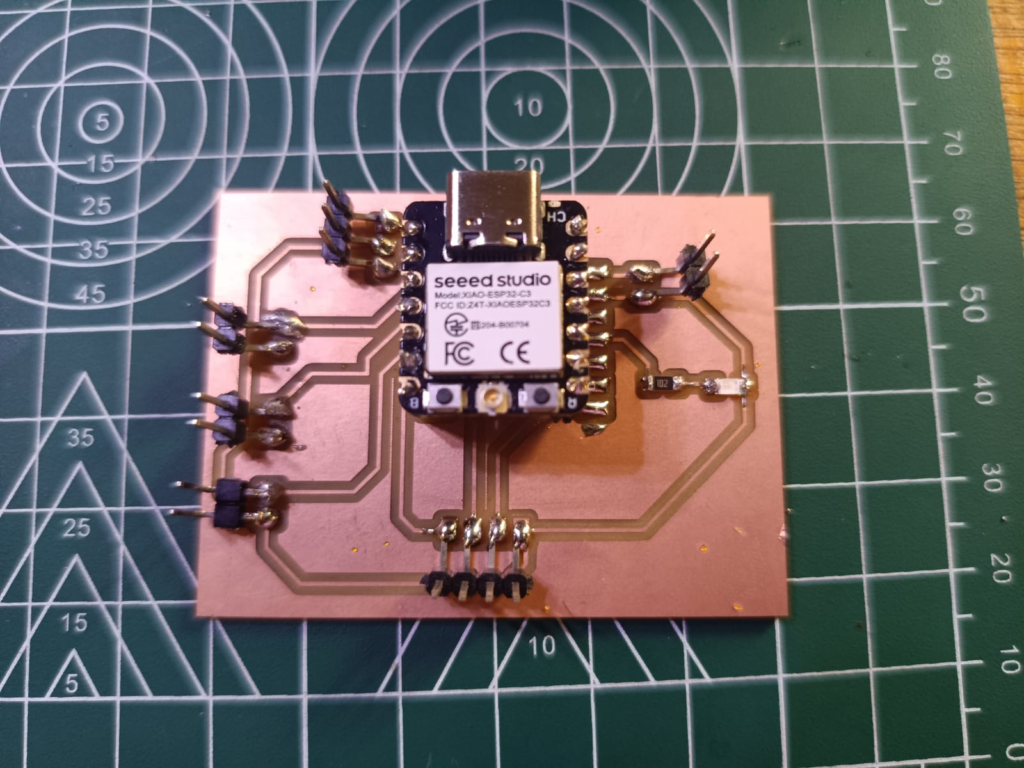
After fabricating the PCB, I started soldering the required connectors and components.
I carefully soldered each connection and checked the solder joints to make sure that there were no loose connections or unwanted shorts.
PCB Testing
After soldering, I tested the PCB using a multimeter.
I checked the continuity of the tracks and important connections. I also checked for possible short circuits.
This step helped me confirm that the PCB was ready before connecting the complete system.
Connecting the Components to PCB
After testing the PCB, I connected the XIAO ESP32-C3, OLED, push buttons and relay according to the final circuit.
I checked every connection before powering the system.
3D Design
After completing the electronics and PCB, I started working on the physical design of the project.
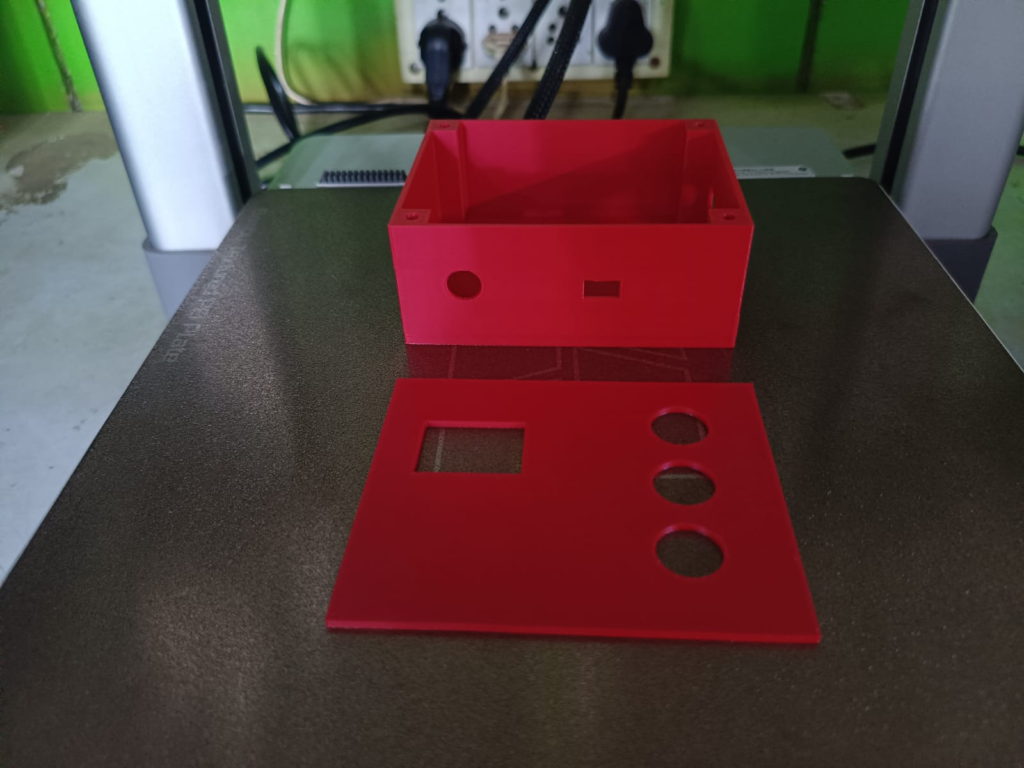
I designed the required parts to provide suitable space for the electronic components, OLED and push buttons.
The physical arrangement was planned so that the user could easily operate the buttons and see the OLED display.
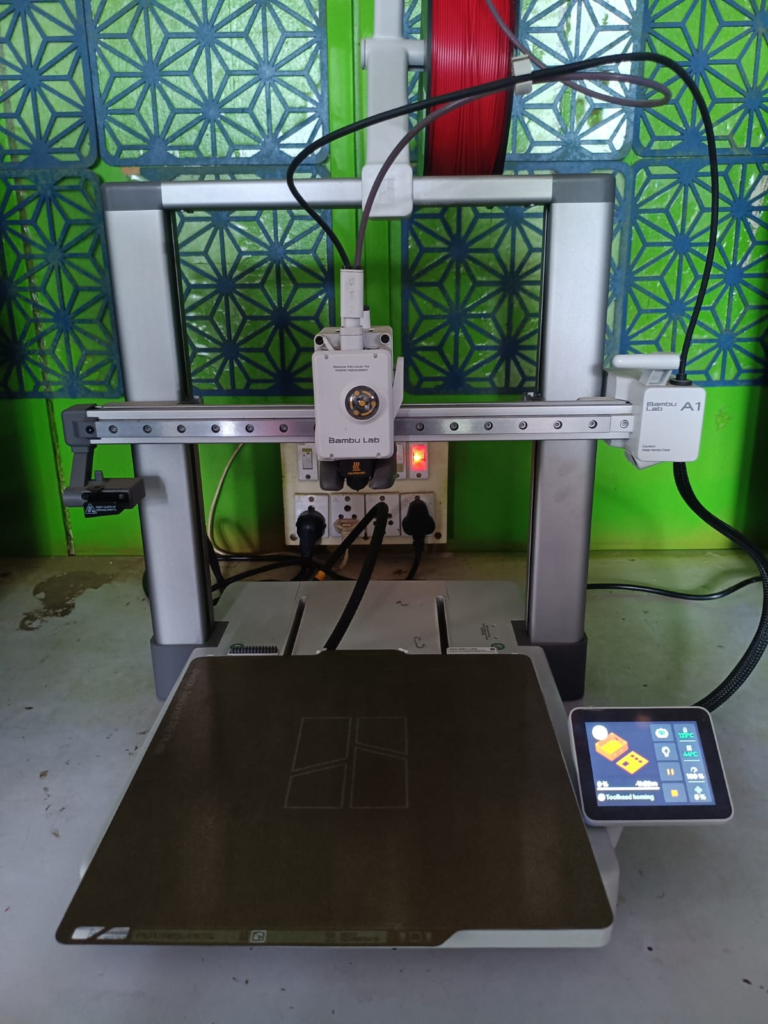
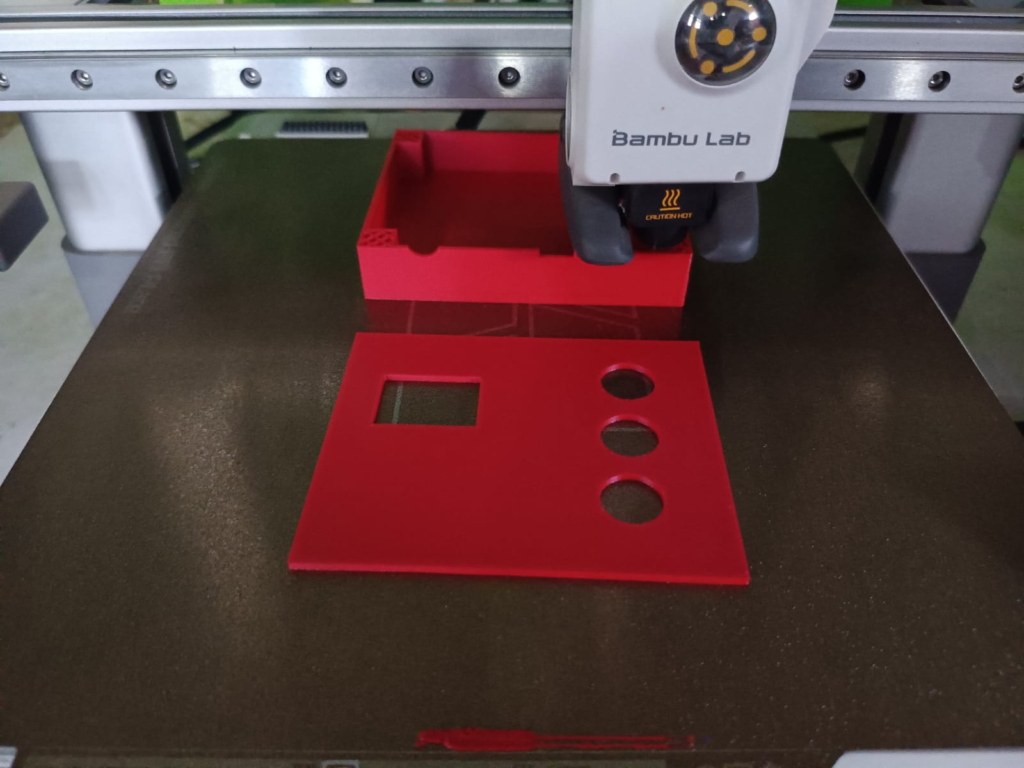
3D Printing
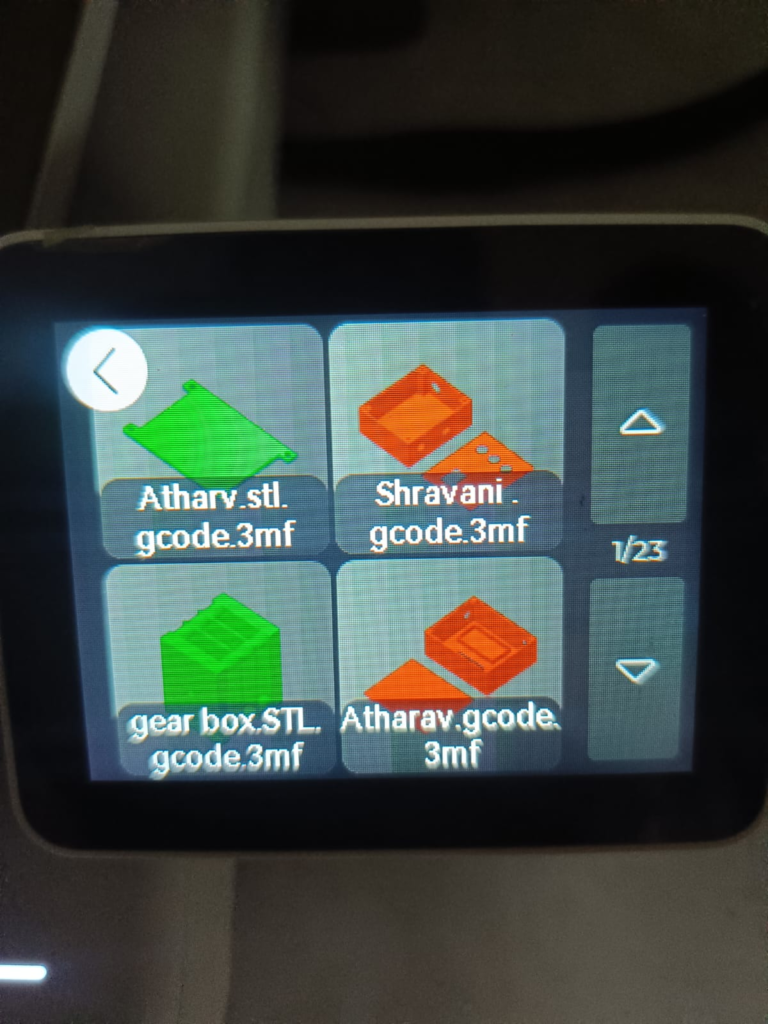
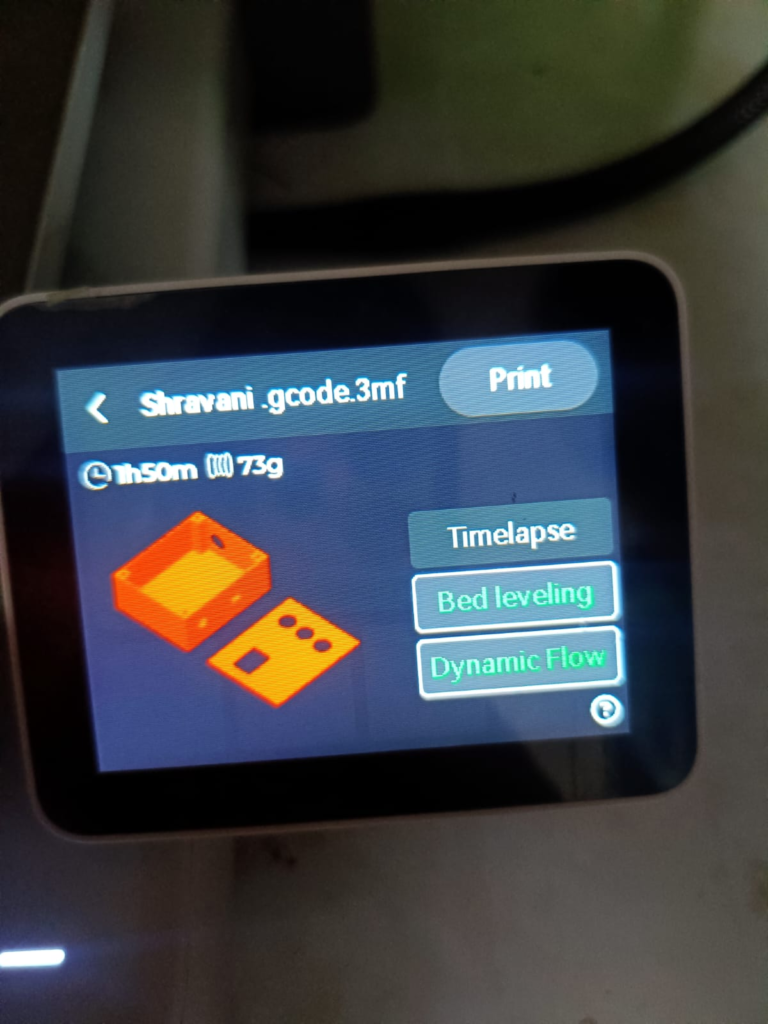
After completing the 3D design, I prepared the model for 3D printing.
The parts were printed and then checked to make sure that the dimensions and openings were suitable for the components.
Final Assembly
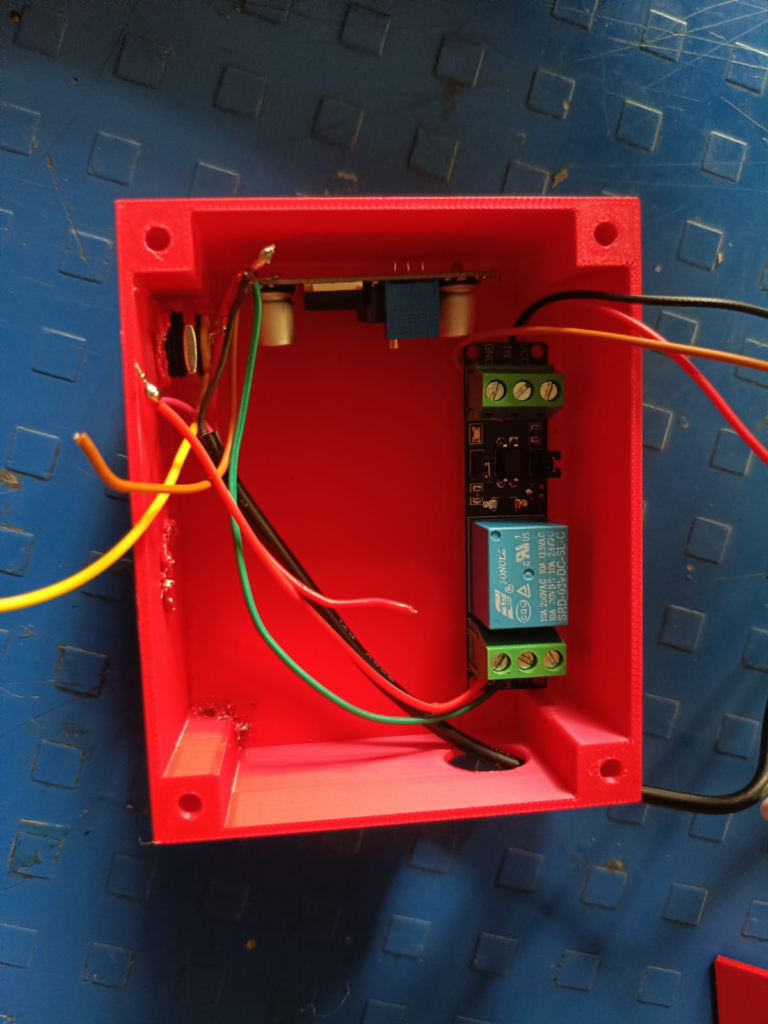
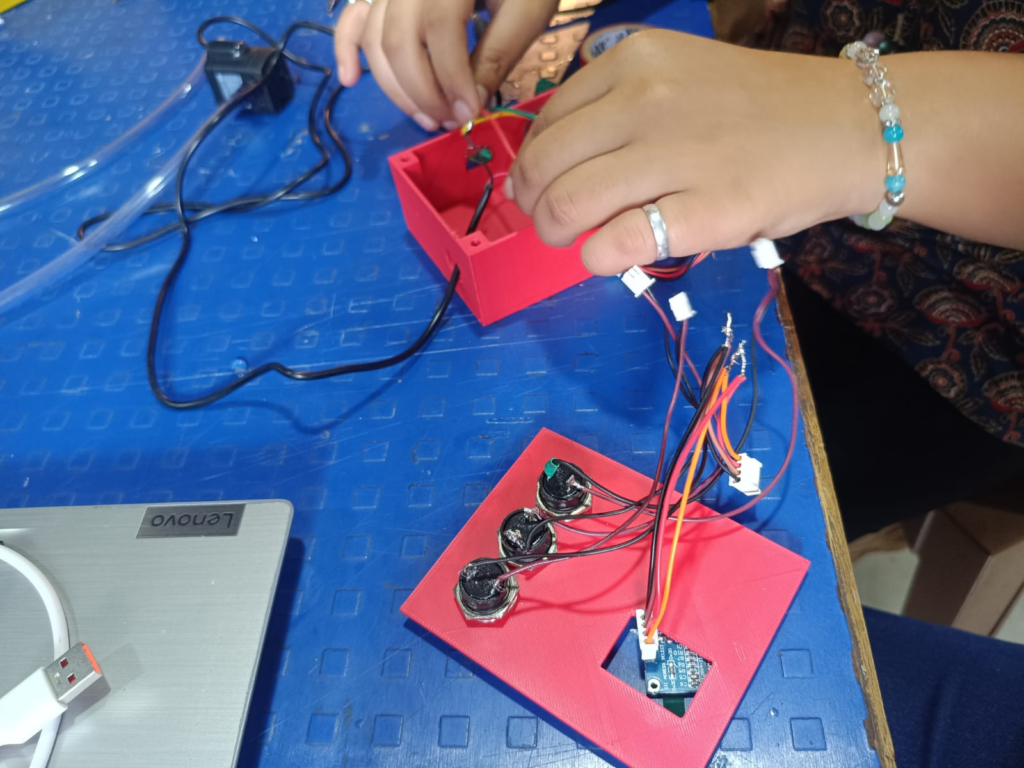
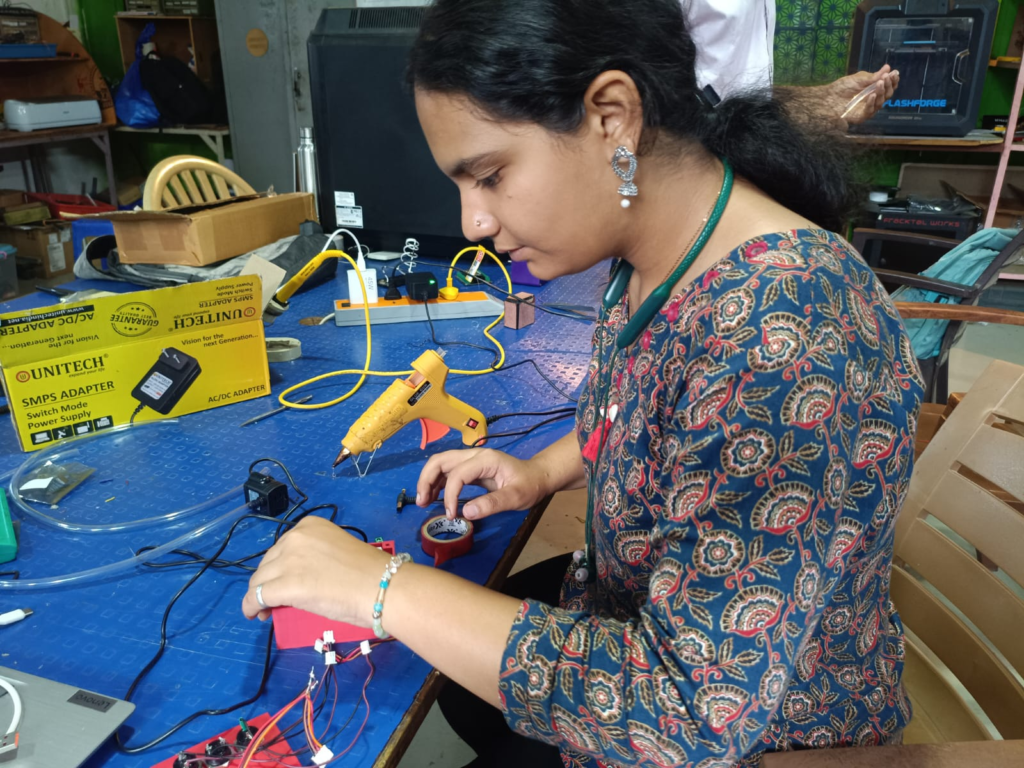
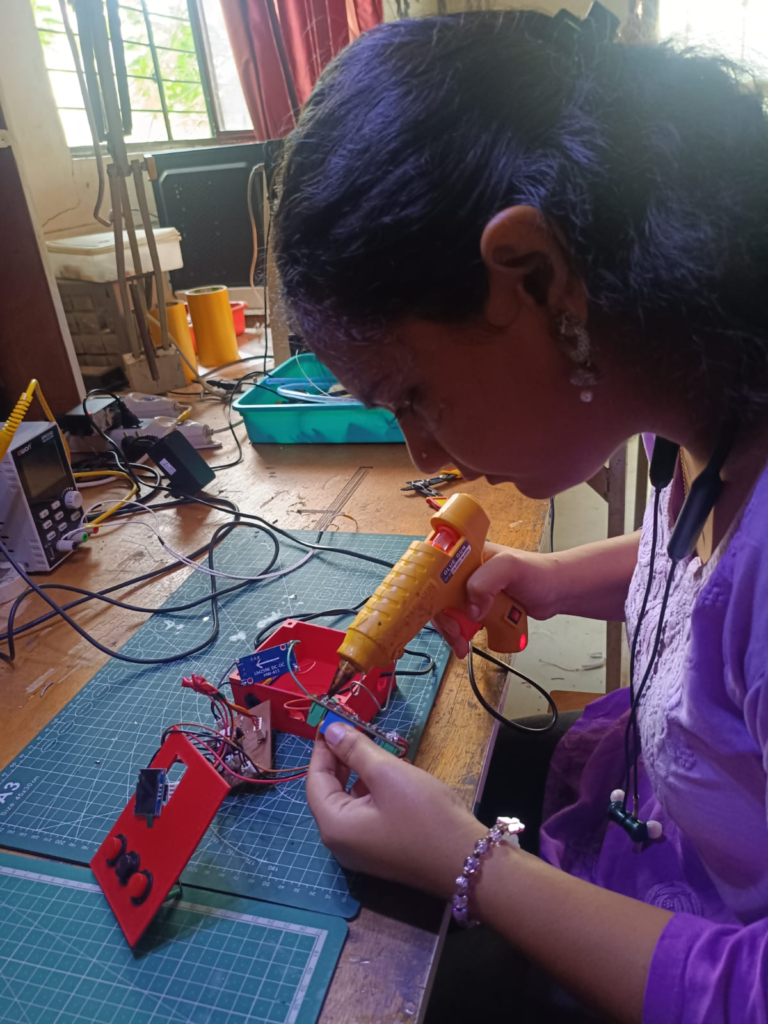
After completing the PCB and 3D-printed parts, I started assembling the complete project.
The PCB and electronic components were placed in the control section. The OLED and push buttons were positioned so they could be easily accessed by the user.
The pump and tubes were arranged according to the required milk-flow path.
System Testing
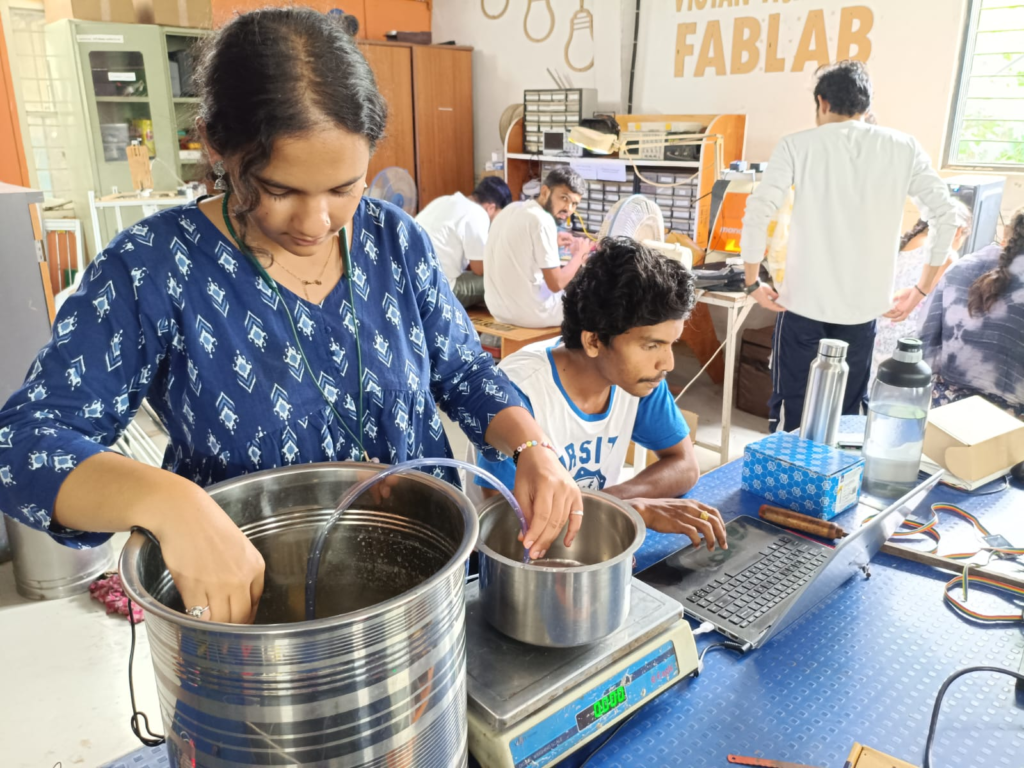
After completing the assembly, I performed the final testing of the complete machine.
I checked all three buttons, OLED display, relay, pump and automatic stopping function.
I tested the complete system to make sure that the hardware and software worked together correctly.
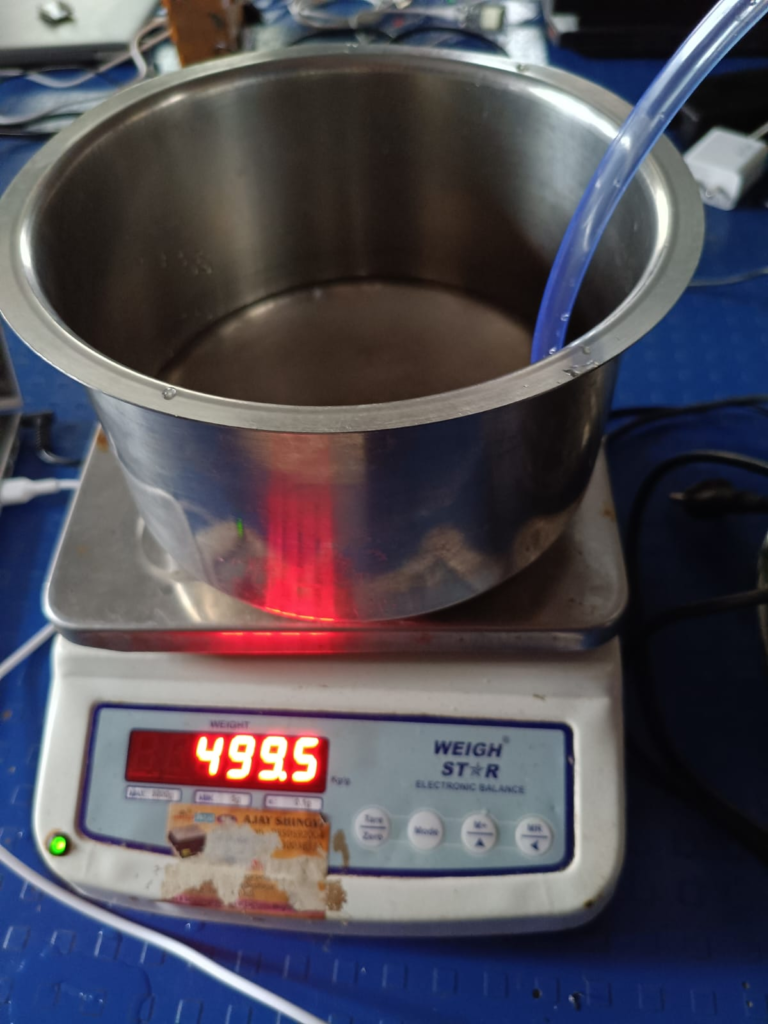
After this testing I did Final testing
Testing Results
| Test | Expected Result | Result |
|---|---|---|
| Button 1 | Select 0.5 L | Passed |
| Button 2 | Select 1 L | Passed |
| Button 3 | Select 2 L | Passed |
| OLED | Display selected quantity/status | Passed |
| Relay | Switch pump ON/OFF | Passed |
| Pump | Dispense milk | Passed |
| Automatic Stop | Stop pump after programmed time | Passed |
| Complete System | All functions work together | Passed |
Final Result
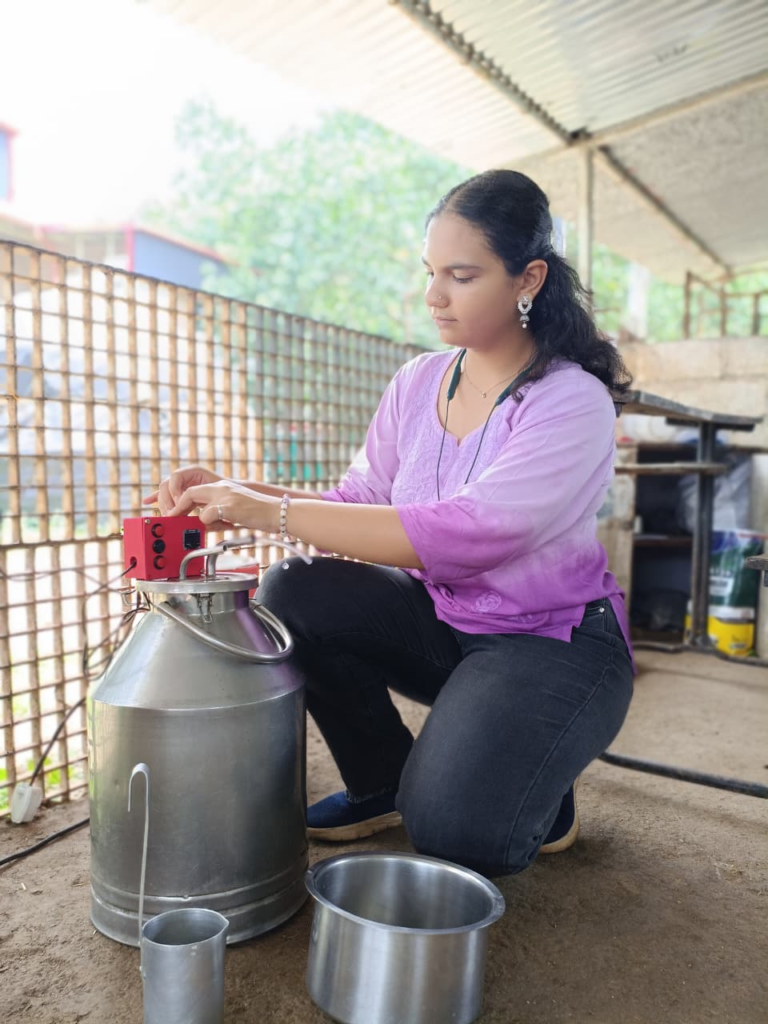
The final prototype successfully demonstrates an automatic milk dispensing system.
The three push buttons allow the user to select the required quantity. The XIAO ESP32-C3 processes the button input and controls the relay.
The relay activates the pump, allowing the milk to flow through the tube. After the programmed time, the controller switches OFF the relay and stops the pump.
The OLED display provides information about the selected quantity and the current status of the machine.
Challenges Faced
During the development of the project, I faced several challenges.
OLED Testing
I had to test the OLED separately and make sure that the correct I2C pins and library configuration were being used.
Relay Control
I tested the relay separately before connecting it to the pump to make sure that the controller could switch it correctly.
Combining Components
The components worked individually, but connecting everything together required additional testing and debugging.
Button Detection
The three buttons needed to be correctly assigned to their respective quantities.
Pump Timing
The pump timing had to be tested and adjusted according to the actual flow rate.
PCB Design
The PCB tracks and component positions had to be planned carefully to avoid incorrect connections.
Soldering
The solder joints had to be checked carefully to avoid loose connections and short circuits.
Physical Assembly
The components needed to be arranged properly so that the buttons and OLED were accessible and the electronics were separated from the milk-flow area.
Future Scope
The project can be improved further by adding a flow sensor to measure the actual quantity of milk being dispensed.
A flow sensor would allow the controller to measure the actual milk flow instead of depending only on pump operating time.
Other future improvements could include:
- More accurate quantity measurement.
- Touchscreen interface.
- Payment system.
- Multiple milk options.
- Automatic quantity calibration.
- Data recording.
- Improved enclosure.
- Larger dispensing capacity.
- Better hygiene and cleaning arrangement.
1-Minute Short Video
Project Demonstration Video:
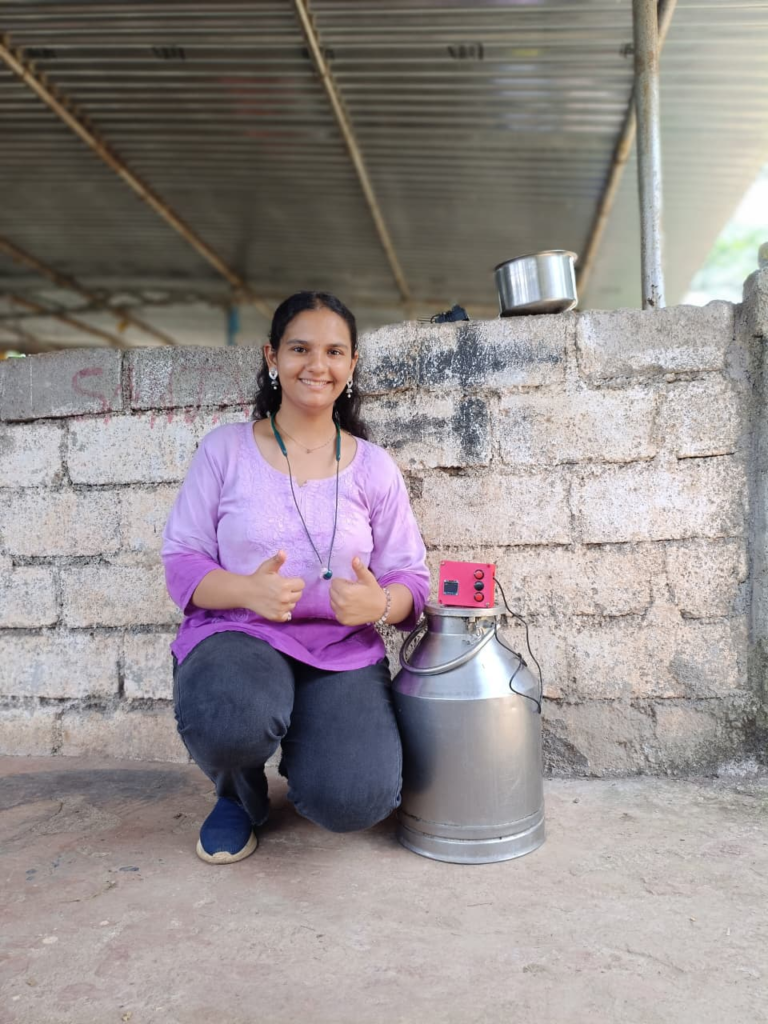
The video will show the main working process of the machine, including button selection, OLED display, relay operation, pump operation, milk dispensing and automatic stopping.
Blog Link
Blog Link:https://vadic.vigyanashram.blog/author/shravanimahajan2026/
Conclusion
The Automatic Milk Vending Machine was successfully developed as a practical embedded systems project.
The project started with the initial idea and rough planning and then progressed through individual component testing, programming, complete circuit testing, PCB design, PCB fabrication, soldering, 3D design, 3D printing, assembly and final testing.
The XIAO ESP32-C3 acts as the main controller. The push buttons provide the user input, the relay controls the pump, and the OLED display provides feedback to the user.
Through this project, I learned and applied embedded programming, electronics, input/output control, relay control, pump control, PCB design using KiCad, PCB fabrication, soldering, 3D design, 3D printing and final system testing.
The final prototype demonstrates how a microcontroller can be used to automate a real-world milk dispensing process using simple inputs and outputs.