Introduction
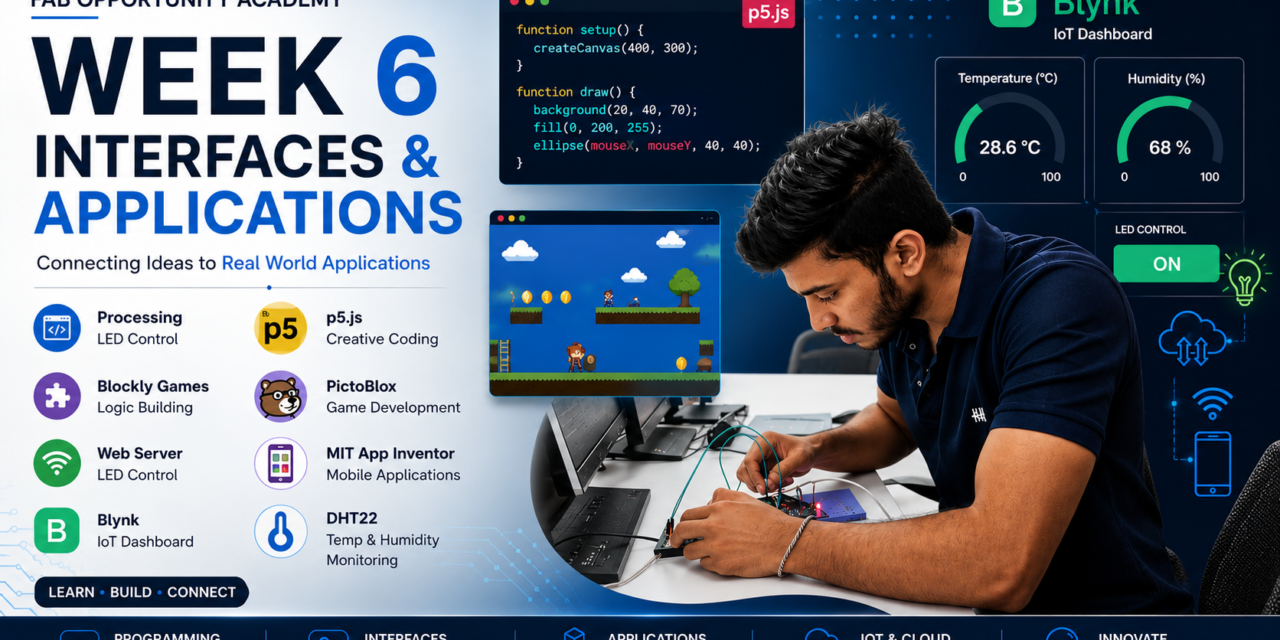
In Week 6, I learned about Interfaces and Applications and explored different software platforms used to create interactive interfaces and communicate with electronic systems. The main topics covered were Processing, p5.js, Blockly, PictoBlox, MIT App Inventor, and Blynk.
During this week, I worked on several individual assignments to understand the connection between hardware and software. I created games using block coading on PictoBlox, installed and explored Processing, controlled five LEDs using the XIAO ESP32-C3, displayed data through a web server, and explored p5.js for creating interactive applications.
I also learned about mobile-based IoT applications using MIT App Inventor and Blynk. Using Blynk, I created a mobile interface to control an LED and monitored temperature and humidity using a DHT22 sensor. These activities helped me understand how microcontrollers, sensors, computers, web interfaces, and mobile applications can work together to create interactive and useful IoT systems.
What are Interfaces and Applications?
An interface is a medium through which a user, software, or electronic device communicates with another system. It allows users to control devices, send commands, and view information in an easy-to-understand form. Examples of interfaces include mobile applications, web pages, graphical user interfaces, buttons, displays, and dashboards. An application is a software program designed to perform a specific task or solve a particular problem. In embedded systems and IoT, applications can be used to monitor sensor data, control devices, and communicate with microcontrollers. During this week, I learned about interfaces and applications using Processing, p5.js, Blockly, PictoBlox, MIT App Inventor, and Blynk, and understood how they can be connected with hardware such as the XIAO ESP32-C3, LEDs, and DHT22 sensor.
interfaces i use –
1.Processing IDE
Processing is an open-source programming language and development environment used to create interactive graphics, animations, visualizations, and applications. It has a simple and user-friendly interface, which makes it suitable for learning programming and developing interactive projects. Processing can also communicate with external hardware such as microcontrollers using serial communication. In this project, Processing was used as an interface to communicate with the XIAO ESP32-C3 and control five LEDs.

how i install processing

search processing ide on google

click to download

downloading

click next

installing

click on new sketch

Individual Assignment
Processing with XIAO ESP32-C3 and 5 LEDs
As part of my individual assignment, I installed and explored the Processing software and learned about its interface and basic features. I then connected the XIAO ESP32-C3 to a circuit containing five LEDs and established communication between Processing and the microcontroller. The Processing interface was used to send commands to the XIAO ESP32-C3, which controlled the five LEDs. I learned how software can be used as an interface to operate physical electronic components and gained practical knowledge of serial communication, microcontroller control, and hardware-software interaction.


code for arduino ide
int leds[] = {D0, D1, D2, D3, D4};

void setup() {
  Serial.begin(115200);

  for (int i = 0; i < 5; i++) {
    pinMode(leds[i], OUTPUT);
    digitalWrite(leds[i], LOW);
  }
}

void loop() {

  if (Serial.available()) {

    char data = Serial.read();

    // Turn ON
    if (data == '1') digitalWrite(D0, HIGH);
    if (data == '2') digitalWrite(D1, HIGH);
    if (data == '3') digitalWrite(D2, HIGH);
    if (data == '4') digitalWrite(D3, HIGH);
    if (data == '5') digitalWrite(D4, HIGH);

    // Turn OFF
    if (data == 'a') digitalWrite(D0, LOW);
    if (data == 'b') digitalWrite(D1, LOW);
    if (data == 'c') digitalWrite(D2, LOW);
    if (data == 'd') digitalWrite(D3, LOW);
    if (data == 'e') digitalWrite(D4, LOW);

    // ALL OFF
    if (data == '0') {
      for (int i = 0; i < 5; i++) {
        digitalWrite(leds[i], LOW);
      }
    }
  }
}
code for processing IDE
import processing.serial.*;

Serial myPort;

void setup() {
  size(600, 400);

  // XIAO ESP32-C3 is on COM6
  myPort = new Serial(this, "COM6", 115200);
}

void draw() {
  background(240);

  // Title
  fill(0);
  textAlign(CENTER);
  textSize(30);
  text("5 LED CONTROL", 300, 50);

  // LED 1
  fill(0, 180, 0);
  rect(30, 100, 100, 60);

  // LED 2
  rect(145, 100, 100, 60);

  // LED 3
  rect(260, 100, 100, 60);

  // LED 4
  rect(375, 100, 100, 60);

  // LED 5
  rect(490, 100, 100, 60);

  // Text
  fill(255);
  textSize(18);

  text("LED 1", 80, 137);
  text("LED 2", 195, 137);
  text("LED 3", 310, 137);
  text("LED 4", 425, 137);
  text("LED 5", 540, 137);

  // ALL OFF button
  fill(200, 0, 0);
  rect(225, 230, 150, 60);

  fill(255);
  textSize(20);
  text("ALL OFF", 300, 267);
}

void mousePressed() {

  // LED 1
  if (mouseX > 30 && mouseX < 130 &&
      mouseY > 100 && mouseY < 160) {
    myPort.write('1');
  }

  // LED 2
  if (mouseX > 145 && mouseX < 245 &&
      mouseY > 100 && mouseY < 160) {
    myPort.write('2');
  }

  // LED 3
  if (mouseX > 260 && mouseX < 360 &&
      mouseY > 100 && mouseY < 160) {
    myPort.write('3');
  }

  // LED 4
  if (mouseX > 375 && mouseX < 475 &&
      mouseY > 100 && mouseY < 160) {
    myPort.write('4');
  }

  // LED 5
  if (mouseX > 490 && mouseX < 590 &&
      mouseY > 100 && mouseY < 160) {
    myPort.write('5');
  }

  // ALL OFF
  if (mouseX > 225 && mouseX < 375 &&
      mouseY > 230 && mouseY < 290) {
    myPort.write('0');
  }
}
Experience – Processing
Working with Processing was an interesting experience because I learned how software can be used as an interface to control physical hardware. I installed Processing, explored its interface and basic functions, and connected it with the XIAO ESP32-C3. I used Processing to communicate with the XIAO ESP32-C3 and control five LEDs. This activity helped me understand serial communication and the connection between a computer application and a microcontroller. It also improved my understanding of interactive programming and hardware-software integration.
2.web server
A web server is a system that stores, processes, and delivers web pages or data to users through a web browser over a network. In IoT and embedded systems, a microcontroller such as the XIAO ESP32-C3 can work as a simple web server by connecting to Wi-Fi and hosting a webpage. Users can access this webpage using the device’s IP address to view data or control connected devices. Web servers are commonly used for remote monitoring, device control, and displaying sensor information.
individual assignment
web server with xiao esp32 c3 to control 3 LEDs
A web server is a system that provides web pages or data to users through a web browser over a network. In this assignment, I used the XIAO ESP32-C3 to create a simple web server and connected it to Wi-Fi. I created a web interface with controls for three LEDs connected to the XIAO ESP32-C3. By accessing the web page through the ESP32-C3’s IP address, I was able to turn the three LEDs ON and OFF using buttons on the webpage. This assignment helped me understand how a microcontroller can act as a web server and how a web interface can be used to control physical devices remotely over a Wi-Fi network.


#include <WiFi.h>

const char* ssid = "YOUR_WIFI_NAME";
const char* password = "YOUR_WIFI_PASSWORD";

WiFiServer server(80);

#define LED1 D0
#define LED2 D1
#define LED3 D2

bool led1State = false;
bool led2State = false;
bool led3State = false;

void setup() {
  Serial.begin(115200);

  pinMode(LED1, OUTPUT);
  pinMode(LED2, OUTPUT);
  pinMode(LED3, OUTPUT);

  digitalWrite(LED1, LOW);
  digitalWrite(LED2, LOW);
  digitalWrite(LED3, LOW);

  WiFi.begin(ssid, password);

  Serial.print("Connecting to WiFi");

  while (WiFi.status() != WL_CONNECTED) {
    delay(500);
    Serial.print(".");
  }

  Serial.println();
  Serial.println("WiFi Connected!");

  Serial.print("IP Address: ");
  Serial.println(WiFi.localIP());

  server.begin();
}

void loop() {

  WiFiClient client = server.available();

  if (!client) {
    return;
  }

  String request = client.readStringUntil('\r');
  client.flush();

  // LED 1
  if (request.indexOf("GET /led1on") >= 0) {
    digitalWrite(LED1, HIGH);
    led1State = true;
  }

  if (request.indexOf("GET /led1off") >= 0) {
    digitalWrite(LED1, LOW);
    led1State = false;
  }

  // LED 2
  if (request.indexOf("GET /led2on") >= 0) {
    digitalWrite(LED2, HIGH);
    led2State = true;
  }

  if (request.indexOf("GET /led2off") >= 0) {
    digitalWrite(LED2, LOW);
    led2State = false;
  }

  // LED 3
  if (request.indexOf("GET /led3on") >= 0) {
    digitalWrite(LED3, HIGH);
    led3State = true;
  }

  if (request.indexOf("GET /led3off") >= 0) {
    digitalWrite(LED3, LOW);
    led3State = false;
  }

  // ALL OFF
  if (request.indexOf("GET /alloff") >= 0) {
    digitalWrite(LED1, LOW);
    digitalWrite(LED2, LOW);
    digitalWrite(LED3, LOW);

    led1State = false;
    led2State = false;
    led3State = false;
  }

  // Web page
  String html = "";

  html += "<!DOCTYPE html>";
  html += "<html>";
  html += "<head>";

  html += "<meta name='viewport' content='width=device-width, initial-scale=1'>";

  html += "<title>3 LED Control</title>";

  html += "<style>";

  html += "body {";
  html += "font-family: Arial;";
  html += "text-align: center;";
  html += "background: #f2f2f2;";
  html += "}";

  html += ".box {";
  html += "background: white;";
  html += "margin: 15px auto;";
  html += "padding: 15px;";
  html += "max-width: 400px;";
  html += "border-radius: 12px;";
  html += "}";

  html += "button {";
  html += "padding: 12px 25px;";
  html += "margin: 5px;";
  html += "font-size: 18px;";
  html += "border: none;";
  html += "border-radius: 8px;";
  html += "}";

  html += ".on {";
  html += "background: green;";
  html += "color: white;";
  html += "}";

  html += ".off {";
  html += "background: red;";
  html += "color: white;";
  html += "}";

  html += "</style>";
  html += "</head>";

  html += "<body>";

  html += "<h1>3 LED CONTROL</h1>";

  // LED 1
  html += "<div class='box'>";
  html += "<h2>LED 1</h2>";

  if (led1State)
    html += "<p>Status: <b style='color:green'>ON</b></p>";
  else
    html += "<p>Status: <b style='color:red'>OFF</b></p>";

  html += "<a href='/led1on'><button class='on'>ON</button></a>";
  html += "<a href='/led1off'><button class='off'>OFF</button></a>";
  html += "</div>";

  // LED 2
  html += "<div class='box'>";
  html += "<h2>LED 2</h2>";

  if (led2State)
    html += "<p>Status: <b style='color:green'>ON</b></p>";
  else
    html += "<p>Status: <b style='color:red'>OFF</b></p>";

  html += "<a href='/led2on'><button class='on'>ON</button></a>";
  html += "<a href='/led2off'><button class='off'>OFF</button></a>";
  html += "</div>";

  // LED 3
  html += "<div class='box'>";
  html += "<h2>LED 3</h2>";

  if (led3State)
    html += "<p>Status: <b style='color:green'>ON</b></p>";
  else
    html += "<p>Status: <b style='color:red'>OFF</b></p>";

  html += "<a href='/led3on'><button class='on'>ON</button></a>";
  html += "<a href='/led3off'><button class='off'>OFF</button></a>";
  html += "</div>";

  // ALL OFF
  html += "<a href='/alloff'>";
  html += "<button class='off'>ALL OFF</button>";
  html += "</a>";

  html += "</body>";
  html += "</html>";

  // Send webpage
  client.println("HTTP/1.1 200 OK");
  client.println("Content-Type: text/html");
  client.println("Connection: close");
  client.println();
  client.println(html);

  delay(1);
  client.stop();
}
what i get on web server
3 LED CONTROL
┌───────────────────┐
│ LED 1 │
│ Status: OFF │
│ [ON] [OFF] │
└───────────────────┘
┌───────────────────┐
│ LED 2 │
│ Status: OFF │
│ [ON] [OFF] │
└───────────────────┘
┌───────────────────┐
│ LED 3 │
│ Status: OFF │
│ [ON] [OFF] │
└───────────────────┘
[ ALL OFF ]
Experience – web server
Working with the web server was a useful hands-on experience. I learned how to connect the XIAO ESP32-C3 to Wi-Fi and use it as a simple web server. I created a web interface with buttons to control three LEDs and tested turning them ON and OFF through a browser. This helped me understand the connection between a microcontroller, Wi-Fi network, web browser, and physical output devices. I also gained practical knowledge about using an IP address to access the web interface and control hardware.
3.PICTOBLOX
What is PictoBlox?
PictoBlox is a block-based programming platform used to learn programming and create interactive projects. It allows users to program microcontrollers and electronic components using drag-and-drop blocks, which makes programming easier for beginners. PictoBlox can be used with Arduino, sensors, LEDs, motors, robotics, IoT, and AI projects. It helps users understand how software can communicate with and control hardware.
how i install Pictoblox
I searched for PictoBlox for Windows on Google.

opened the official PictoBlox download page and selected Windows.

clicked the Windows Installer 64-bit option to download PictoBlox

entered the required details and started the PictoBlox download.

The PictoBlox installer was downloaded successfully.

I opened the downloaded PictoBlox setup file to start the installation.

selected the installation folder and clicked the Install button.

PictoBlox was being installed on the computer.

The installation was completed, and I clicked Finish to launch PictoBlox.
Indiviual Asignment
Bounce Ball Game Using PictoBlox
As part of another individual assignment, I created a Bounce Ball Game using PictoBlox with block-based coding. I used different programming blocks to control the movement of the ball, detect collisions, and create the game logic. This assignment helped me understand basic programming concepts such as events, loops, conditions, variables, and sprite movement. Creating the game using block coding made it easier to understand programming logic and improved my problem-solving and interactive application development skills.

I opened PictoBlox

selected the Blocks option to create the game.

I added the ball and paddle sprites and set up the game background.

created the ball movement and bouncing logic using blocks.

programmed the paddle to move left and right using the arrow keys.

tested the game and checked whether the ball bounced correctly on the paddle.
Experience – pictoblocks
Creating the Bounce Ball Game in PictoBlox was a good learning experience for me. I learned how to use different blocks to control the movement of the ball and paddle and make the ball bounce properly. While making the game, I understood how conditions and loops are used to create game logic. I also faced some small problems while testing the game, but solving them helped me improve my debugging and problem-solving skills.
4.p5.js
what is p5.js
p5.js is a JavaScript library used for creating interactive graphics, animations, drawings, and creative web applications. It provides simple functions for drawing shapes, adding colors, images, sounds, and user interactions such as mouse and keyboard actions. p5.js runs in a web browser, making it easy to create and test interactive projects. It is useful for learning programming, creative coding, animation, game development, and interactive web applications.

search p5.js on google

p5.js Web Editor Interface.
Individual Assignment – p5.js
As part of my individual assignment, I learned about p5.js and explored its Web Editor, coding structure, and basic functions. I used p5.js to create different games, pictures, animations, and interactive graphics by writing my own code with the help of ChatGPT AI for learning, understanding, and developing the programs. This activity helped me understand how code can be used to create visual and interactive applications. I learned about functions, shapes, colors, animations, user interaction, and game logic while experimenting with different projects. This assignment improved my programming skills and gave me practical experience in creative coding and interactive web development.

code
function setup() {
  createCanvas(600, 400);
}

function draw() {
  // Sky
  background(135, 206, 235);

  // Sun
  fill(255, 200, 0);
  noStroke();
  circle(450, 100, 100);

  // Mountains
  fill(80, 100, 120);
  triangle(0, 300, 180, 100, 360, 300);
  triangle(250, 300, 430, 120, 600, 300);

  // Snow on mountains
  fill(255);
  triangle(180, 100, 145, 140, 165, 130);
  triangle(430, 120, 395, 160, 420, 150);

  // Ground
  fill(60, 150, 80);
  rect(0, 300, 600, 100);

  // River
  fill(70, 170, 220);
  beginShape();
  vertex(250, 300);
  vertex(350, 300);
  vertex(500, 400);
  vertex(100, 400);
  endShape(CLOSE);

  // Tree trunk
  fill(100, 60, 30);
  rect(80, 220, 25, 100);

  // Tree leaves
  fill(30, 120, 50);
  circle(90, 200, 90);
  circle(55, 225, 70);
  circle(125, 225, 70);

  // Birds
  noFill();
  stroke(0);
  strokeWeight(2);
  arc(150, 100, 25, 15, PI, TWO_PI);
  arc(180, 100, 25, 15, PI, TWO_PI);

  // Title
  noStroke();
  fill(0);
  textSize(20);
  text("p5.js Sunset Landscape", 20, 30);
}
game on p5.js web

code
let ballX;
let ballY;
let ballSize = 30;
let score = 0;
let speed = 3;

function setup() {
  createCanvas(600, 400);
  ballX = random(30, width - 30);
  ballY = 50;
}

function draw() {
  background(220);

  // Ball
  fill(255, 0, 0);
  circle(ballX, ballY, ballSize);

  // Move ball downward
  ballY += speed;

  // Score
  fill(0);
  textSize(24);
  text("Score: " + score, 20, 35);

  // Reset ball if it reaches bottom
  if (ballY > height + ballSize) {
    ballY = 50;
    ballX = random(30, width - 30);
  }
}

function mousePressed() {
  // Check if mouse clicks the ball
  let distance = dist(mouseX, mouseY, ballX, ballY);

  if (distance < ballSize / 2) {
    score++;
    ballY = 50;
    ballX = random(30, width - 30);
  }
}
Experience – p5.js
Exploring p5.js was an interesting experience because I learned how programming can be used to create visual and interactive applications. I explored the p5.js Web Editor and experimented with different codes to create pictures, animations, and games. With the help of ChatGPT AI, I learned how to understand and modify code and use functions, shapes, colors, movement, and user interaction in my projects. This assignment improved my understanding of JavaScript and creative coding and gave me confidence in creating interactive projects using code.
5.Blockly Games
Blockly Games is a collection of educational games designed to teach programming concepts using block-based coding. It allows users to create programs by arranging and connecting visual blocks instead of writing traditional code. Through different interactive games and challenges, users can learn concepts such as sequence, loops, conditions, logic, and problem-solving. Blockly Games makes programming easier and more engaging for beginners and helps develop logical thinking and basic coding skills.

search blockly on google

blockly games interface
Individual Assignment – Blockly Games
As part of my individual assignment, I explored Blockly Games, a collection of educational games designed to teach programming concepts using block-based coding. Instead of writing code using traditional programming languages, I arranged and connected different blocks to create instructions and solve challenges. Through these games, I learned basic programming concepts such as sequence, loops, conditions, logic, and problem-solving. This activity made programming easier to understand and helped me develop logical thinking and coding skills in an interactive way.

Blockly Games: Maze
In this assignment, I worked with Blockly Games – Maze, where I used block-based coding to guide a character through a maze and reach the destination. I used programming blocks such as move forward, turn left, turn right, repeat until, and if path to create the required sequence of instructions. The assignment required me to understand the maze structure and arrange the blocks in the correct logical order so that the character could reach the target without getting stuck. This activity helped me understand loops, conditional statements, sequencing, and logical problem-solving through visual programming. It also improved my ability to develop programming logic without writing traditional text-based code.
Applications I Use
1.MIT App Inventor
MIT App Inventor and ESP32 LED Control
In my individual assignment, I developed a simple mobile application using MIT App Inventor to control an LED connected to an ESP32. The ESP32 was connected to the mobile phone through Wi-Fi, and the app was designed with buttons to turn the LED ON and OFF. When a button was pressed in the app, the ESP32 received the command and controlled the LED accordingly. This activity helped me understand MIT App Inventor, ESP32 Wi-Fi communication, app development, and IoT-based device control.
what is MIT app inventor
MIT App Inventor
MIT App Inventor is a web-based platform used to create mobile applications using a simple drag-and-drop interface and block-based programming. It allows users to develop Android applications without requiring advanced programming knowledge. In this assignment, MIT App Inventor was used to create a mobile application for controlling an LED connected to an ESP32. The app sends commands to the ESP32 through Wi-Fi, allowing the LED to be turned ON and OFF from the mobile phone.
steps a follow to create app on MIT app inventor
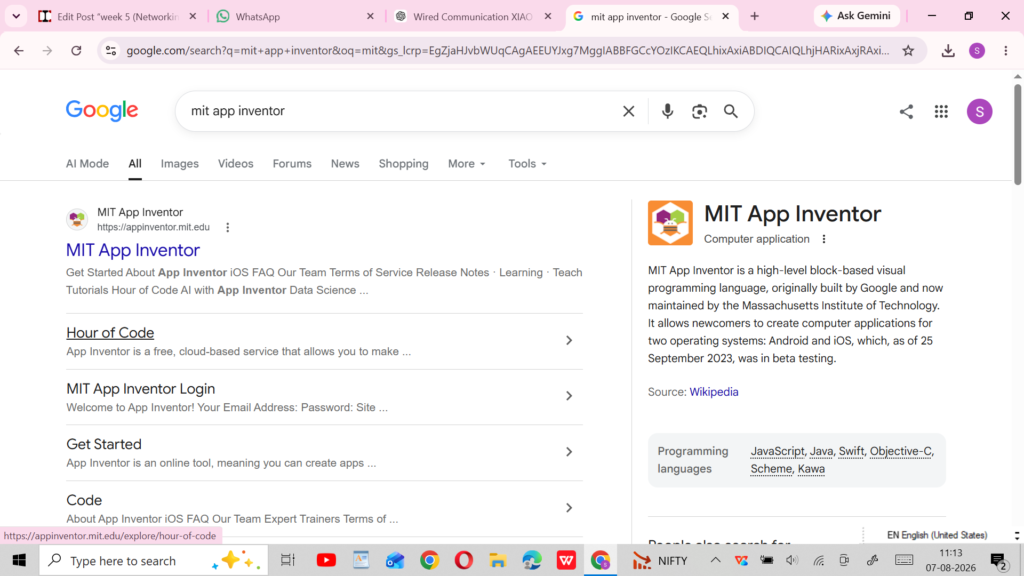
search MIT app inventor on google
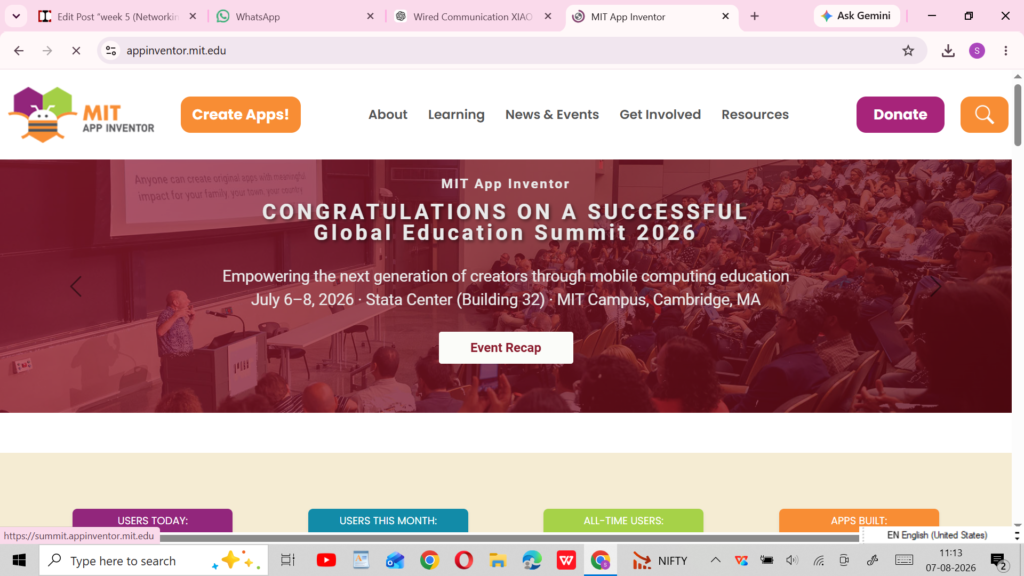
open website and create account
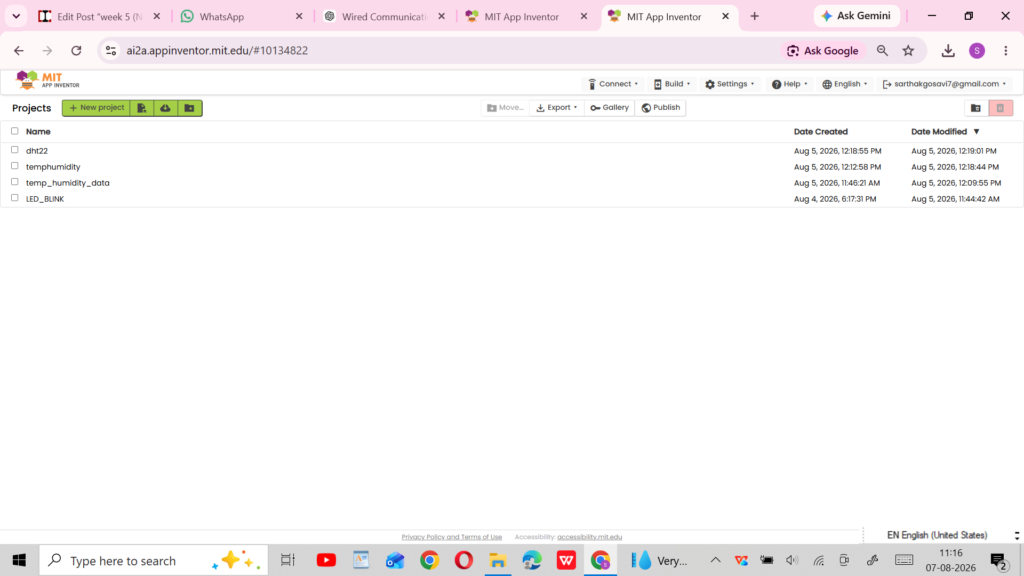
click on new project
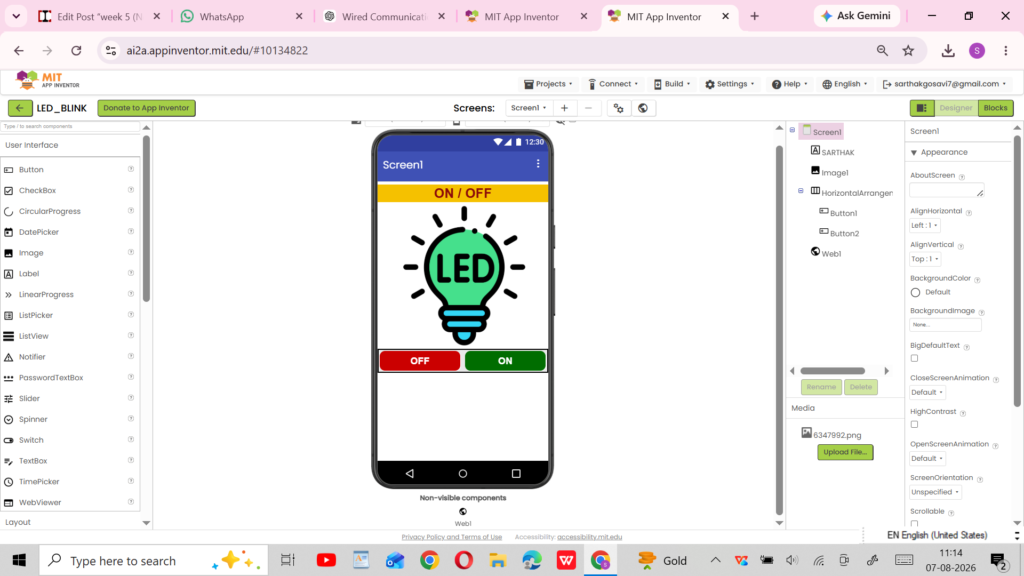
create a app interface as you need
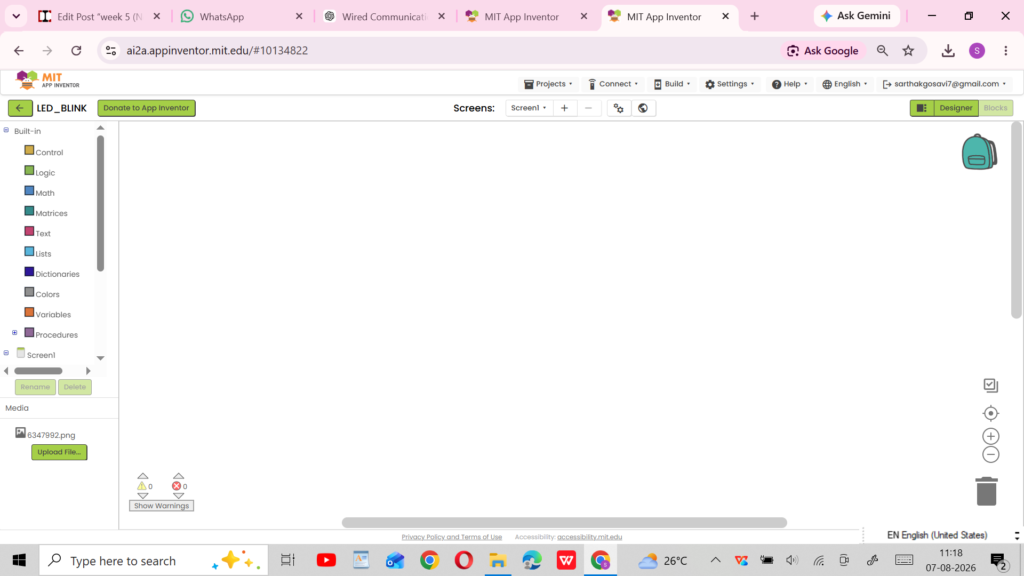
go to the blocks
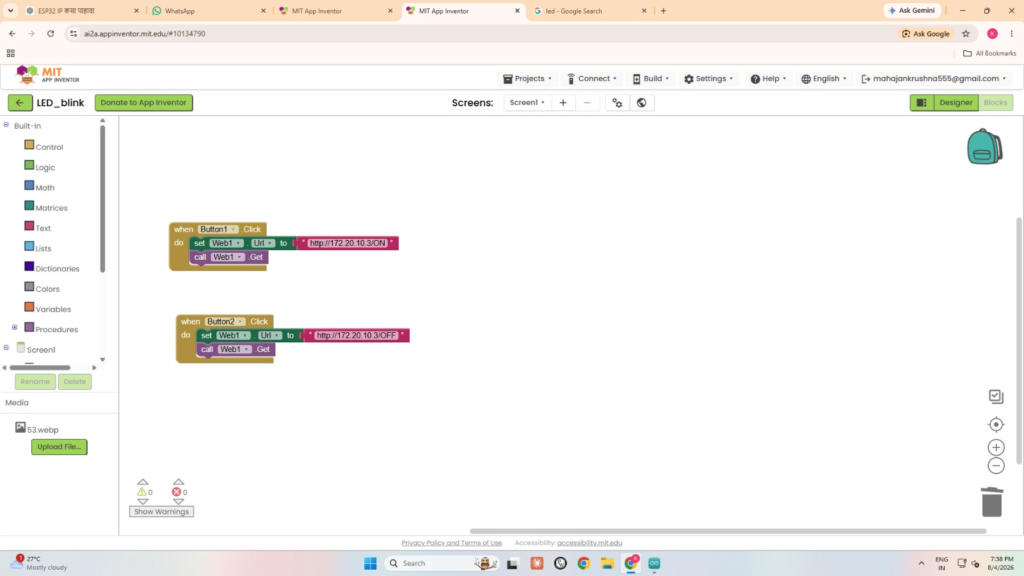
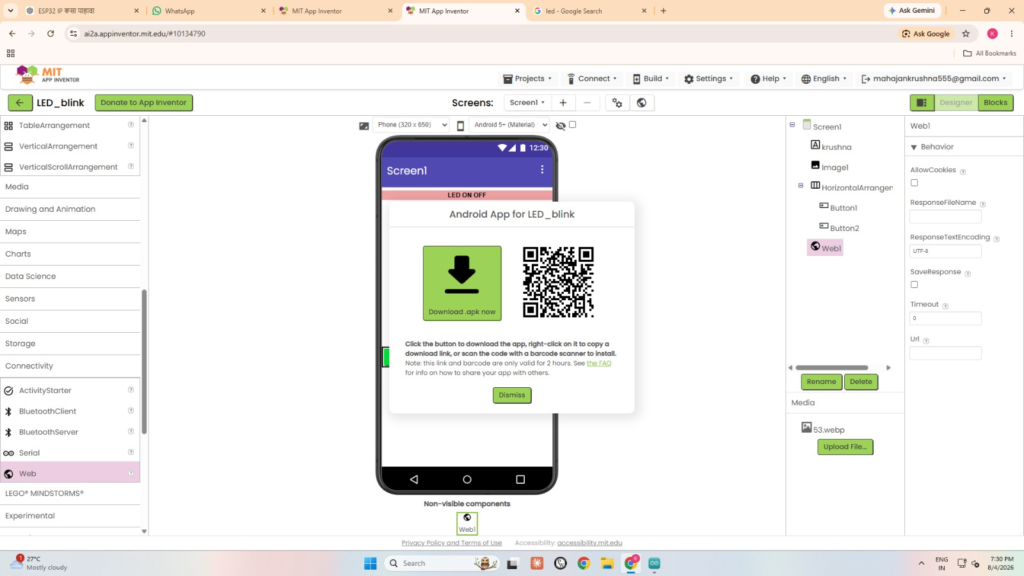
scan QR and download app on mobile
code
#include <WiFi.h>
#include <WebServer.h>

const char* ssid = "YOUR_WIFI_NAME";
const char* password = "YOUR_WIFI_PASSWORD";

WebServer server(80);

const int ledPin = 2;

void handleOn() {
  digitalWrite(ledPin, HIGH);
  server.send(200, "text/plain", "LED ON");
}

void handleOff() {
  digitalWrite(ledPin, LOW);
  server.send(200, "text/plain", "LED OFF");
}

void setup() {
  Serial.begin(115200);

  pinMode(ledPin, OUTPUT);
  digitalWrite(ledPin, LOW);

  WiFi.begin(ssid, password);

  while (WiFi.status() != WL_CONNECTED) {
    delay(500);
    Serial.print(".");
  }

  Serial.println();
  Serial.print("ESP32 IP Address: ");
  Serial.println(WiFi.localIP());

  server.on("/on", handleOn);
  server.on("/off", handleOff);

  server.begin();
}

void loop() {
  server.handleClient();
}
ESP32 Configuration
To connect the ESP32 with the MIT App Inventor application, the Wi-Fi network name and password were entered in the ESP32 program. The ESP32 was then connected to the same Wi-Fi network as the mobile phone. After successful connection, the ESP32 automatically displayed its IP address in the Serial Monitor. This IP address was used in the MIT App Inventor application to communicate with the ESP32 and control the LED. No IP address was required to be added manually to the ESP32 code.
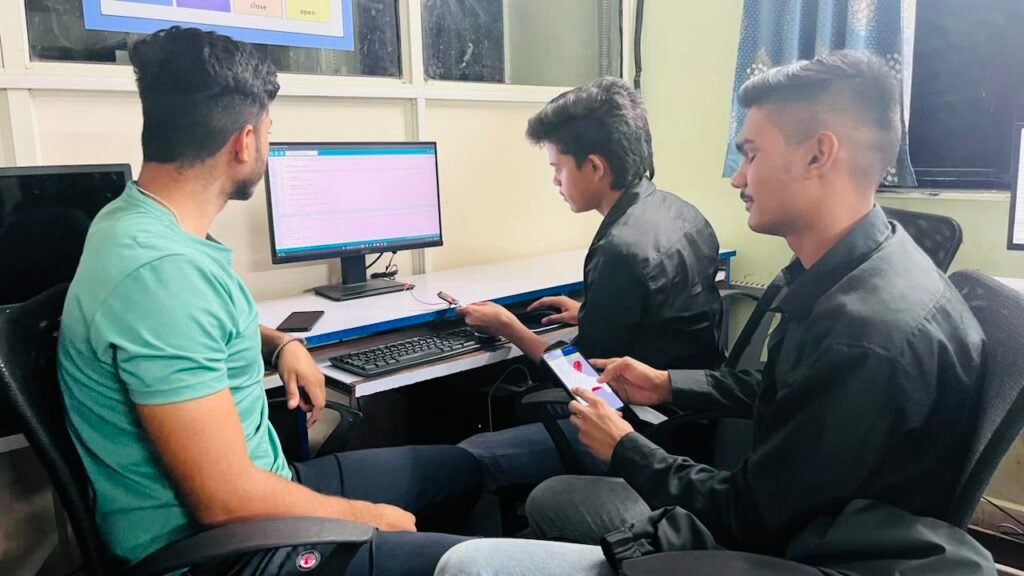
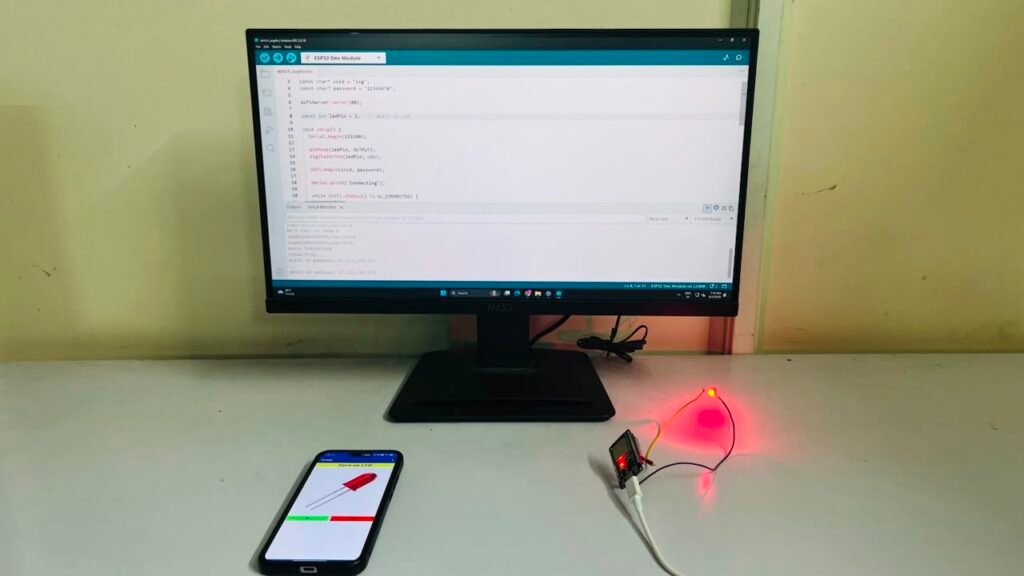
Experience
In this activity, I learned how to create a mobile application using MIT App Inventor and connect it with an ESP32 through Wi-Fi. I learned how to enter the Wi-Fi details, find the ESP32 IP address, and use it in the mobile application. I also learned how to create ON and OFF buttons using block programming to control an LED. This activity gave me practical experience in app development, Wi-Fi communication, ESP32 programming, and basic IoT control.
2.blynk iot
what is Blynk
Blynk is an IoT platform used to connect, monitor, and control electronic devices through a mobile or web application. It allows a microcontroller such as the XIAO ESP32-C3 to communicate with a smartphone over the internet. Users can create a graphical interface using widgets such as buttons, switches, displays, and gauges. In this week, I used Blynk to create a mobile interface for controlling an LED and for displaying temperature and humidity data from a DHT22 sensor. Blynk is commonly used in IoT applications such as home automation, environmental monitoring, smart agriculture, and remote device control.
Log in and interface of blynk


Individual Assignment – LED Control Using Blynk
As part of my individual assignment, I used Blynk to create a mobile interface for controlling one LED connected to the XIAO ESP32-C3. I installed the Blynk application, created a project interface, and added a button to control the LED. The XIAO ESP32-C3 was connected to Wi-Fi and linked with the Blynk application. When I pressed the button on the mobile app, a command was sent to the XIAO ESP32-C3, which turned the LED ON or OFF. This assignment helped me understand how a mobile application can be used as an IoT interface to control physical devices remotely.

Create a Template by selecting new template

Create a Datastream and dashboard


edit template ID , template name , token number and wifi name password in the code and upload it in arduinoIDE
#define BLYNK_TEMPLATE_ID "TMPL36K5YoDc1"
#define BLYNK_TEMPLATE_NAME "esp"
#define BLYNK_AUTH_TOKEN "2aoak6gsYXFcgDgJ-m98syD3383bAj0F"

#include <WiFi.h>
#include <BlynkSimpleEsp32.h>

char ssid[] = "karan";
char pass[] = "12345678";

#define LED_PIN 21

BLYNK_WRITE(V0)
{
  int value = param.asInt();
  digitalWrite(LED_PIN, value);
}

void setup()
{
  Serial.begin(115200);

  pinMode(LED_PIN, OUTPUT);
  digitalWrite(LED_PIN, LOW);

  Blynk.begin(BLYNK_AUTH_TOKEN, ssid, pass);
}

void loop()
{
  Blynk.run();
}


Individual Assignment – Temperature and Humidity Monitoring Using Blynk
As part of my individual assignment, I used the DHT22 sensor, XIAO ESP32-C3, and Blynk to monitor temperature and humidity. The DHT22 sensor was connected to the XIAO ESP32-C3 to measure the surrounding temperature and humidity. The XIAO ESP32-C3 read the sensor values and sent the data through Wi-Fi to the Blynk platform. I created a mobile interface in Blynk to display the temperature and humidity readings using suitable widgets. This assignment helped me understand how sensor data can be collected by a microcontroller and displayed remotely on a mobile application using IoT technology.

create a new template for monitoring temperature and humidity

then create a datastream

then create a dashboard and upload a code in arduino IDE with template ID , template name , token number and wifi name password

Week 6 – Overall Experience
Week 6 was a very interesting and practical learning experience because I learned how interfaces and applications can be used to communicate with and control electronic systems. I explored different platforms such as Processing, p5.js, Blockly Games, PictoBlox, web servers, MIT App Inventor, and Blynk. Through individual assignments, I created a Bounce Ball game using PictoBlox, solved programming challenges using Blockly Games, created games and pictures using p5.js with the help of ChatGPT AI, and used Processing to control five LEDs connected to the XIAO ESP32-C3. I also created a web server to control three LEDs through a web browser.
I further explored IoT applications using Blynk, where I created a mobile interface to control an LED and monitored temperature and humidity using a DHT22 sensor connected to the XIAO ESP32-C3. These activities helped me understand the connection between hardware, software, web interfaces, and mobile applications. Overall, Week 6 improved my programming, problem-solving, IoT, and interface-design skills and gave me practical experience in developing interactive and connected applications .
END OF WEEK 6.