Introduction
This week, I learned how to build an application that interfaces with a microcontroller board and explored different tools used for developing applications and user interfaces. I worked on connecting the microcontroller with an application to control and monitor hardware functions.
Individual assignment
In this individual assignment, I developed and tested different application interfaces to communicate with and control a microcontroller board. The main objective was to understand how microcontroller hardware can be controlled using different software tools and application development platforms. I explored MIT App Inventor, Processing, Blynk, Web Server, PictoBlox, p5.js, and Blockly and compared their features, communication methods, and ease of use.
Processing

Processing is an open-source development platform used to create graphics, animations, and interactive applications. In our project, we used Processing to communicate between the computer and a custom PCB through serial communication. It allowed us to control multiple LEDs using buttons and interactive controls. We could change LED patterns, brightness, and behavior in real time. This helped us understand how graphical interfaces can be used to control microcontroller hardware.
Steps to Download and Install Processing:

Search processing download for windows.

Click on Download.


Click on next


Installing..

Click on finish.

Servo Motor Using Processing on XIAO ESP32-C3
In this assignment, I controlled a servo motor connected to the ESP32-C3 using Arduino IDE and Processing. I programmed the ESP32-C3 in Arduino IDE to receive commands and control the servo motor angle. Processing was used to create a simple graphical interface for sending control commands to the ESP32-C3. Using the interface, I could move the servo motor to different positions in real time. This helped me understand serial communication between Processing and the ESP32-C3 and practical servo motor control.


Arduino IDE Code:-
#include <ESP32Servo.h>

Servo myServo;

const int servoPin = 4;

void setup() {
  Serial.begin(115200);

  myServo.attach(servoPin);
  myServo.write(90);

  Serial.println("Servo Ready");
}

void loop() {
  if (Serial.available() > 0) {

    int angle = Serial.parseInt();

    if (angle >= 0 && angle <= 180) {
      myServo.write(angle);

      Serial.print("Servo Angle: ");
      Serial.println(angle);
    }
  }
}
Processing Code:-
import processing.serial.*;

Serial myPort;

void setup() {
  size(600, 350);

  // ESP32-C3 is connected to COM13
  myPort = new Serial(this, "COM13", 115200);

  println("Connected to ESP32-C3 on COM13");
}

void draw() {
  background(240);

  // Title
  fill(0);
  textAlign(CENTER);
  textSize(28);
  text("ESP32-C3 Servo Control", width / 2, 50);

  // Buttons
  drawButton(40, 120, 90, 60, "0°");
  drawButton(150, 120, 90, 60, "45°");
  drawButton(260, 120, 90, 60, "90°");
  drawButton(370, 120, 90, 60, "135°");
  drawButton(480, 120, 90, 60, "180°");

  // Instructions
  fill(0);
  textSize(18);
  text("Click a button to move the servo", width / 2, 250);

  textSize(15);
  text("ESP32-C3 | COM13 | 115200 baud", width / 2, 290);
}

void drawButton(int x, int y, int w, int h, String label) {

  fill(200);
  rect(x, y, w, h, 10);

  fill(0);
  textAlign(CENTER, CENTER);
  textSize(20);
  text(label, x + w / 2, y + h / 2);
}

void mousePressed() {

  if (mouseY >= 120 && mouseY <= 180) {

    if (mouseX >= 40 && mouseX <= 130) {
      sendAngle(0);
    }

    else if (mouseX >= 150 && mouseX <= 240) {
      sendAngle(45);
    }

    else if (mouseX >= 260 && mouseX <= 350) {
      sendAngle(90);
    }

    else if (mouseX >= 370 && mouseX <= 460) {
      sendAngle(135);
    }

    else if (mouseX >= 480 && mouseX <= 570) {
      sendAngle(180);
    }
  }
}

void sendAngle(int angle) {

  myPort.write(str(angle) + "\n");

  println("Sent angle: " + angle);
}
Experience
In this activity, I controlled a servo motor using Processing and the XIAO ESP32-C3. I created a Processing interface to send control commands to the ESP32-C3 and used the ESP32-C3 to control the servo motor. I learned how to establish communication between Processing and a microcontroller and control the servo according to the received commands.
WebServer
A web server is a system that receives requests from users and provides web pages or data in response. In embedded systems, a web server can be hosted on a microcontroller such as the ESP32. It allows users to monitor sensor values and control connected devices through a web browser. Web servers are commonly used in IoT projects for remote monitoring and control. This makes communication between the user and the embedded system simple and convenient.
LCD Display with XIAO ESP32-C3 Using Web Server
In my individual assignment, I interfaced an LCD display with the XIAO ESP32-C3 and created a simple web server. I used the IP address of the ESP32-C3 to access the web page from a browser. Through the web page, I sent messages to the ESP32-C3, which then displayed the received message on the LCD. This project helped me understand web server communication, IP addresses, and controlling an output device through a browser.


Here is the code I use as follows :
#include <WiFi.h>
#include <WebServer.h>
#include <Wire.h>
#include <LiquidCrystal_I2C.h>

const char* ssid = "YOUR_WIFI_NAME";
const char* password = "YOUR_WIFI_PASSWORD";

LiquidCrystal_I2C lcd(0x27, 16, 2);

WebServer server(80);

void handleRoot() {

  String page = R"rawliteral(
<!DOCTYPE html>
<html>

<head>
  <meta name="viewport" content="width=device-width, initial-scale=1">

  <title>ESP32-C3 LCD</title>

  <style>

    body {
      font-family: Arial;
      text-align: center;
      background: #f2f2f2;
      margin-top: 50px;
    }

    h1 {
      font-size: 30px;
    }

    input {
      width: 80%;
      height: 50px;
      font-size: 20px;
      padding: 5px;
      border-radius: 10px;
      border: 1px solid #888;
    }

    button {
      width: 180px;
      height: 60px;
      margin-top: 20px;
      font-size: 22px;
      background: green;
      color: white;
      border: none;
      border-radius: 12px;
    }

  </style>

</head>

<body>

<h1>XIAO ESP32-C3</h1>

<h2>LCD CONTROL</h2>

<form action="/send" method="GET">

  <input
    type="text"
    name="message"
    maxlength="32"
    placeholder="Type message"
  >

  <br>

  <button type="submit">SEND</button>

</form>

</body>
</html>
)rawliteral";

  server.send(200, "text/html", page);
}


void handleSend() {

  if (server.hasArg("message")) {

    String message = server.arg("message");

    lcd.clear();

    // First 16 characters
    lcd.setCursor(0, 0);
    lcd.print(message.substring(0, min(16, (int)message.length())));

    // Next 16 characters
    if (message.length() > 16) {

      lcd.setCursor(0, 1);

      lcd.print(
        message.substring(
          16,
          min(32, (int)message.length())
        )
      );
    }
  }

  server.sendHeader("Location", "/");
  server.send(303);
}


void setup() {

  Serial.begin(115200);

  // I2C
  Wire.begin(6, 7);

  // LCD
  lcd.init();
  lcd.backlight();

  lcd.setCursor(0, 0);
  lcd.print("Connecting...");

  // WiFi
  WiFi.begin(ssid, password);

  while (WiFi.status() != WL_CONNECTED) {

    delay(500);
    Serial.print(".");
  }

  Serial.println();

  Serial.println("WiFi Connected!");

  Serial.print("IP Address: ");
  Serial.println(WiFi.localIP());

  lcd.clear();

  lcd.setCursor(0, 0);
  lcd.print("WiFi Connected");

  delay(1000);

  lcd.clear();

  // Web server
  server.on("/", handleRoot);
  server.on("/send", handleSend);

  server.begin();

  Serial.println("Web Server Started!");
}


void loop() {

  server.handleClient();
}
Experience
In this activity, I connected an LCD display to the XIAO ESP32-C3 and created a simple web server. I used the ESP32-C3 IP address to open a web page in a browser and send messages wirelessly. Whatever message I entered on the web page was received by the ESP32-C3 and displayed on the LCD. This activity helped me understand how a microcontroller can communicate with a web browser over Wi-Fi.
Exploring Pictoblox Application

PictoBlox is a block-based programming software used to learn coding, AI, robotics, electronics, and game development.
I explored PictoBlox, a block-based programming application used for learning coding, game development, artificial intelligence, and interactive projects. PictoBlox made it easy to understand programming concepts by allowing me to create programs using visual blocks instead of writing complex code.

Pictoblox interface.

After clicking blocks it looks as per above image.
Ball and Paddle Game
First, I created a simple Ball and Paddle Game in Pictoblox. The main objective of the game was to control the paddle and prevent the ball from falling down.

First, I have taken ball and paddle from sprite.
I programmed the ball with blocks when the ball touched the paddle, it continued moving and bouncing. I also added a Game over. If the ball touched the bottom area the game stopped and displayed the game over.


Hand Gesture Control
I designed a hand gesture control game in PictoBlox’s Machine Learning using a Hand Pose Classifier to recognize different hand gestures.
The detected gestures are used as controls to perform actions in the game.


I rained the classifier with different hand movements and created four classes:
- Up
- Down
- Left
- Right

After giving different hand movements, PictoBlox recognized the gestures through the webcam and controlled the game accordingly. I developed a puzzle game where hand gestures were used to move the insect character left and right. When the insect touches the apple, the game is completed successfully.

P5js
What is p5.js
p5.js is a JavaScript library used to create interactive graphics, animations, and creative web applications. It provides simple functions for drawing shapes, colors, images, and animations directly in a web browser. p5.js is beginner-friendly and helps users learn programming through visual projects. It can also be used to create interactive games and connect with hardware projects.

Search P5js on Google and click Web Editor.

Here is the interface of P5js
In my individual assignment, I explored p5.js to understand how interactive games can be created using JavaScript. p5.js provides functions for creating shapes, colors, animations, keyboard controls, and other interactive elements. I used these features to design a simple game where the player can control objects and interact with elements on the screen. I also learned how game logic, scoring, movement, and collision detection can be implemented using JavaScript.


Here is the code I use as follows :
let playerX;
let bullets = [];
let enemies = [];
let score = 0;
let gameOver = false;

function setup() {
  createCanvas(600, 600);

  playerX = width / 2;

  for (let i = 0; i < 5; i++) {
    enemies.push({
      x: random(30, width - 30),
      y: random(-500, -50),
      speed: random(2, 4)
    });
  }
}

function draw() {
  background(10, 10, 30);

  if (!gameOver) {
    // Stars
    fill(255);
    for (let i = 0; i < 50; i++) {
      ellipse((i * 97) % width, (i * 53 + frameCount * 2) % height, 2, 2);
    }

    // Move player
    if (keyIsDown(LEFT_ARROW)) {
      playerX -= 6;
    }

    if (keyIsDown(RIGHT_ARROW)) {
      playerX += 6;
    }

    playerX = constrain(playerX, 25, width - 25);

    // Draw spaceship
    fill(0, 200, 255);
    triangle(
      playerX, height - 70,
      playerX - 25, height - 25,
      playerX + 25, height - 25
    );

    // Bullets
    fill(255, 255, 0);

    for (let i = bullets.length - 1; i >= 0; i--) {
      bullets[i].y -= 8;
      rect(bullets[i].x, bullets[i].y, 5, 15);

      if (bullets[i].y < 0) {
        bullets.splice(i, 1);
      }
    }

    // Enemies
    for (let i = enemies.length - 1; i >= 0; i--) {
      let enemy = enemies[i];

      enemy.y += enemy.speed;

      // Enemy
      fill(255, 60, 60);
      ellipse(enemy.x, enemy.y, 40, 40);

      // Collision with player
      if (
        dist(playerX, height - 45, enemy.x, enemy.y) < 35
      ) {
        gameOver = true;
      }

      // Collision with bullets
      for (let j = bullets.length - 1; j >= 0; j--) {
        if (
          dist(
            bullets[j].x,
            bullets[j].y,
            enemy.x,
            enemy.y
          ) < 25
        ) {
          score++;

          bullets.splice(j, 1);

          enemy.x = random(30, width - 30);
          enemy.y = random(-300, -50);
          enemy.speed = random(2, 5);

          break;
        }
      }

      // Enemy reaches bottom
      if (enemy.y > height) {
        enemy.x = random(30, width - 30);
        enemy.y = random(-300, -50);
      }
    }

    // Score
    fill(255);
    textSize(24);
    text("Score: " + score, 20, 35);

    text("SPACE = Shoot", 20, 65);

  } else {
    background(10, 10, 30);

    fill(255);
    textAlign(CENTER);

    textSize(50);
    text("GAME OVER", width / 2, height / 2);

    textSize(25);
    text("Score: " + score, width / 2, height / 2 + 50);

    text("Press R to restart", width / 2, height / 2 + 90);

    textAlign(LEFT);
  }
}

// Shoot bullet
function keyPressed() {
  if (key === ' ') {
    bullets.push({
      x: playerX,
      y: height - 70
    });
  }

  // Restart
  if (key === 'r' || key === 'R') {
    score = 0;
    bullets = [];
    gameOver = false;

    for (let enemy of enemies) {
      enemy.x = random(30, width - 30);
      enemy.y = random(-500, -50);
    }
  }
}
Blockly
What is blockly
Blockly is a visual programming library developed by Google that allows users to create programs by connecting colorful blocks instead of writing code manually. Each block represents a programming concept such as loops, conditions, variables, and functions. It is beginner-friendly and helps users understand programming logic easily. Blockly can generate code in languages such as JavaScript, Python, and Dart. It is commonly used in educational tools, robotics, and embedded-system projects.

Search Blockly on Google.

Interface of Blockly


Experience
As part of my assignment, I explored Blockly Puzzle and Maze to understand programming concepts through visual blocks. I used different blocks to create sequences, solve puzzles, and guide the character through the maze. This activity helped me understand logical thinking, loops, conditions, and step-by-step problem solving.
Blynk

What is blynk
Blynk is an IoT platform used to connect and control hardware devices through a mobile app or web dashboard. It allows microcontrollers such as ESP32, ESP32-C3, and Arduino to communicate with the internet and exchange data. With Blynk, users can monitor sensor values and control devices such as LEDs, motors, and relays remotely. It provides widgets like buttons, gauges, charts, and displays to create simple IoT interfaces. Blynk is useful for building and testing IoT and smart-device projects without developing a complete app from scratch.

Search Blynk on Google.


Login to Blynk

Interface of Blynk
DHT22 with Blynk Using XIAO ESP32-C3
As part of my individual assignment, I explored the Blynk IoT platform and interfaced a DHT22 temperature and humidity sensor with the XIAO ESP32-C3. The DHT22 sensor measures temperature and humidity, while the XIAO ESP32-C3 sends the readings to Blynk through Wi-Fi. I created a Blynk dashboard to display the temperature and humidity values in real time.


Here is the code I use as follows :
#define BLYNK_TEMPLATE_ID "YOUR_TEMPLATE_ID"
#define BLYNK_TEMPLATE_NAME "DHT22"
#define BLYNK_AUTH_TOKEN "YOUR_BLYNK_AUTH_TOKEN"

#define BLYNK_PRINT Serial

#include <WiFi.h>
#include <BlynkSimpleEsp32.h>
#include <DHT.h>

// Wi-Fi details
char ssid[] = "YOUR_WIFI_NAME";
char pass[] = "YOUR_WIFI_PASSWORD";

// DHT22 connection
#define DHTPIN 2
#define DHTTYPE DHT22

DHT dht(DHTPIN, DHTTYPE);

BlynkTimer timer;

void sendSensorData()
{
  float temperature = dht.readTemperature();
  float humidity = dht.readHumidity();

  if (isnan(temperature) || isnan(humidity))
  {
    Serial.println("DHT22 sensor reading failed!");
    return;
  }

  // Serial Monitor
  Serial.print("Temperature: ");
  Serial.print(temperature);
  Serial.println(" °C");

  Serial.print("Humidity: ");
  Serial.print(humidity);
  Serial.println(" %");

  // Send data to Blynk
  Blynk.virtualWrite(V0, temperature);
  Blynk.virtualWrite(V1, humidity);
}

void setup()
{
  Serial.begin(115200);

  dht.begin();

  // Connect ESP32-C3 to Wi-Fi and Blynk
  Blynk.begin(BLYNK_AUTH_TOKEN, ssid, pass);

  // Read sensor every 2 seconds
  timer.setInterval(2000L, sendSensorData);
}

void loop()
{
  Blynk.run();
  timer.run();
}
What is MIT App Inventor
MIT App Inventor is a free, web-based platform developed by the Massachusetts Institute of Technology (MIT) for creating Android applications using a simple drag-and-drop block programming interface. It enables users to build mobile apps that can communicate with devices such as the ESP32 over Wi-Fi or Bluetooth, making it an ideal tool for IoT and embedded systems projects.
Control LED using MIT App Inventor
Open MIT App Inventor.

Click on Create Apps.
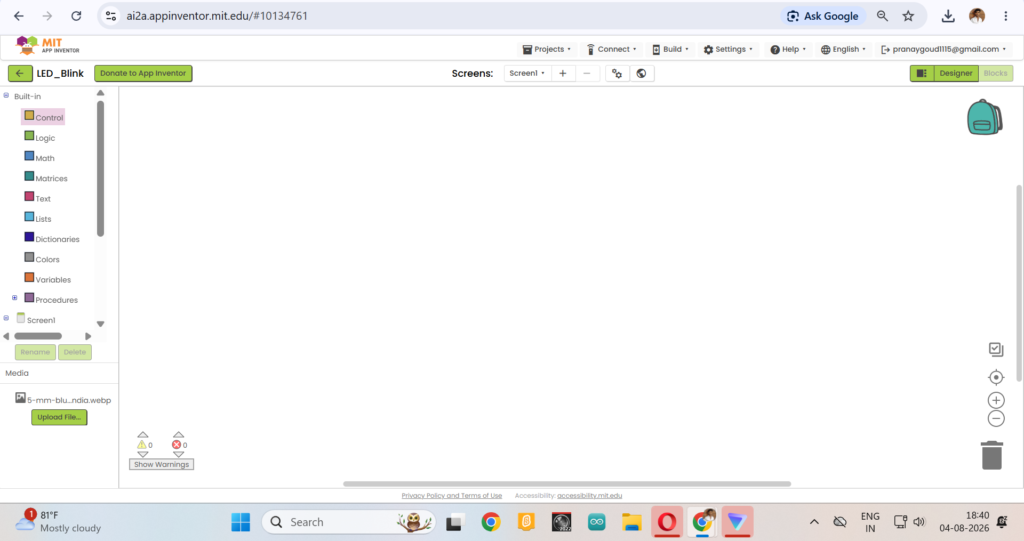
Start a New Project and give it a name.
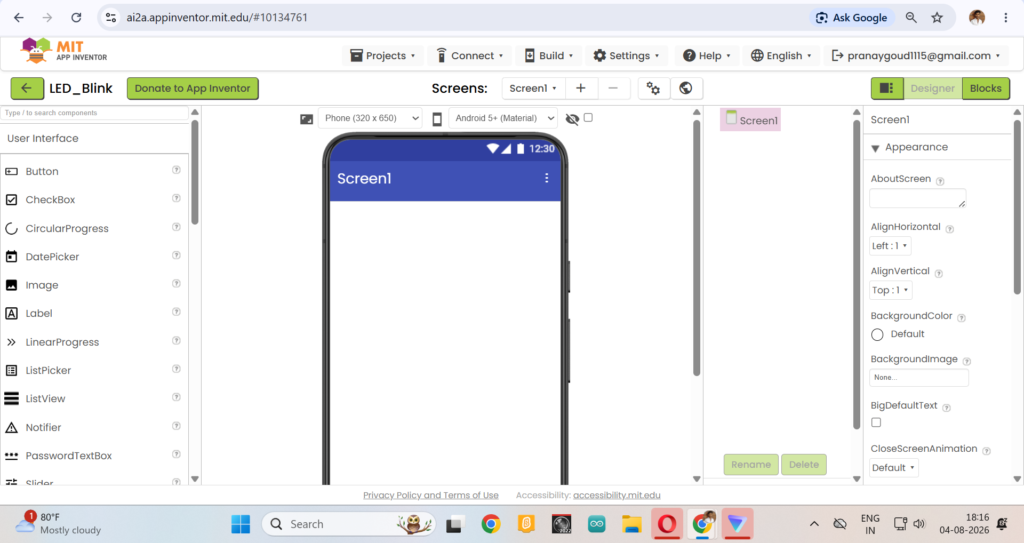
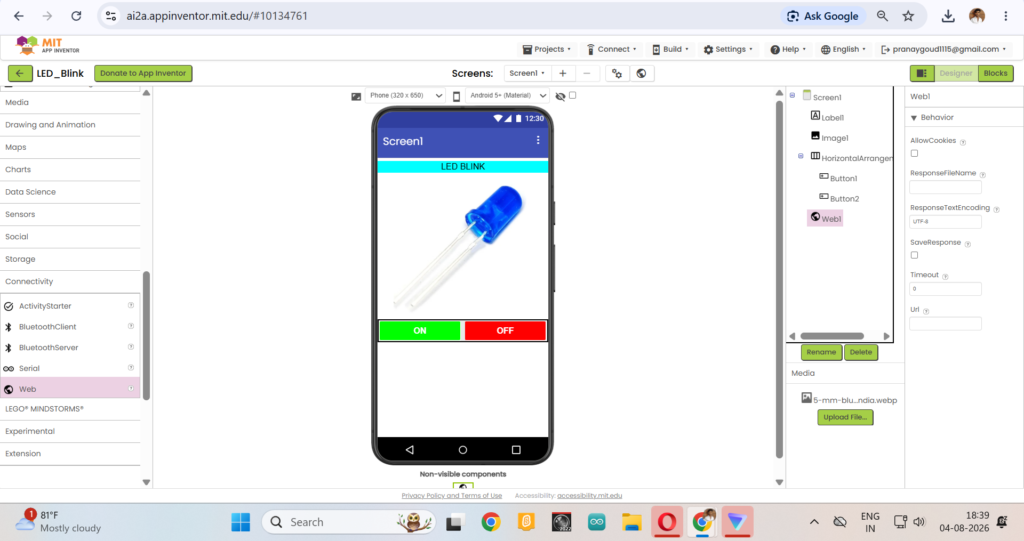
In the Designer view, add
- Button → Rename to LED ON
- Button → Rename to LED OFF
- Label → To display the LED status
- Web
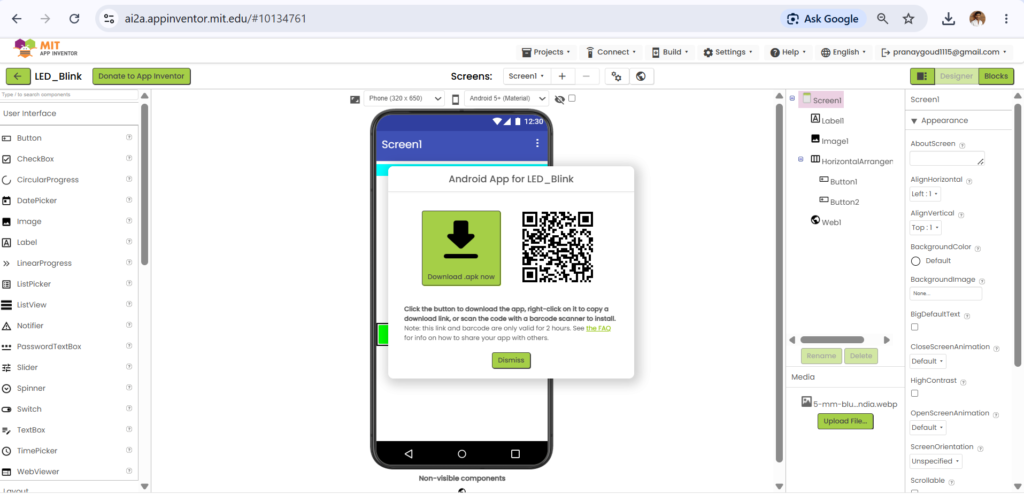
Click on build and install the APK.
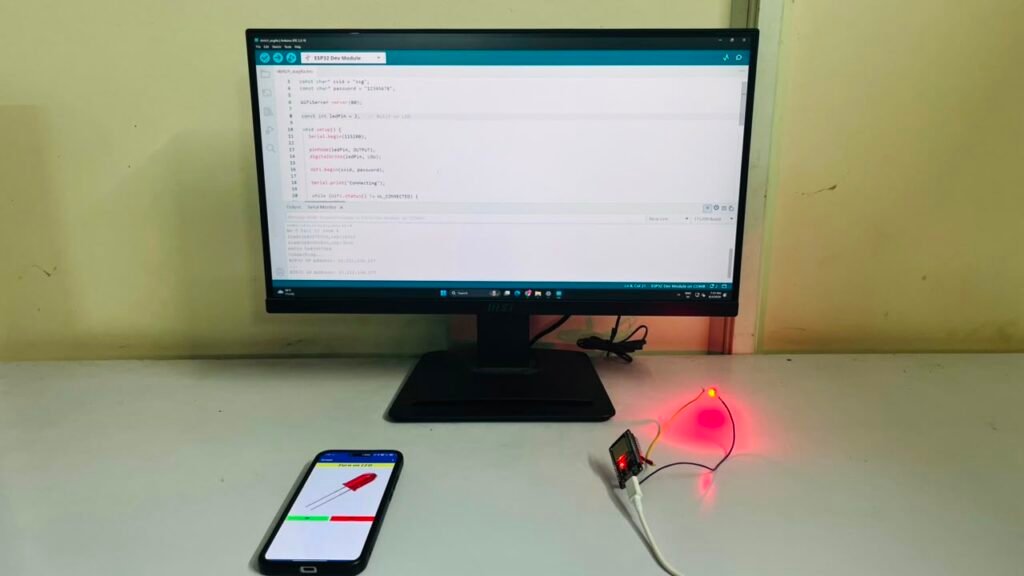
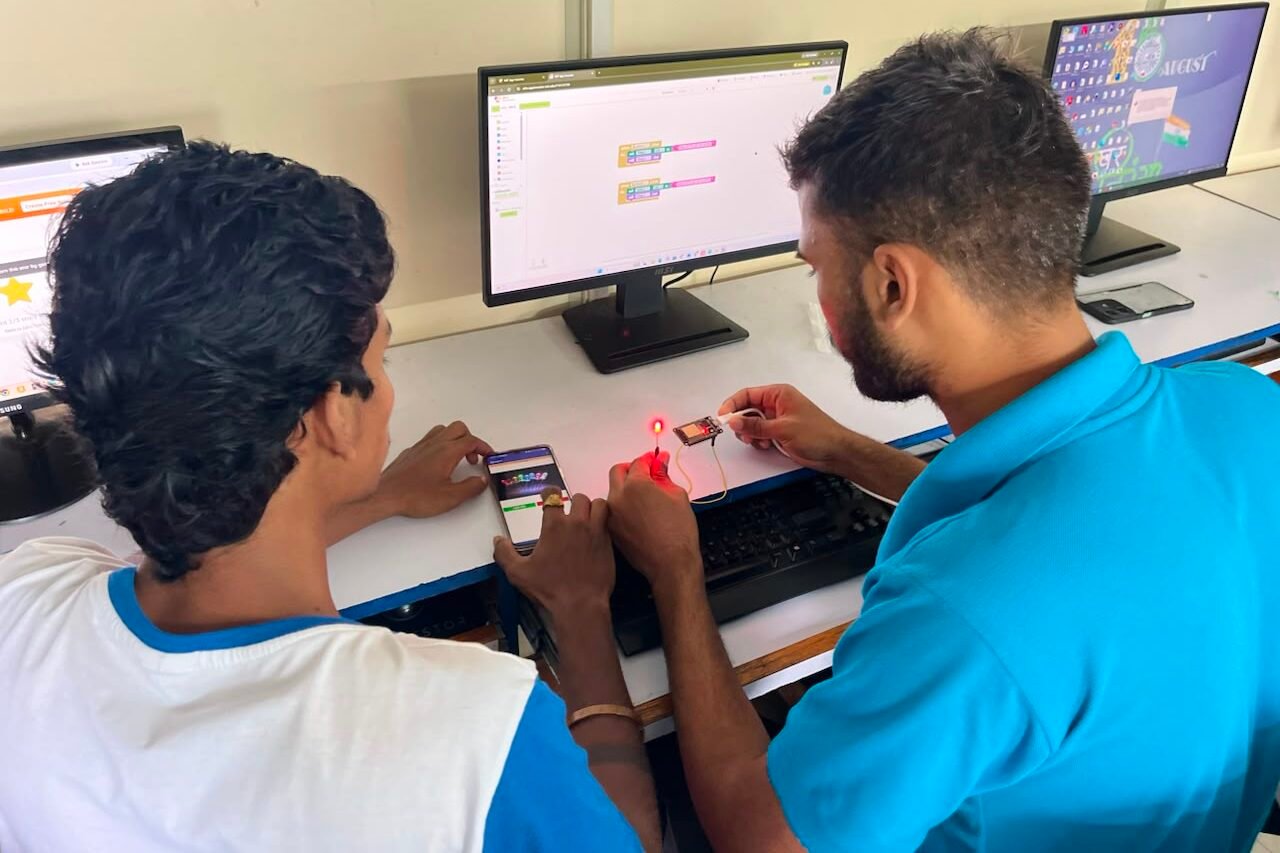
Connect your phone to the same Wi-Fi press the LED ON and LED OFF buttons.
Experience
I created a mobile app using MIT App Inventor to control an ESP32 LED wirelessly over Wi-Fi. This activity helped me understand mobile app development and wireless communication with embedded systems.
Week Summary
This week, I explored different application development and communication tools such as Processing, Web Server, PictoBlox, p5.js, Blockly, Blynk, and MIT App Inventor. I worked with the XIAO ESP32-C3 to control a servo motor, LCD, LED, and DHT22 sensor using graphical, web-based, and mobile interfaces. I also created simple games using PictoBlox and p5.js and learned about wireless communication, serial communication, IoT dashboards, and interactive programming. Overall, this week improved my practical understanding of connecting software applications with hardware.