
Project Overview
This project demonstrates how to control a light (or any appliance) wirelessly using the Blynk IoT platform and an ESP32 microcontroller. It’s the first step toward building a full-fledged smart home automation system.
So far, I’ve successfully:
✅Controlled a bulb using a relay and ESP32
✅ Used the Blynk app to switch it ON/OFF
✅ Tested reliability and responsiveness
✅ Ready to expand to multiple lights for full room automation
This project aims to:
- Save energy
- Allow centralized control
- Enable remote switching
- Automate operations in the future
Components Used
| Component | Quantity | Description |
| ESP32 Dev Board | 1 | Microcontroller with wi-fi |
| 5V Relay Module | 1 | Controls high voltage appliances |
| Bulb + Holder + Plug | 1 | For testing switching |
| Jumper Wires | Several | For connections |
| Breadboard / PCB | 1 | For prototyping |
| Smartphone | 1 | To run Blynk app |
| 5V USB adapter | 1 | For powering ESP32 in final installation |
| Blynk IoT App (Free) | 1 | For control interface |
Software & Tools
Blynk IoT App (Play Store / App Store)
Blynk Web Console (https://blynk.cloud)
Arduino IDE
USB cable (for uploading code)
Blynk Auth Token, Wi-Fi SSID, and password
ESP32 to Relay Connections
ESP32 Pins → Relay Pins
🟢 5V → VCC
🟤 GND → GND
🟠 GPIO 5 → IN
Note:
- You must connect the relay’s VCC and GND to 5V and GND of ESP32
- The IN pin on the relay receives a HIGH or LOW signal from GPIO 5
AC Mains:
- Live (Phase) from wall → Relay COM
- Relay NC → Live to bulb(s)
- Neutral from wall → directly to bulb(s)
Set Up the Blynk Mobile App for Wi-Fi Light Control
1: Install the Blynk IoT App
- On Android: Google Play Store link
- On iPhone: App Store link
Search for “Blynk IoT” — not the old Blynk Legacy app.
2: Create a Free Blynk Account
- Open the app after installing
- Click Sign Up
- Enter your email and password
- Click Create Account
- You’ll be taken to the Blynk dashboard
3: Create a New Project
- Tap the “+ Template” button
- Tap “New Device Template”
- Fill in:
- Template Name:
Light Control - Hardware: Choose ESP32 Dev Board
- Connection Type: Wi-Fi
- Template Name:
- Click Done
4: Add a Datastream (Virtual Pin V1)
- Tap the template you just created
- Go to Datastreams tab
- Tap “+ New Datastream” → Choose Virtual Pin
- Set:
- Name:
Relay Control - Virtual Pin:
V1 - Data Type: Integer
- Min: 0
- Max: 1
- Name:
- Tap Create
This datastream is how your app will communicate with the ESP32.
5: Create a Device from the Template
- Go back to home screen
- Tap “+ Add Device”
- Choose From Template
- Select your
Light Controltemplate - Tap Create Device
Now your phone is linked to this project.
6: Add a Button Widget to Control Relay
- Open your device dashboard (from Home)
- Tap the “Edit” pencil icon (top right)
- Tap + Widget → Choose Button
- Drag it onto the canvas
Then tap the button to configure:
- Datastream: Select
V1(Relay Control) - Mode: Switch (toggle)
- Label it something like “Corridor Light”
📌 This button now sends ON (1) and OFF (0) to ESP32 when pressed.
7: Get Your Blynk Auth Token
- From your Blynk Web Dashboard: https://blynk.cloud
- Log in with same email/password
- Go to Devices → Click your device
- You’ll see the Auth Token (copy it)
OR
- On your phone, open the device → Click Device Info → Copy Auth Token
You’ll paste this token into the Arduino code later.
Arduino Code
Required Libraries in Arduino IDE
Before uploading the code to ESP32, install these libraries:
- Open Arduino IDE
- Go to: Tools → Manage Libraries
- Search & install the following:
✅ WiFi
✅ Blynk (Official)
- Search for: Blynk
- Install: Blynk (by Volodymyr Shymanskyy)
- Version: Blynk 1.0.1 or latest
- Install ESP32 board support:
- Go to: File → Preferences
- Add this URL in “Additional Board URLs”:
https://raw.githubusercontent.com/espressif/arduino-esp32/gh-pages/package_esp32_index.json - Then go to: Tools → Board → Board Manager
- Search “ESP32”
- Click Install for “esp32 by Espressif Systems”
Now restart Arduino IDE.
Arduino Code
#define BLYNK_TEMPLATE_ID "YourTemplateID"
#define BLYNK_TEMPLATE_NAME "LightControl"
#define BLYNK_AUTH_TOKEN "YourAuthToken"  // ← Paste from Blynk email

#include <WiFi.h>
#include <BlynkSimpleEsp32.h>

char ssid[] = "YourWiFiName";         // ← Your Wi-Fi name
char pass[] = "YourWiFiPassword";     // ← Your Wi-Fi password

#define RELAY_PIN 5  // GPIO5 connected to Relay IN

BLYNK_WRITE(V1) {
  int value = param.asInt();  // Get button state
  digitalWrite(RELAY_PIN, value);
}

void setup() {
  Serial.begin(115200);
  pinMode(RELAY_PIN, OUTPUT);
  digitalWrite(RELAY_PIN, LOW);  // Relay off at start
  Blynk.begin(BLYNK_AUTH_TOKEN, ssid, pass);
}

void loop() {
  Blynk.run();
}
📝 Replace:
- BLYNK_AUTH_TOKEN: with your blynk auth token
- ssid & pass: your actual Wi-Fi credentials
Testing
Upload code to ESP32
Open Serial Monitor (115200 baud)
When ESP32 connects to Wi-Fi, your Blynk button will control the relay
Clicking the button will turn ON/OFF the connected bulb
Final Tips for Blynk App
You can log in on another phone with the same Blynk account
Only one user per project in free plan (share login if needed)
You must keep the ESP32 powered at all times
Internet is required for the Blynk app to send the command
Conclusion
Through this project, I was able to build a simple and effective smart lighting system for the corridor lights at Vigyan Ashram. The main goal was to avoid manually switching on and off multiple lights from different switches across the building. By using an ESP32 microcontroller, a relay, and the Blynk mobile app, I created a system where all six lights can now be controlled from one place — a smartphone.
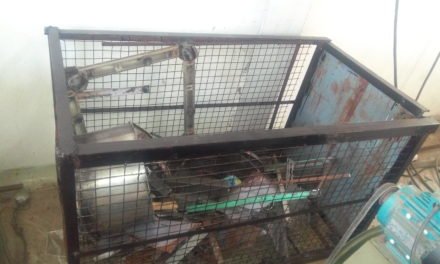
I’ve tested the setup successfully using a breadboard and a single relay. It works reliably, and with a proper power supply and enclosure, it can be permanently installed. The only part left is combining all the light wires into one switch point, which can be done with the help of an electrician.
This project has not only helped solve a real problem at the ashram, but also taught me a lot about basic IoT, working with hardware, and how to bring an idea into reality. I hope this documentation helps anyone who wants to take it further — whether it’s installing it, maintaining it, or even building something more advanced using this as a base.


