Objective :
Checking N , P , K , OC , EC , pH of the soil .
Requirements :
soil testing kit including all things .
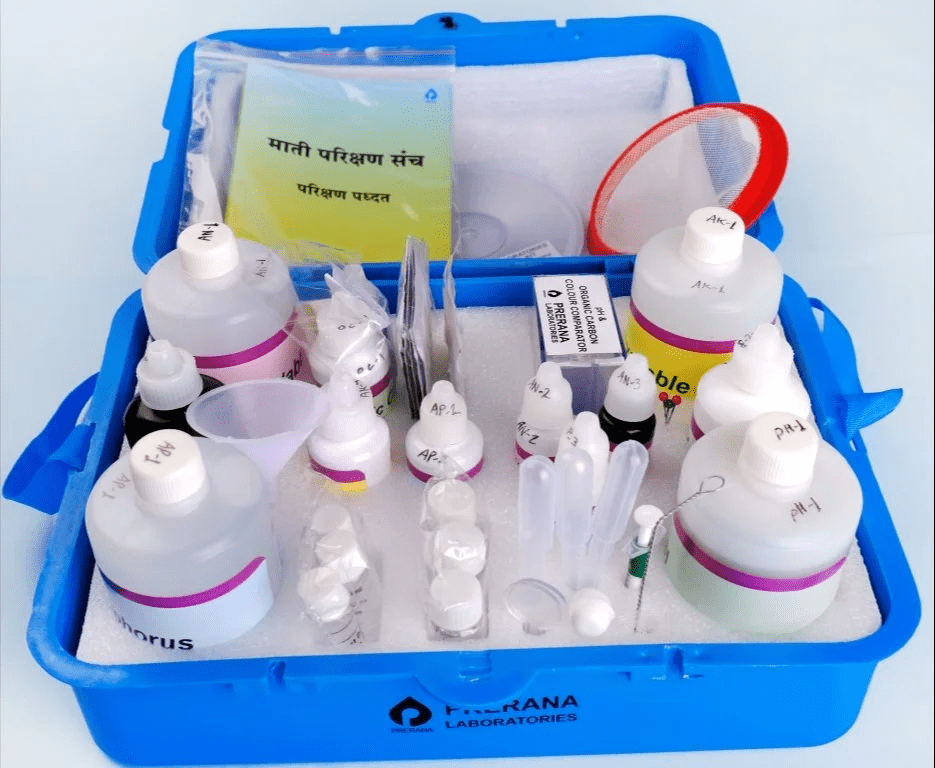
prerana soil testing kit .
procedure :
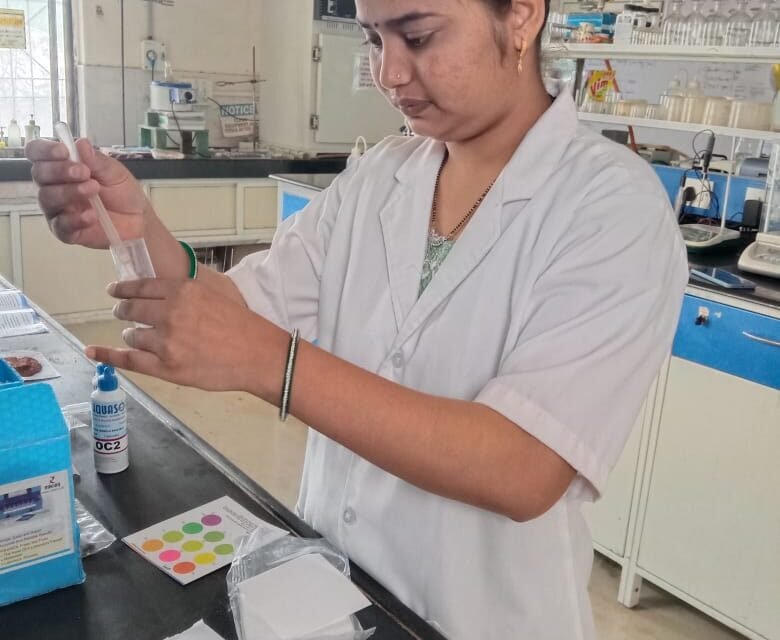
we use prerana kit for soil sample testing .
1.procedure for soil pH test :
- Take reagent pH-1 in Test Bottles NO .1 up to 5 ml .
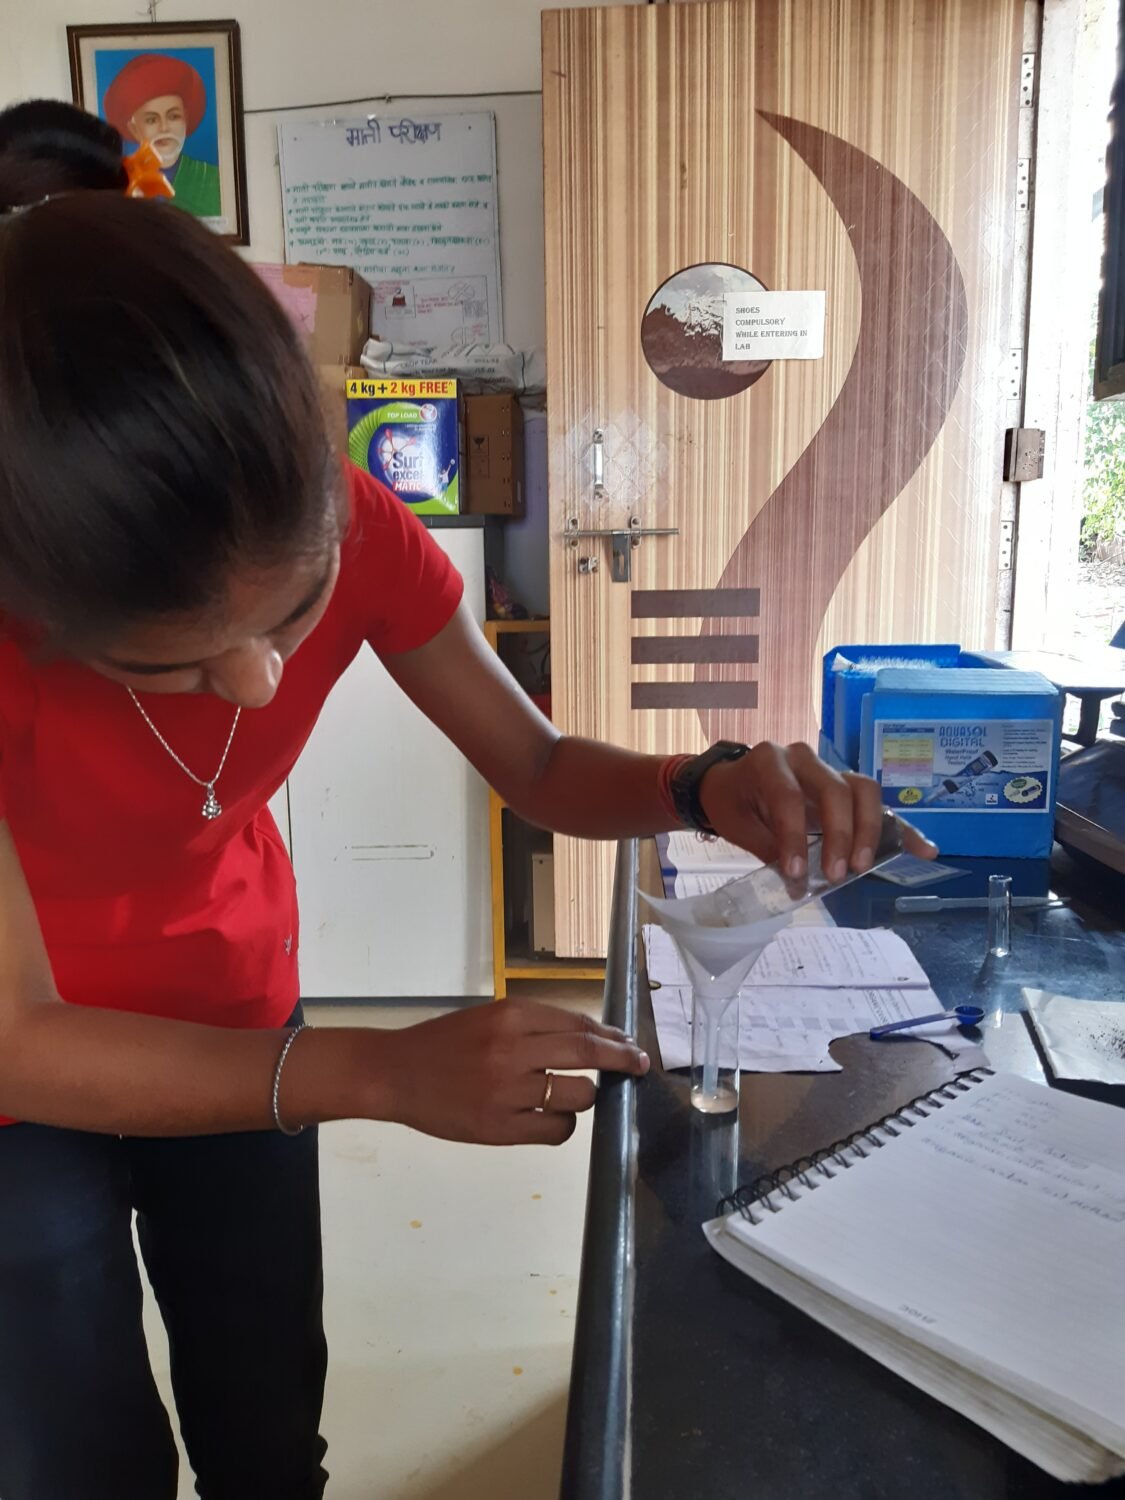
- Add 2 flat spoonful of soil (2 gm ) in the test bottles no.1 with the help of funnel .
- Put cap and mix by gentle inversion for one minute .( Do not shake vigorously .mix for one minutes only ) Allow the bottles to stand for 10 minutes .soil will settles &sepetate to leave clear liquid layer on the top .
- Insert the pH colour chart in the Comparator unit .Now the pH colour comparator can be used for matching of pH test colour .
- Place the bottles no.1 in pH COLOUR CAMPARATOR and match the colour of top liquid layer with colours on the camparator .
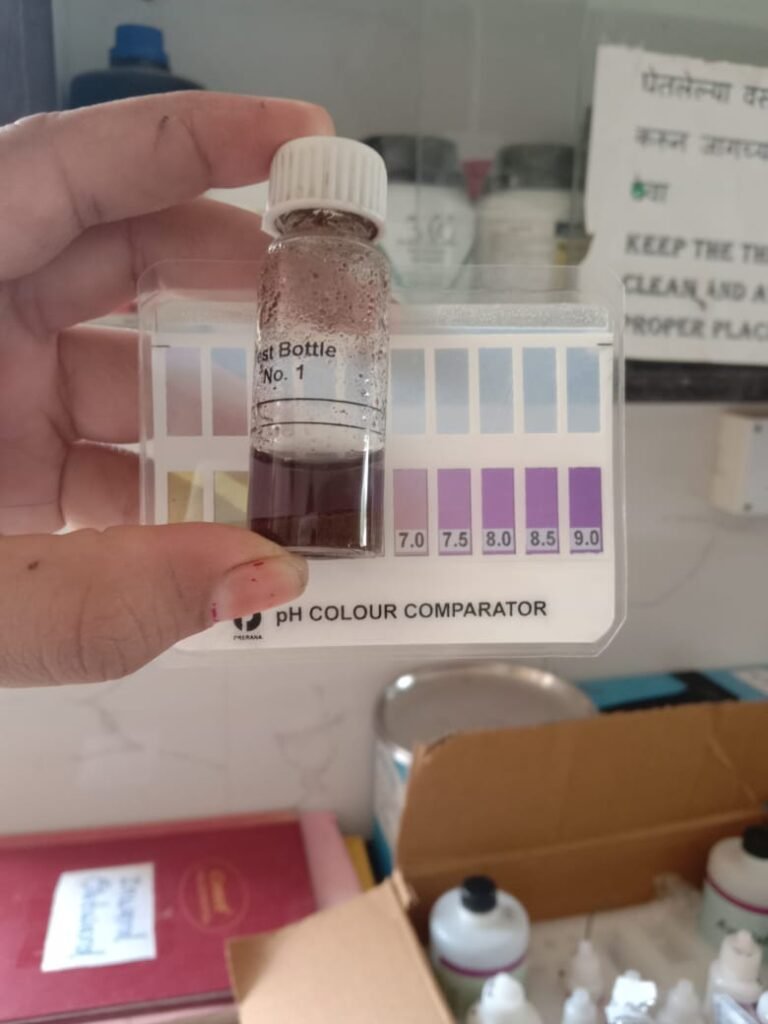
soil pH test
2. Procedure for Organic Carbon (OC)
- Using 100 mg. spoon , take one spoonful (100mg) of finely ground soil in test bottle no. 1.
- To the bottle no.1, add 0.5ml. of reagent OC-1with the help of 1ml. Green coloured syringe .
- To the bottle No. 1,add 80 drops of reagent OC-2 and mix by gentle swirling. put cap . wait for 30 minutes.
- Add reagent OC-3 to make the level in bottle No.1 up to 5ml. mark. Mix by gentle Swirling Allow the bottle to stand for 5 minutes. soil will settle & separate to leave clear liquid layer on the top.
- Insert the organic carbon colour chart in the comparator unit.
- now the organic carbon colour comparator can be used for matching organic carbon test colour .
- place the bottle in organic colour comparator and match the colour of top liquid layer with the colour slots on comparator by holding the comparator against day light.

organic carbon test
3 .procedure for Nitrogen :
- Take in test bottle no.1, Nitrogen reagent AN-1 up to 6ml. mark.
- Using funnel, add one flat spoonful of soil(1gm.) in Test bottle No.1.
- Put cap and mix by gentle inversion for one minute. allow to leave clear liquid layer on the top.
- In clean bottle No.2,carefully transfer 2ml of upper clear liquid from bottle No.1, using dropper.
- To the Test bottle No.2, add 4 drops of reagent AN-2. & mix gently.
- To the bottle No. 2, add 4 drops of reagent AN-3, put cap & mix gently. Wait for 5 minutes.
- Insert the Available Nitrogen colour chart in the comparator unit. Now the nitrogen colour comparator can be used for matching Available Nitrogen test colour.
- After 5 minute , mix gently & place the bottle in nitrogen colour comparator & match colour the bottle with colours on comparator (refer note regarding colour comparator.)
- Read the available Nitrogen directly on comparator .
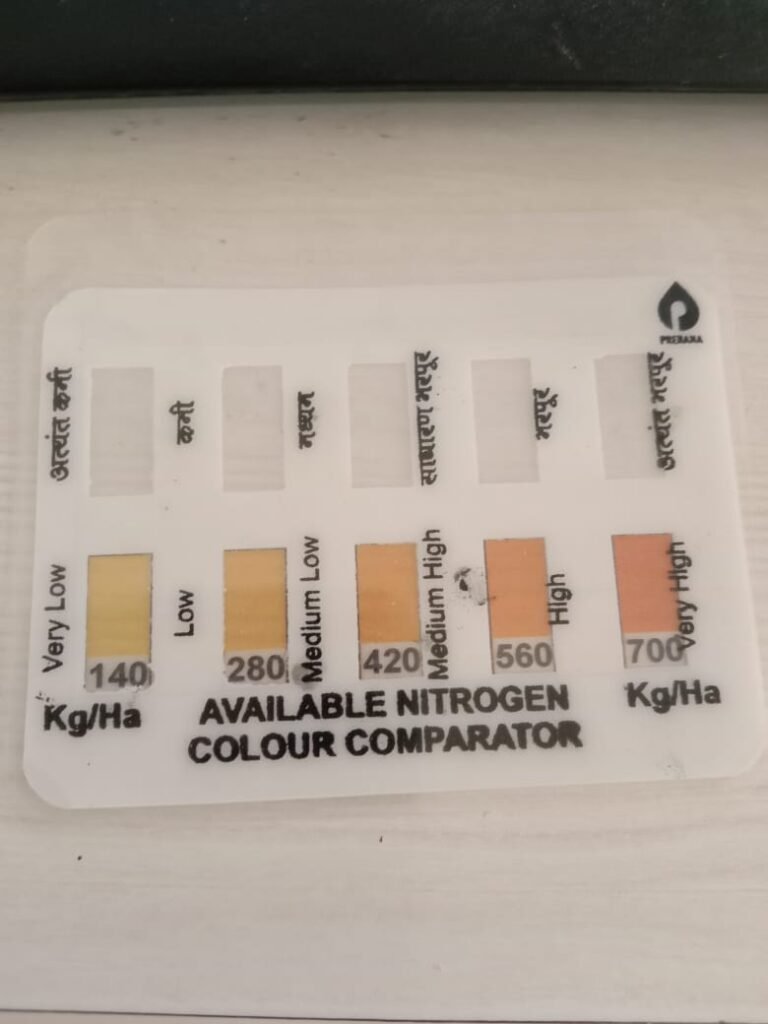
soil Nitrogen test
Procedure for PHOSPHOROUS :
- Take in the Test bottle No. 1, phosphorous Reagent AP-1 up to 6ml. mark.
- Using funnel, add one flat spoonful(1gm.) of soil in Test bottle No. 1
- Put cap and mix by gentle inversion for one minute. allow the bottle to stand for 5 minutes. Soil will settle & separate to leave clear liquid layer on the top.
- Carefully draw upper clear liquid in dropper and transfer the same to test bottle No.2 to make level up to 3 ml. mark.
- To 3ml. liquid in bottle No. 2, add 6 drop of phosphorus reagent AP- 2 and mix gently by swirling. Add 3 drop of reagent AP-3. Put cap and mix well. Blue colour will develop in bottle no. 2
- Insert the available Phosphorus colour chart in the comparator unit. Now the Phosphorus colour comparator can be used for matching of Available Phosphorus test colour.
- Place the bottle in phosphorous colour comparator & match the colour of bottle with the colours on Phosphorous colour comparator can be used for matching of Available Phosphorus test colour.
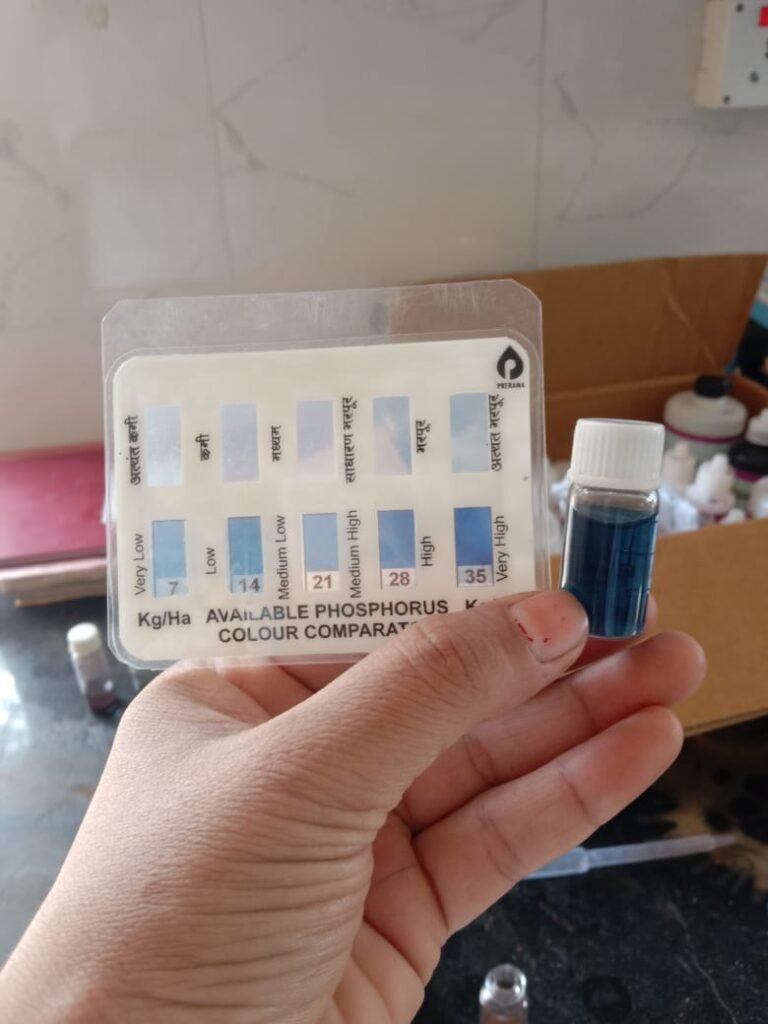
soil Phosphrous test
Procedure of Pottassium :
- Take in the bottle No. 1, Potassium reagent AK-1 upto6ml.mark.
- Using funnel, add two flat spoonful (2gm.) of soil in Test bottle No.1
- Put cap and mix by gently inversion for one minute. allow the bottle to stand for 5 minutes. Soil will settle & separate to leave to leave clear liquid layer on the top.
- Carefully drop upper liquid in dropper and transfer the same to another clean bottle No. 2, to make level up to 2ml. Mark.
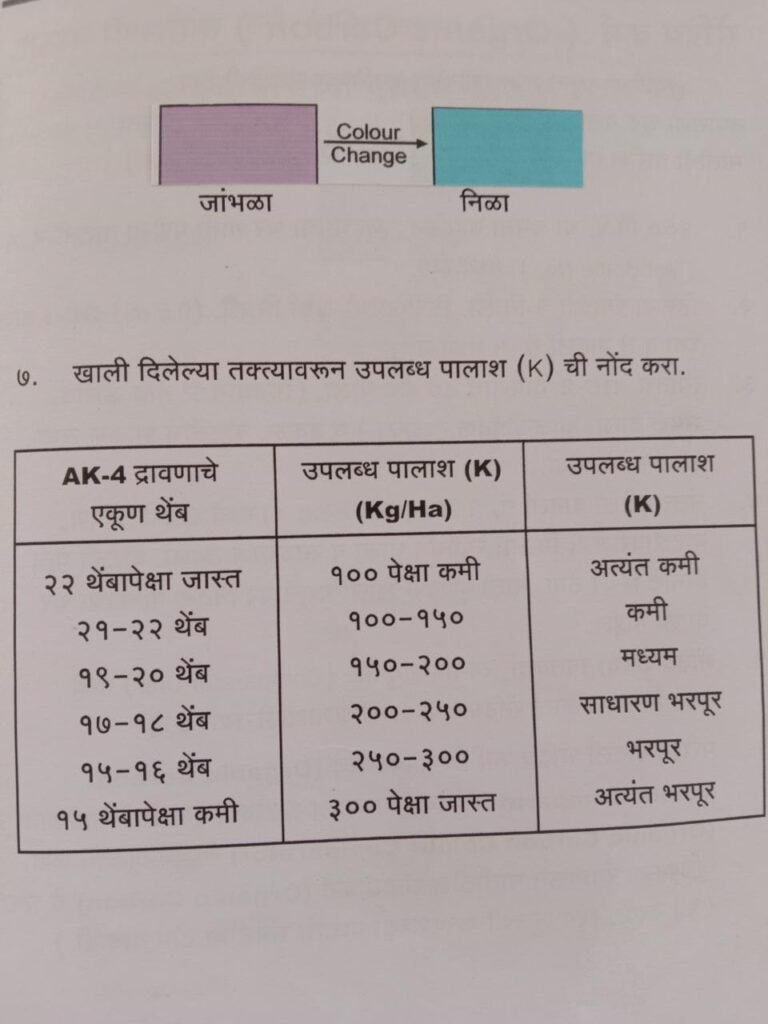
- To 2ml. liquid in bottle No. 2, add one tablet of potassium reagent AK- 2 do not put cap. Mix by swirling. Allow tablet to dissolve completely. Mix by swirling intermittently to assist dissolution (it may take 5-6 minutes to dissolve the tablet completely) .Add AK-3 then Purple colour will develop in bottle No. 2, proceed further only after complete dissolution of tablet.
- Take potassium reagent AK-4 in the 1ml syringe. Add reagent AK-4 to bottle No. 2, two drops at a time, and mix gently after each addition keep count of drops and continue addition until colour changes from purple to blue. Count the no. of drops of reagent AK-4 required for colour change.
- Use red coloured 1ml. Syringe for taking potassium.
Checking EC –
Take 10 ml water in a beaker .
Put 1 gm soil in water.
Mix it well, Let the soil settle down .
By using EC metre check EC OF that soil.
conclusion :
I Learned how to do soil testing Finally by this process we know the pH , potassium(k), Nitrogen(N) , Phosphorous(P) ,Organic Carbon (OC ), Electric Conductivity (EC) present in the soil.
WATER TESTING
How to use water testing kit :
Fill the test bottles with a water sample up to the mark, dip a test strip in water and wait a 48 hours test kit resulting of the water sample.
WHAT IS H2S STRIP TEST :
H2S test performs to check the microbial contamination in water.

water testing kit
https://docs.google.com/spreadsheets/d/1iej9ZhMEMBnQnP5-k8atZdMk4uTyk8bPkJiSDTuVHSw/edit?usp=sharing


