Today Sonal Madam informed us about soil testing. It was told how soil testing is done.
Date : 5 /12 /2022
Objective
Checking N , P , K , OC , EC , pH of the soil .
Requirements
soil testing kit including all things , soil
Introduction:
We all know that health of soil is equally important as health of any person. It is more applicable when it comes to ‘farming’. But, it is observed that now a day, ‘health of soil’ doesn’t get enough attention. People care more about only ‘cash crops and increasing quantity of the crop’. As a result of this, soil becomes unproductive. Awareness about ‘soil health’ should be increased to avoid this.
Why do we need ‘Soil Testing’? Soil is an important matter for cultivation of any type of crop. Soil supplies many necessary nutrients required for healthy growth of a crop. The yield is largely dependent on the soil in which the crop grows. So, before cultivation, it is very important to check the soil for its nutrients. By checking the soil you will know whether the soil is having enough amount of nutrients or not. If any nutrient is less or more than the required amount, necessary measures can be taken. In short following are the benefits of ‘soil testing’: •Soil testing encourages plant growth by providing the best fertilizer recommendations. •It diagnoses whether there is too little or too much of a nutrient. •‘Soil testing’ promotes environmental quality. •It also saves money that might otherwise be spent on unneeded fertilizer.
Nutrient Colour change in lower leaves
N Plant light green, older leaves yellow
P Plants dark green with purple cast, leaves and plants small
K Yellowing and scorching along the margin of older leaves Mg Older leaves have yellow discolouration between veins-finally reddish purple from edge inward Zn Pronounced interveinal chlorosis and bronzing of leaves Nutrient Colour change in upper leaves (Terminal bud dies)
Ca Delay in emergence of primary leaves, terminal buds deteriorate
B Leaves near growing point turn yellow, growth buds appear as white or light brown, with dead tissue. Nutrient Colour change in upper leaves (Terminal bud remains alive)
S Leaves including veins turn pale green to yellow, first appearance in young leaves.
Fe Leaves yellow to almost white, interveinal chlorosis at leaf tip Mn Leaves yellowish-gray or reddish, gray with green veins
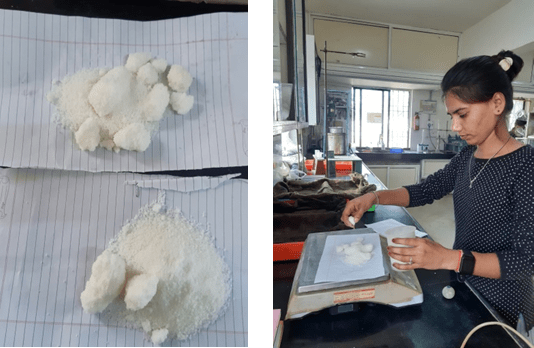
procedure :
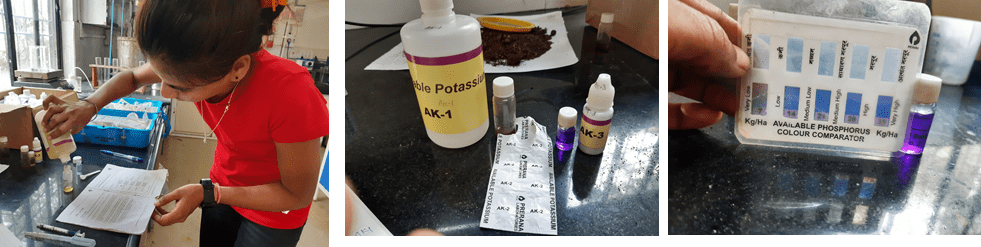
WE use MRIDAPARIKSHAK kit for soil sample testing.
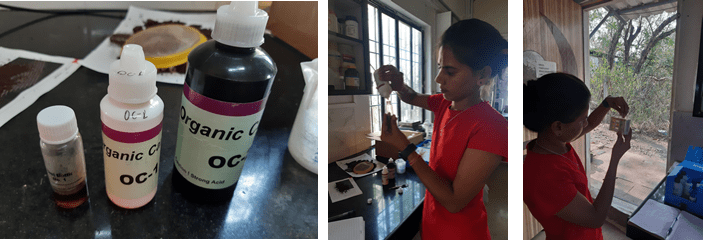
1. Procedure for Organic Carbon (OC)
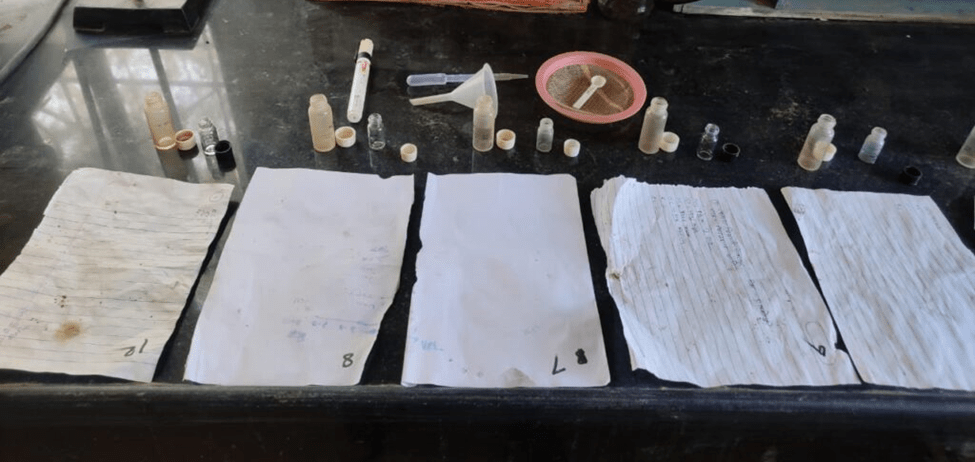
- Using 100 mg. spoon , take one spoonful (100mg) of finely ground soil in test bottle no. 1.
- To the bottle no.1, add 0.5ml. of reagent OC-1with the help of 1ml. Green coloured syringe .
- To the bottle No. 1,add 80 drops of reagent OC-2 and mix by gentle swirling. put cap . wait for 30 minutes.
- Add reagent OC-3 to make the level in bottle No.1 up to 5ml. mark. Mix by gentle Swirling Allow the bottle to stand for 5 minutes. soil will settle & separate to leave clear liquid layer on the top.
- Insert the organic carbon colour chart in the comparator unit.
- now the organic carbon colour comparator can be used for matching organic carbon test colour .
- place the bottle in organic colour comparator and match the colour of top liquid layer with the colour slots on comparator by holding the comparator against day light.
2. Procedure for Nitrogen (N)
- Take in test bottle no.1, Nitrogen reagent AN-1 up to 6ml. mark.
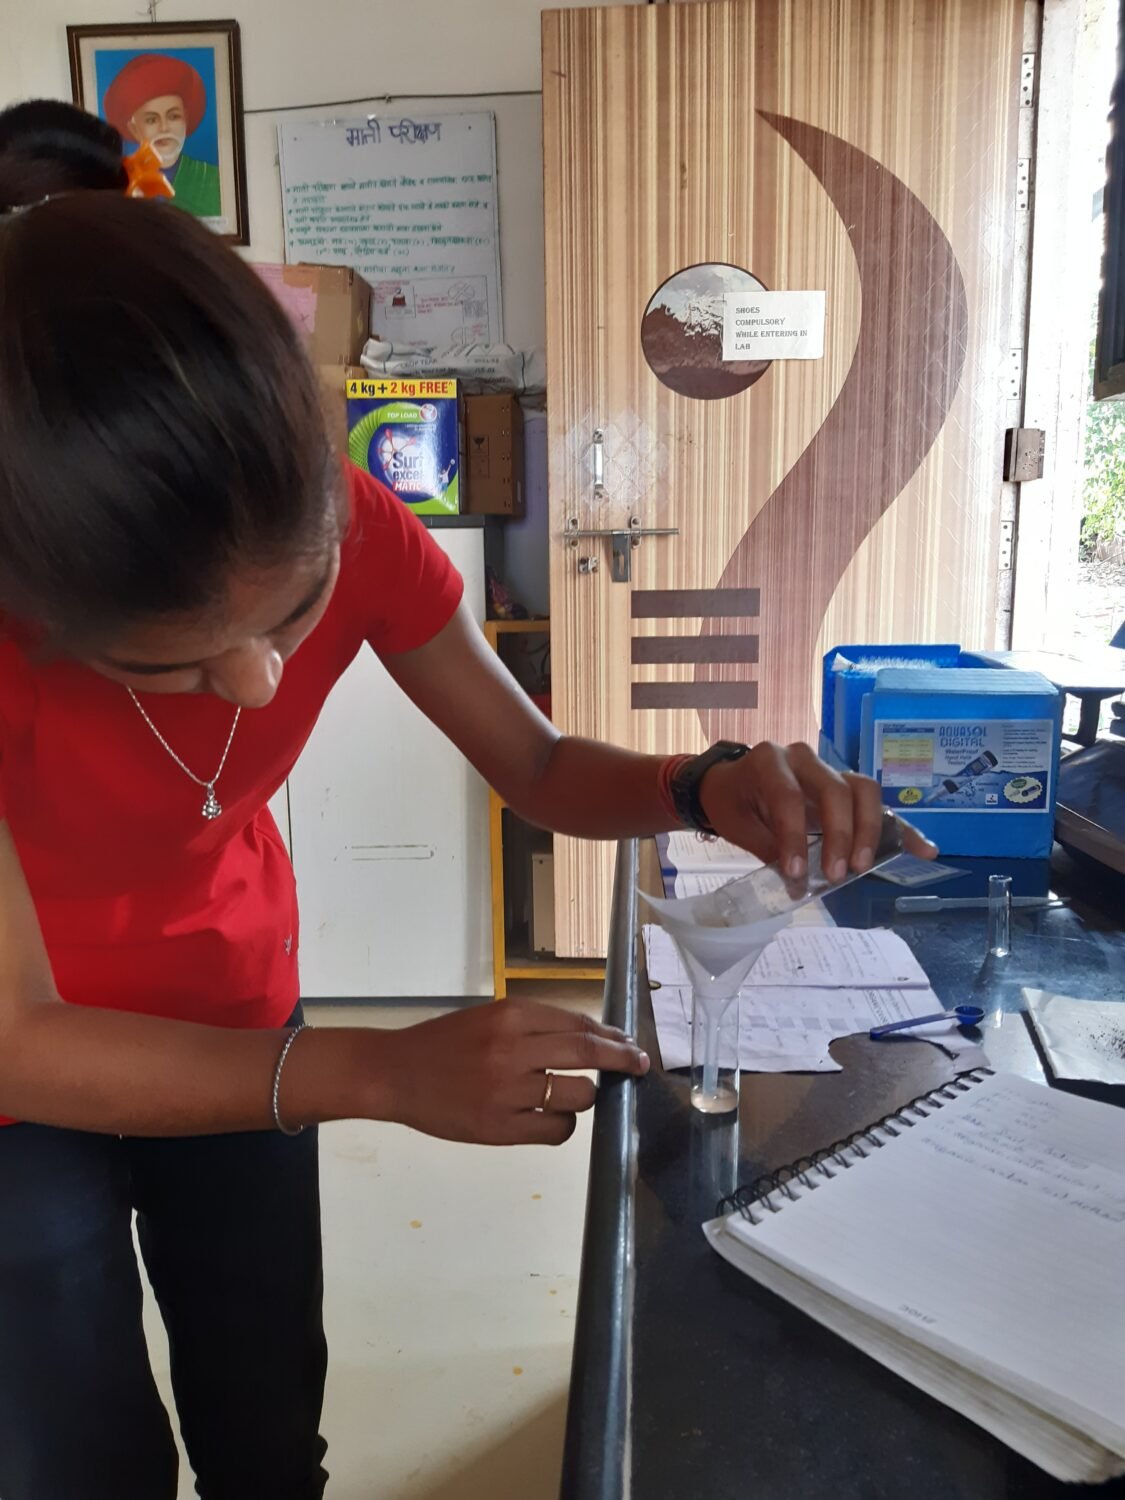
- Using funnel, add one flat spoonful of soil(1gm.) in Test bottle No.1.
- Put cap and mix by gentle inversion for one minute. allow to leave clear liquid layer on the top.
- In clean bottle No.2,carefully transfer 2ml of upper clear liquid from bottle No.1, using dropper.
- To the Test bottle No.2, add 4 drops of reagent AN-2. & mix gently.
- To the bottle No. 2, add 4 drops of reagent AN-3, put cap & mix gently. Wait for 5 minutes.
- Insert the Available Nitrogen colour chart in the comparator unit. Now the nitrogen colour comparator can be used for matching Available Nitrogen test colour.
- After 5 minute , mix gently & place the bottle in nitrogen colour comparator & match colour the bottle with colours on comparator (refer note regarding colour comparator.)
- Read the available Nitrogen directly on comparator .

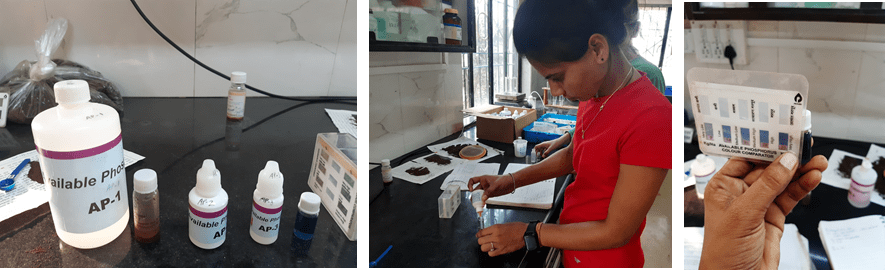
3. Procedure for Phosphorus (P)
- Take in the Test bottle No. 1, phosphorous Reagent AP-1 up to 6ml. mark.
- Using funnel, add one flat spoonful(1gm.) of soil in Test bottle No. 1
- Put cap and mix by gentle inversion for one minute. allow the bottle to stand for 5 minutes. Soil will settle & separate to leave clear liquid layer on the top.
- Carefully draw upper clear liquid in dropper and transfer the same to test bottle No.2 to make level up to 3 ml. mark.
- To 3ml. liquid in bottle No. 2, add 6 drop of phosphorus reagent AP- 2 and mix gently by swirling. Add 3 drop of reagent AP-3. Put cap and mix well. Blue colour will develop in bottle no. 2
- Insert the available Phosphorus colour chart in the comparator unit. Now the Phosphorus colour comparator can be used for matching of Available Phosphorus test colour.
- Place the bottle in phosphorous colour comparator & match the colour of bottle with the colours on Phosphorous colour comparator can be used for matching of Available Phosphorus test colour.
4. Procedure for Potassium (K)
- Take in the bottleNo. 1, Potassium reagent AK-1 upto6ml.mark.
- Using funnel, add two flat spoonful (2gm.) of soil in Test bottle No.1
- Put cap and mix by gently inversion for one minute. allow the bottle to stand for 5 minutes. Soil will settle & separate to leave to leave clear liquid layer on the top.
- Carefully drop upper liquid in dropper and transfer the same to another clean bottle No. 2, to make level up to 2ml. Mark.
- To 2ml. liquid in bottle No. 2, add one tablet of potassium reagent AK- 2 do not put cap. Mix by swirling. Allow tablet to dissolve completely. Mix by swirling intermittently to assist dissolution (it may take 5-6 minutes to dissolve the tablet completely) Purple colour will develop in bottle No. 2, proceed further only after complete dissolution of tablet.
- Take potassium reagent AK-4 in the 1ml syringe. Add reagent AK-4 to bottle No. 2, two drops at a time, and mix gently after each addition keep count of drops and continue addition until colour changes from purple to blue. Count the no. og drops of reagent AK-4 required for colour change.
- Use red coloured 1ml. Syringe for taking potassium. Reagent AK-4.
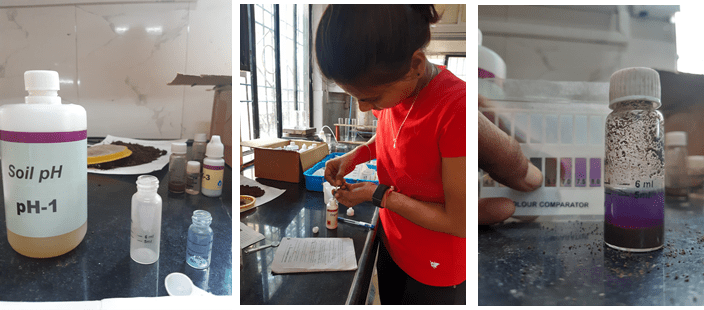
5. PH measurement
- Take reagent pH-1 in Test bottle No. 1 up to 5m. mark.
- Add 2 flat spoonful of soil (2gm) in Test bottle No. 1 with the help of funnel.
- Put cap and mix by gentle inversion for one minute. allow the bottle to stand for 10 munities. Soil will settle & separate to leave clear liquid layer on the top.
- Insert the pH colour chart in the comparator unit. Now the pH colour comparator can be used for matching of pH test colour.
- Place the bottle No. 1 in pH colour comparator and match the colour of top liquid layer with colours on the comparator. Read soil pH directly on comparator (refer note for method of colour matching).
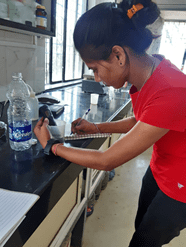
Checking Ec –
Take 10 ml water in a beaker .
Put 1 gm soil in water.
Mix it well, Let the soil settle down .
By using EC metre check EC OF that soil.
Conclusion :
Finally by this process we know the ph , potassium(k), Nitrogen(N) , Phosphorous(P) ,Organic Carbon (OC ), Electric Conductivity (EC) present in the soil. I have tested 2 soil samples on 5th December 2022 using Prerna kit.
Water Testing
INTRODUCTION
Water is essential for the survival of life on earth. Due to environmental degradation and poor sanitary surroundings, water supply sources get polluted with harmful micro-organisms. 80% of infectious disease are water born and 50% of death among children is due to diarrhoeal diseases in developing countries.
This method is –
Cost effectives
Less time consuming
Requires less expertise
User friendly water quality field testing kit.
It can be uses in distant region like slum, Rural areas.
WHAT IS H2S STRIP TEST
H2S test performs to check the microbial contamination in water.
It is quick and qualitative test to determine the coliforms which present in drinking water they causes disease like Diarrhoea, Typhoid.

Trials on existing H2S strips
Water testing
Take water testing bottle
Add water sample in each kit
Add sample which collected form (Kitchen water and tap water)
Incubate at room temperature for 48 hours
Result were noted .
After 48 hours
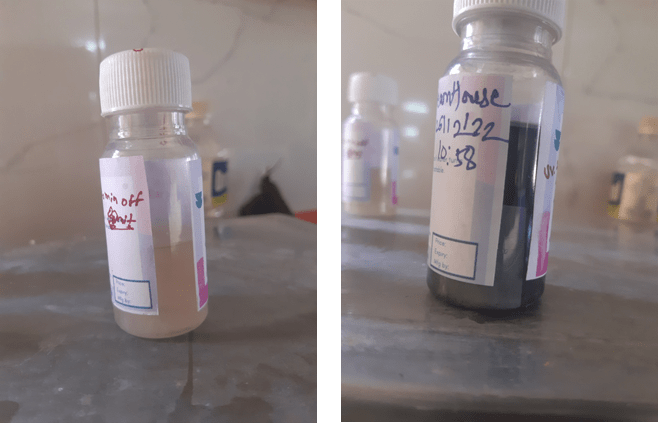
OBSERVATION TABLE :-
| S.r No. | Sample Name | Result |
| 1 | Tab water | Positive (not potable) |
| 2 | Kitchen water | Negative (potable) |
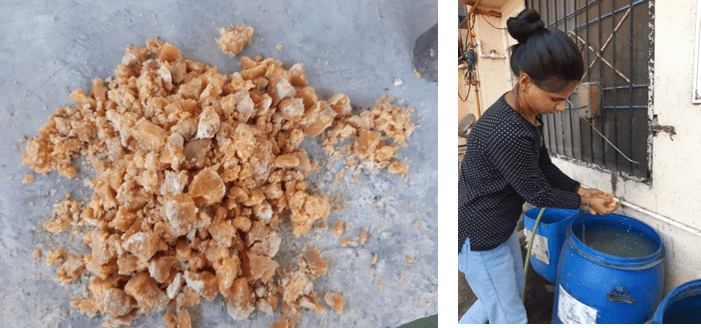
MULTIPLIACATION OF BARC
Date – 2/01/2023
Today I learned to do Multiplication of BARC
Process
We did the multiplication of BARC culture in 200 liters of water.
- 200 liters of water requires 2 kg Jaggery and 200 gm of urea.
- Took 200 grams of urea.
3.Took 2kg jaggery.
4.And cut jaggery into small pieces and mix it in 200 liters of water.
4.Tank closed with shade net.
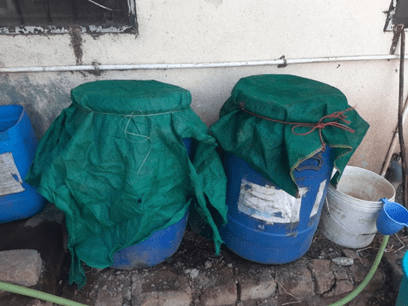
5.We have to mix the tank water two times a day for 5 days.


