Introduction
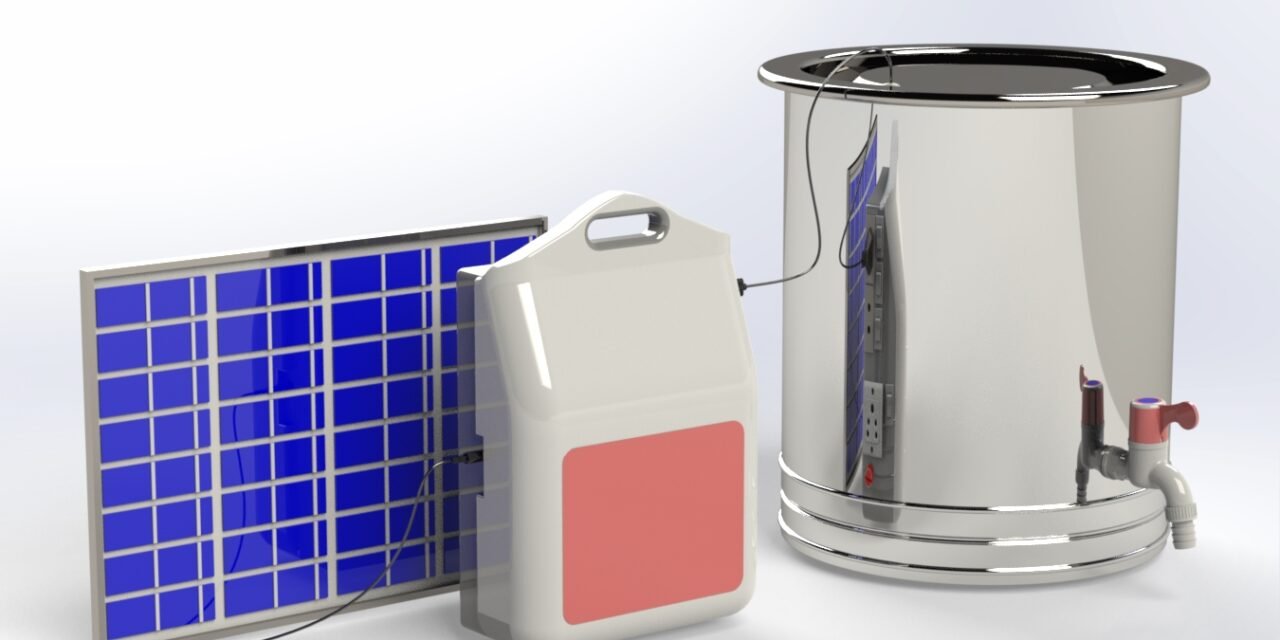
Vigyan Ashram has designed & developed a “Portable UV Filter” for small houses/ bungalows. Users of the manual will be able to build their own Hydroponics Structure using this manual. All the Bills of Materials (BOM) and dimensions of the systems are given in the design. We have provided design files drawn using Solidworks along with this manual. Users are suggested to read the manual carefully along with the site conditions before the fabrication of the unit.
Purpose of Manual
- To share the standardized design of Portable UV Filter suitable for small bungalows, houses, schools and institutes.
- Design to be made available online for local fabricators to build Portable UV Filter for their customers.
Product Description
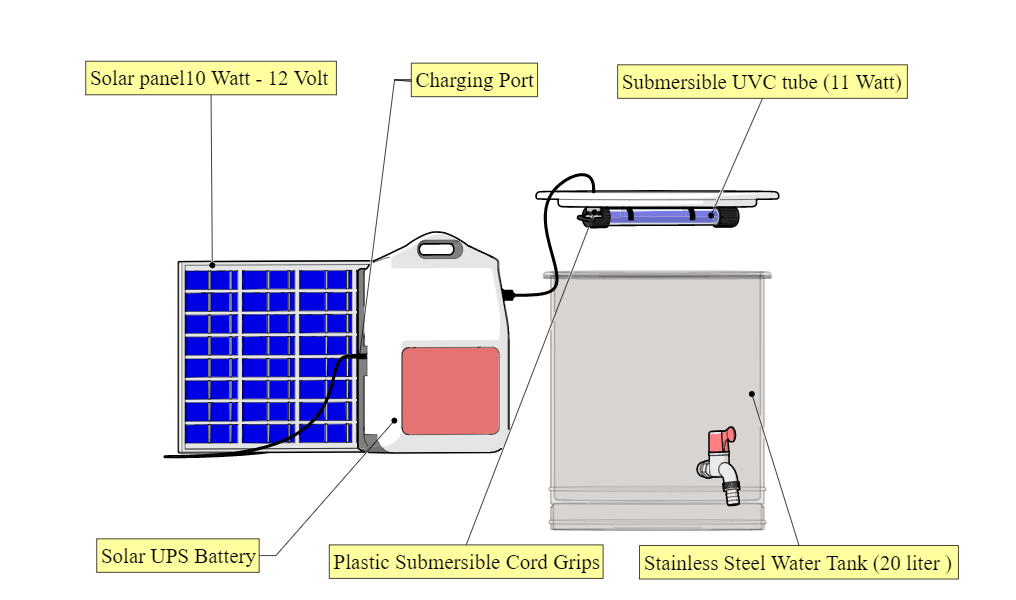
This is a Portable UV Filter. This system can be deployed in the kitchen, no construction is needed. The system consists of a 20L storage tank, submersible UV tube of 11 W. The proposed system is able to filter the water at a time. The detail view and BOM are shown in below:
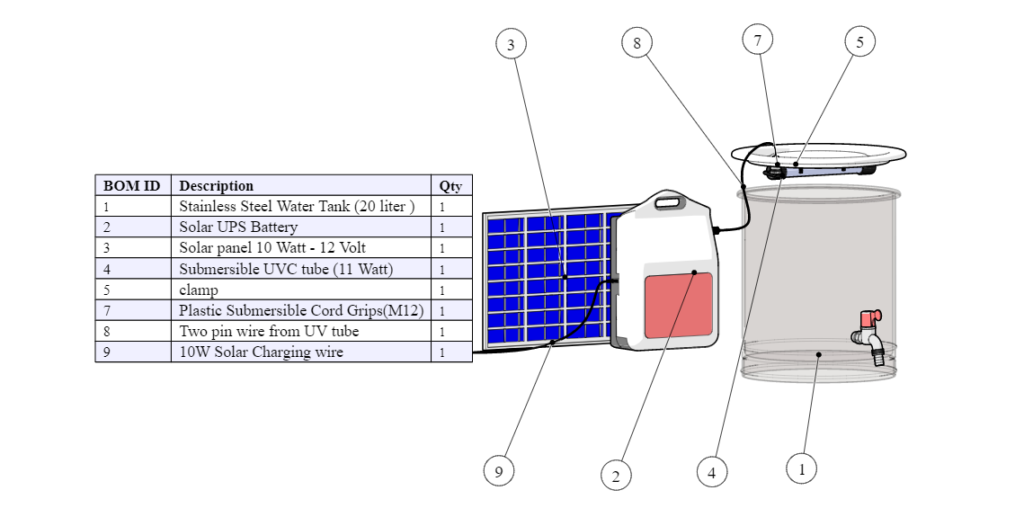
Features
- Portable water filter / Easy to handle
- Low cost
- Less maintenance / Easy cleaning
- Operates on Grid and Solar Power
- Low power consumption
How it works?
This filter unit is very handy to use, just follow the below steps to start using this.
- Open a filter cover and keep this aside, cover it with a UVC tube (fragile material), take care during handling.
- Pour tap water inside up to marking. ( Take care of this while selecting water source – This filter removing only bacterial content, it’s not reducing water hardness or filters muddy water)
- Keep filter cover on tank, orient tube inside direction.
- Now plug in the filter connection in the 230V AC socket and turn the ON switch.
- Keep this for the next 15-20 min6.
- Turn OFF the switch and remove the connection. Water is ready to drink.
- Keep the filter ON every day for 15-20 min.
Advantages:
- This filter uses UVC light radiations in bandwidth 200 to 280mm to kill pathogens inside water in a batch process. It requires around 15-20 minutes for 20-litre water.
- No need to give continuous supply. Vey less electricity consumption, 11 watts/hour.
- The portable unit works on solar power, for remote area users, for tribal communities.
- No need for an extra tank, motor and solenoids like the continuous type of filters.
- Low cost, affordable to tribal, remote area peoples.
- Takes very little space and is handy to use and clean.
Disadvantages:
- It’s only disinfecting water by killing bacteria and viruses, it’s not reducing the water hardness.
- Not suitable for muddy water.
Step by Step installation
Collect all material like a SOLAR 10 Watt – 12 Volt Solar Panel, SOLAR 10 Watt – 12 Volt Solar Panel, Stainless Steel Water Tank 20L, with Cover, Submersible UV tube(11W), UV tube holder, Wire Glance, Water Tap, Adapter.
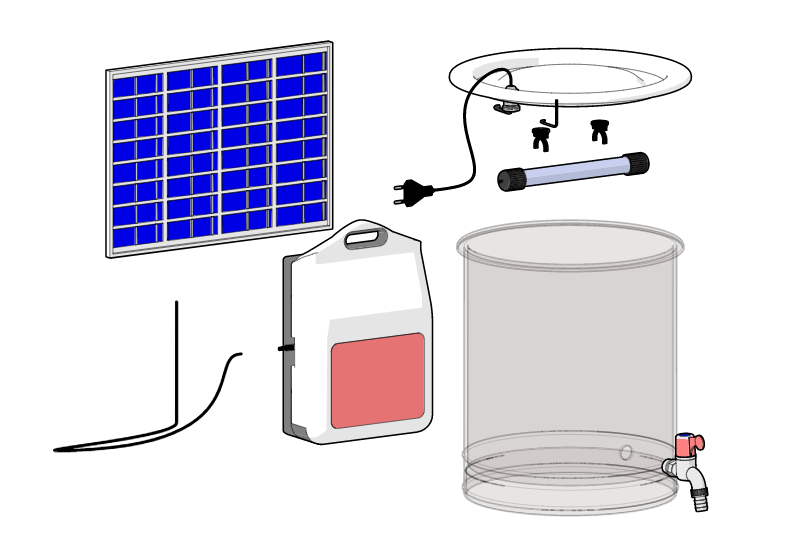
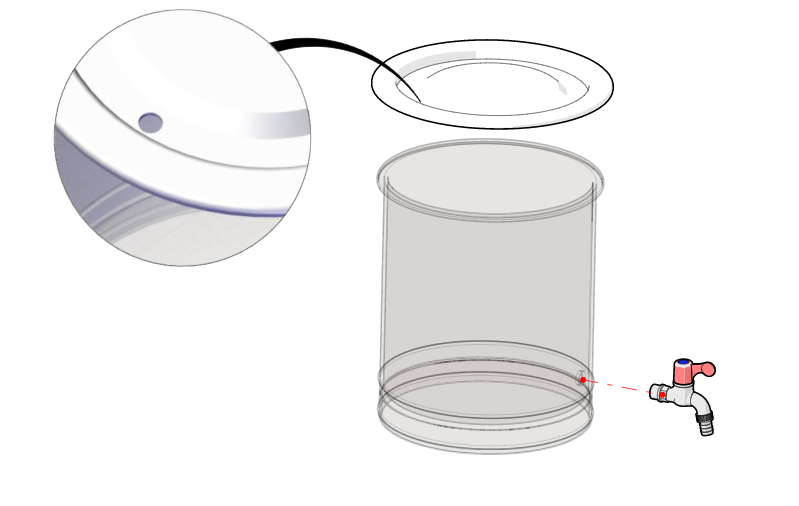
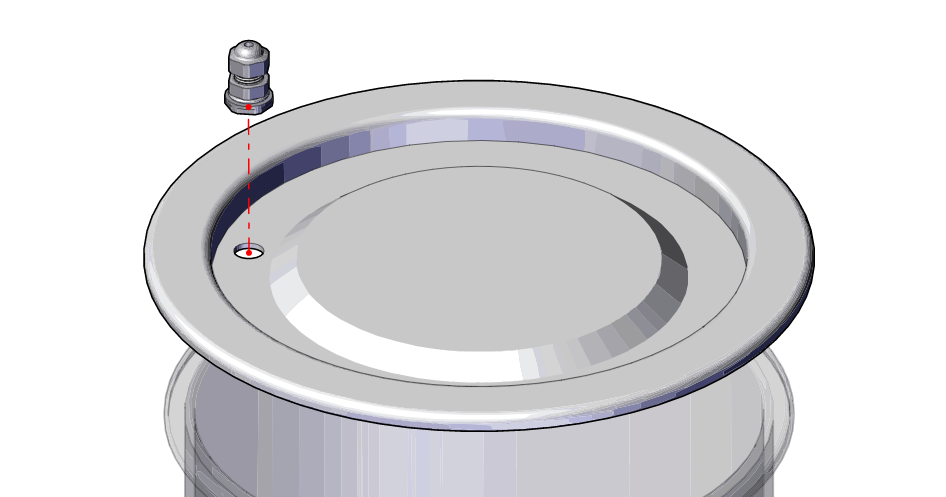
Take Stainless Steel Water Tank 20L. Make a 5.30mm hole on the Tank Cover for fixing the Wire Glance and also make a hole in the Tank for Fixing the Water Tap.
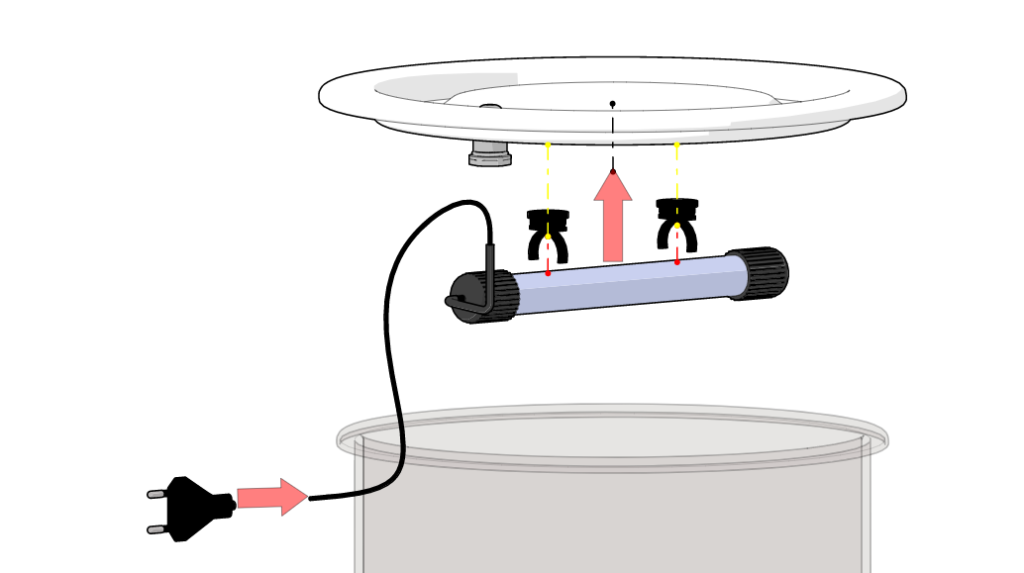
Take a UV Tube and UV tube holder in 2Qty. Then fixed the UV Tube on Tank Cover using Nuts and Bolts in 4Qty.
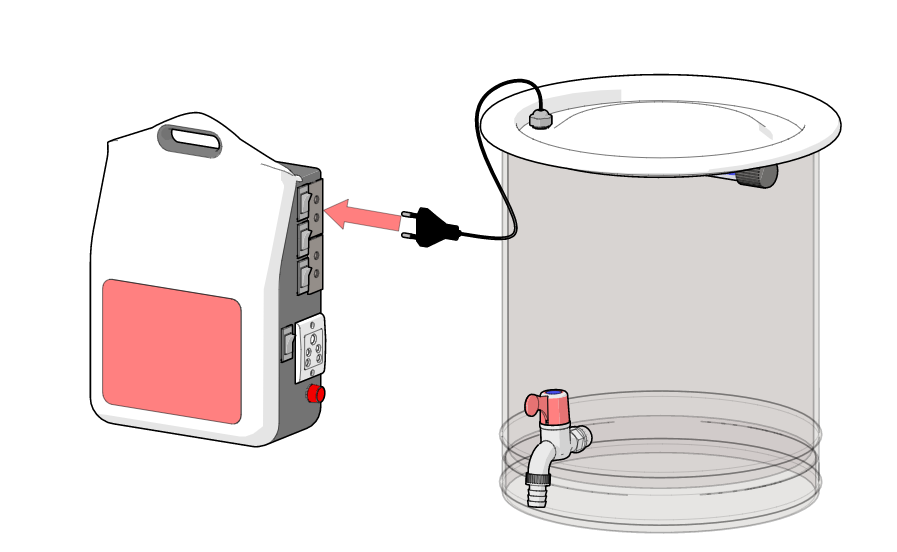
Take a UV tube Adapter and Plug it into the Solar Inverter.
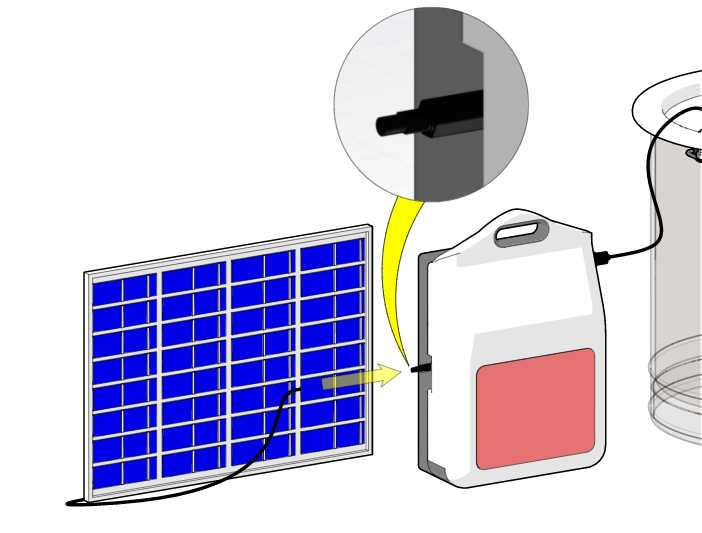
Connect the Solar Power Supply to the Solar Inverter.
Final Assembly
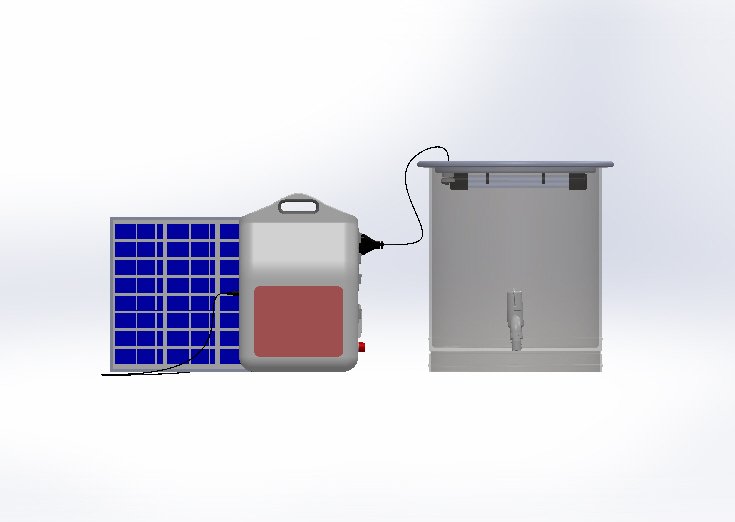
After following all steps. Solar UV Filter final assembly is shown in fig
Commissioning of system
- Check fragile parts regularly.
- Check electric connections regularly.
- If the tube is not operational don’t turn it ON.
- Check water level while filling water.
Maintenance of system
- Don’t open filter cover when its ON
- Fit cover properly after pouring water.
- Fill water up to the marking only.
- Fix UVC tube properly with vacuum press attachments after cleaning.
- Keep it ON every day for 15 min only, don’t leave it ON for the whole day/ night.
- Handle fragile parts carefully.

