This project is the continuation of the project made by PJ (link) and Sumedh Yewale (link)
The goal of this second version of the data logger is to replicate the previously undertaken process, document it, and explore potential improvements.
Le projet Bsf est la realisation d’un compost utilisant des mouche black soldier comme principale intervenant
The goal of this 2nd version of the data logger is to repeat the process made previously, document it and looking for possible improvement.
This project is divided into different segments:
Software:
- Hardware (Arduino) & Arduino -> Firebase
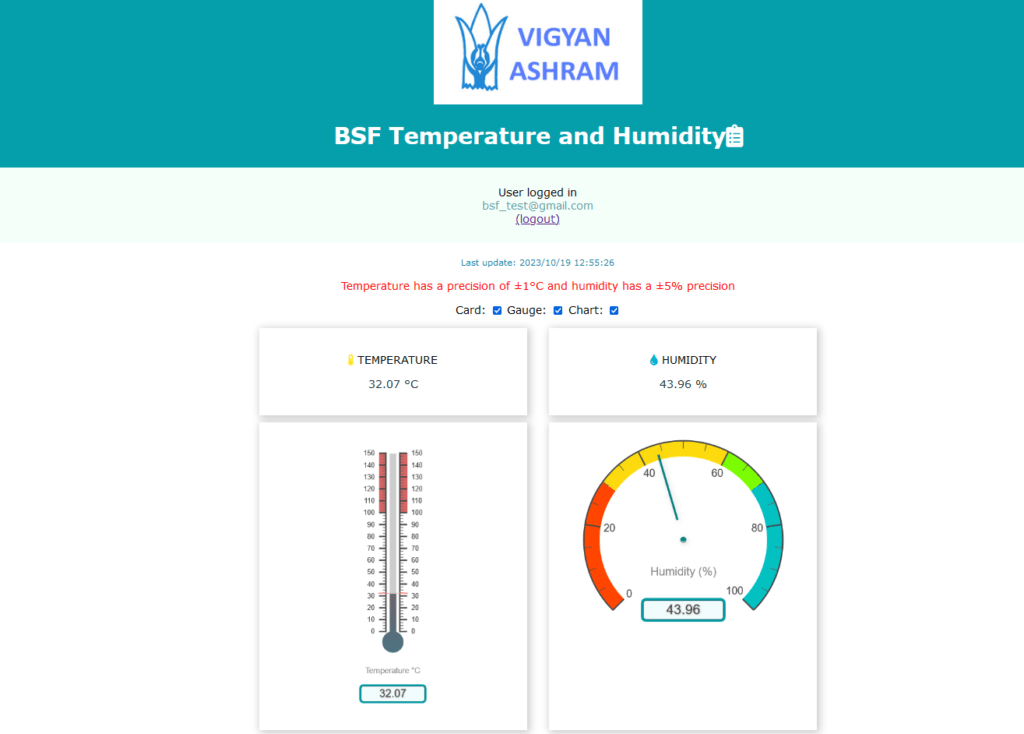
- Firebase -> User Interface (GUI)
Hardware:
- Electronics
- Printed Circuit Board (PCB)
Tutorial for new client
Replication :
This project is primarily based on the tutorial provided by randomnerdtutorials.com, with adaptations to suit our constraints and sensors.
1. Hardware (Arduino) & Arduino -> Firebase
The complete code can be found on the GitHub link. The code was developed using Vscode with PlatformIO, and the following libraries were used:
- mobizt/Firebase Arduino Client Library for ESP8266 and ESP32@^4.4.8
- adafruit/Adafruit AHTX0@^2.0.5
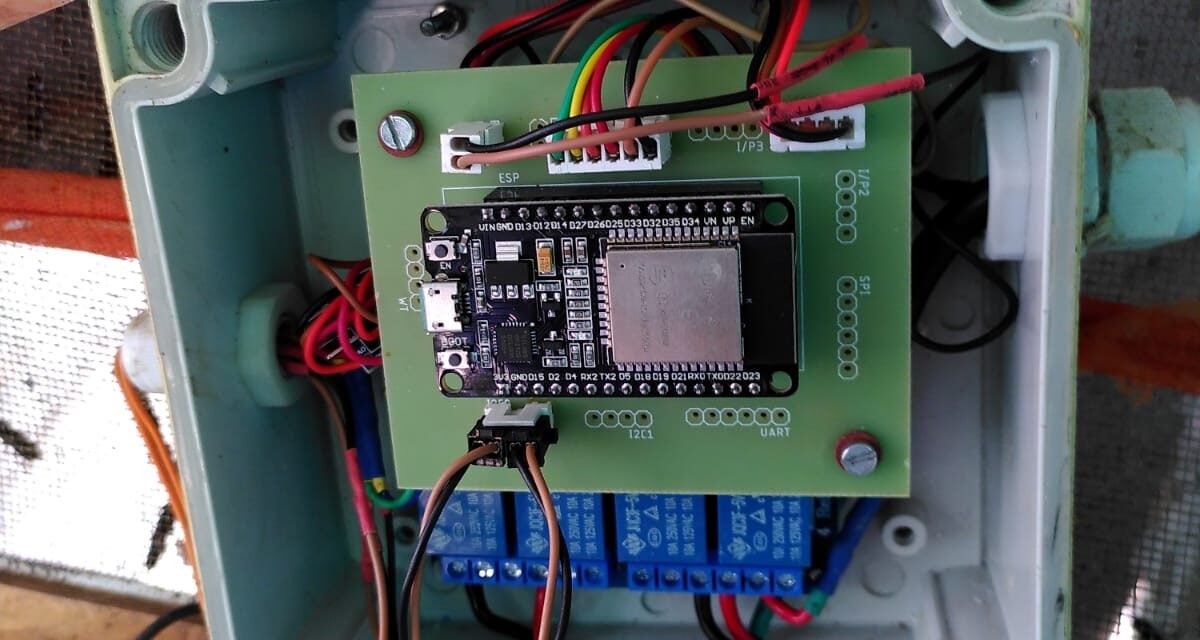
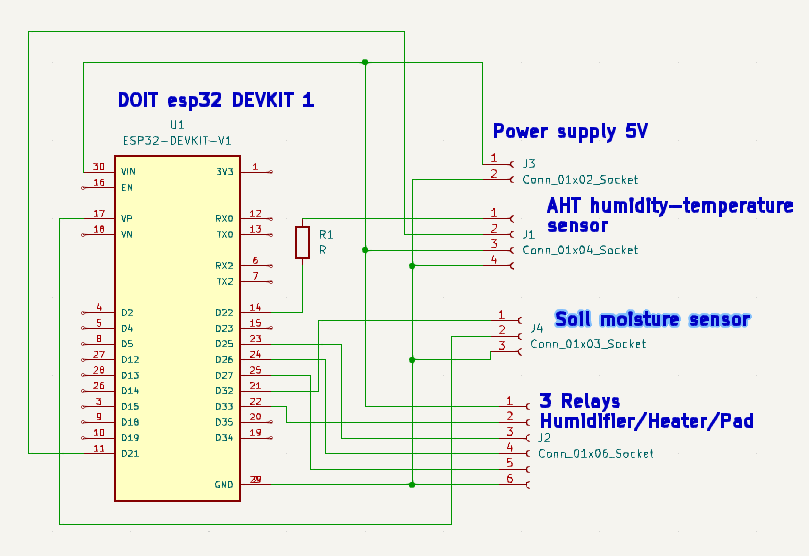
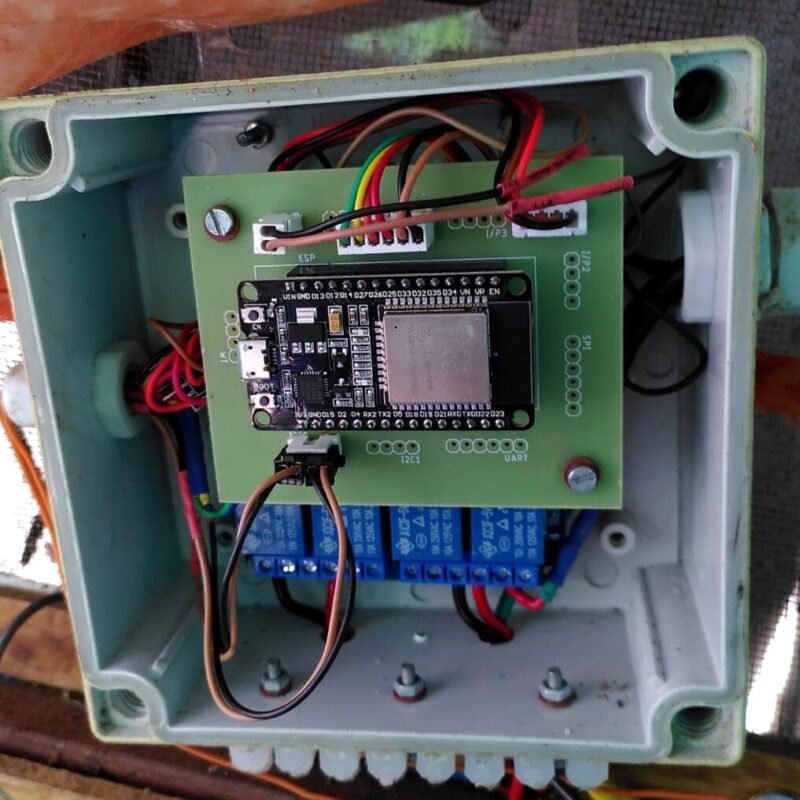
The microcontroller used is the DOIT ESP32 Devkit 1 for its Wi-Fi connectivity.
To understand the code’s major components, we recommend reading the following tutorial: Link to the tutorial.
2. Firebase -> User Interface (GUI)
The complete code can be found on the GitHub link. The code was developed using Vscode with PlatformIO.
To understand the core aspects of the code, we recommend reading the following tutorial: Link to the tutorial.
3. Electronic
DOIT ESP32 devkit v1 Pinout: Link to pinout
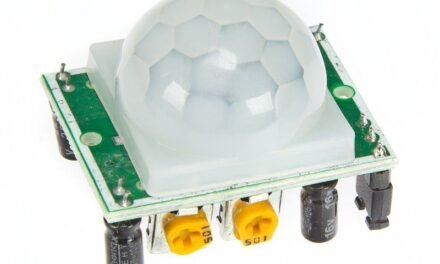
Sensors :
Humidity-Temperature probe : AHT2415C00
Soil moisture sensor: Link to the sensor
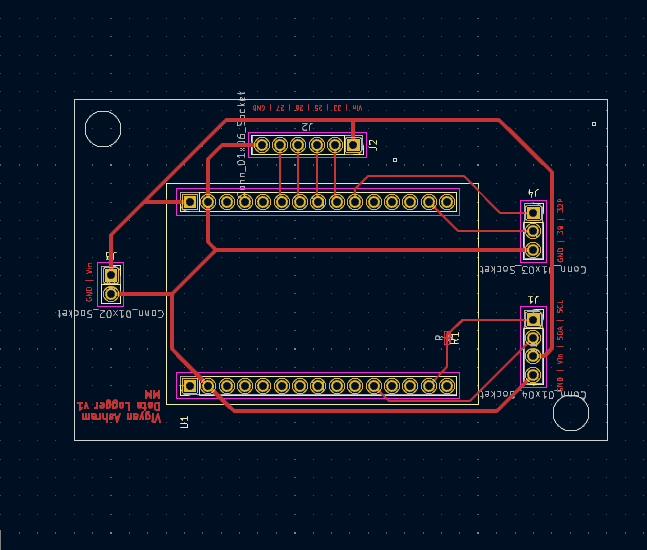
4. PCB
5.Assembling of the device
Tutorial for Creating a Project for a New Client:
Based on the following tutorial Part 1 esp to firebase / part2 firebase toGUI and the work of Sumedh Yewale and PJ
1.Firebase Setup: Create and configure a new project in Firebase.
Follow steps 1 to 5 in Part 1 esp to firebase
- To upload code on the ESP32 we used Vs Code with the extension PlaterformIO
- Open the project BSF-v2-MM (made for DOIT ESP32 devkit and AHT25 sensor) Modify the following line in the main file according to your new Firebase project and Wi-Fi network:
2 ESP32
- WiFi_ssid: Wi-Fi network name
- WiFi_password: Wi-Fi network password
- API_key: Specific key of your Firebase project, found in the project settings
- User_email and password: To be declared in the Firebase project under Build -> Authentication (the email doesn’t need to be real)
- Database_url: Link to your database, found in Build -> Realtime Database
Code of the ESP32 :
// Insert your network credentials and make sure the define at the beginning of the document is correct
#if defined(WIFI_WORKSHOP)
#define WIFI_SSID “*******************”
#define WIFI_PASSWORD “*******************”
#endif
// Insert Firebase project API Key
#define API_KEY “*******************”
// Insert Authorized Email and Corresponding Password
#define USER_EMAIL “*******************@gmail.com”
#define USER_PASSWORD “*******************”
// Insert RTDB URLefine the RTDB URL
#define DATABASE_URL “https://*******************.asia-southeast1.firebasedatabase.app/”
3 Firebase Web App
Install the required software before starting the Firebase Web App creation. Here’s a list of the necessary software (click on the links for instructions):
Follow step 1) and 2) of part2 firebase toGUI
Replace the “public” folder with the “public” folder of you own project. In the index.html file, the only thing to change is the Firebase configuration:
const firebaseConfig = {
apiKey: “*******************”,
authDomain: “*******************”,
databaseURL: “*******************”,
projectId: “*******************”,
storageBucket: “*******************”,
messagingSenderId: “*******************”,
appId: “*******************”
};
You can find your Firebase configuration in your Firebase profile under Project Settings -> Project Settings.
