Introduction
I have been asked to create a Body Mass Index (BMI) device.
The BMI is a convenient rule of thumb used to broadly categorize a person as underweight, normal weight, overweight or obese based on tissue mass and height. However, this index is not accurate on everybody, especially on individuals with abdominal obesity, small stature or unusually high body-mass.
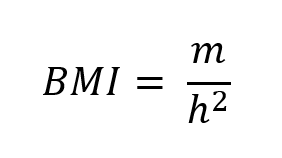
The BMI formula is based on the mass m in kilograms and the height h in meters.
| Category | BMI |
| Underweight | < 18.5 |
| Normal weight | 18.5 – 25 |
| Overweight | 25 – 30 |
| Obese | > 30 |
My program and design are on Fablab google drive account (https://drive.google.com/drive/folders/1NHVq3mFy1Qk4OMN1yF_zGtn_LwGS-HQB?usp=sharing).
Idea
The idea of the BMI device is to have a weighing scale on the ground, a telescopic rod on which is a distance sensor to measure the height and a display to show BMI measurement results.
Hardware used
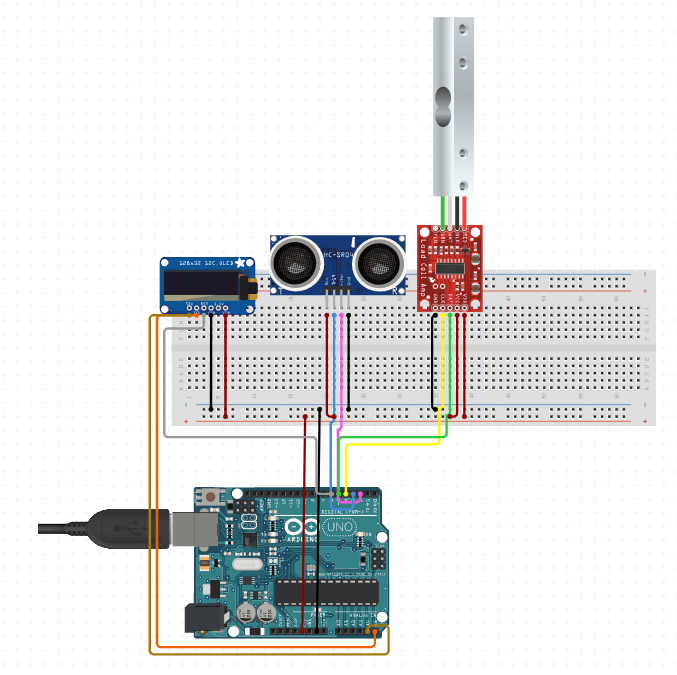
- Arduino UNO
- HC-SR04 ultrasonic sensor
- HX711 24-Bit Analog-to-Digital Converter (ADC) for Weigh Scales
- Load cell 150 kg
- SSD1306 display
- Weight scale structure
- Telescopic rod
Structure
Weighing scale
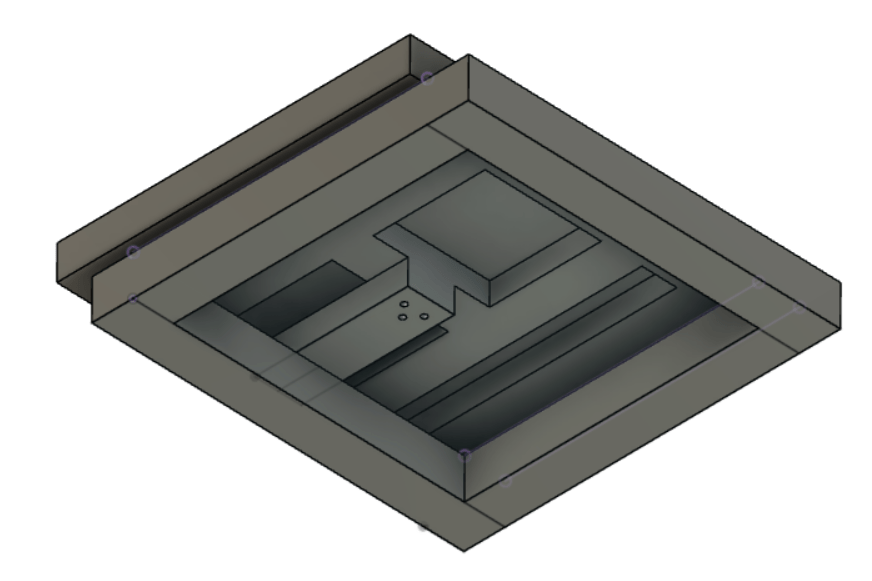
There are three important points in the weighing scale design. Firstly, it is to let some room for the load cell deformation. In that way, I used the structure of the top platform to create enough space. Secondly, it is to have the end effector of the load cell in the middle of the standing platform. And thirdly, the base of the load cell will be off center and has to be taken into account. Indeed, I designed a structure large enough on the ground to avoid the whole scale to when someone get on it.
I thought of a standing platform of 30×30 cm after comparing online with commercial weighing scale dimensions.
Telescopic rod
The telescopic rod should be at least 1.5 m high and around 2 m for the maximum height.
Arduino program
The program steps :
- Scale is calibrated with the 28.33 calibration coefficient that has been computed previously with the code on https://randomnerdtutorials.com/arduino-load-cell-hx711/
- Scale is tared
- The display is initialized
- The calibration distance is measured. Indeed, because the vertical rod changes sire, we need to compute the actual height separating the weighing scale to the ultrasonic sensor.
- Calculation of the weight
- Calculation of the distance between the ultrasonic sensor and the top of the user’s head
Electrical wiring
Testing
This structure will be more than 2 meters high which means that the ultrasonic sensor has to be accurate.
- One of my concern was to make sure that from 2 m high, the ultrasonic is detecting the 30×30 cm weighing platform and not the surrounding ground that is more than 2 meters far.
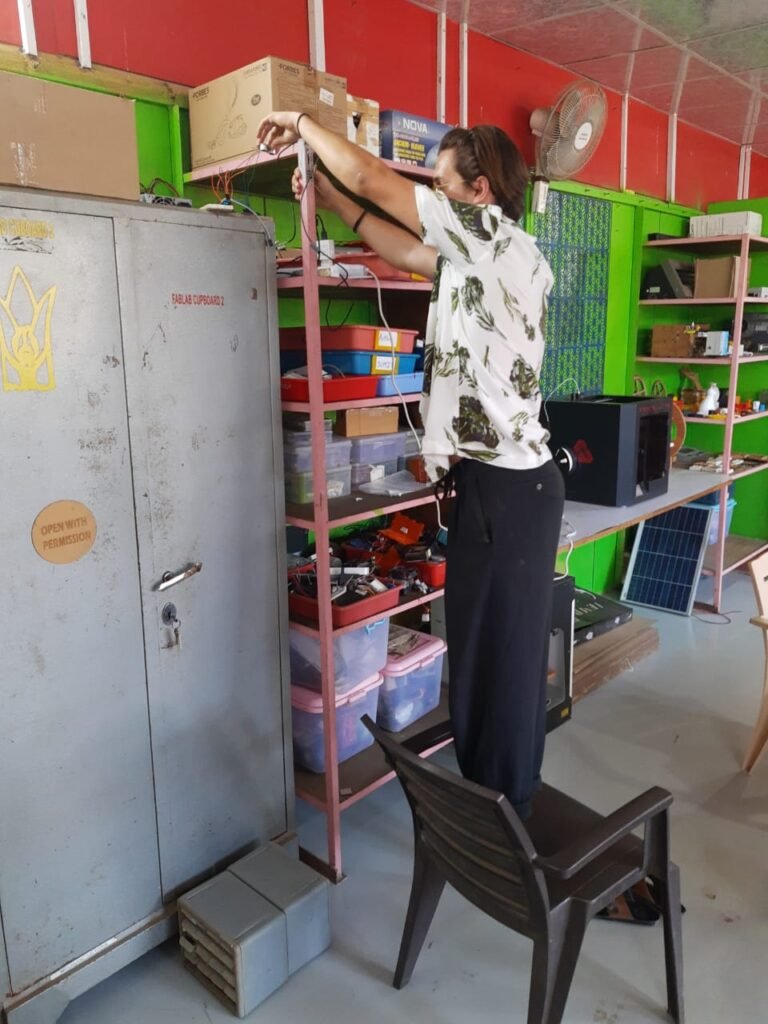
The device gave me a very good accuracy when nothing is in the way, like this cupboard handle was sometimes.
- This device will use relatively long wires. The load cell wires are already 1.3 m long. Counting the HX711 board, the arduino board can be placed at 1.4 m high. So my concern was to know if 70 cm long wires will transmit accurate data from the ultrasonic sensor to the Arduino board. After testing, I can say that it is surprisingly accurate.
Discussion
The lowering of the weighing scale is not taken into account.
The goat weighing scale (http://fabacademy.org/2021/labs/vigyanashram/students/pavan-mahadeokuchar/project/FinalProject.html) in Vigyan Ashram is using the same one load cell principle. So I tested the platform lowering and it almost doesn’t change with my own weight (62 kg).


