Introduction :
Home automation is becoming increasingly popular as people seek to make their homes more efficient, convenient, and secure. One aspect of home automation is light control, where homeowners can control their lights remotely using a mobile device. This technology allows homeowners to turn their lights on or off, dim them, and set schedules or scenes with just a few taps on their phone or tablet. The ability to control lights from a mobile device not only adds convenience but can also lead to energy savings by allowing users to turn off lights when they are not needed. In this way, light automation control using mobile devices is a great way to modernize and optimize any home.
Hardware Use :
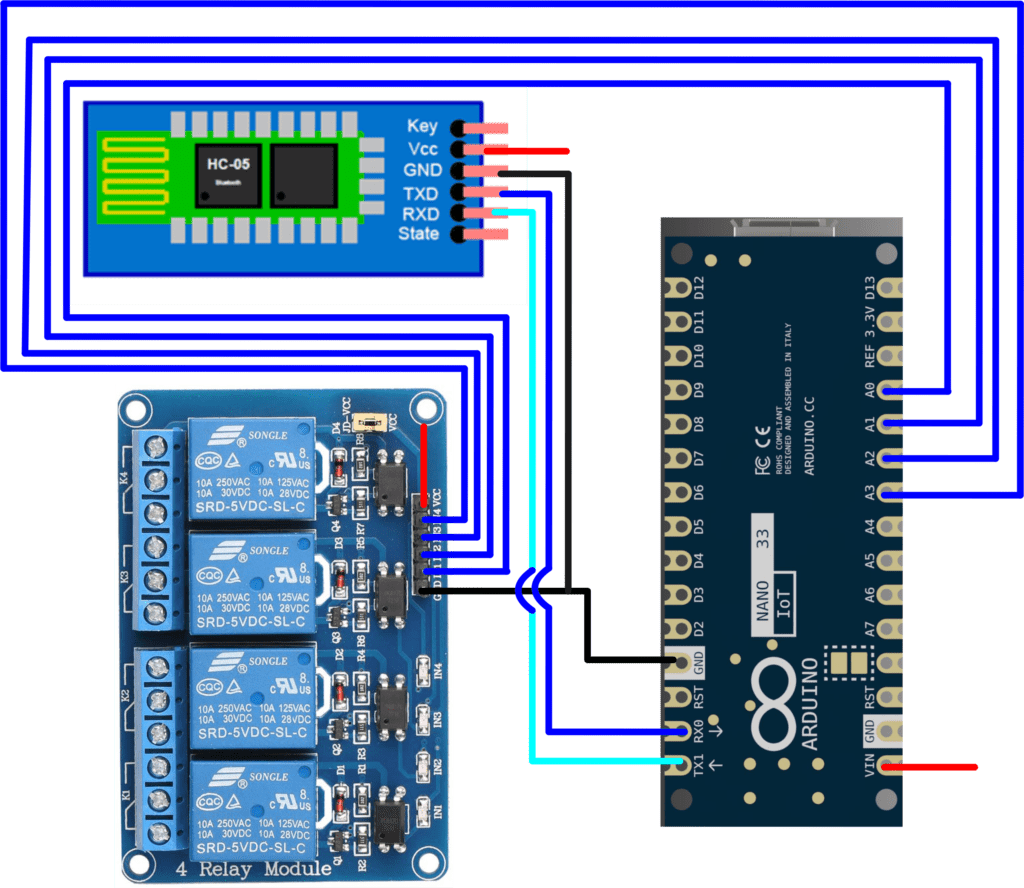
Arduino Nano

The Arduino Nano is a compact and versatile microcontroller board that can be used in various projects, including light automation. With its small size and wide range of input/output pins, the Arduino Nano is ideal for controlling and automating lighting systems. By connecting sensors or switches to the board, you can program it to detect changes in ambient light levels or trigger lights based on specific events. Its simplicity and compatibility with Arduino software make it a popular choice for light automation projects.
4 Relay Module channel
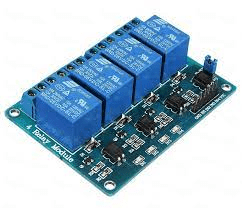
A relay module with four channels is ideal for light automation projects. Each channel can control a separate light or group of lights, allowing for efficient management. With this module, you can easily connect the lights to an external power source and control them remotely. The compact design of the module makes it suitable for various applications, offering versatility and ease of use. It is an essential component for implementing automated lighting systems in Lab
HC-05 Bluetooth Module
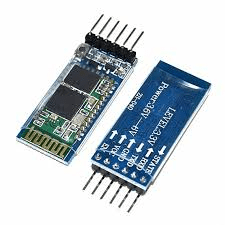
In a light automation project, a Bluetooth module acts as a wireless communication interface between the control device and the lighting system. The Bluetooth module operates on specific channels within the 2.4 GHz frequency range, commonly referred to as the “Bluetooth band.” These channels enable the module to transmit and receive data, commands, and control signals reliably.
Circuit Diagram
code
Click Here 👇👇
Installation :
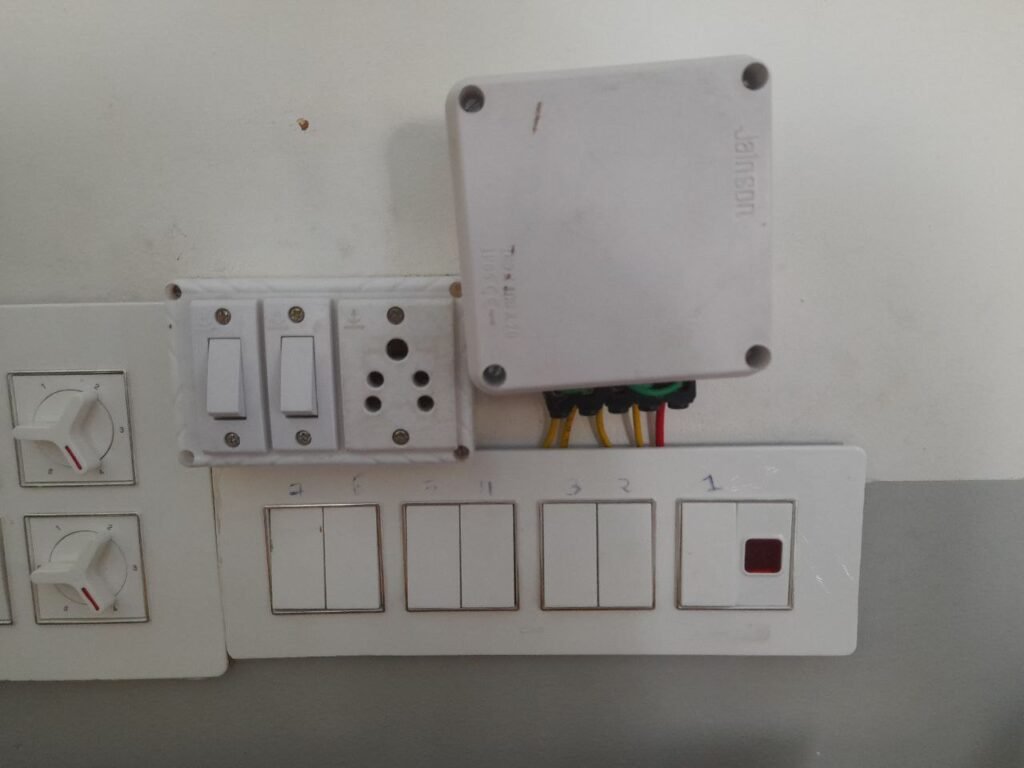
Step: 1


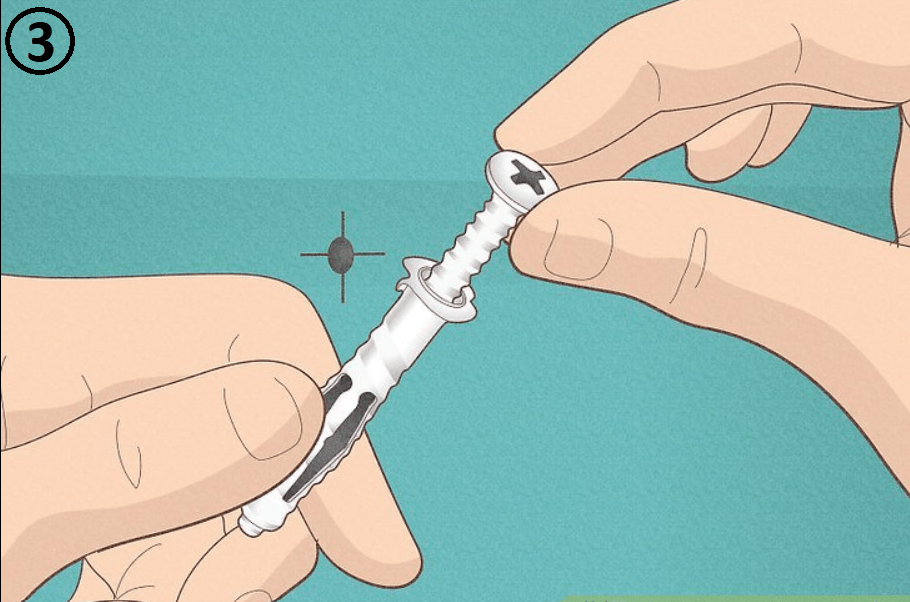
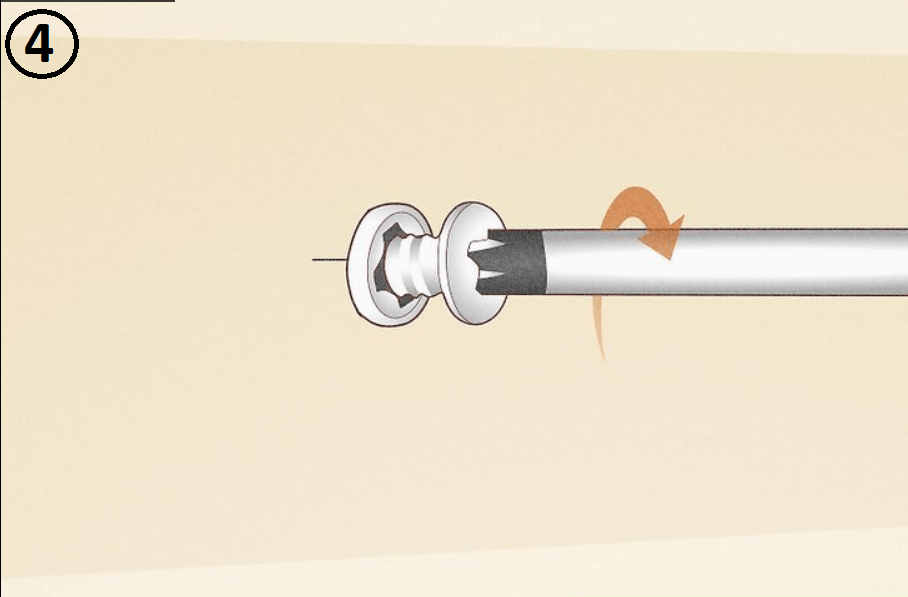
first, need to select an appropriate drill bit for the size of the plug. Then, mark the position on the wall where you want to insert the screw and drill a hole. Next, insert the plug into the hole and gently tap it in with a hammer until it is flush with the wall. Finally, use a screwdriver to insert the screw into the plug’s center.
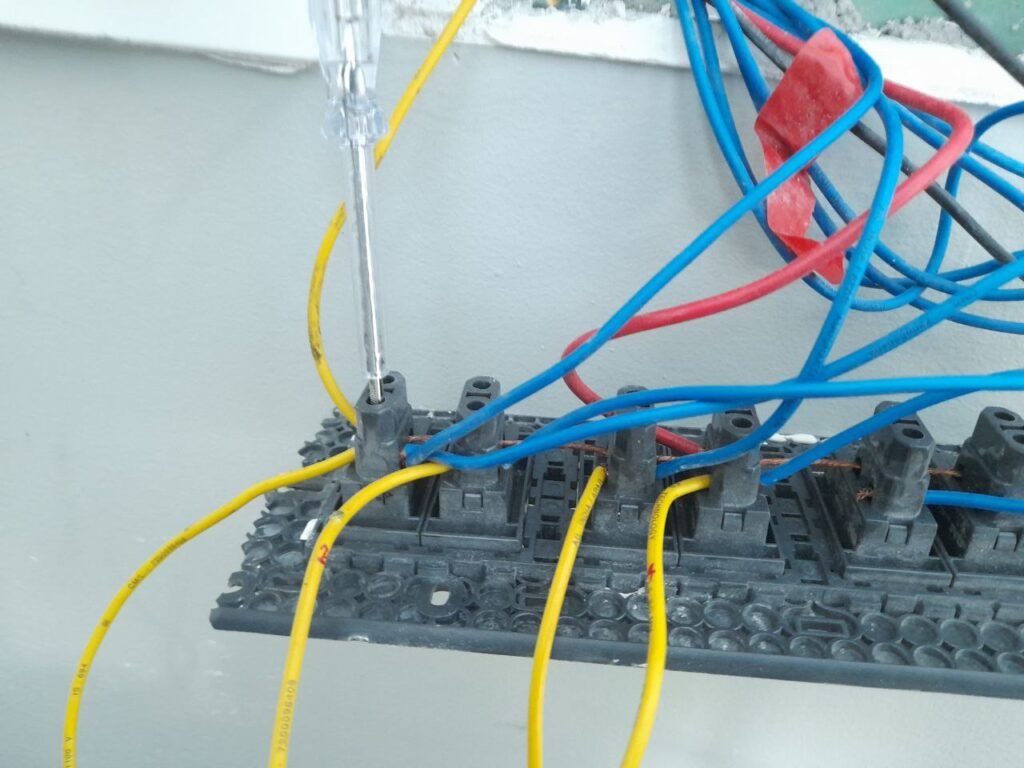
Step: 2
Get wire from the Socket using 1.5 core wire.
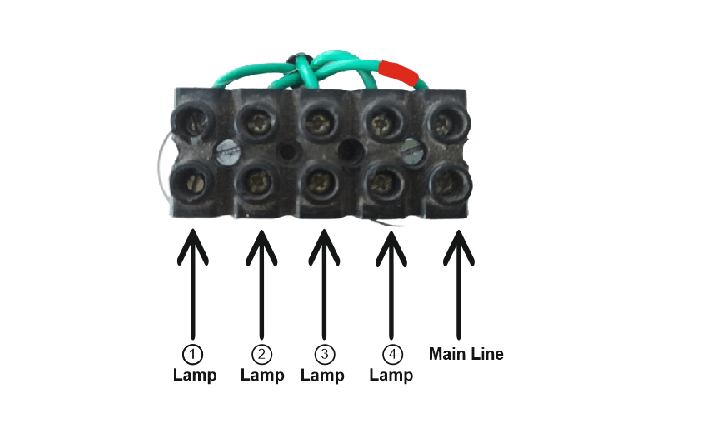
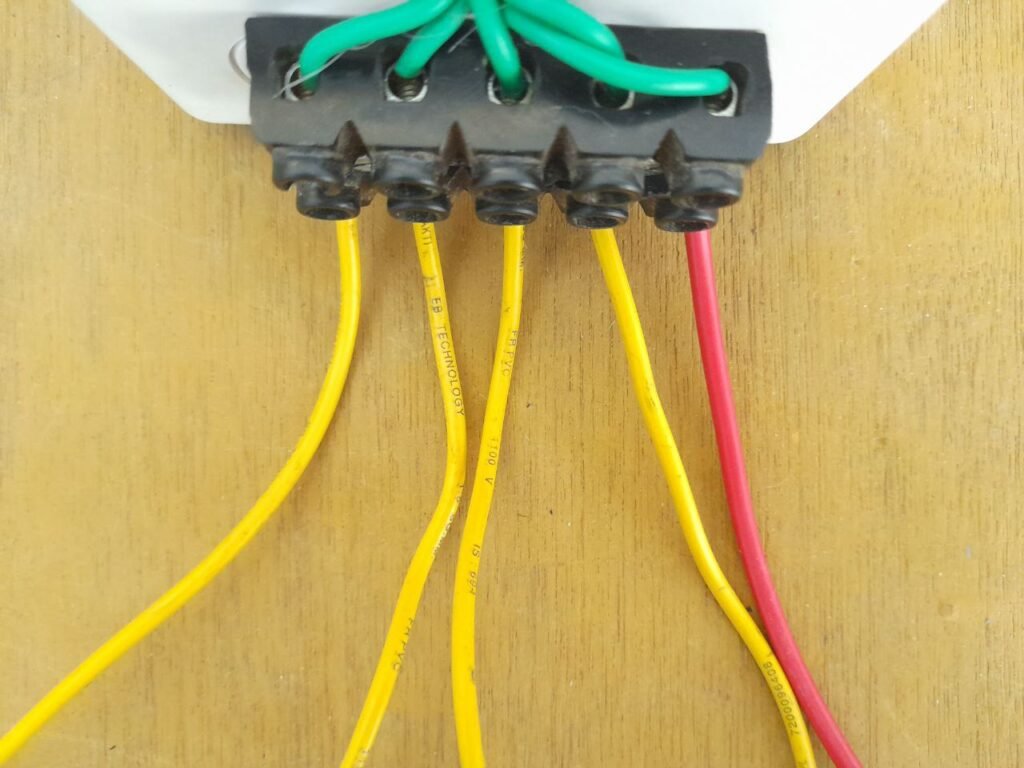
Connect the wire to the light switch in the electrical board. be careful not to short-circuit.
App installation
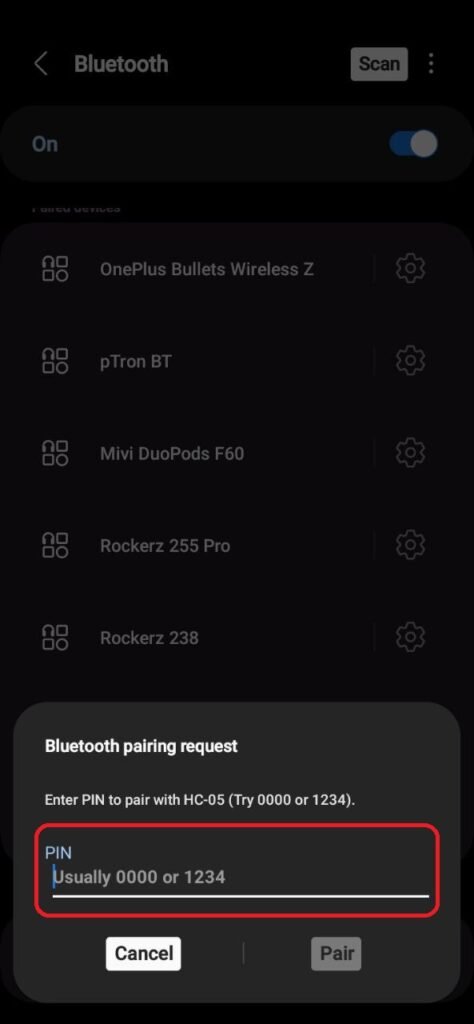
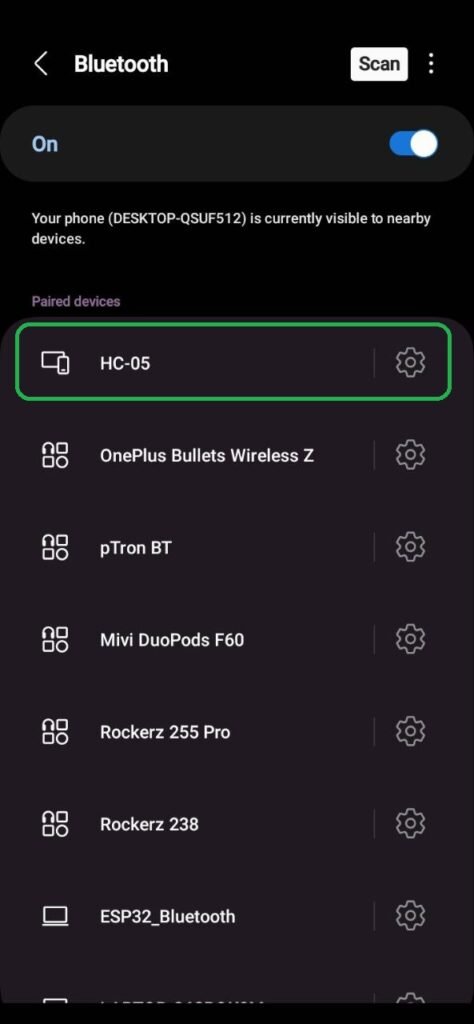
Setup: 1
Turning on bluetooth → Serching Device → Click HC-05 → password: 1234 → click pair


Step: 2
Install the app Click Here 👇👇
App Setup
Go to play store —-> Search ( Arduino Home Automation) —-> Install App —-> Open

In-App setup steps according

After App Setup Turn On Bluetooth open the app

Working Video

