10 June, 2026 to 17 June, 2026
Introduction
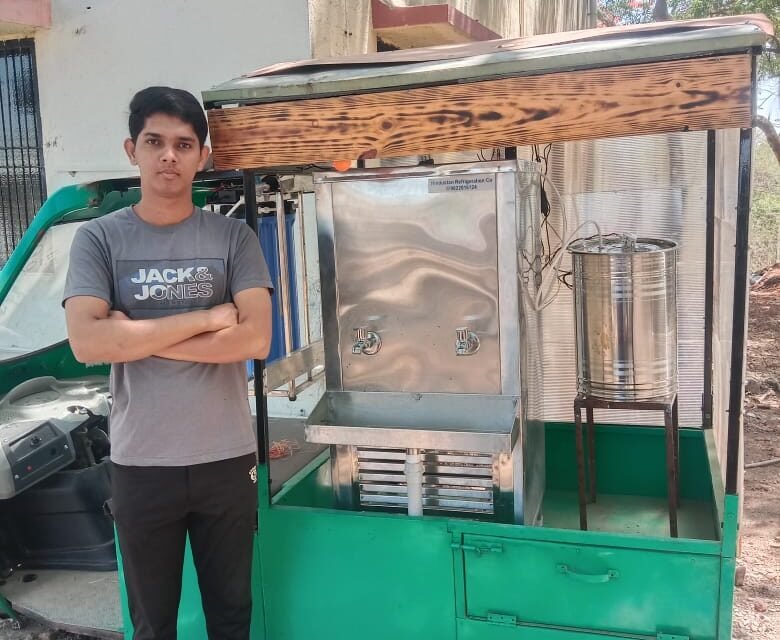
The objective of this project was to develop an Automatic Water Purification System capable of automatically controlling water purification using water-level sensors, a UV treatment unit, a water pump, and an Arduino Uno. Throughout the seven-day development process, I worked on project planning, hardware assembly, programming, mechanical fabrication, testing, debugging, and final implementation. Each day presented new challenges that improved both my technical knowledge and practical engineering skills.
Day 1 – Project Planning and Initial Programming (10 June 2026)
The project began with understanding the requirements and planning the overall working process of the automatic water purification system. I finalized the operating sequence, including water intake, UV purification, storage management, and automatic control using water-level sensors.
After completing the planning stage, I started writing the Arduino program. The initial code included logic for reading the sensors, controlling the relay module, operating the UV lamp, and switching the water pump automatically according to the water levels.
Day 2 – Hardware Collection and Circuit Assembly (11 June 2026)
On the second day, I collected all the required hardware components, including the Arduino Uno, 4-channel relay module, water-level sensors, UV lamp, water pump, power supply, sockets, and connecting wires.
After gathering the components, I assembled the circuit according to the design and tested each relay channel individually. The UV lamp and pump were successfully controlled through the Arduino, confirming that the basic hardware setup was functioning correctly.
Day 3 – Tank Preparation and Mechanical Work (12 June 2026)
The third day focused on preparing the water tank for installation. Holes were drilled for water pipelines, sensor mounting, and electrical wire routing. Proper positioning was carefully maintained to ensure accurate water-level detection and smooth water flow throughout the system.
After drilling, all fittings were checked to confirm proper alignment before final assembly.
Day 4 – Debugging and Enclosure Design
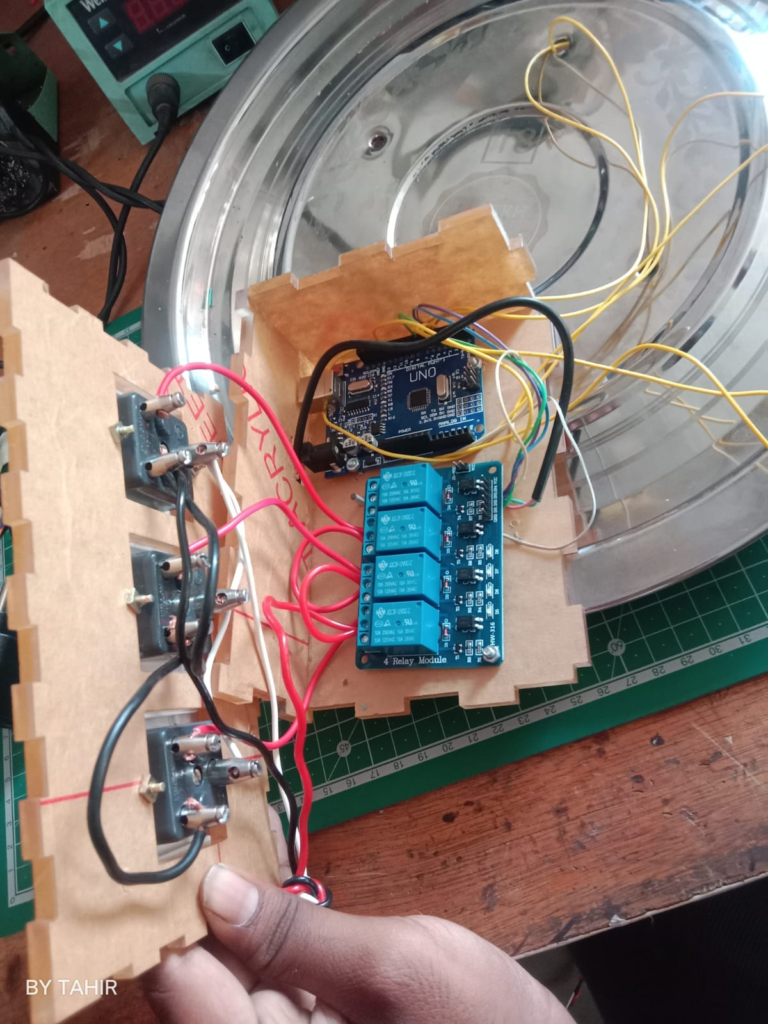
After assembling the hardware, I tested the complete system and identified several coding errors and incorrect electrical connections that prevented proper operation.
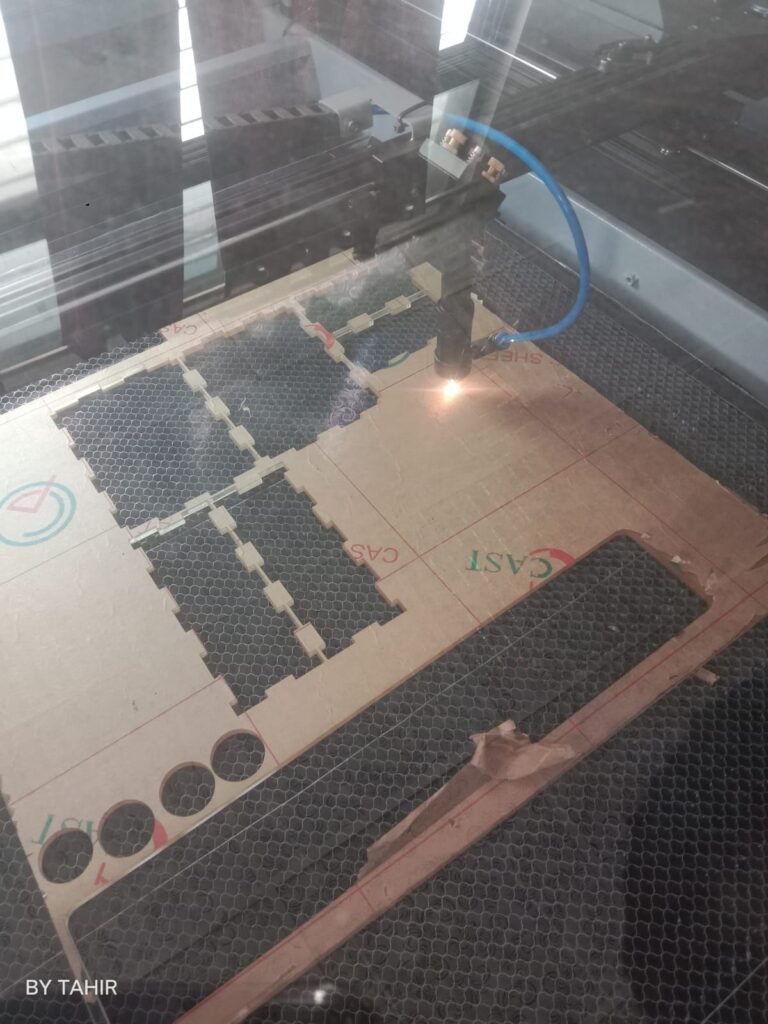
I carefully reviewed the Arduino program, corrected the software bugs, and rechecked all wiring connections. Once the system operated correctly, I designed the circuit enclosure using Inkscape and prepared dedicated sockets for the UV unit, Aqua Purifier, and Water Pump. This improved both the safety and organization of the complete setup.
Day 5 – Sensor Installation and System Integration
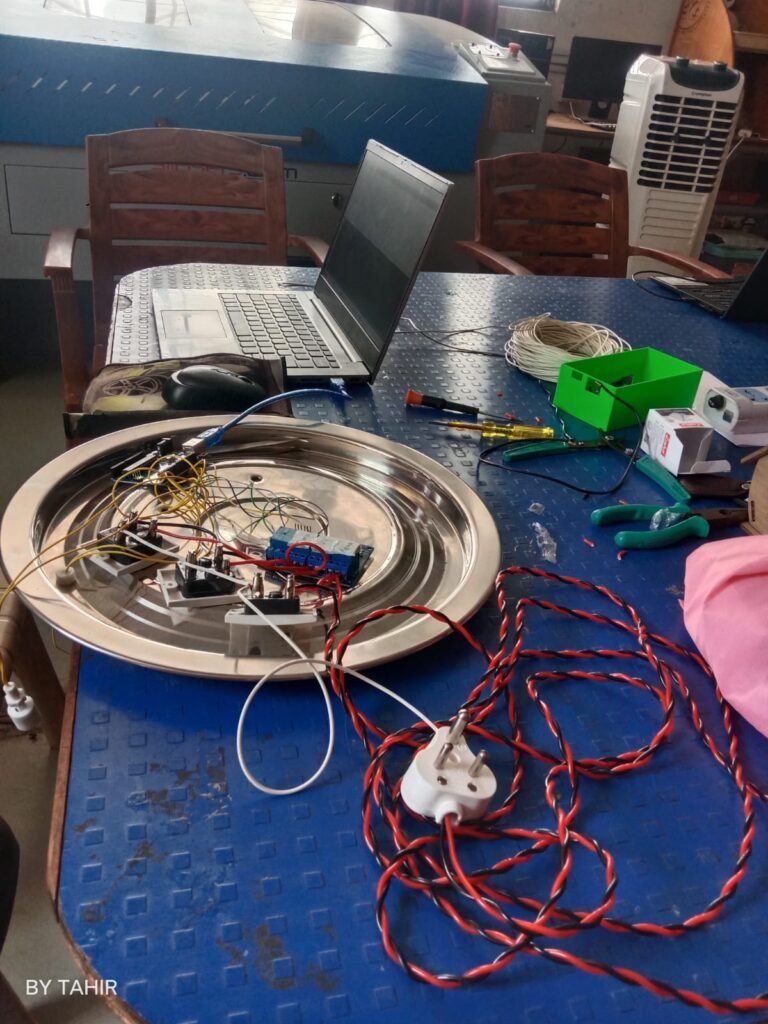
On the fifth day, I installed all the water-level sensors in their respective positions and completed the plumbing and electrical connections.
Additional holes were created in the UV tank for pipe routing and wiring. After installation, every sensor, relay, pump, and UV unit was connected together to complete the full automation system. Finally, I inspected all mechanical and electrical connections to ensure the setup was ready for real-time testing.
Day 6 – Real-Time Testing and Program Optimization
The sixth day was dedicated to operating the system under actual working conditions. Water was supplied to the system, and the performance of every component was carefully monitored.
During testing, I measured the time required for the UV processing tank to fill completely. Based on these observations, I updated the Arduino program by adding appropriate timing delays and optimizing the control logic. After modifying the program, I repeated the tests several times until the system operated smoothly and reliably.
Day 7 – Final Demonstration and Project Completion
On the final day, I successfully demonstrated the complete Automatic Water Purification System under real operating conditions.
The system automatically performed all required operations, including water intake, UV purification, storage tank management, and sensor-based pump control without manual intervention. The successful demonstration confirmed that both the hardware and software were functioning efficiently and reliably.
The completed project met all the planned objectives and provided valuable practical experience in automation, embedded programming, circuit design, mechanical fabrication, troubleshooting, and system testing.
CODE :-
// WATER AUTOMATION SYSTEM
define TANK1_TOP_SENSOR 2
define TANK2_TOP_SENSOR 4
define AQUA_RELAY 7
define UV_RELAY 8
define PUMP_RELAY 9
// ======================================
// TIME SETTINGS (CHANGE HERE)
// ======================================
int uvTimeMinutes = 15; // UV Time
int pumpMaxMinutes = 14; // Pump Timeout
unsigned long uvTime =
(unsigned long)uvTimeMinutes * 60UL * 1000UL;
unsigned long pumpMaxTime =
(unsigned long)pumpMaxMinutes * 60UL * 1000UL;
// ======================================
void setup() {
Serial.begin(9600);
// Wait for Serial Monitor to physically open and catch up
delay(2000);
pinMode(TANK1_TOP_SENSOR, INPUT_PULLUP);
pinMode(TANK2_TOP_SENSOR, INPUT_PULLUP);
pinMode(AQUA_RELAY, OUTPUT);
pinMode(UV_RELAY, OUTPUT);
pinMode(PUMP_RELAY, OUTPUT);
// Active LOW Relays – Turn them OFF initially
digitalWrite(AQUA_RELAY, HIGH);
digitalWrite(UV_RELAY, HIGH);
digitalWrite(PUMP_RELAY, HIGH);
Serial.println(“================================”);
Serial.println(“WATER AUTOMATION STARTED”);
Serial.println(“================================”);
}
void loop() {
printSensorStatus();
if (digitalRead(TANK1_TOP_SENSOR) == LOW) {
Serial.println(“Action: Tank1 Not Full -> Starting Refill”);
fillTank1AndSterilize();
}
if (digitalRead(TANK2_TOP_SENSOR) == LOW) {
Serial.println(“Action: Tank2 Needs Water -> Starting Pump”);
fillTank2();
}
else {
Serial.println(“Status: Tank2 Full – Waiting”);
}
// Visual separator in serial monitor
Serial.println(“Loop cycle finished. Waiting 3 seconds…”);
delay(3000);
}
void fillTank1AndSterilize() {
Serial.println(“>>> Aquaguard ON”);
digitalWrite(AQUA_RELAY, LOW);
while (digitalRead(TANK1_TOP_SENSOR) == LOW) {
delay(500); // Check sensor frequently
}
digitalWrite(AQUA_RELAY, HIGH);
Serial.println(“>>> Tank1 Full. Aquaguard OFF”);
Serial.println(“>>> UV ON (Starting 15 Mins Sterilization…)”);
digitalWrite(UV_RELAY, LOW);
// FIXED: Non-blocking wait loop so Serial/Microcontroller doesn’t crash during the 15 mins
unsigned long uvStart = millis();
while (millis() – uvStart < uvTime) {
// Just wait safely without freezing the hardware
delay(100);
}
digitalWrite(UV_RELAY, HIGH);
Serial.println(“>>> UV OFF. Tank1 Ready”);
}
void fillTank2() {
Serial.println(“>>> Pump ON”);
digitalWrite(PUMP_RELAY, LOW);
unsigned long startTime = millis();
while (true) {
// Tank2 Full
if (digitalRead(TANK2_TOP_SENSOR) == HIGH) {
  Serial.println(">>> Stop: Tank2 Reached Full Level");
  break;
}

// Pump Timeout
if (millis() - startTime >= pumpMaxTime) {
  Serial.println(">>> Stop: Pump Timeout reached (Tank1 assumed empty)");
  break;
}

delay(500);
}
digitalWrite(PUMP_RELAY, HIGH);
Serial.println(“>>> Pump OFF”);
if (digitalRead(TANK2_TOP_SENSOR) == LOW) {
Serial.println(">>> Tank2 Still Not Full. Need to refill Tank 1 first.");
fillTank1AndSterilize();

Serial.println(">>> Restarting Pump Sequence");
fillTank2(); // Safe recursion
}
else {
Serial.println(“>>> Tank2 completely Full. Process Complete.”);
}
}
void printSensorStatus() {
Serial.println(“\n— SENSOR READINGS —“);
Serial.print(“Tank1 Top (Target 1=Full, 0=Empty): “);
Serial.println(digitalRead(TANK1_TOP_SENSOR));
Serial.print(“Tank2 Top (Target 1=Full, 0=Empty): “);
Serial.println(digitalRead(TANK2_TOP_SENSOR));
Serial.println(“———————–“);
}
Conclusion :
The seven-day development of the Automatic Water Purification System significantly enhanced my understanding of automation and embedded systems. Throughout the project, I gained practical experience in Arduino programming, hardware integration, electrical wiring, enclosure design, sensor installation, mechanical fabrication, real-time testing, debugging, and system optimization.
Most importantly, I learned that successful engineering projects require careful planning, systematic testing, patience, and continuous improvement. This project increased my confidence in developing automation-based systems and strengthened my problem-solving skills, preparing me for more advanced engineering projects in the future.
