
Introduction
Vigyan Ashram has designed & developed an “Automatic bell” for schools / College/Institute and remote locations. Users of the manual will be able to build their own Automatic bell using this manual. All the Bills of Materials (BOM) and dimensions of the systems are given in the design. We have provided design files drawn using Solidworks along with this manual. Users are suggested to read the manual carefully along with the site conditions before fabrication of the unit.
In today’s life, everyone gives importance to time. Time does not wait for anybody. Everything should be performed in time & with accuracy. Nowadays school/college bells are operated manually. Hence there is a big question of accuracy. Also there is the necessity of manpower and money. Hence here we have presented a system, which saves our manpower and money & also gives highest accuracy. A bell is a percussion instrument used in schools and colleges that indicates the students when it is time to go to the class in the morning and when it is time to change classes during the day. No other instrument can do such a work. So it is an important instrument in both primary and secondary schools and even in the industries and other businesses where the bell timer plays a critical role throughout the day.
Purpose of Manual
- To share standardized design of Automatic bell suitable for small schools, Colleges and institutes.
- Design to be made available online for students to build Automatic bell for their uses.
- Conventional methods require a peon or bell operator to attend and operate the bell system for every period and interval in schools and institutions.
- Systems need sufficient human efforts to do so, and require advancement in order to become automated – the ones that minimize human efforts.
- As the bell system is important in schools, homes, and industries, the automatic operation of this instrument must have to be performed with a precise time controller economically.
Product Description
This is an Automatic Bell. This system can be deployed on schools, colleges, industries, factories, hotels. Restaurants, warehouses, cinema halls.
Electricity operated gong bell, Rated voltage 220 V that is normal voltage. Strong gong bell for loud long range sound. Unbeatable big bell for loud sound.
The Proposed system can be able to ring the bell in Accurate Time.

Features
- No man Power Needed
- 100% Accurate time (instead say – fairly accurate)
- Easy to Set timing and Date
- Simple operation & settings, no computers required to program or maintain ringing schedule
- No battery required to maintain clock and stored program.
How it works?
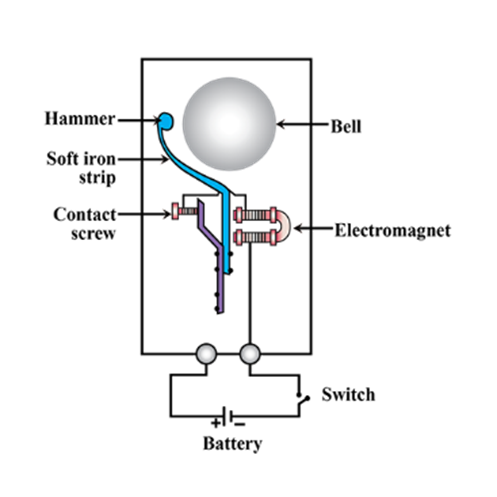
When the switch is pushed on, the circuit gets completed and the current starts flowing through the U-shaped electromagnet which creates a magnetic field in the core. This attracts the iron armature. When the armature moves towards the electromagnet, the hammer strikes the gong and the bell rings.
How relay work in Timer
A Timer Relay is a combination of an electromechanical output relay and a control circuit. The contacts will open or close before or after a pre-selected, timed interval.
The time delay relay is ready to accept a trigger. When the trigger is applied, the time delay (t1) begins. At the end of the time delay (t1), the output is energized. When the trigger is removed, the output contacts remain energized for the time delay (t2).
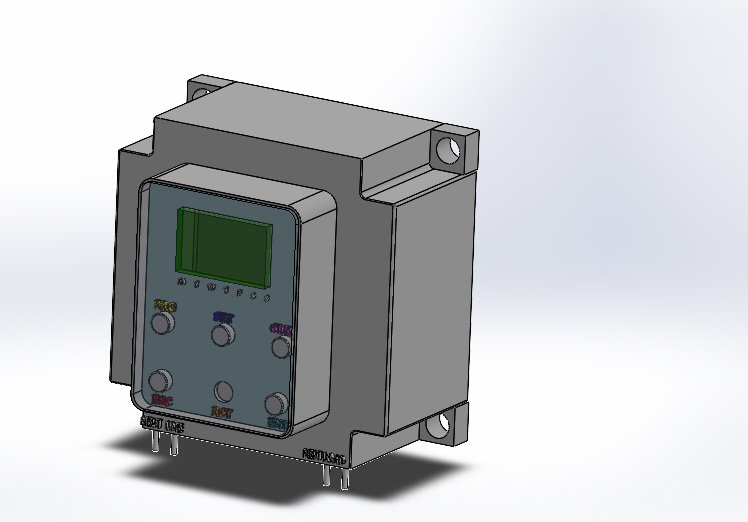
Timer setting
In this timer we have lots of settings. The first one is the program setting. Maximum 50 different programs are set in this timer. Then the timer has a Date and time setting to set the date and time. And also another setting is Keypad lock setting, Holiday setting, Auto Manual Setting.
- Before setting the time, the timer shows their version as shown in the first image. Then click the enter button to set the current date. For moving us arrow button. After setting the date click on PRG Button for the program.
- The second step is to set the time. The process is similar to step first. Set the current time and program it.after setting the time to set the current day for which day alarm is on or off.
- After entering to set the hour. Like you want to time in 12hr or 24hr.After this program setting timer is Configure.
- Click on PRG Button for ON days setting in the timer. After the daytime is on then set an alarm time/Ringing time of bell (ST).First, it shows a 0.00 time setting.
- First set the Alarm ON time.eg I set 11.00am is on time for bell. Then set the close time it means alarm OFF time.eg.I set 11.01 as off time for the bell. You can set almost 50 alarms in this timer.
Video Link –


Step by Step installation
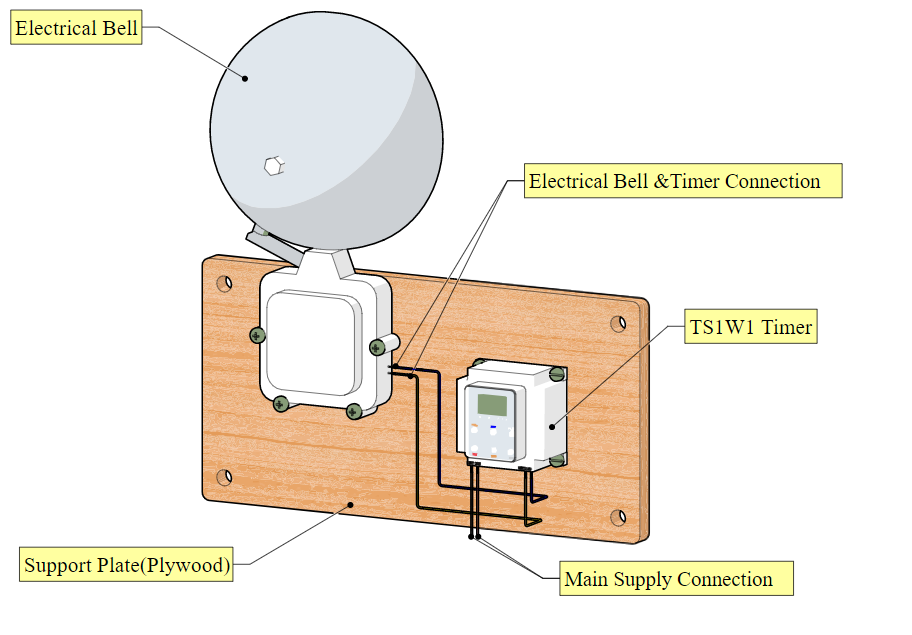
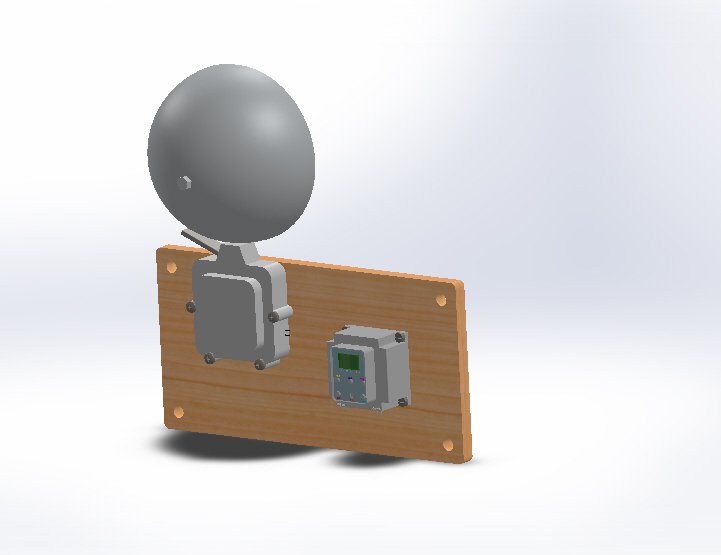
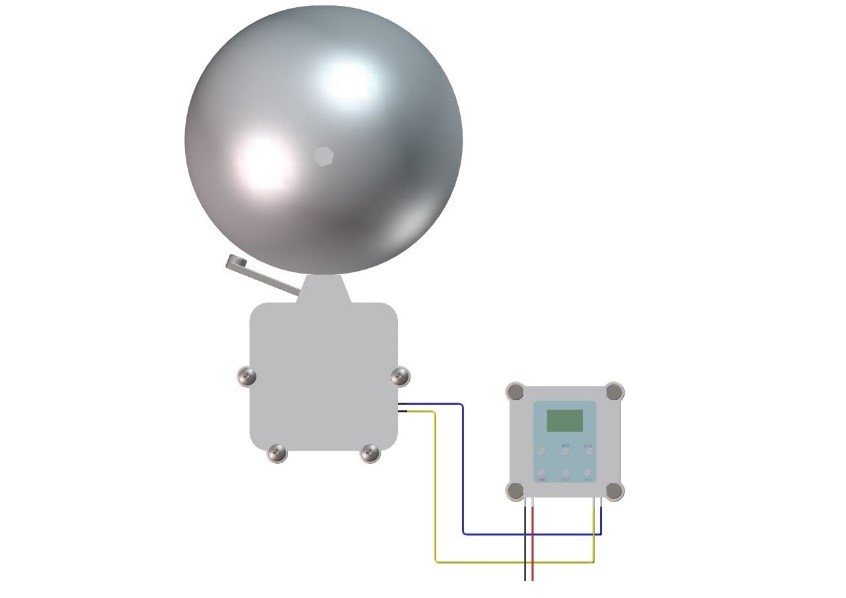
Collect all material like an Electrical bell, TS1w1 Timer, Supportive Plywood material, cr pan head screw, Hexagon flange screw, Slotted cheese head screw for Fixing the bell and timer on plywood. Also take a wire like Yellow, Blue, Red and Black for connection of bell to timer.

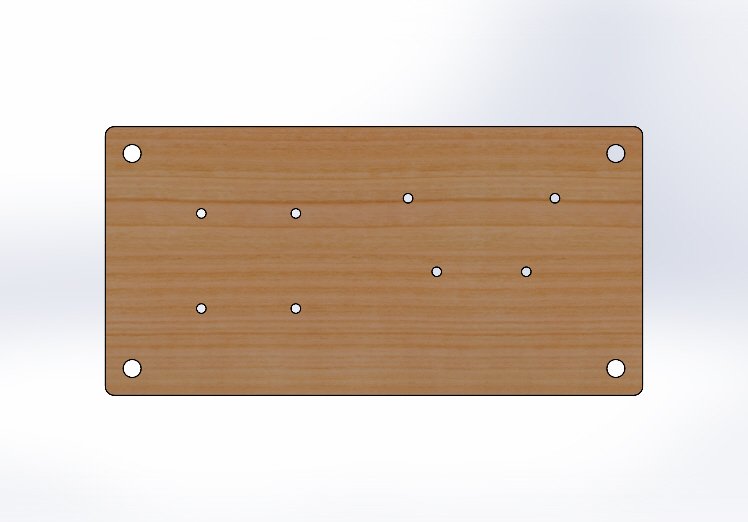
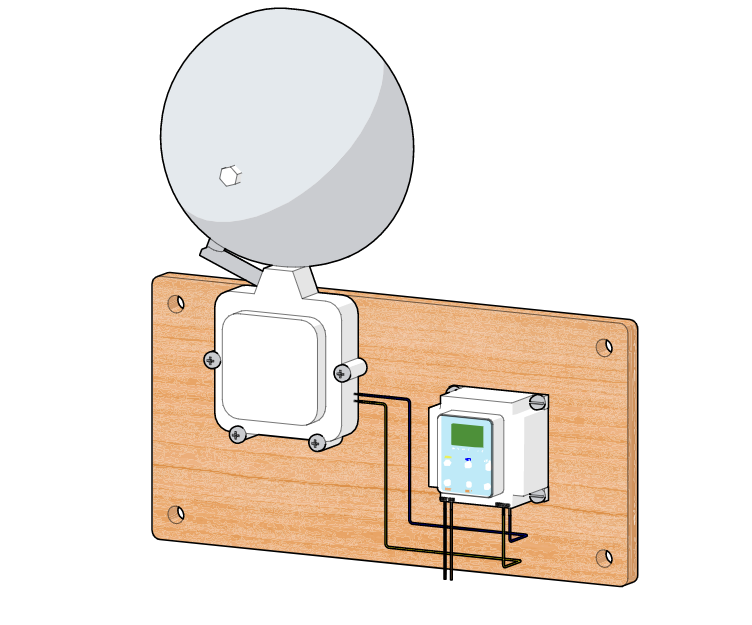
- Support Plate(Plywood)
Take a 12mm Supportive plate of plywood with 290mm by 140mm dimensions. Make a 5.30mm hole in 8 Nos.for fixing the bell and timer on plate. And make a 10mm hole Nos.for fixing the plate on the wall.

- Electric Bell Fitting on Support Plate
Take an Electrical bell and cr pan head screw in 4 qty.and take hexagon flange nut in 4 qty. fix the bell on the plate using cr pan head screw and fitting it using hexagon nuts from back side of plate. Screws are indicated in yellow colour and nuts are indicated in red.

- TS1W1 Timer Fitting on Support Plate –
Take an TS1W1 timer and Slotted cheese head screw in 4 qty.and take hexagon flange nut in 4 qty. fix the Timer on the plate using Slotted cheese head screw and fitting it using hexagon nuts from the back side of the plate. Screws are indicated in yellow colour and nuts are indicated in red.


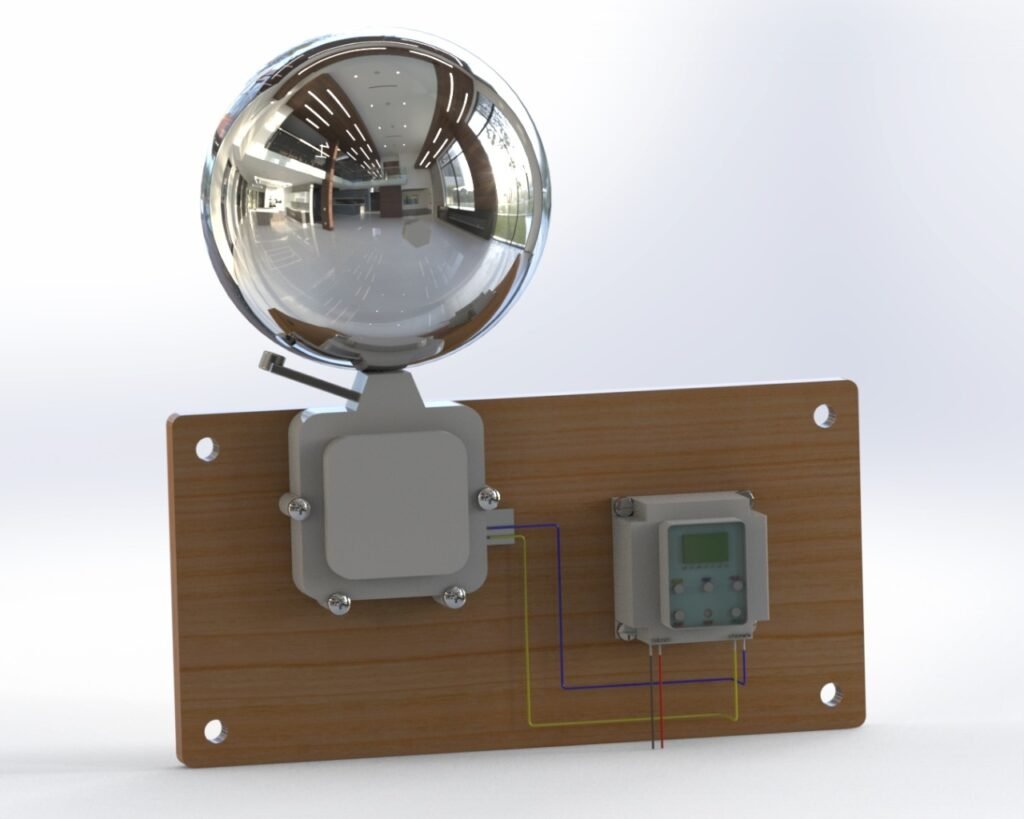
- Final Assembly
After following all steps. Automatic bell final assembly is shown in fig.


