
Introduction
This project aims to develop a graphical user interface on a website or as an application to interface with an ESP 32. This could be very useful in a wide variety of Vigyan Ashram projects to keep track of changes over time, detect irregularities, and control devices remotely. As an instance, we could imagine a room with a temperature and humidity sensor, that continuously collect and store data on a database, which could easily be visualized later on a website, and take the adequate decision on programming heating to control the room perfectly.
Connect ESP32 to a simple webpage
This was my first project using an ESP32, which is mainly used for its wifi and Bluetooth connection. I then had to first understand how this wifi connection would work. By following a simple tutorial, I have been able to connect it to the wifi and make it emulates a webpage where I could connect myself to control GPIOs on the ESP32. This was quick and easy to set up but has two main limitations: it was a local webpage, meaning that you should be connected to the same wifi as the esp32 to connect, and you couldn’t store data from a sensor, as everything would be shut down and reset if the ESP32 is disconnected.
Control a google sheet
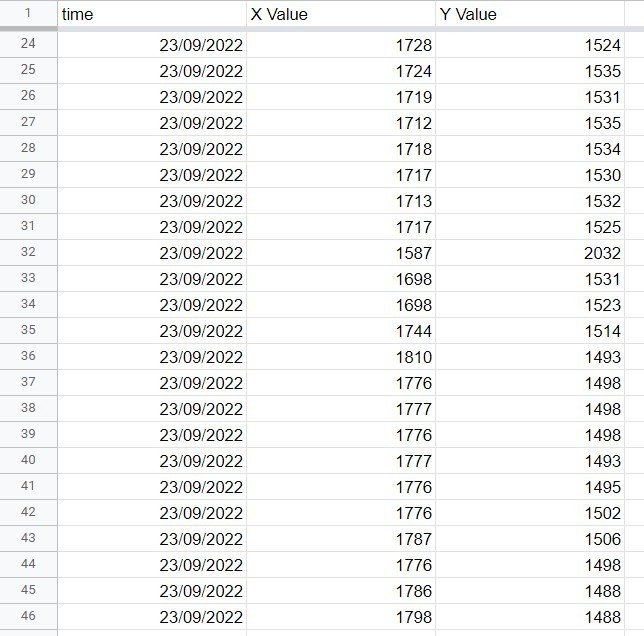
After setting up this simple page, I wanted to be able to input value from a sensor online. I have created a simple google sheet with three rows, time, X Value, and Y Value and I wanted to be able to upload from an accelerometer the value from the X and Y axis to this google sheet when needed. I needed to use google scripts to create a script that would allow me to add and modify the value on this sheet. This script was simply a web link you need to access and that will automatically add a row with a new value. I have created an ESP32 program that accesses this link every few seconds and adds the X and Y value from the sensor, here is the result :
The main problem with this implementation is the lack of a user interface and easy communication with the ESP32, I could easily add new value to the sheet, but obtaining value from the sheet was harder. That’s why I decided to create a database that could allow 2-way modification more easily.
Setting up my first database
The next step in this project would be to create a database, to store data from a sensor to a long term and be able to access it from anywhere at any moment in the world. I have used Firebase Database, a free service that allows the creation of a simple database that is widely used, and hence, has a lot of documentation. After following a simple introductory tutorial ( see (1)), I set up my first database and my goal was to be able to command a new sensor measurement when I change a boolean in the database.
To do this, I needed to regularly check the state of this boolean, and make a new measure if any change was detected, as well as upload these measures to the database, here how it looks like in a video :
Graphical User Interface (GUI)
The last and maybe longest step is to assemble this database access with a pretty-looking website or app that allows simple control and monitoring of this database. this part is clearly not at all related to my studies but I was interested to understand how it worked. I have developed a simple website that accesses the database, here is the result :
To do so, I have to check many tutorials on how to access and edit the database easily (see (2)). The code I used is the different implementation is available (check conclusion) and is as commented as possible.
First implementation: Goat measurement system
Now that the communication with the server has been completed, it’s time to implement the first system. The goal here is to create a GUI that will display the evolution of the weight of different goats, measured using an ESP32 and RFID tag. The webpage must communicate in real-time with the database and update live when a new measurement is made. ( see (3))
After some time, I achieved to create this real-time system, with the possibility to plot the weight evolution of the adequate goat.
I also added a “Download as CSV” button that allows downloading the state of the database as well as the actual graph information into a CSV format (excel, google sheet). This works well.
Second implementation: Gate opening system
Now that the connection with the database is completed, it’s quite easy to adapt it to new applications. For example, one of the ideas that came up when discussing this project was the possibility to open and close the Vigyan Ashram gate at distance. I first only did the software implementation, here is the video of the result. As everything is connected through the database, the change in the gate state is common to every person using the page.
This Gate_state can therefore be read by an esp32 connected to any wifi network and directly controlled by the gate.
Real implementation
– with the Goat measurement system
I made previously an implementation for a goat weighing system but using fake data just as a proof of concept. I now needed to implement it on the real device. I then obtained it and started working on its implementation with the database and webpage.
It was a little bit more complicated than planned because the data didn’t quite look the same way which led me to create one plot for each goat. I also added some buttons to edit the data, remove unnecessary ones or delete everything. Here is a video of the result
Suhas sir then tried to connect it to the weighing device already available in the fab lab. He connected everything properly and we together performed some testing to finalize it. After calibrating the scale, we were able to weigh ourselves and send the data to the server to be displayed on the webpage

– with the Gate Opening
I now tried to adapt the opening of the gate to the real system in place. The real device uses two tanks of water that can be filled and empty using two pumps, creating a counterweight able to close and open the gate on purpose. My goal was to adapt my code to create adequate filling using two existing float sensors.
On the first test, nothing worked. Indeed, the system was placed outside for a long time without being used, and most of the connections were rusted and didn’t work properly. I changed some wires and checked each connection to understand where the system failed.
After fixing most of it, I was able to fill and empty the tank at the correct amount to move the gate to the desired position.

The next video presents the results of the gate-opening system, over a complete cycle of opening and closing. It might take seems a long time to do so but in reality, after each open and close, the counterweight tank is half filled or half emptied in order to accelerate the next closing or opening respectively.
-with a Warehouse monitoring system
The next implementation that could use the firebase to the webpage to esp connection would be to replace Fasa smart farming system in the polyhouse. To do so, the implemented device should be able to communicate at least temperature and humidity measurements, on a regular basis as well as on command and display results on a graph. ( see (4))
After developing the UI, and testing with different sensors, here s the results. The esp32 performs one measurement each hour and you can ask for further measures with a button.
This project has been then applied to the black soldier fly breeding, used as a very high source of proteins when at the larva state. We can then monitor the temperature and humidity inside and a further project would be to adapt temperature based on the last measures. This next image shows the evolution over 3 days. Even if the humidity sensor is a bit off (it goes over 100%), we can clearly see the high and rise of temperature and humidity over days and nights.

Conclusion and files
This project had very diverse applications and a lot of use in Vigyan Ashram or elsewhere. I tried as much as possible to create an intuitive UI and connection to firebase in order to be applicable to as many actual and future projects as possible. It should be able to allow future real-time monitoring and control at Vigyan Ashram. Moreover, it has allowed me to understand and learn how a webpage was built as well as ESP32 wifi connection.
All the files are available here by connecting to the Vigyan Ashram google account (ask Suhas Sir): Google Drive
If any question is asked in the future related to this project, feel free to contact me. I would love to help
References
- ESP32 Firebase’s first implementation / ESP32 All command to firebase
- Web page firebase connection
- Google Chart
- Sensor Gauge
- To change and improve the website and UI, check W3S for a lot of HTML / js tutorial
Important Side Notes
If anyone wants to start with my files and create a new UI based on this here are a few things to keep in mind:
- When adapting the web firebase connection to a new database, in a new project, only replace inside const “firebaseConfig = {}”. The rest is common and works better than the default things.
- When adapting the ESP files to a new project, you only have to change the API key, database URL, and email/password to the new database (see (1)). Everything to do the connection is made in setup() function and can be copy pasted.
- Avoid as much as possible using delay inside the “if (Firebase.ready())” because it should refresh the connection as much as possible. (I know I used it in gate opening, sorry haha).


